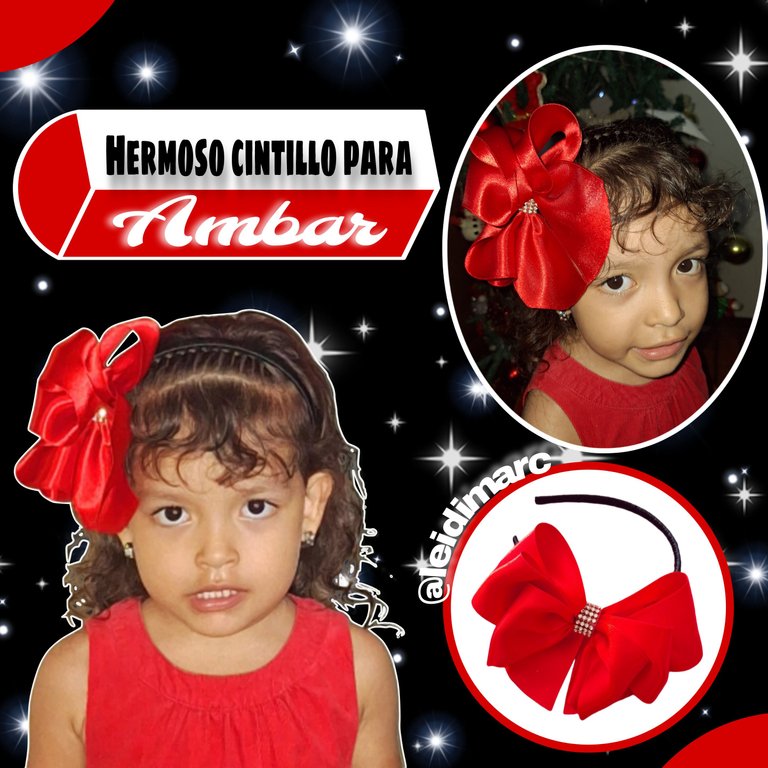
Hola mi gente de @needleworkmonday, tenía tiempo que no pasaba por aquí, pero ganas no me faltaban, puesto que siempre me doy mis vueltas para ver sus lindas creaciones. Por lo general paso a mostrarles las cosas lindas que le hago a mis princesas.
Todos los años para navidad, es cuando más lazos les hago, ya que es cuando más estrenan ropas para esta fechas especiales. Esta vez en tantos años fue cuando menos hice. A penas le hice a Ámbar este cintillo que les muestro y un par de pinza que luego paso a contarles como se las hice, que al igual que este quedó bellísima.
Este hermoso cintillo rojo ce lo hice para la noche de navidad, ya que le hacía juego con su outfit y si quieren ver como lo hice sigue leyéndome, je, je, je.
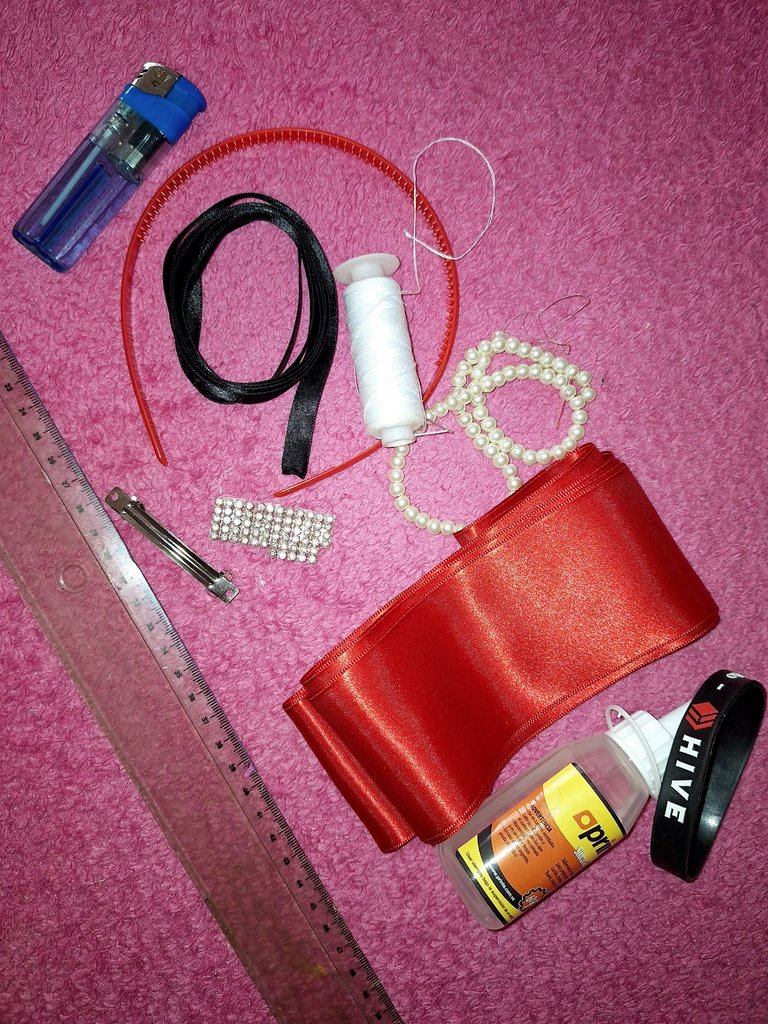
Materiales
Este lazo, como era con una cinta de raso gruesa, quise hacerlo de un solo color y forrar el cintillo en otro como el color de las sandalias.
Ahora bien, estos son los materiales:
- Cinta de raso roja de 6,5 cm.
- Cinta de razón negra de 1,5 cm.
- 1 cintillo plástico de 1,5 cm de grosor.
- Hilo y aguja.
- Tijera y regla.
- Silicona y pistola de silicona caliente.
- Yesquero y decoraciones.
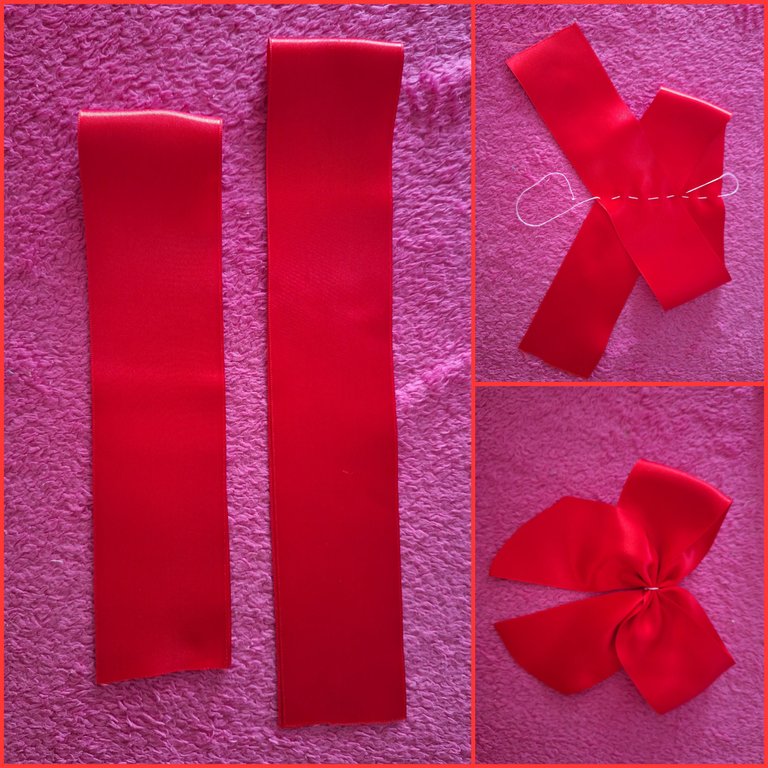
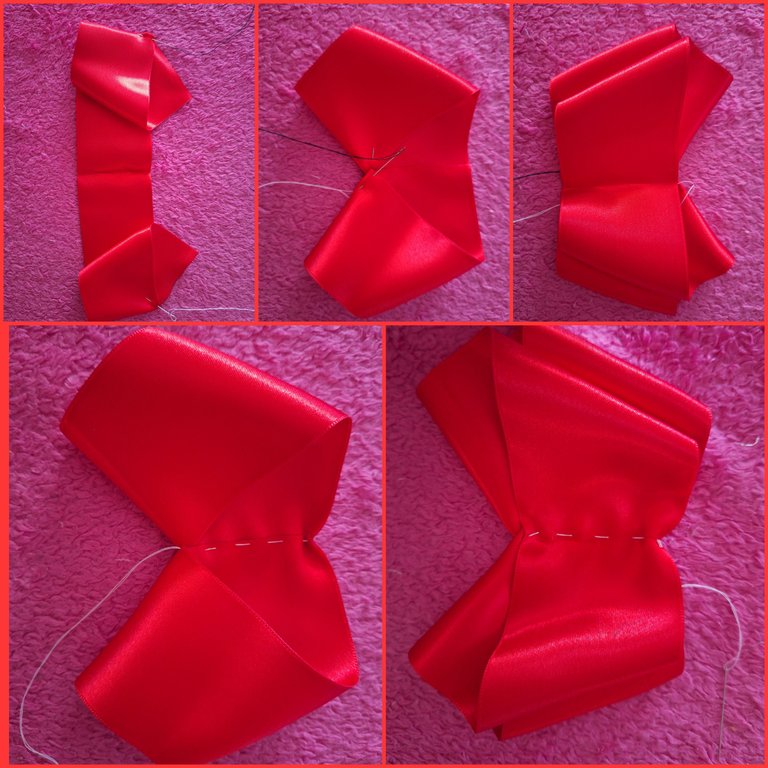
Corte dos cintas, una de 75 cm, que fue con la que hice el lazo base, doble la cinta a la mitad, las cruce y por el medio pase costura.
La otra cinta era de 65 cm, la doble a la mitad, para marcar el medio y luego a 4 cm del extremo marque con una aguja, no conseguí mis alfileres, je, je, je. Para hacer los dobleces que se ven en las imágenes de ambos lados.
Luego doble hacia atrás ambas puntas que quedaron, haciéndolas coincidir con el centro. Al voltearlo se ven de dobleces de cada lado. Se le pasa costura por el medio para formar el lazo.
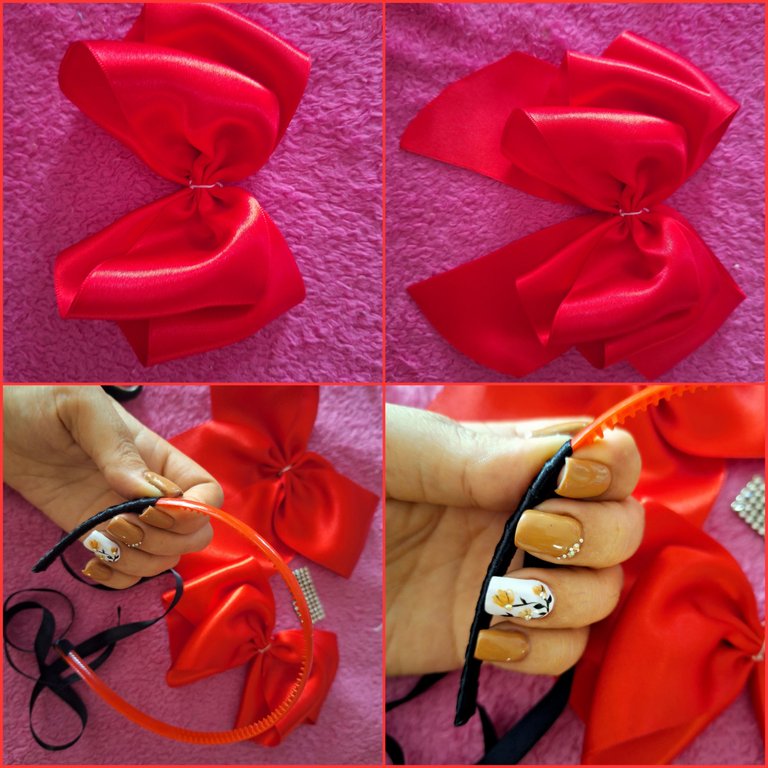
Una vez que se tengan los dos lazos cocidos se pegan uno encima del otro, también le pase costura para asegurar.
Empecé a forrar el cintillo con la cinta delgada, echándole un poco de silicona para asegurar bien.
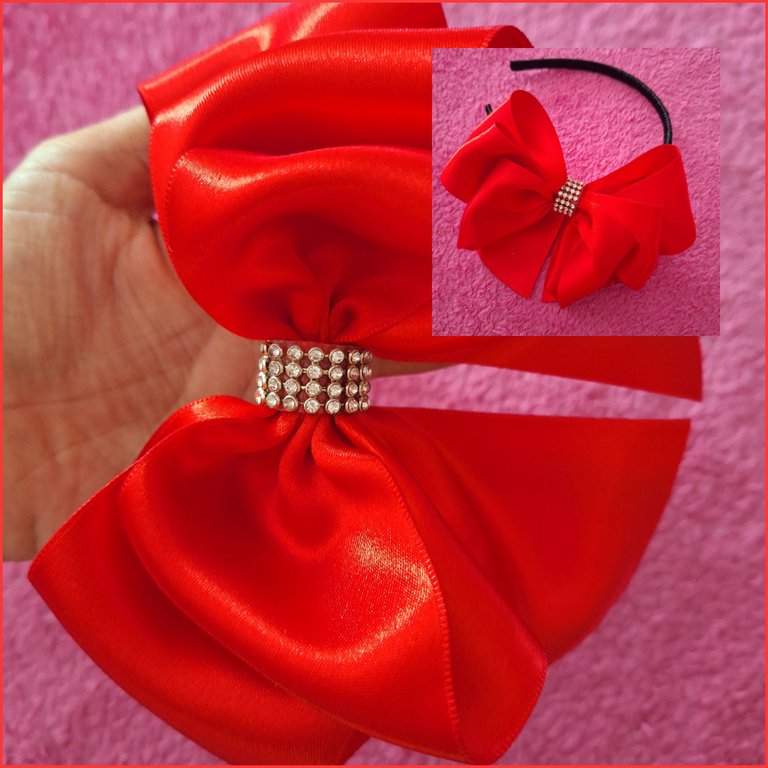
Una vez lista todas piezas, arme este hermoso cintillo, para decorar le pegue en el centro unos cristales que lo hace ver muy elegante y vistoso.
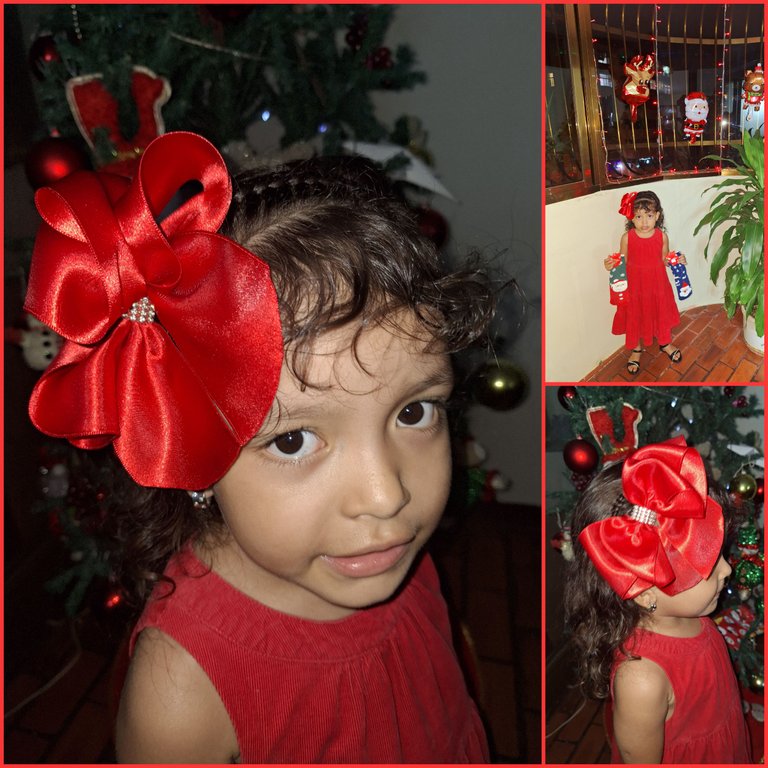
Y así se veía de hermosa y radiante mi princesa Ámbar con su cintillo, combinado con su lindo outfit, un vestido en capas de tela de pana.
Su bella sonrisa engalana todo su look de este día de navidad, en donde todos en familia la pasamos muy bien.
Me hace muy feliz crear con mis propias manos estos accesorios para mi hija y verla tan linda como una princesa, como siempre les digo.
Espero les hayan gustado amigos, pronto les estaré mostrando los otros que le hice.
Por otro lado, estos últimos meses han sido muy ocupados y ni siquiera pude cocer con mi nueva máquina, es algo que tengo pendiente y ya me verán más seguido por aquí, espérenme, je, je, je.
Bueno, amigos agradecidos de su visita. Dios les bendiga.


Beautiful headband for Amber
Hello my people of @needleworkmonday, it's been a while since I've been here, but I've been looking forward to it, since I always go around to see your beautiful creations. I usually stop by to show you the cute things I make for my princesses.
Every year for Christmas, is when I make the most bows for them, since that is when they wear the most new clothes for this special time of the year. This time in so many years was when I made the least. I just made Amber this headband that I show you and a pair of hairpins that I will tell you later how I made them, which, like this one, turned out beautifully.
I made this beautiful red headband for Christmas night, because it matched her outfit and if you want to see how I made it, keep reading me, heh, heh, heh, heh.

Materials
This bow, as it was with a thick satin ribbon, I wanted to make it in one color and cover the headband in another color like the color of the sandals.
Now, these are the materials:
- 6.5 cm red satin ribbon.
- 1.5 cm black ribbon.
- 1 plastic headband of 1.5 cm thick.
- Thread and needle.
- Scissors and ruler.
- Silicone and hot silicone gun.
- Tinder and decorations.


Cut two ribbons, one of 75 cm, which was the one I used to make the base ribbon, fold the ribbon in half, cross them and sew in the middle.
The other ribbon was 65 cm, I folded it in half, to mark the middle and then 4 cm from the end I marked it with a needle, I didn't get my pins, heh, heh, heh. To make the folds that you see in the pictures on both sides.
Then fold back both ends that were left, making them coincide with the center. When you flip it over you can see the folds on each side. Sew through the middle to form the loop.


Once the two loops are sewn, glue them one on top of the other, also sewing them together to secure them.
I began to line the headband with the thin ribbon, applying a little silicone to secure it well.
Once all the pieces were ready, I assembled this beautiful headband. To decorate it, I glued some crystals in the center, which makes it look very elegant and colorful.

And this is how beautiful and radiant my princess Amber looked with her headband, combined with her cute outfit, a layered corduroy dress.
Her beautiful smile adorns her whole look this Christmas day, where we all had a great time as a family.
It makes me very happy to create with my own hands these accessories for my daughter and see her as pretty as a princess, as I always say.
I hope you liked them friends, soon I will be showing you the others I made for her.
On the other hand, these last months have been very busy and I could not even bake with my new machine, it is something I have pending and you will see me more often here, wait for me, heh, heh, heh, heh.
Well, friends, thank you for your visit. God bless you.

Dispositivo | Device | Samsung Galaxy A54
Fotos editadas en: |Photos edited in | CC Express for Picsart / Canva
Separadores hechos en | Separators made in | CC Express for Samsung
Traducción con | Translation with| DeepL

