ENGLISH VERSION
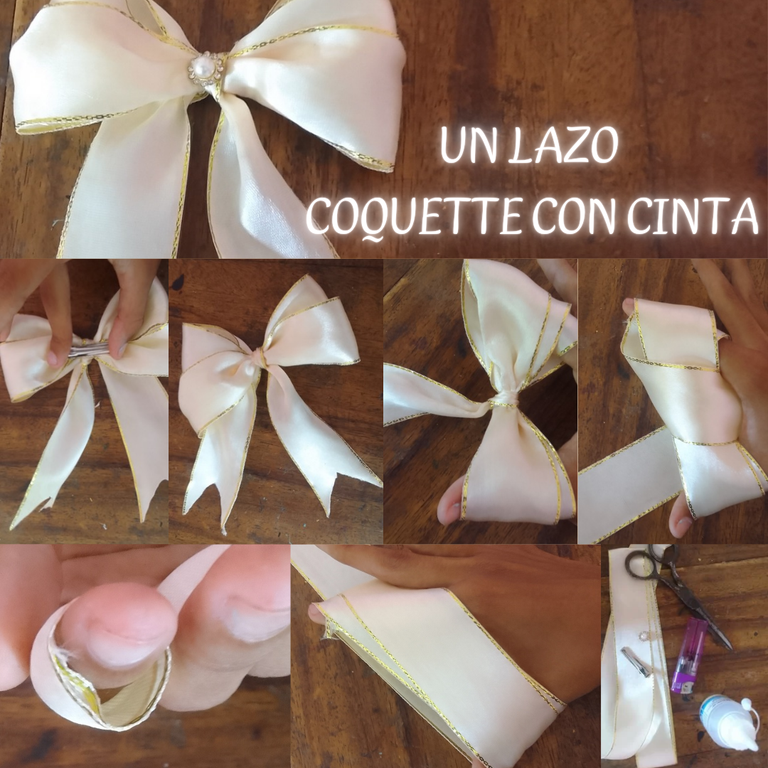
Hello everyone today I have the pleasure of publishing again in this beautiful #Diyhub community and this time I bring you a very simple way to make a beautiful coquette loop with tape.
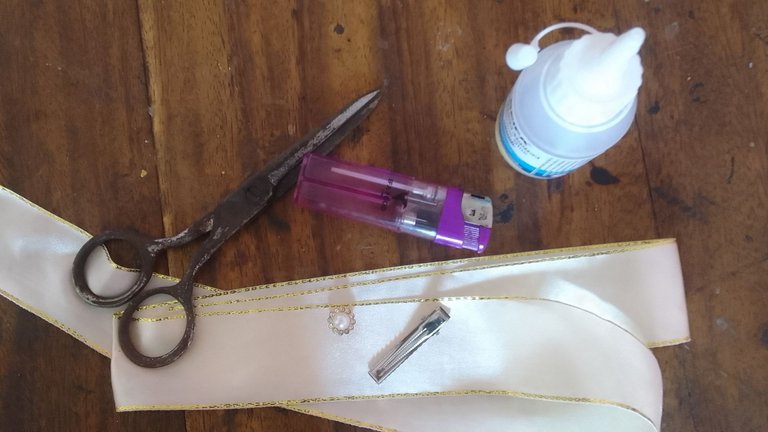
MATERIALS
One meter of tape
A pin
An ornament
Liquid silicone
Scissors
Phosphorera
First step
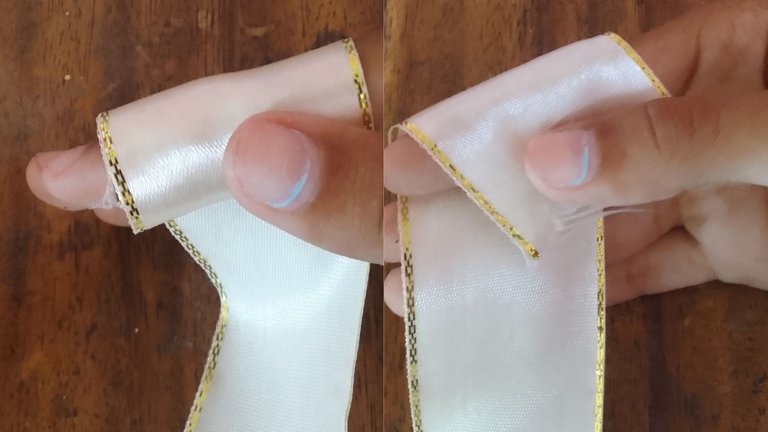
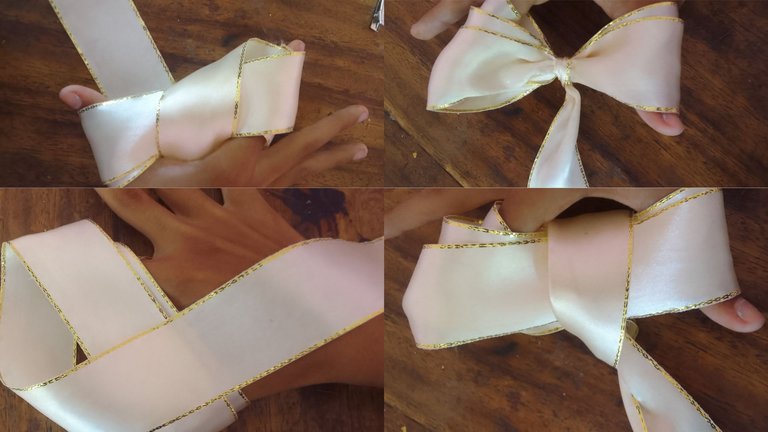
The first thing I did was give my finger two turns with the tip of the tape. To make a Lazo leg
Second step
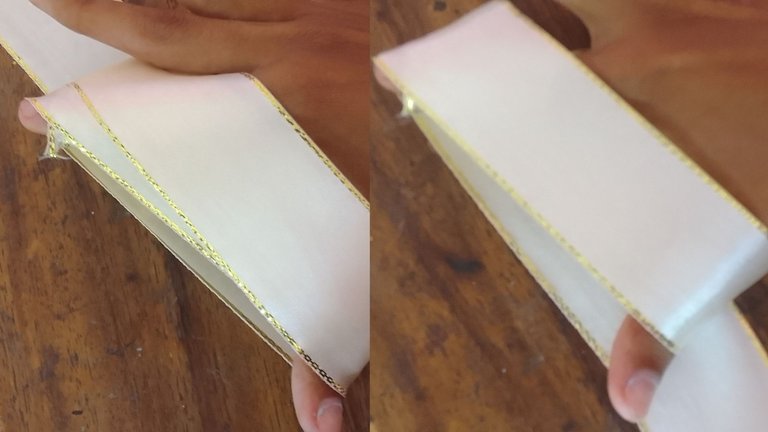
The following was to separate my index finger and thumb at a distance of approximately 7 cm and then I gave the tape on my two fingers. That this would be the loop
Third step
After having given the tape the two laps between my index finger and thumb. With the remaining side of the tape we are going to turn around in the middle of the tape between my two fingers. Then we make a knot. That it would be the center of the loop and there would be a piece of tape that would be the other leg
Fourth step
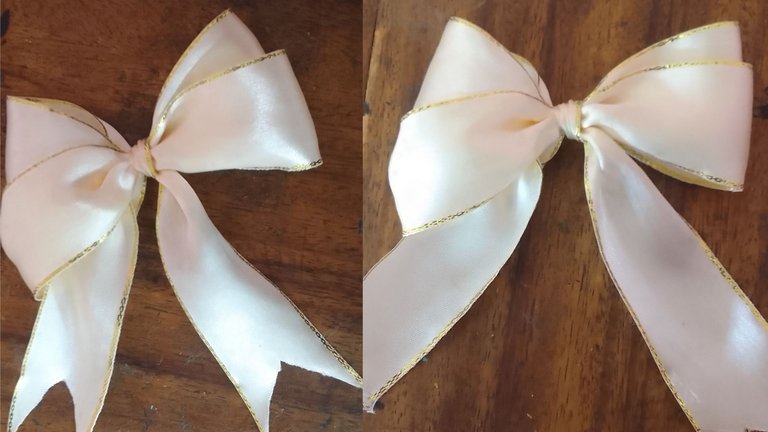
For the loop to be more beautiful with the help of a scissors we are going to cut the tips of the legs first straight in such a way that they measure the same and then fold them in half and cut diagonally. So that we are not going to get rid, we will be careful not to burn the phosphorera by the edges.
fifth step
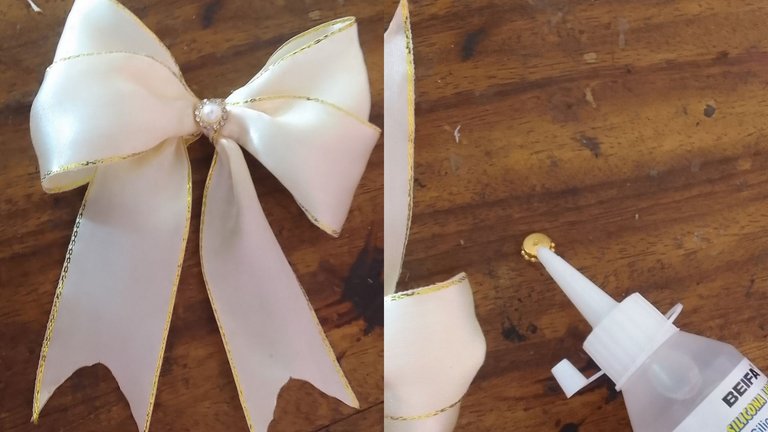
To decorate the center of El Lazo we will place an orna
Sixth step
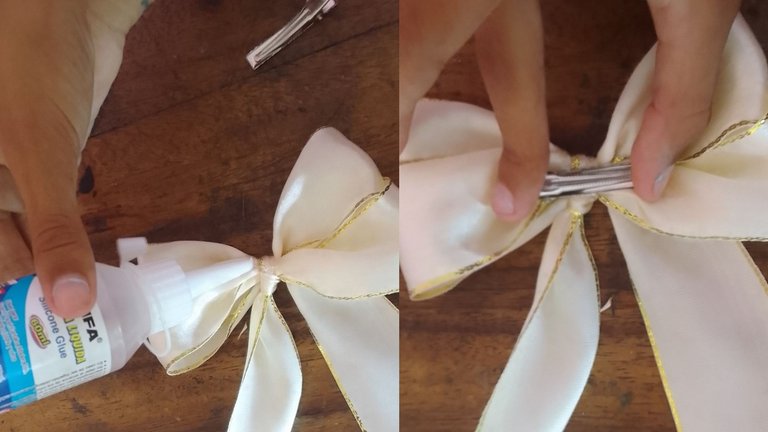
The last of our loop is to hit with the help of hot silicone the pin that will allow us to use this beautiful coquette loop in our hair
And this was the result of my work I hope you like it as much as me. I just have to wish everyone a wonderful day.
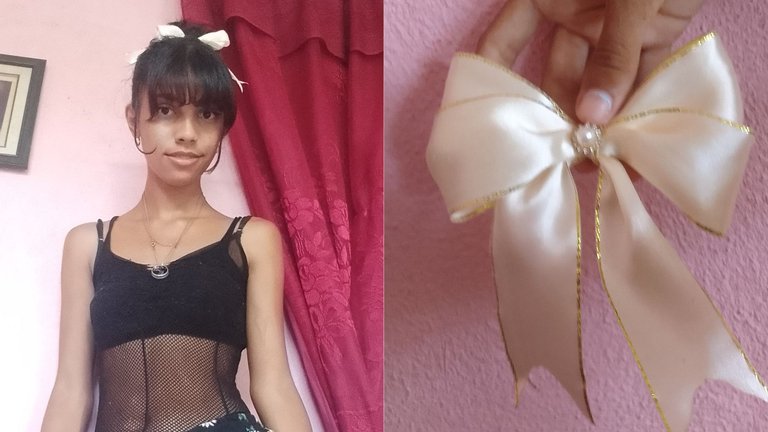
The photos were taken by my phone Samsung Galaxy at 03 Core and edited in [Canva] (https://www.canva.com/)
The text was translated by [DEPL] (https://www.deepl.com/es/translator)

VERSIÓN EN ESPAÑOL
Hola a todos hoy tengo el placer de publicar nuevamente en esta hermosa comunidad de #DIYHub y esta vez les traigo una manera muy muy sencilla de hacer un hermoso lazo coquette con cinta.
MATERIALES
Un metro de cinta
Un pasador
Un adorno
Silicona líquida
Tijera
Fosforera

PRIMER PASO
Lo primero que hice fue darle dos vueltas a mi dedo con la punta de la cinta. Para realizar una patita de el lazo

SEGUNDO PASO
Lo siguiente fue separar mi dedo índice y pulgar a una distancia de 7 cm aproximadamente y luego le di dos vueltas a la cinta en mis dos dedos .Que esto vendría siendo el lazo

TERCER PASO
Después de haber dado a la cinta las dos vueltas entre mi dedo índice y pulgar . Con el lado restante de la cinta le vamos a dar una vuelta justo en medio de la cinta que se encuentra entre mis dos dedos. Luego hacemos un nudo . Que sería el centro del lazo y quedaría un pedazo de cinta que sería la otra patita

CUARTO PASO
Para que el lazo quede más bonito con ayuda de una tijera vamos a recortar las puntas de las patitas primeramente recta de tal forma que midan lo mismo y luego las doblamos a la mitad y recortamos en forma diagonal. Para que no se nos vaya a deshilar le vamos a pasar con cuidado de no quemarlo la fosforera por los bordes.

QUINTO PASO
Para adornar el centro de el lazo vamos a colocar un adorno con ayuda de la silicona líquida y pegarlo en el nudo de él centro del lazo

SEXTO PASO
Lo último de nuestro lazo es pegarle con ayuda de la silicona caliente el pasador que nos va a permitir usar en el pelo este hermoso lazo coquette

Y este fue el resultado de mi trabajo espero que les guste tanto como a mí. Solo me queda desearles a todos un feliz y maravilloso día.

Las fotos fueron tomadas por mi teléfono Samsung Galaxy A 03 Core y editadas en canva
El texto fue traducido por Deepl


