
English

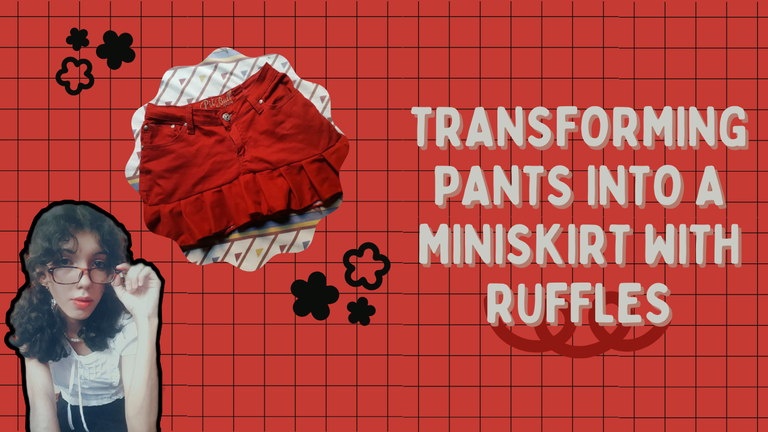
This time I dared to do something very risky: Transforming clothes is one of the things I was most afraid of, but I saw a pair of pants that I didn't like at all, and I thought “what if…?” I have always been a skirt lover, so I gathered courage and what you will see below happened, here we go!

Materials

- A pair of pants (obvi, hehe).
- Scissors.
- Thread and needles.
- Pins (you can use needles if you don't have pins).
- Tape measure and ruler (to make straight lines where we should cut the fabric).
- A pencil or chalk (to mark where we will cut the fabric).

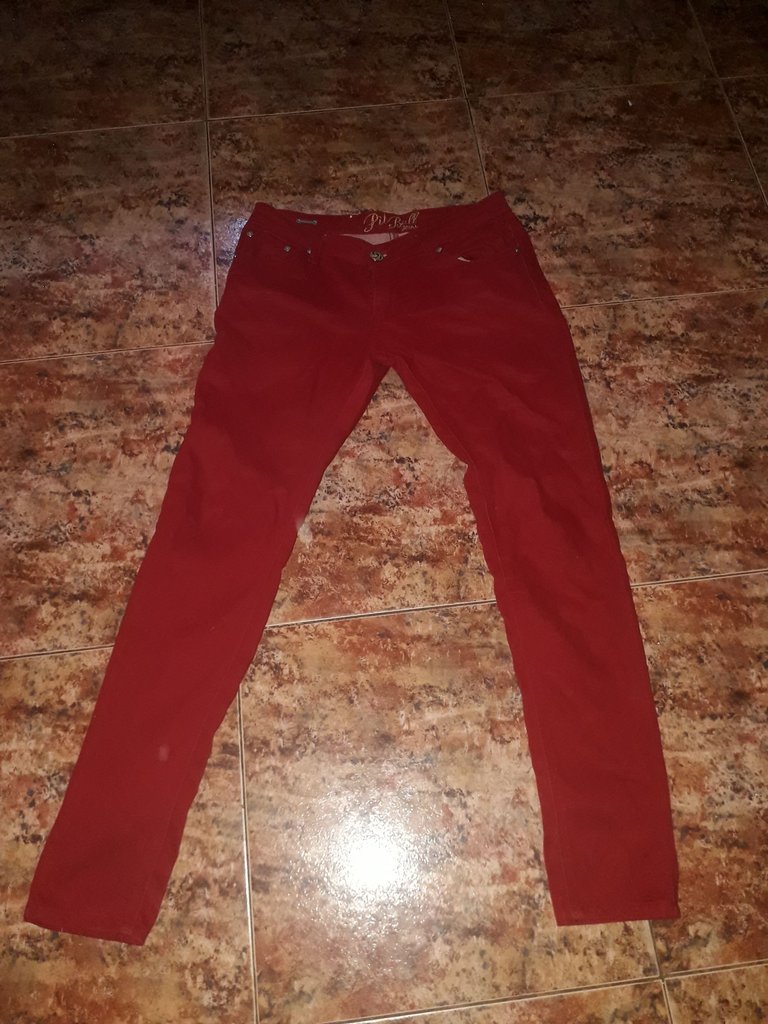

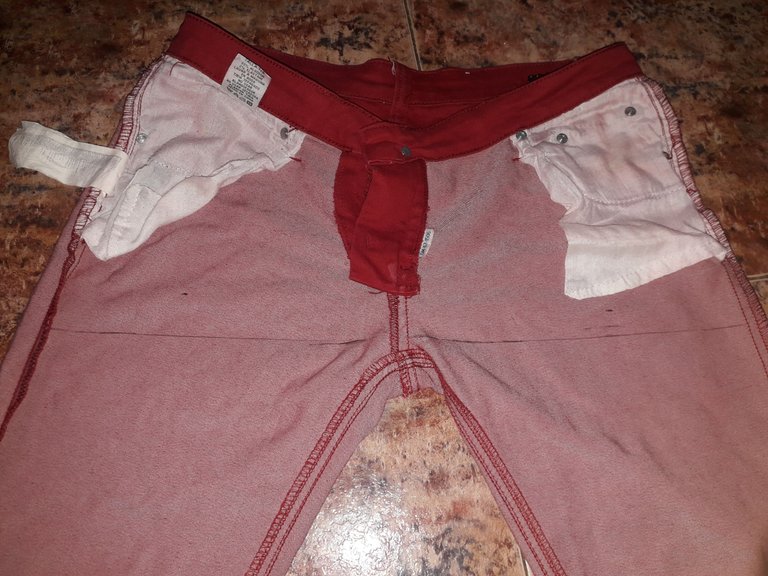
First we take our unused pants, and stretch them well on a flat surface; in my case I put them on the floor, which is clean because I clean and mop it daily, ok? hehe. I flipped the pants over so I could mark it with the pen freely, because I was afraid of staining the fabric.

 |  |
|---|

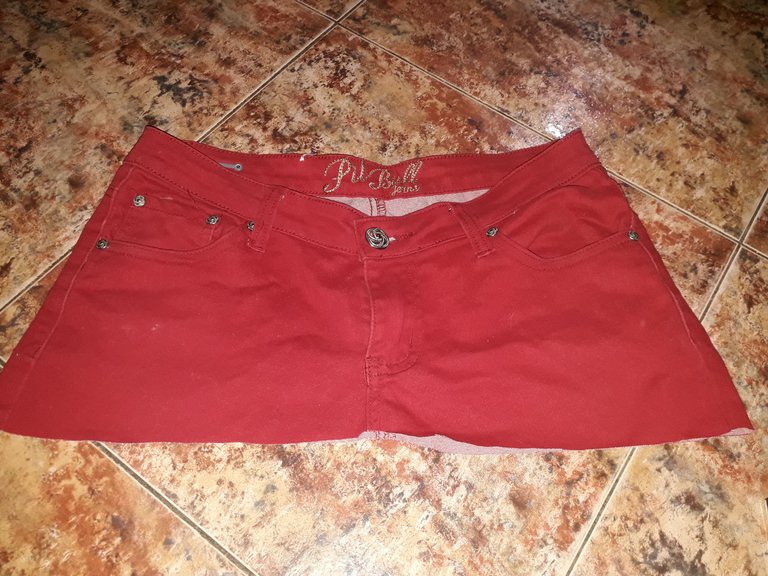
We mark a straight horizontal line, a few centimeters below the zipper; in this case, it's about 2 or 3 cm below the zipper.
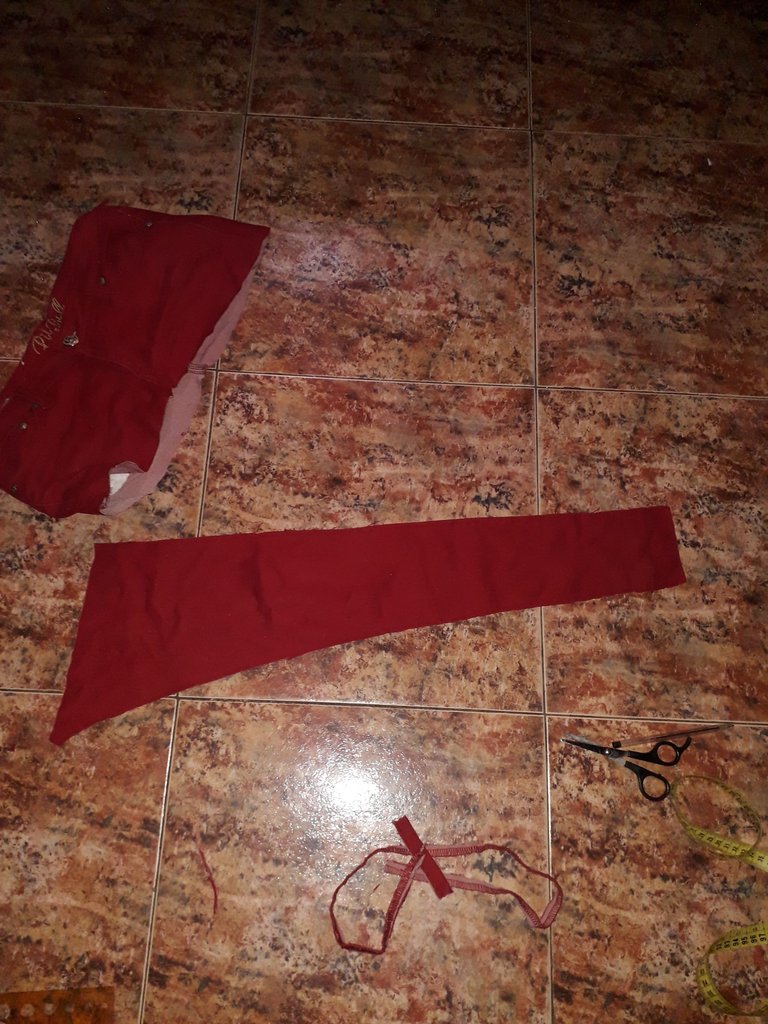
With a lot of fear, I cut the fabric, and it was a little crooked, but I kept trusting the process because I really liked the fabric, which is very soft and suede, so there was no turning back. So let's continue.

 |  |
|---|
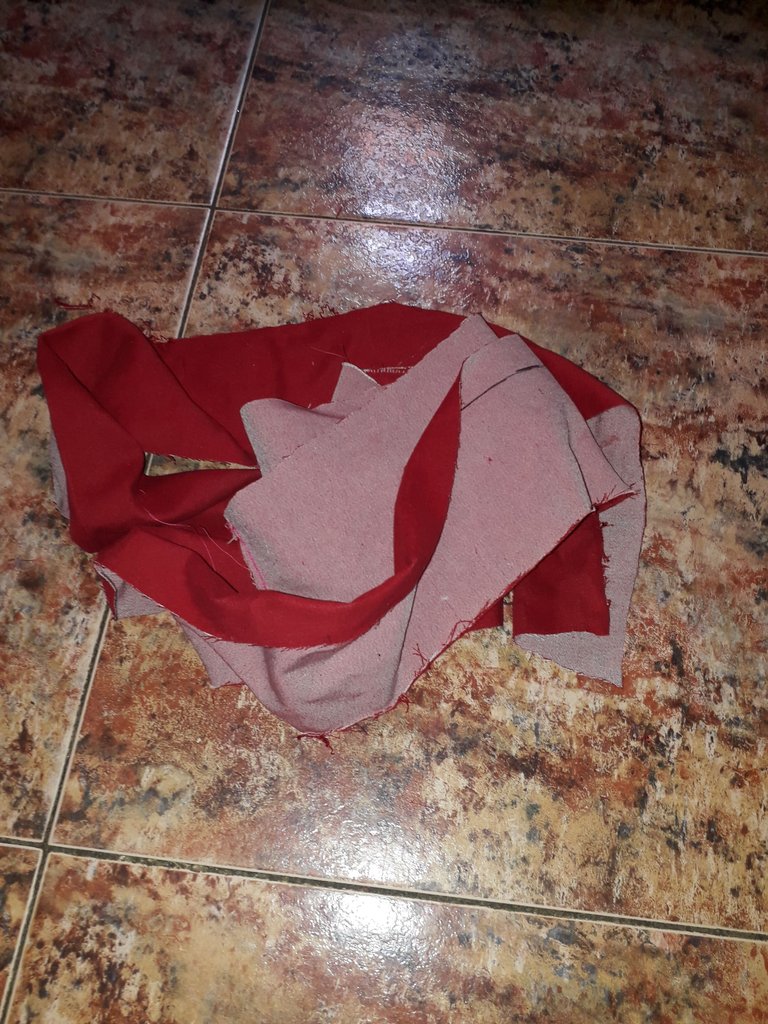

I then cut the fabric for the pant legs, undoing the original stitching and cutting off the thick, unnecessary edges.
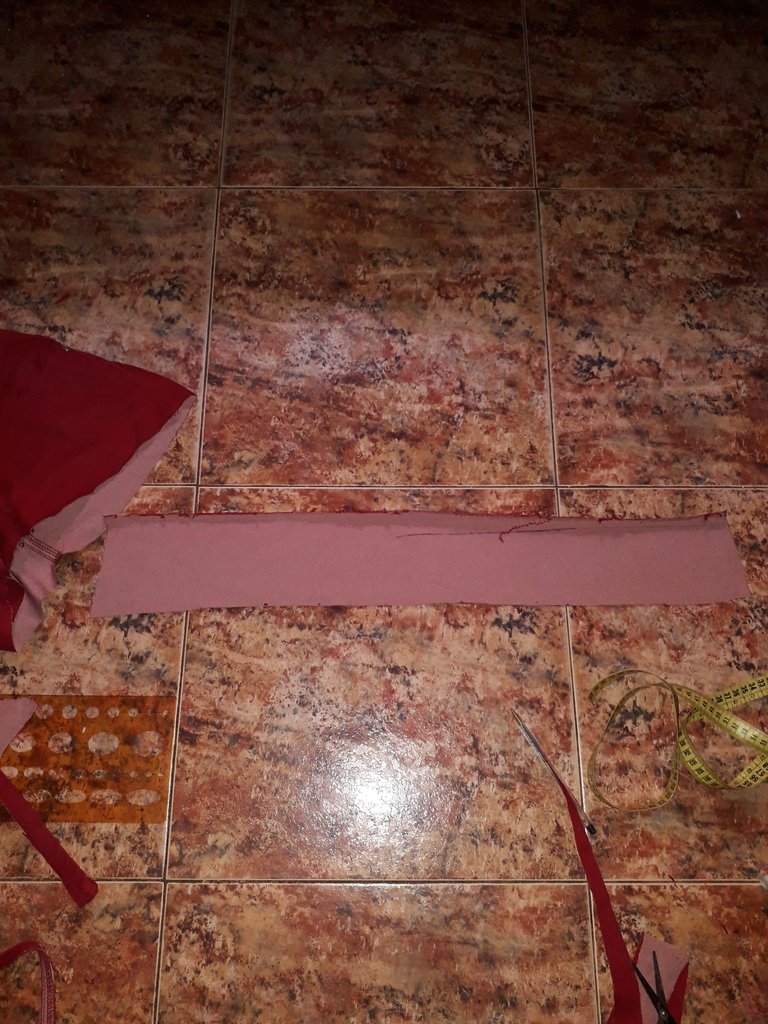
I cut a straight strip of fabric. What I didn't like about this pant was its shape, it was wider at the top and got narrower and narrower down to the ankles. The strip of fabric I cut was 13 cm long. You have to be careful, because this strip of fabric is the one that will determine the length of the skirt; if your pants are straight cut, or wider in the legs, you can use the tape measure to measure how long you want your skirt, am I explaining myself well? Hehehe, I get very tangled, but I want it to be clear for those who are very beginners like me.
I made four strips of fabric with the two pant legs.
Then, let's put the four strips of fabric together, making a very long ribbon. I handstitched this, doing a slow and careful stitching, so that it would hold up well.

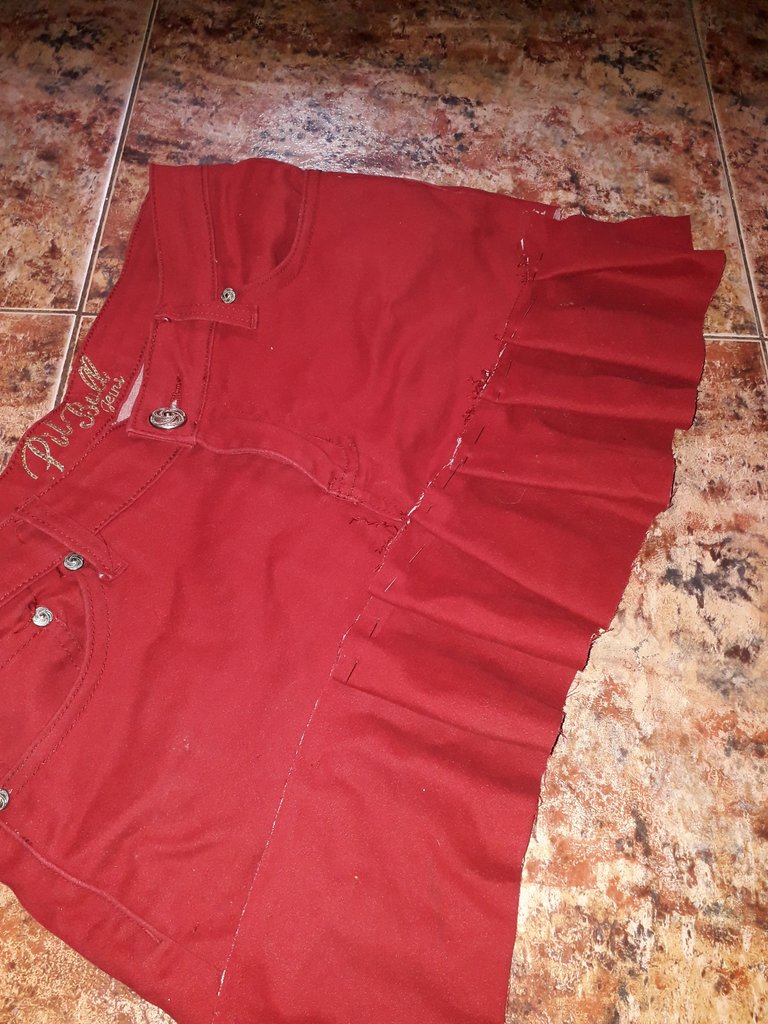

We take the long ribbon and pleat it. I folded it like this: I took the fabric and made a pleat two fingers wide, then I put a needle to hold the pleat (I didn't have pins, but I worked it out). Then I would measure two fingers apart, and repeat the process: two fingers, make the pleat, secure with the needle, and leave two fingers between each pleat.
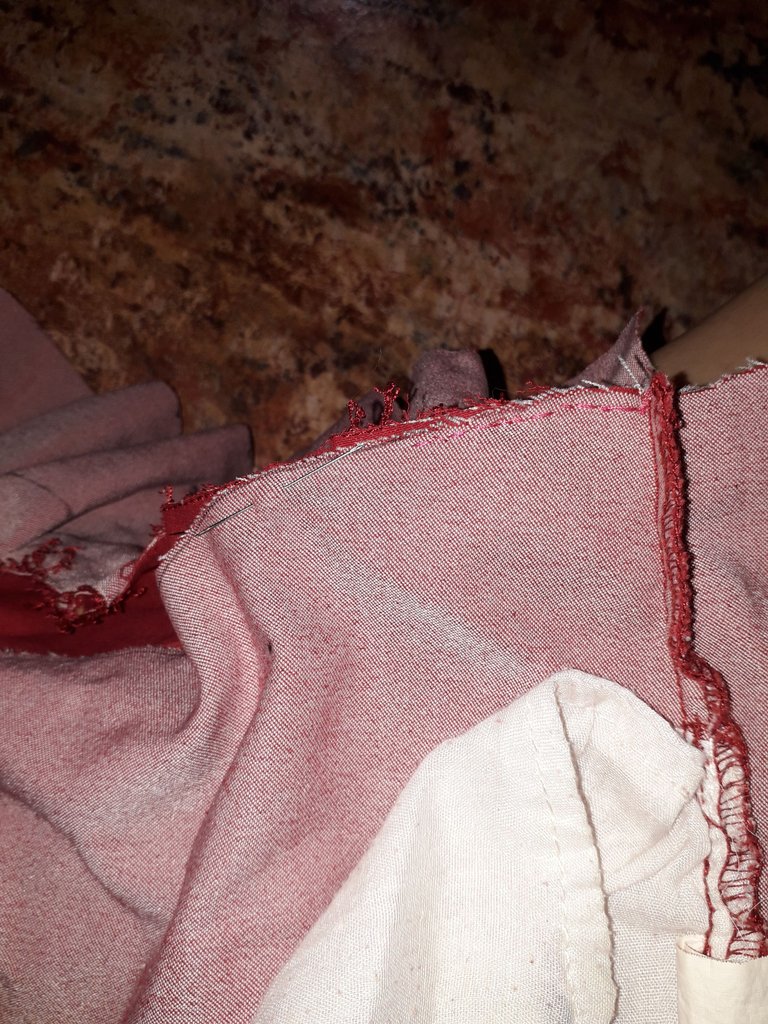
In this part, I recommend that you sew the edge of all this pleating that we did, so that you can remove the pins. However, since I don't know how to use a sewing machine, even though we have one at home, I had to make this entire skirt by hand.

 |  |
|---|

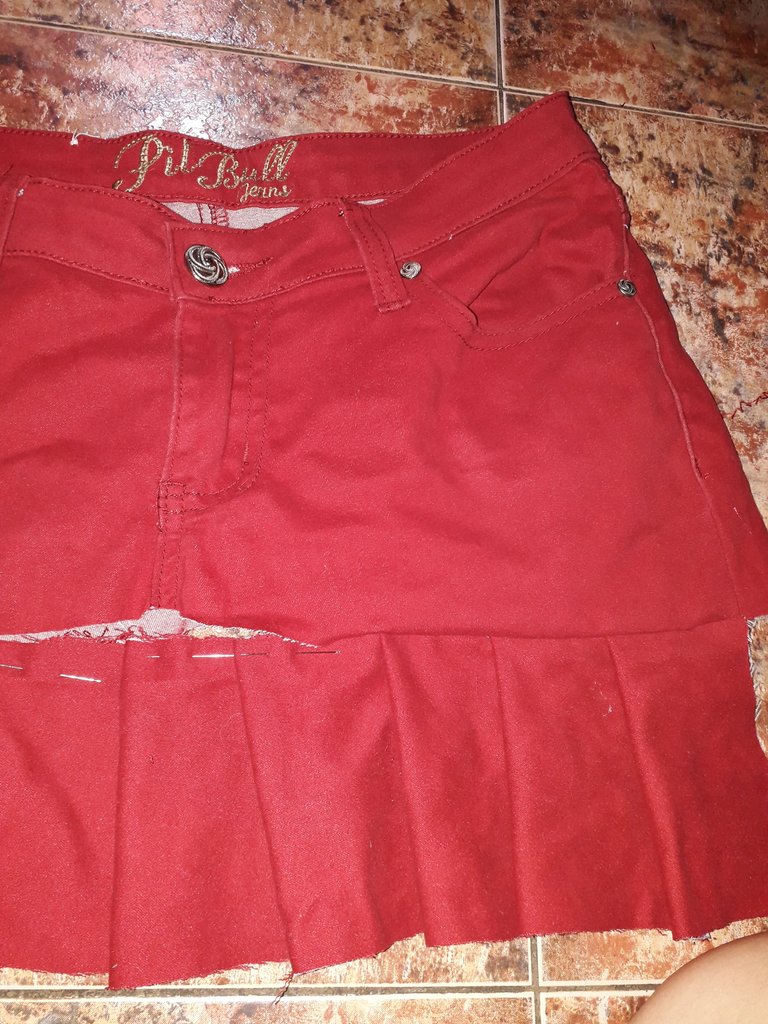
We take the pleat, and start sewing edge to edge: the edge of the pleat next to the edge of the cut pants.
Here I made a mistake, because I started sewing the pleat from a place from where it will be very visible when the two sides of the pleat are matched. Because yes, I did one pleat for the front and one for the back. Don't judge me, I have no experience at all, but what I learned with this skirt is very valuable.
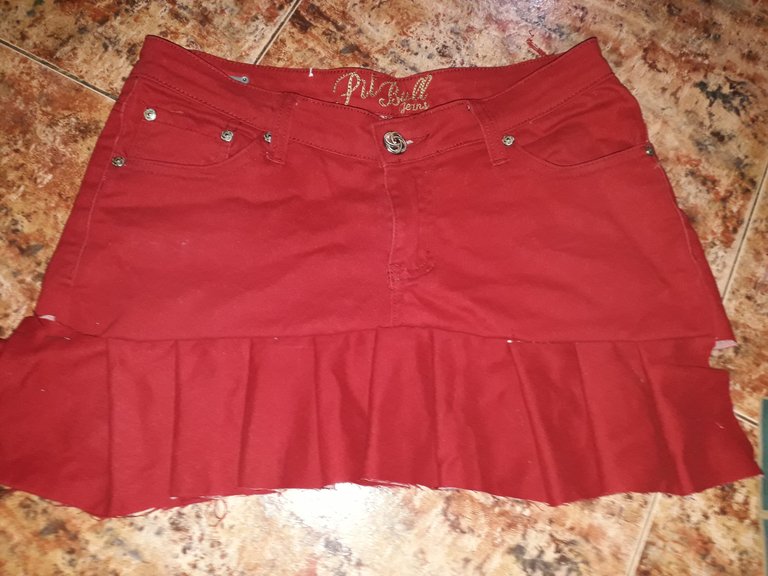
I already had the front side sewn, how does it look? I think from here it was already promising.

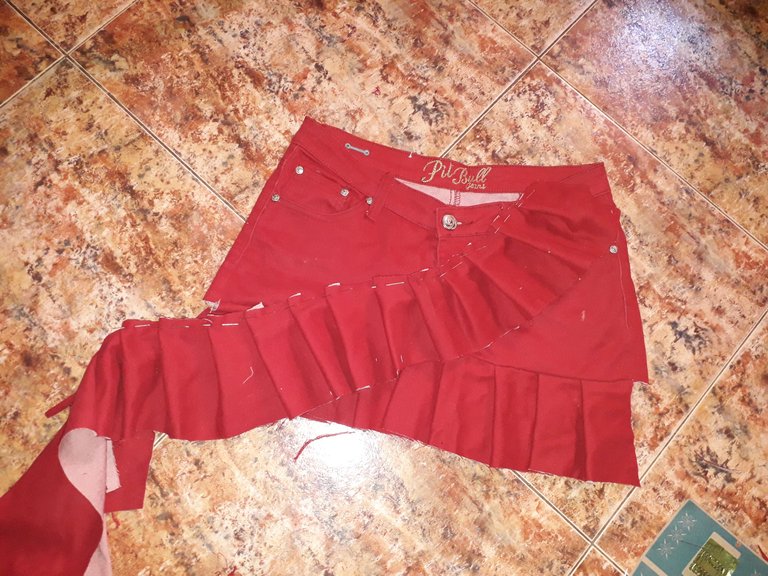 | 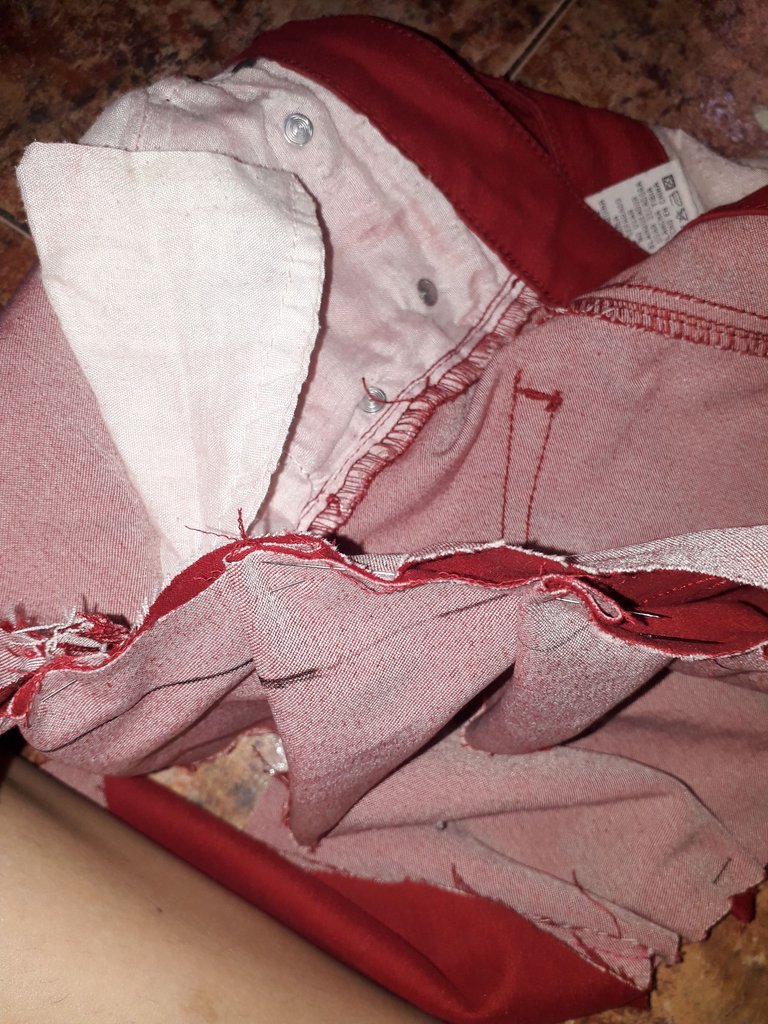 |
|---|
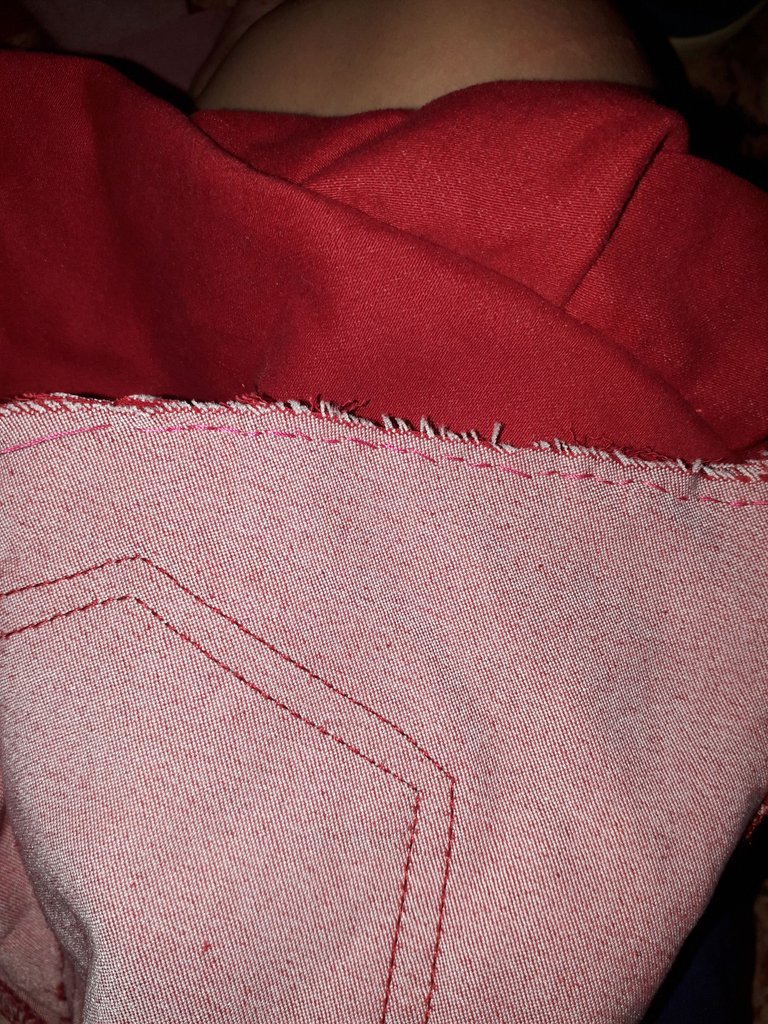

Now the back pleating side was missing. Here in the pictures, you can see how I sewed the edges of the pleat with the pant's cut. It looks easy, but I had to sew twice and with very small stitches, so that it would be well secured, without holes, and that it would not come unstuck.

 |  |
|---|

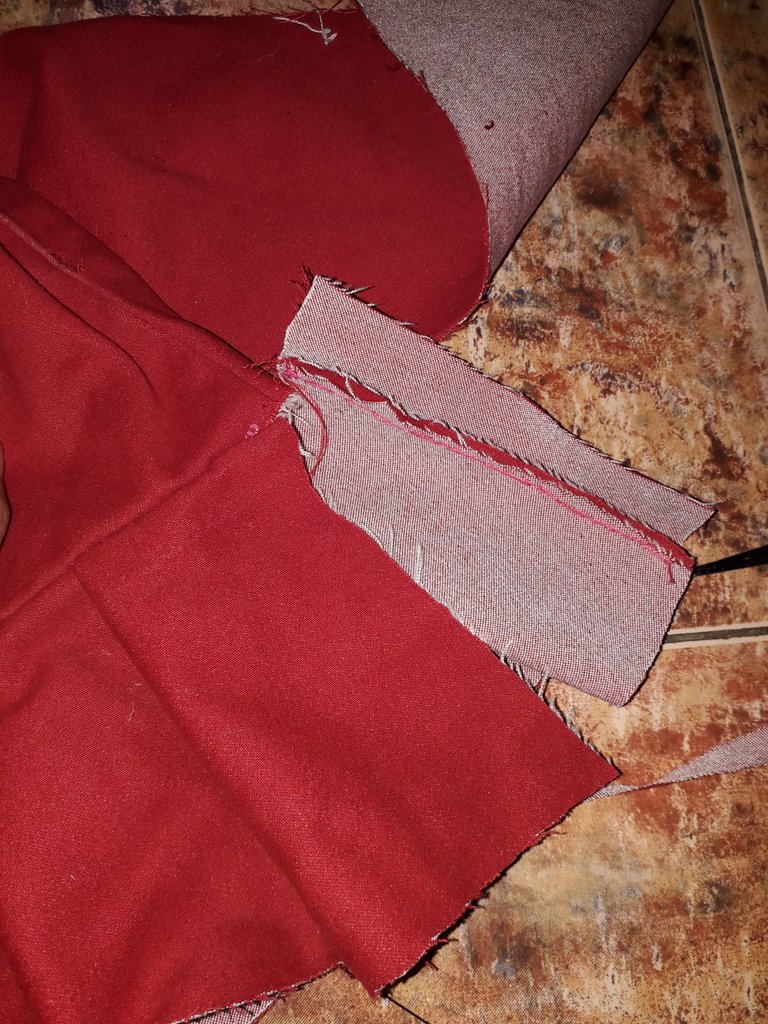
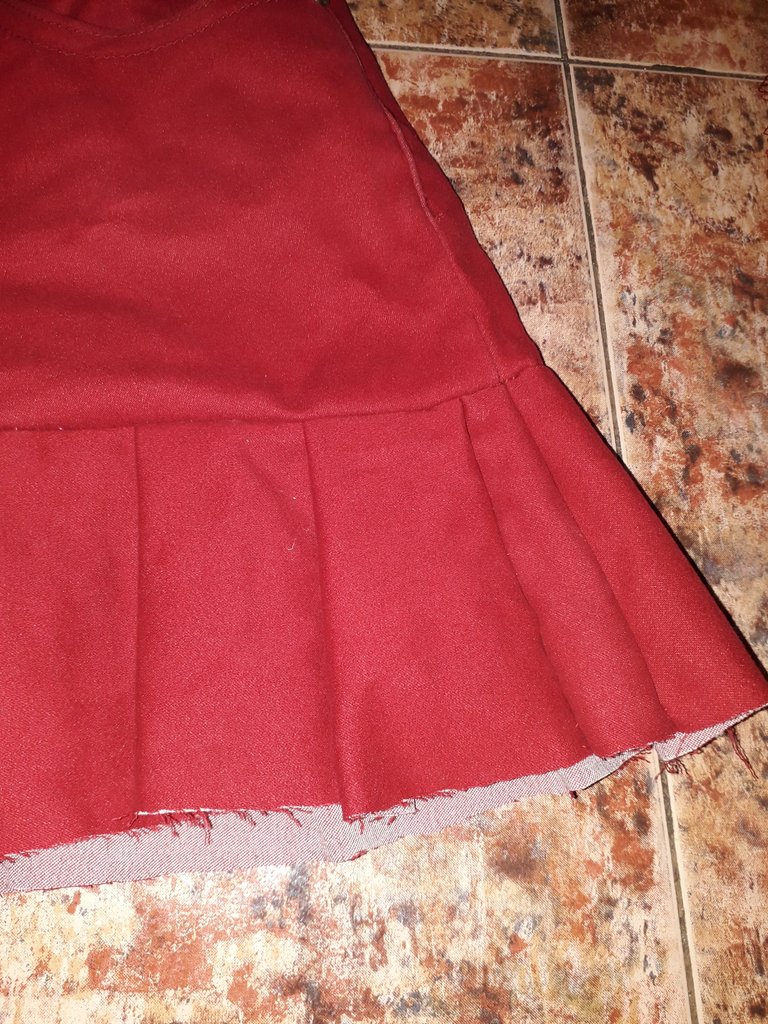
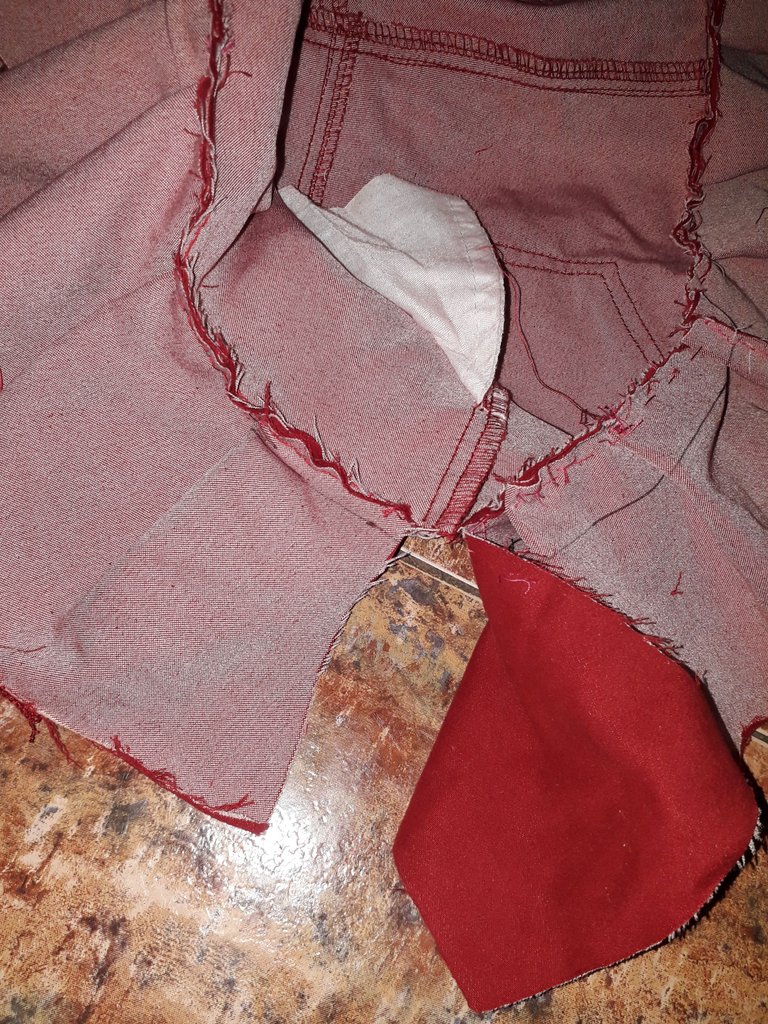
As I told you, I made a mistake in the part where the two sides of the pleat met. Don't make the same mistake as I did, measure well, I don't recommend you to make two sides of the pleat, but only one long one. In the first picture I show you how the part where the fabrics were going to be tied together looked like, and unfortunately it coincided in an area where there was already a tie.
This is how it looked when I tied them, it doesn't look very good, but not so bad either; at least the pleating disguises a little that bad seam.

 |  |
|---|

After sewing all the pleating to the cut pants, we finally sew the edge where the two sides of the pleating meet, finally.
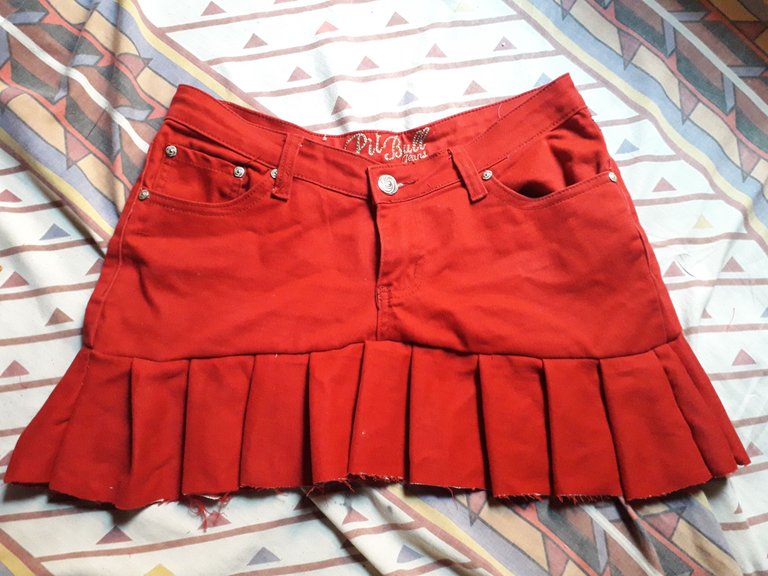
Now, it's finally a skirt. We did it!
Well, the hem of the skirt is still missing. Here we go.

 |  |
|---|
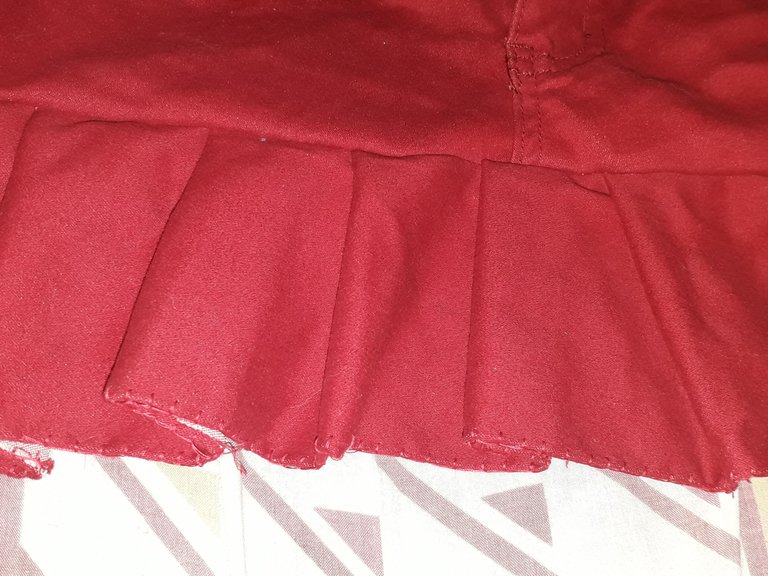

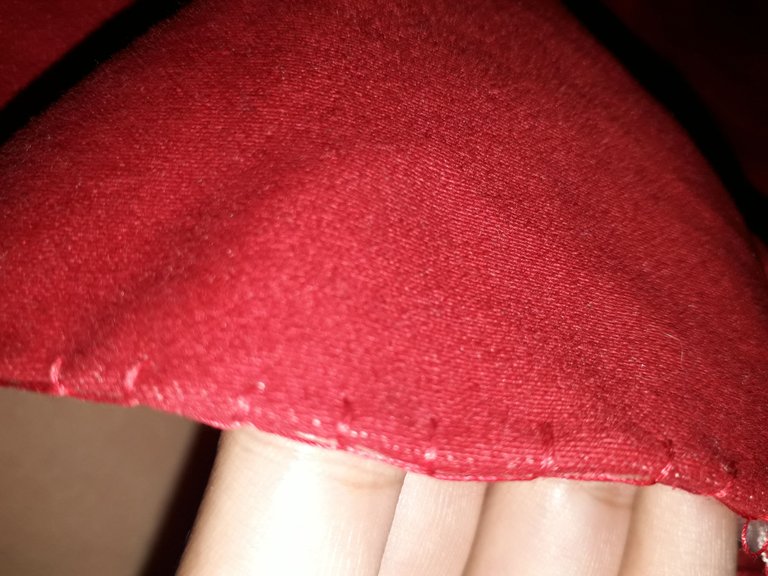
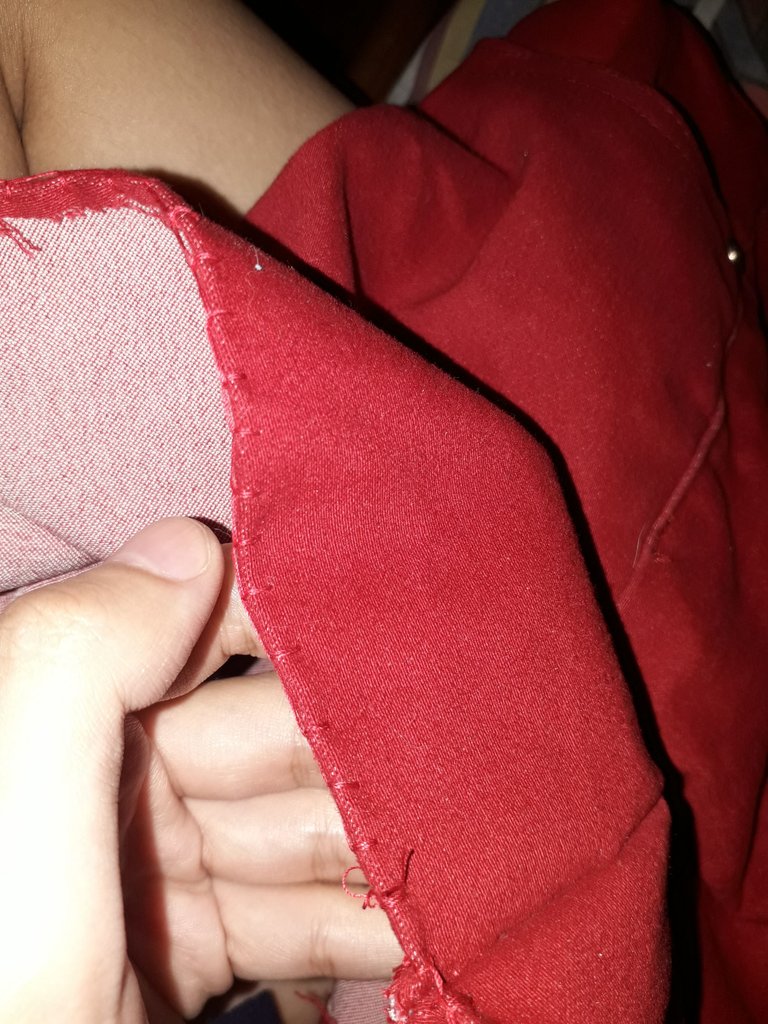
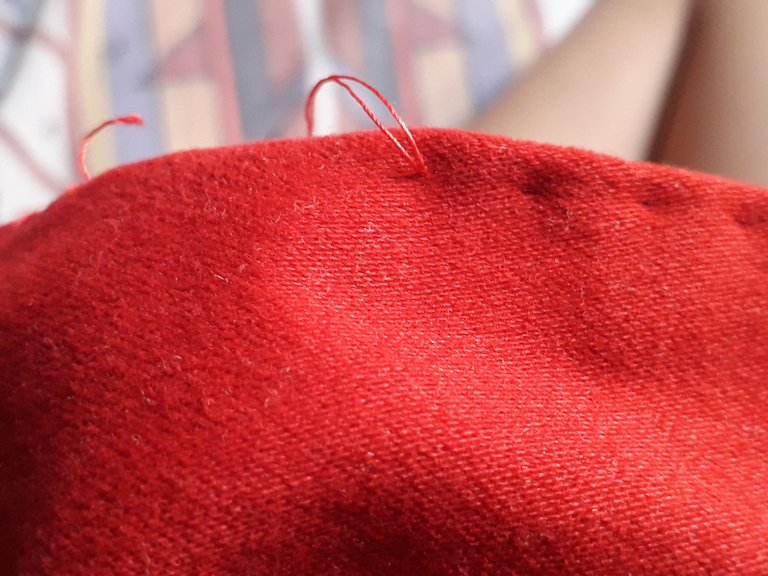
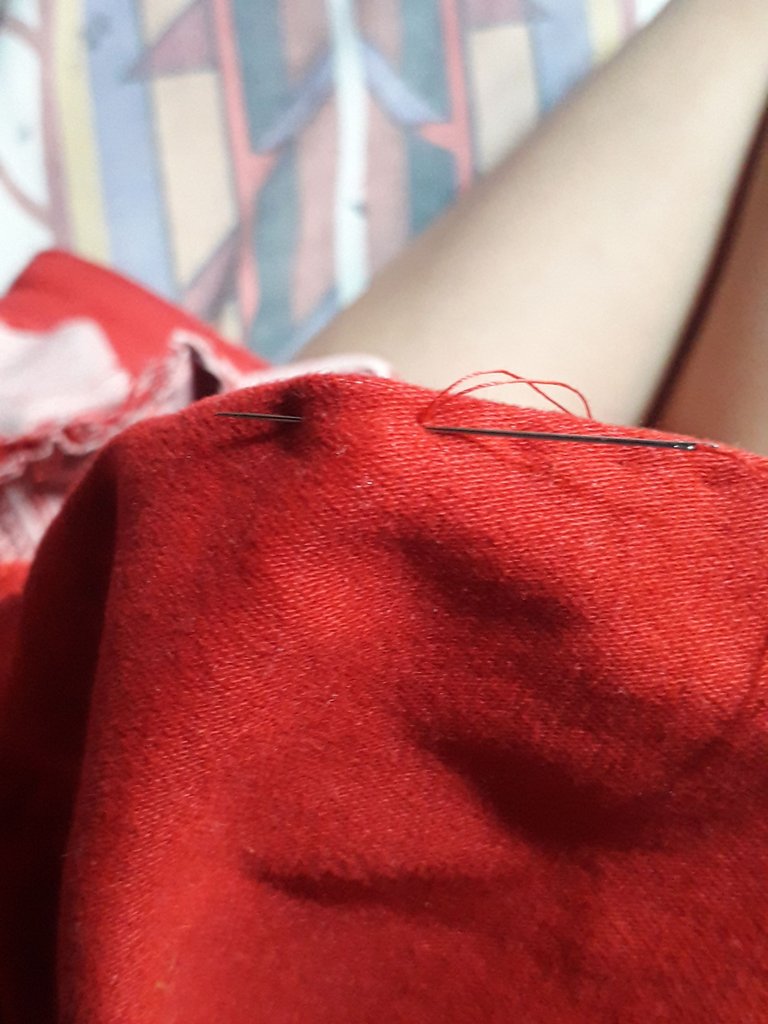
Here I share some pictures of the stitching I was making the caster with. You know that the hem is made by folding some fabric inside and sewing over it. I was making this seam that is kind of cute, I had planned to make the hem with this seam, because I felt it would look cute with that seam that looks very handmade, that handmade touch. But the bad thing is that this seam is a bit delicate, so it could come undone, or the fabric could fray anyway, and we know that a hem is to avoid this.

 |  |
|---|---|
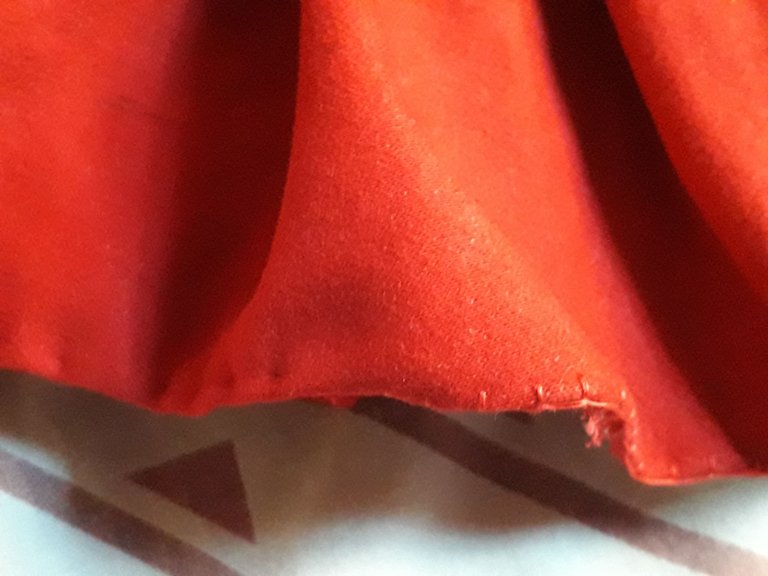 | 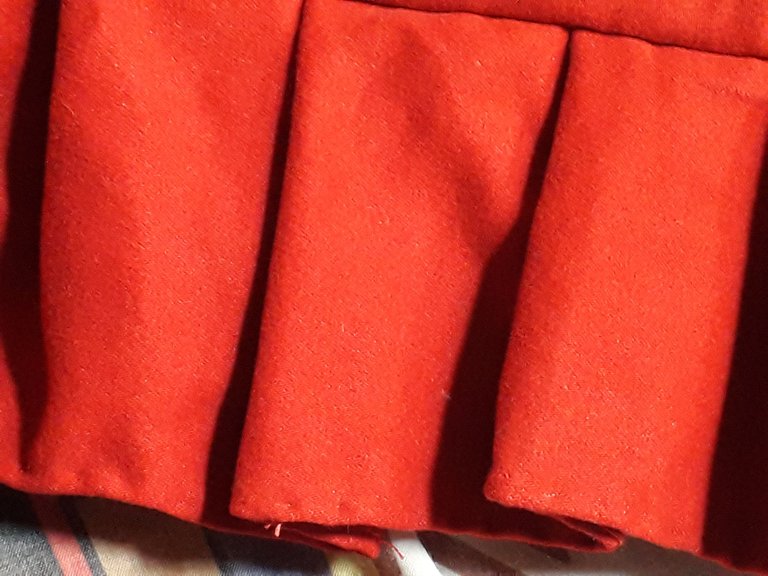 |

Then I picked up a bit inside again, hiding this seam I made earlier. Now I stitched over it, making a very small stitch seam of just dots, which is done by putting the needle in almost the same place it came out. It looks much neater with this hem, with an almost imperceptible seam.
I have to say it again, I love the soft, sueded fabric of this skirt. It doesn't show in the photos, but it also has a nice color, like a deep, rich, dark red (in the photo of the pants, above, you can see the actual color of the fabric, only the lighting and camera makes it look orange).
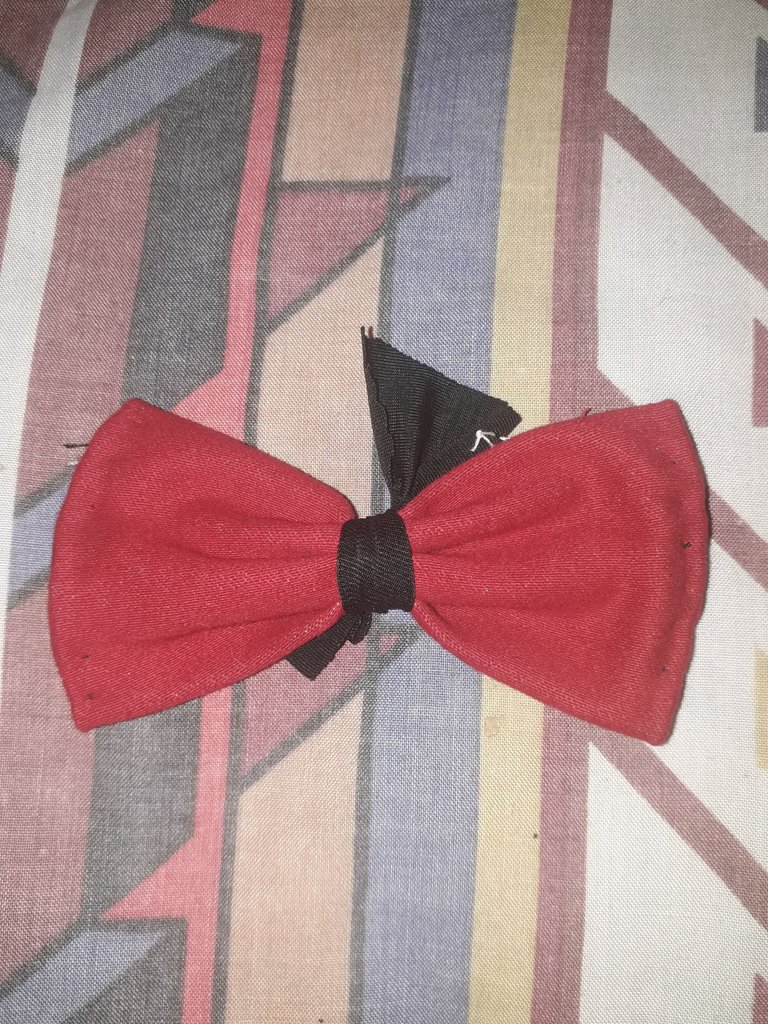
Finally, this skirt would be ready. But I wanted to add a little embellishment. A bow in this case.

 |  |
|---|---|
 |  |

I'm not going to explain exactly how I made the bow, because it's not very complicated, either.
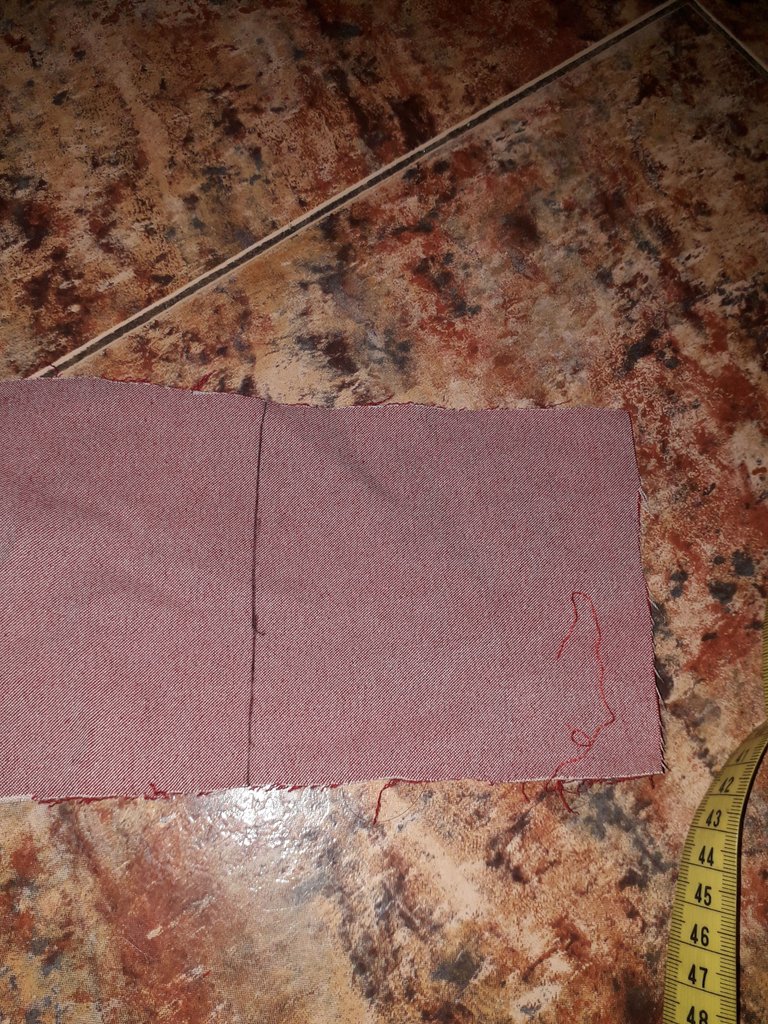
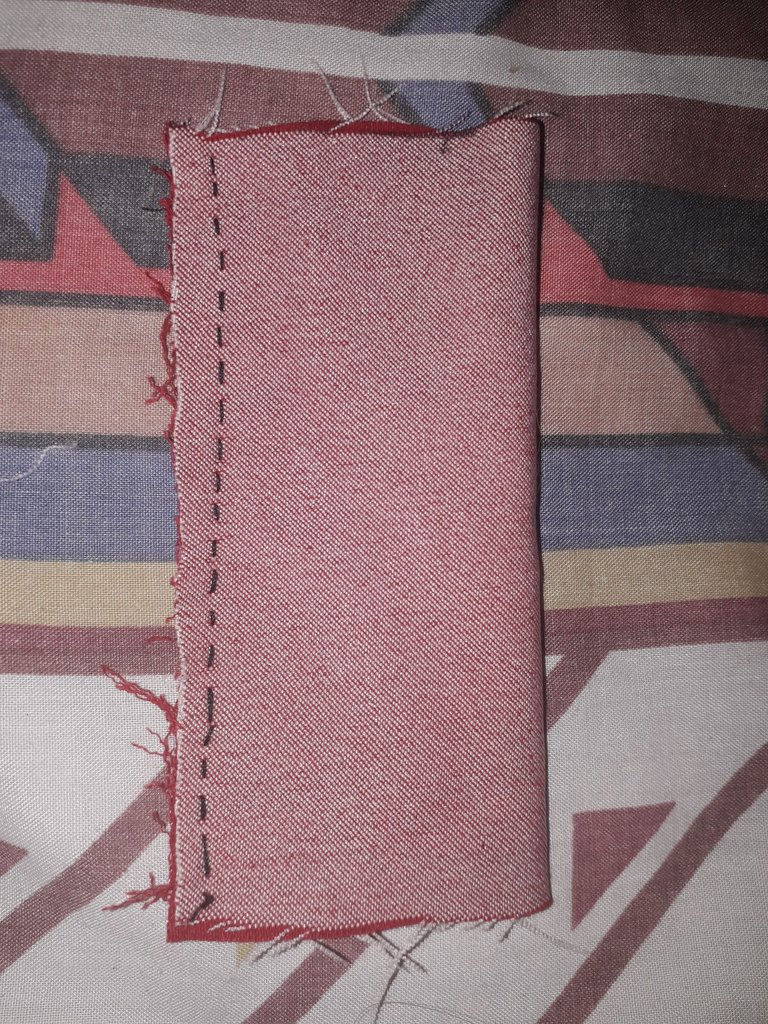
I cut a square of fabric of about 10×7 cm. Then I folded it in half and sewed it as shown in the picture above.
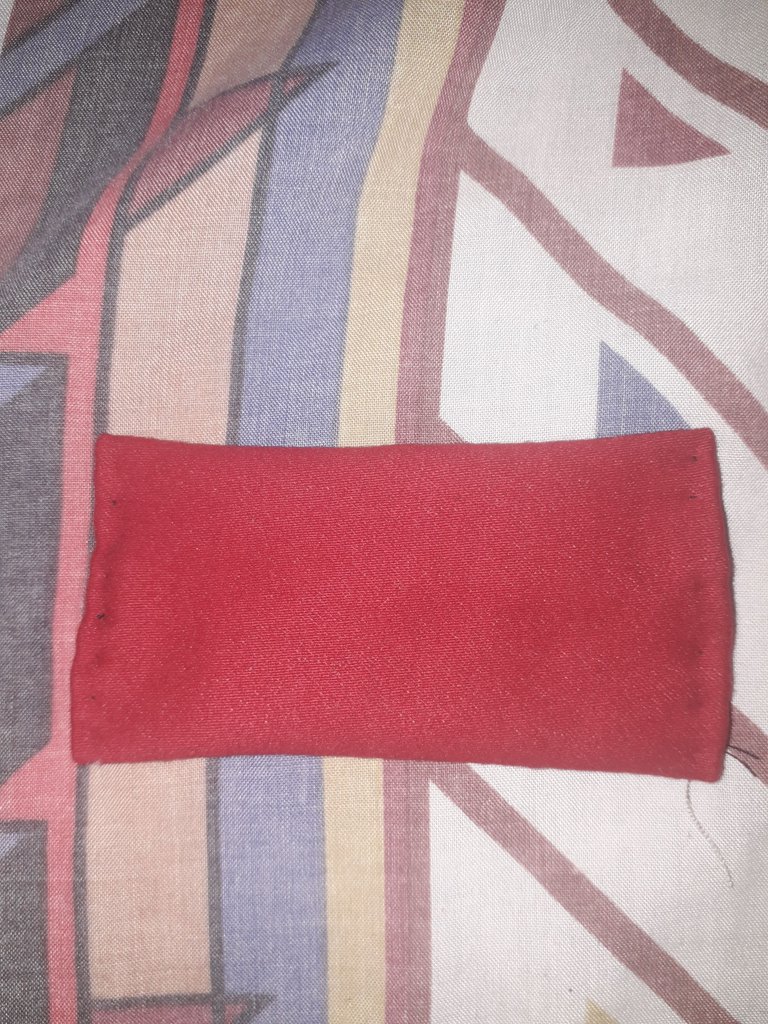
Next, I flipped the fabric over and tucked the fabric on the edges of the sides, facing in, and sewed over them (just like the ruffles, in fact, with small seams as well).
Lastly, I took a small square of black fabric, and wrapped the rectangle of fabric around it, pressing it a bit to get that stereotypical bow shape. I secured the black fabric, sewing it on the back.

 |  |
|---|

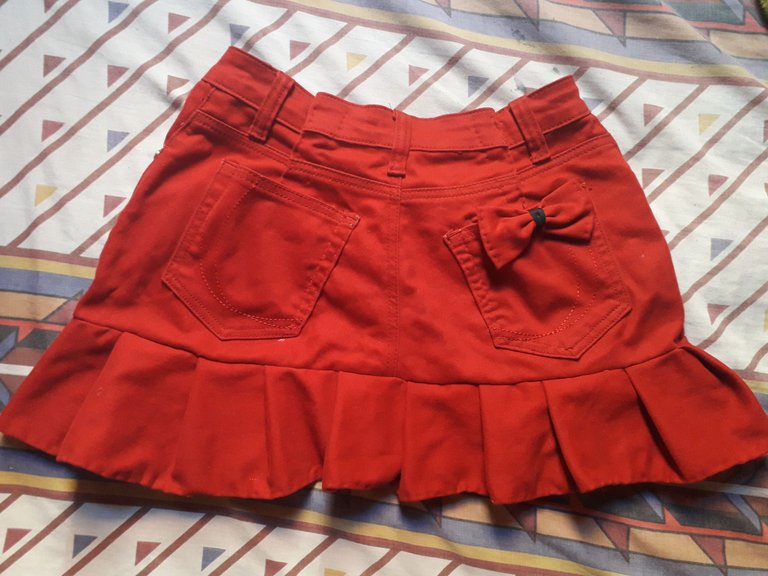
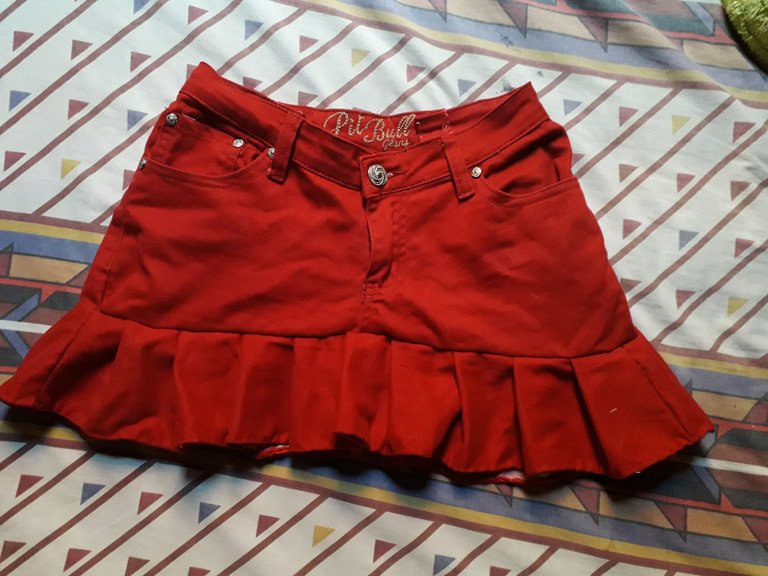
The final step, where I finally sighed in relief, was where I sewed the bow to the pocket. I felt like doing two bows, for symmetry, but, I don't know why, I feel it's exactly perfect like this.
So here are the pictures of the front and back. I am very proud.

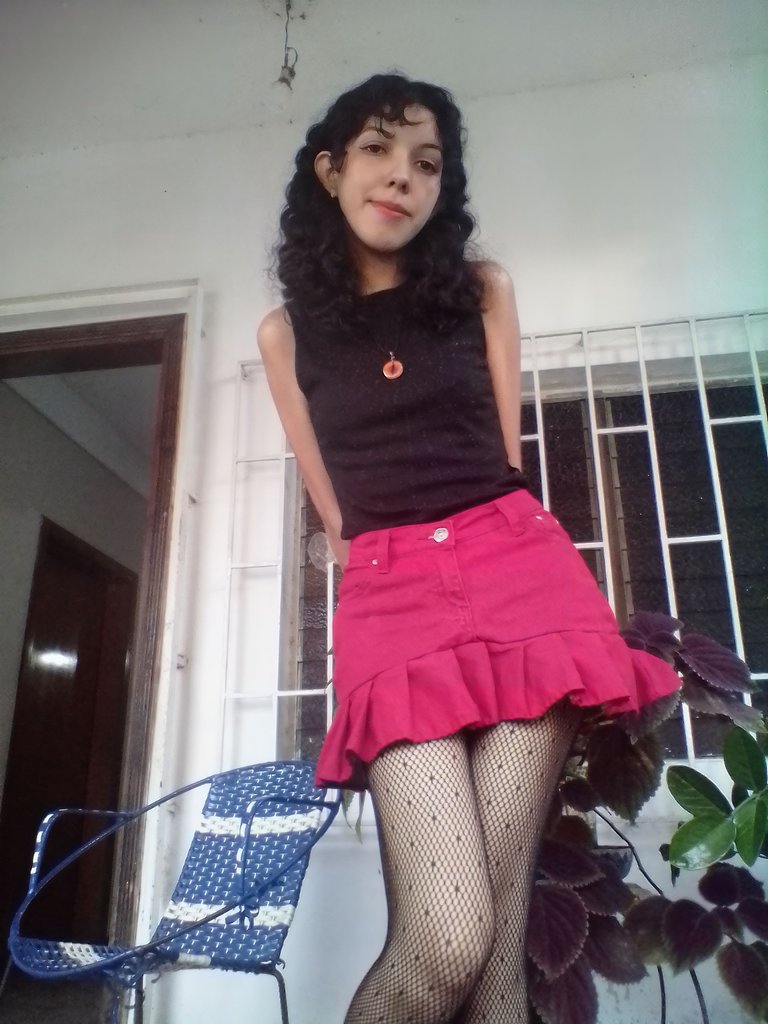

Also, obviously I had to attach a picture of me using it, right? They are from yesterday, I was very happy with it, so much so that I took a photo shoot that I will upload to Liketu later, if possible.
It's worth mentioning that this skirt took me three days to make it, because sewing by hand is much slower than sewing on a sewing machine (which I haven't learned to use yet). They were quite stressful days, don't think it came out right the first time, there was a moment where I had to unpick the whole seam, where the pants and the pleats were joined, because it came out crooked, just imagine.
However, it was worth it, what do you say?

Nothing more to add, I hope you liked the process as much as I did. Take care, drink lots of water, don't forget to smile, and have a nice day!


Español

Holiii, amigos de la comunidad de HiveDIY, ¿qué tal están? Espero que muyyy bien.
En esta ocasión me atreví a hacer algo muy arriesgado: Transformar ropa es una de las cosas que más miedo me daba, pero vi un pantalón que no me gustaba nada, y pensé “¿y si…?” Desde siempre he sido amante de las faldas, así que reuní valor y sucedió lo que verán a continuación, ¡vamos allá!

Materiales

- Un pantalón (obvi, jiji).
- Tijeras.
- Hilo y agujas.
- Alfileres (puedes usar agujas si no tienes alfileres).
- Cinta métrica y regla (para hacer trazos rectos en donde debemos cortar la tela).
- Un lapicero o tiza (para marcar donde cortaremos la tela).


Primero tomamos nuestro pantalón que no usamos, y lo estiramos bien en una superficie plana; en mi caso yo lo puse en el suelo, que está limpio porque lo limpio y trapeo a diario, ¿ok? Jiji. Yo volteé el pantalón para poder marcarlo con el lapicero libremente, porque me daba miedo manchar la tela.

 |  |
|---|

Marcamos una línea recta horizontal, unos centímetros más abajo del cierre; en este caso, son como 2 o 3 cm más abajo del cierre.
Con mucho miedo, corté la tela y me quedó algo chueca, pero seguí confiando en el proceso porque me gustaba mucho la tela, que es muy suave y gamuzada, entonces ya no había vuelta atrás. Así que sigamos.

 |  |
|---|


Luego corté la tela de las piernas del pantalón, deshaciendo la costura original y cortando los bordes gruesos e innecesarios.
Corté una tira de tela recta y lisa. Lo que no me gustaba de este pantalón era su corte, era más ancho arriba y se iba haciendo más estrecho hasta los tobillos. La tira de tela que corté, medía 13 cm de largo. Hay que tener cuidado, porque esta tira de tela es la que va a determinar el largo de la falda; si tu pantalón es de corte recto, o más ancho en las piernas, puedes usar la cinta métrica para medir de qué largo quieres tu falda, ¿me estoy explicando bien? Jijiji, me enredo mucho, pero quiero que sea claro para los que son muy principiantes como yo.
Hice cuatro tiras de tela con las dos piernas del pantalón.
Luego, vamos a juntar las cuatro tiras de tela, haciendo una cinta muy larga. Yo cosí a mano esto, haciendo una costura lenta y cuidada, para que resistiera bien.


Tomamos la cinta larga y la vamos plisando. Yo la plisé así: tomaba la tela y le hacía un plisado de dos dedos de ancho, luego le ponía una aguja para sujetar el plisado (no tenía alfileres, pero resolví). Luego medía dos deditos de separación, y volvía a repetir el proceso: dos deditos, hago el plisado, aseguro con la aguja, y dejo dos deditos de separación entre cada plisado.
En esta parte, les recomiendo que cosan el borde de todo este plisado que hicimos, para que puedan quitar los alfileres. Sin embargo, como yo no sé usar máquina de coser, a pesar de que tengamos una en casa, tuve que hacer toda esta falda a mano.

 |  |
|---|


Tomamos el plisado, y comenzamos a coser borde con borde: el borde del plisado junto al borde del pantalón cortado.
Aquí cometí un error, porque comencé a coser el plisado desde un lugar desde el que será muy visible cuando se empaten las dos caras del plisado. Porque sí, yo hice un plisado para el frente y otro para la parte de atrás. No me juzguen, no tengo nada de experiencia, pero lo que aprendí con esta falda es muy valioso.
Ya tenía la cara de adelante cosida, ¿cómo se ve? Yo creo que desde aquí ya prometía.

 |  |
|---|


Ahora faltaba la cara de plisado trasera. Aquí en las imágenes pueden ver como cosía los bordes del plisado con el pantalón cortado. Parece fácil, pero tuve que coser dos veces y con puntos muy pequeños, para que quedara bien asegurado, sin huecos, y que no se despegara.

 |  |
|---|

Como les dije, cometí un error en la parte donde se juntaban las dos caras del plisado. No cometan el mismo error que yo, midan bien, no les recomiendo hacer dos caras de plisado, sino una sola larga. En la primera imagen les muestro como se veía la parte donde se iban a empatar las telas, y lamentablemente justo coincidió en una zona donde ya había un empate.
Así quedó cuando las empaté, no se ve muy bien, pero tampoco tan mal; al menos el plisado disimula un poco ese empate mal hecho.

 |  |
|---|

Después de coser todo el plisado al pantalón cortado, cosemos finalmente el borde donde se unen las dos caras del plisado, finalmente.
Ahora, por fin es una falda. ¡Lo logramos!
Bueno, aún falta el ruedo de la falda. Vamos allá.

 |  |
|---|


Aquí les comparto algunas fotos de la costura con la que estaba haciendo el ruedo. Ya saben que el ruedo se hace doblando un poco de tela hacia dentro y cosiéndole encima. Yo le estaba haciendo esta costura que es algo linda, yo tenía pensado hacer el ruedo con esta costura, porque sentí que quedaría cute así con esa costura que se nota muy hecha a mano, ese toque artesanal. Pero lo malo es que esa costura es algo delicada, así que se podía descoser o la tela se podía deshilachar igual, y sabemos que un ruedo es para evitar esto.

 |  |
|---|---|
 |  |

Entonces volví a recoger un poquito hacia dentro nuevamente, ocultando esta costura que hice antes. Ahora cosí encima, haciendo una costura muy pequeña de solo puntitos, la cual se hace metiendo la aguja casi por el mismo sitio por el que salió. Se ve mucho más cuidado con este ruedo, con una costura casi imperceptible.
Debo decirlo de nuevo, me encanta la tela suave y gamuzada de esta falda. No se nota en las fotos, pero también tiene un color bonito, como un rojo oscuro e intenso (en la foto del pantalón, más arriba, se puede apreciar el color real de la tela, solo que la iluminación y la cámara la hace ver naranja)
Por fin, ya estaría lista esta falda. Pero yo quise añadirle un adornito. Un lazo en este caso.

 |  |
|---|---|
 |  |

No voy a explicar exactamente como hice el lazo, porque tampoco es muy complicado.
Corté un cuadrado de tela de unos 10x7 cm. Luego lo doblé por la mitad y lo cosí como se ve en la foto de arriba.
Después, voltee la tela y metí la tela de los bordes de los lados, hacia dentro, y les cosí por encima (tal como los ruedos, de hecho, con costuras pequeñas también).
Por último, tomé un cuadrito de tela negra, y envolví el rectángulo de tela, apretando un poco para que tome esa forma de lacito estereotípico. Aseguré la tela negra, cosiéndola por detrás.

 |  |
|---|

El paso final, en el que por fin suspiré aliviada, fue donde cosí el lacito al bolsillo. Tenía ganas de hacer dos lacitos, para lograr simetría, pero, no sé por qué, siento que está exactamente perfecto así.
Entonces les dejo las fotos de atrás y delante. Estoy muy orgullosa.


Además, obvio que tenía que adjuntar una foto mía usándola, ¿no? Son de ayer, estaba muy feliz con ella, tanto que me tomé una sesión de fotos que subiré a Liketu después, si es posible.
Cabe destacar que esta falda me tomó tres días hacerla, pues la costura a mano es mucho más lenta que en máquina de coser (la cual aún no aprendo a usar). Fueron días bastante estresantes, no crean que salió bien a la primera, hubo un momento donde tuve que descoser toda la costura, donde el pantalón y los plises se juntaban, porque me salió chueco, imagínense.
Sin embargo, valió la pena, ¿qué me dicen?

Sin nada más que añadir, espero que les haya gustado el proceso tanto como a mí. Cuídense, tomen mucha agua, no se olviden de sonreír, ¡y que tengan un lindo día!


Credits | Créditos
- English translation DeepL (sorry for any mistakes, I don't know much English)
- Traducción al inglés DeepL (lo siento por cualquier error, no sé mucho inglés.)
- Cover and banners made in Canva
- Separadores y banners hechos en Canva
Los separadores fueron hechos con una imagen de Freepik y editados con Canva.
The dividers were made with an image from Freepik and edited with Canva.
- Photos taken by me, using a Samsung Galaxy J6
Fotos tomadas por mí, usando un Samsung Galaxy J6
Posted Using InLeo Alpha


