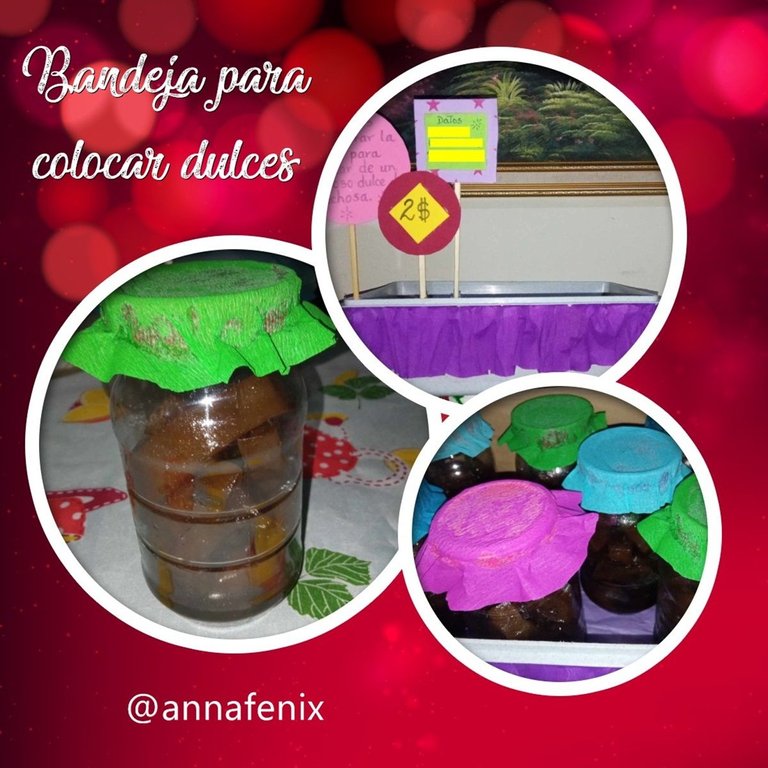

A few days ago, I had the opportunity to bring some of my homemade candy to my stretching class, taking advantage of an opportunity the trainers gave us to promote our ventures during class. I didn't have anything on hand, and had to quickly improvise a tray to place the sweets on. The idea was that it would be comfortable, safe, and at the same time colorful and eye-catching, and most importantly, that it would speak for me, hahaha. I'll explain what that's all about.
Días atrás, tuve la oportunidad de llevar algunos de mis dulces caseros a mi clase de stretching, aprovechando una oportunidad que nos dieron las entrenadoras para promover nuestros emprendimientos durante las clases. No tenía nada a la mano, y tuve que improvisar rápidamente una bandeja para colocar los dulces. La idea era que fuera cómoda, segura, y a la vez pintoresca y llamativa, y lo más importante, que hablara por mí, jajaja. Ya les explicaré de qué trata eso.
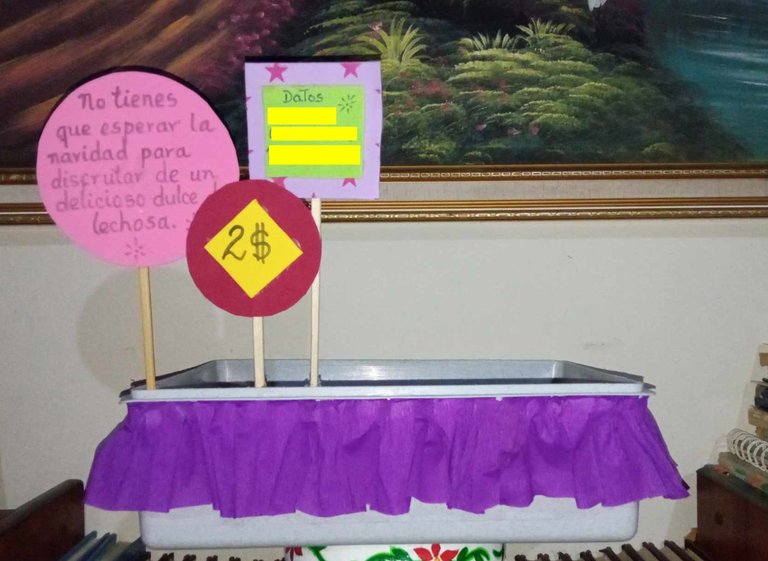
In this simple craft, you will find two types of recycling; the tray and the candy containers. Usually, I put the candy in transparent trays with my brand logo, but at this moment I didn't have either one or the other. I made a day before a delicious milky candy, something that is rarely sold outside the Christmas season, so I made a slogan based on this.
En esta sencilla manualidad, se encuentran dos tipos de reciclaje; la bandeja y los recipientes para el dulce. Por lo general, coloco los dulces en bandejas transparentes con el logo de mi marca, pero en ese momento no tenía ni una cosa ni la otra. Elaboré un día antes un delicioso dulce de lechosa, algo que pocas veces se vende fuera de la temporada navideña, por lo que hice un eslogan basada en esto.
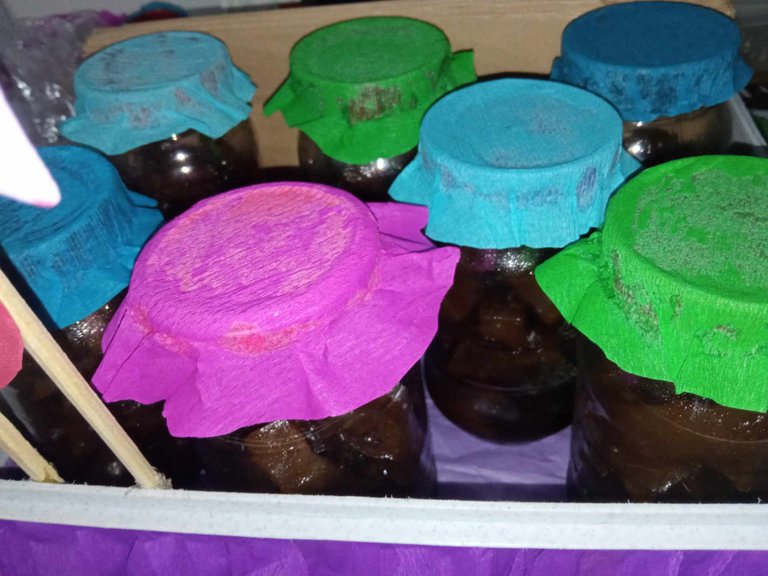
I placed the candies in containers of mayonnaise, sauces, and mustard, which I always keep for storing some meals in the fridge. I washed them well, conditioned them, and put different colored crepe paper on the lids, so they would attract more attention.
And then I took a plastic tray from the kitchen, and started to bring it to life with some materials I had saved. Here are the materials, the steps, and the final result:
Los dulces los coloqué en recipientes de mayonesa, salsas, y mostaza, que siempre conservo para guardar algunas comidas en la nevera. Los lavé bien, los acondicioné, y les coloqué papel crepé de distintos colores en las tapas, para que llamaran más la atención.
Y luego tomé una bandeja plástica de la cocina, y comencé a darle vida con algunos materiales que tenía guardados. A continuación les doy los materiales, los pasos, y el resultado final:
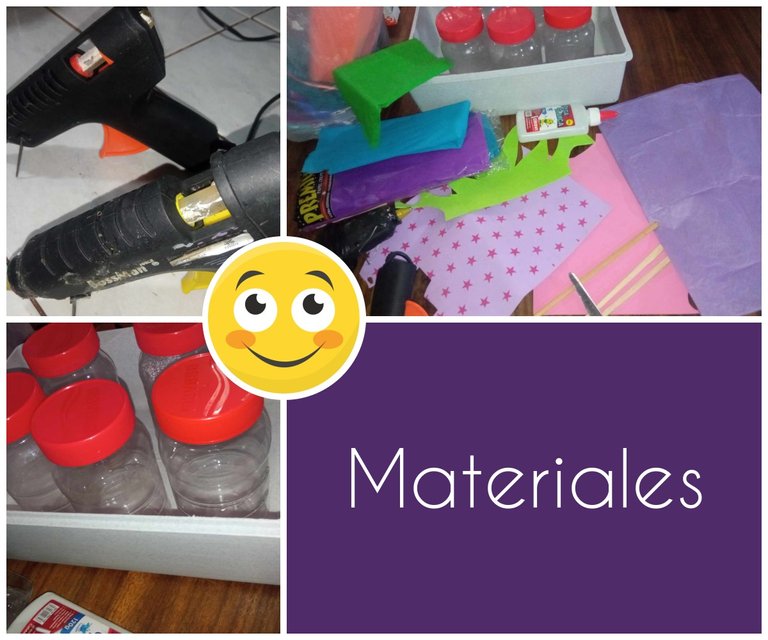
MATERIALS 🎁
Crepe paper of various colors
Tissue paper
Empty mayonnaise pots
A plastic tray (square)
Silicone guns
Silicone sticks
White glue
Scissors
Pencil
Ruler
Compass
Height sticks
Foami scraps of various colors
Black markers (fine tip and thick tip)
MATERIALES 🎁
Papel crepé de varios colores
Papel de seda
Potes de mayonesa vacíos
Una bandeja plástica (cuadrada)
Pistolas de silicón
Barras de silicón
Pega blanca
Tijeras
Lápiz
Regla
Compás
Palitos de altura
Retazos de foami de varios colores
Marcadores color negro (punta fina y punta gruesa)
STEPS 🎁
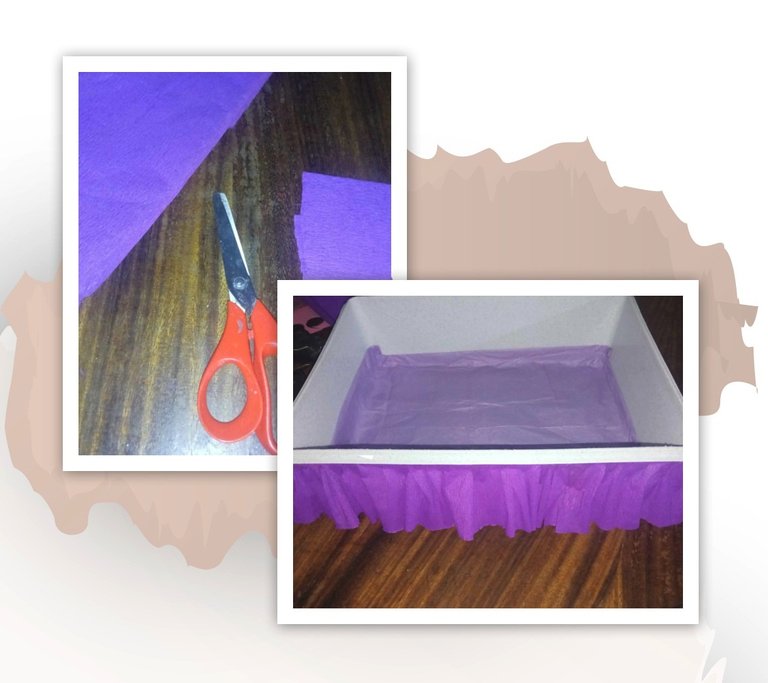
🎁 The first step was to cut out a strip of crepe paper and glue it to the edge of the tray with white glue, in the shape of a faralao, resembling a skirt. On the inside, I placed a tissue paper base so that the pots would not slide.
PASOS 🎁
🎁 El primer paso fue recortar una franja de papel crepé y pegarla en la orilla de la bandeja con pega blanca, en forma de faralao, semejando una falda. En la parte interna, le coloqué una base de papel de seda para que los potes no deslizaran.
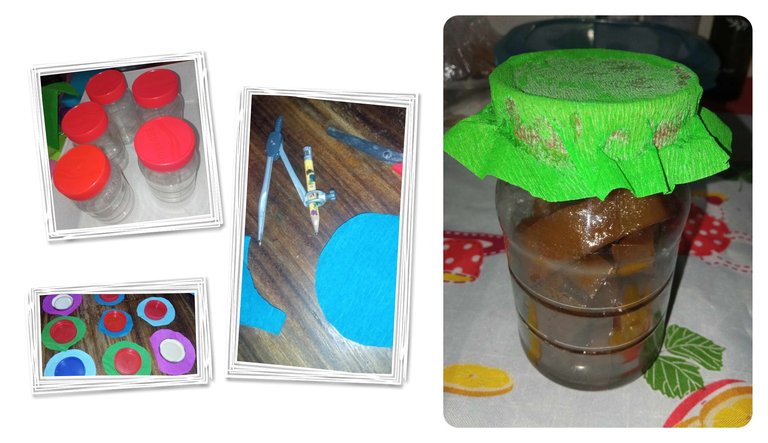
🎁 Then I made circles of crepe paper in various colors using a compass. I cut them out, glued them to the center of the pot lids, and then glued them to the edge with white glue. When they dried, the lids were no longer transparent.
🎁 Luego hice círculos de papel crepé en variados colores usando un compás. Los recorté, y los pegué al centro de las tapas de los potes, y luego los fui pegando a la orilla con pega blanca. Al secar, ya no transparentaba la tapa.
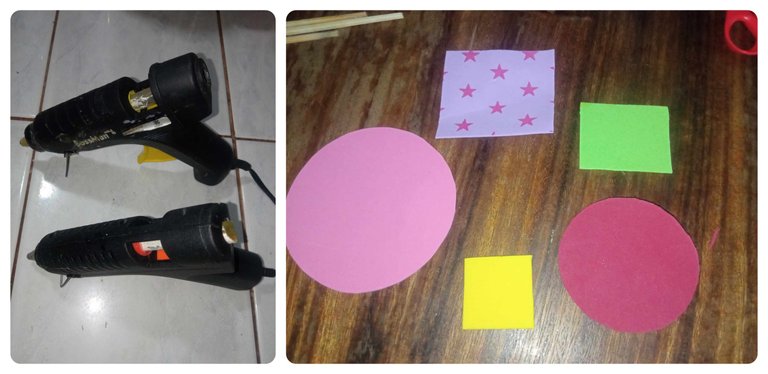
🎁 Finally, I cut out geometric shapes in different types of foami, and attached them to the tray with tall sticks glued with hot silicone.
🎁 Finalmente, recorté formas geométricas en distintos tipos de foami, y los fijé a la bandeja con palitos de altura pegados con silicón caliente.
🎁 On the foami signs I placed a message or slogan, the price of the candy, and the cancellation information.
🎁 En los cartelitos de foami coloqué un mensaje o eslogan, el precio de los dulces, y los datos para cancelarlos.
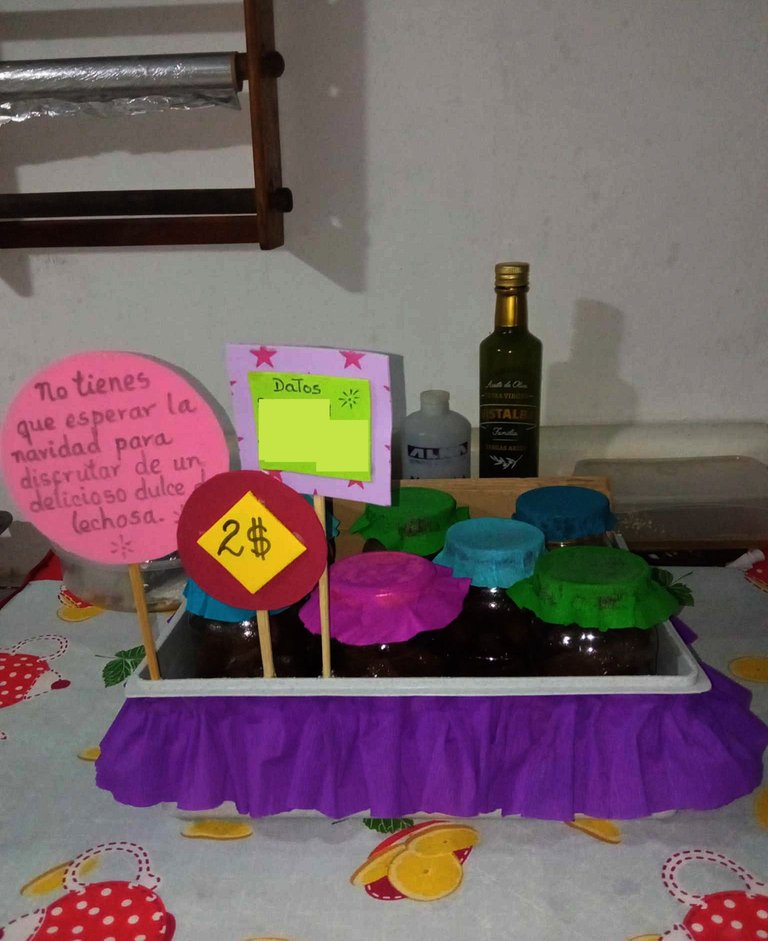

IMAGE SOURCES:
FUENTES DE IMÁGENES
Todas las imágenes de contenido pertenecen a mi galería personal
The translator used is: Deepl Translator // El traductor utilizado es: Deepl Translator

Contenido Original del Autor
Aplicaciones: Canva, PhotoScape, Instagram, Inshot y Pixiz.
Traducción: Deepl Traductor www.DeepL.com/Translator
Las imágenes personales son tomadas con un dispositivo móvil Android Xiaomi Redmi 9 de mi propiedad.
Las imágenes utilizadas en los banners, minibanners, gifs y separadores, son cortesía de Pixabay.
Derechos Reservados del Autor: @annafenix (2021 – 2024)
~ ~ ~ ~ ~ ~ ~ ~ ~ ~ ~ ~
Original Author Content
Applications: Canva, PhotoScape, Instagram, Inshot and Pixiz.
Translation: Deepl Translator www.DeepL.com/Translator
Personal images are taken with an Android Xiaomi Redmi 9 mobile device owned by me.
Images used in banners, minibanners, gifs and separators, are courtesy of Pixabay.
© Copyright: @annafenix (2021 - 2024)

