Hello, hello greetings dear friends of #hive and this wonderful community.
#Jewelry I wish you a lovely Tuesday from whatever little corner of the world is reading me.
Hola, hola saludos queridos amigos de #hive y de esta maravillosa comunidad
#Jewelry les deseo un encantador día martes desde cualquier rinconcito del mundo que me esté leyendo.
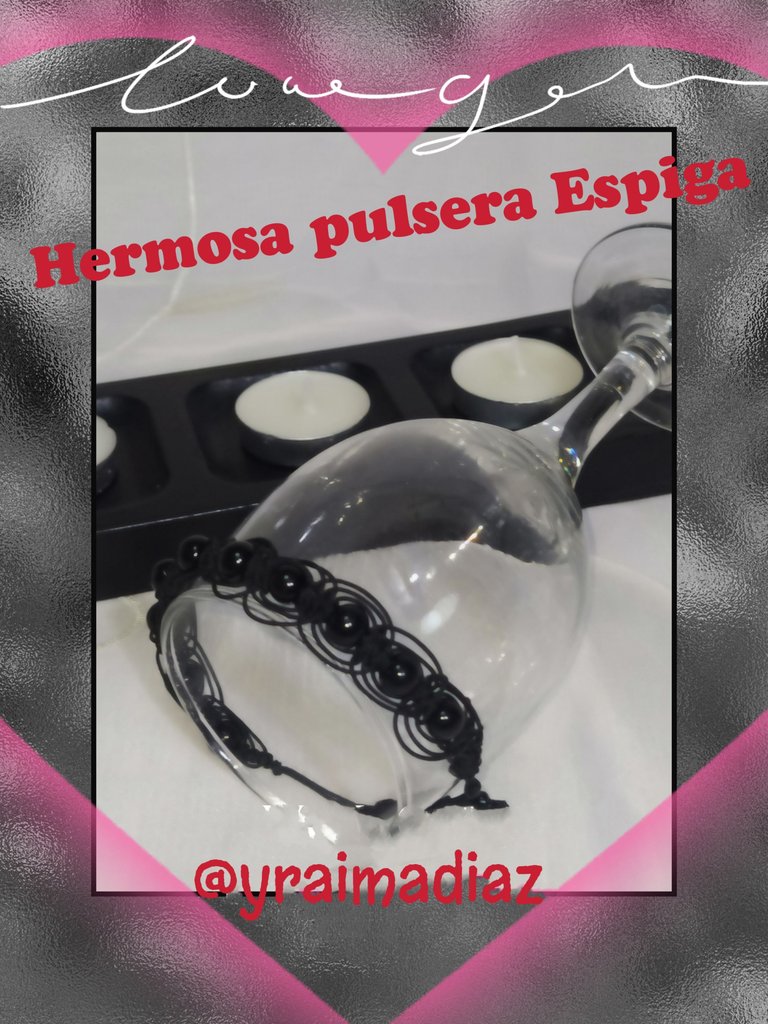
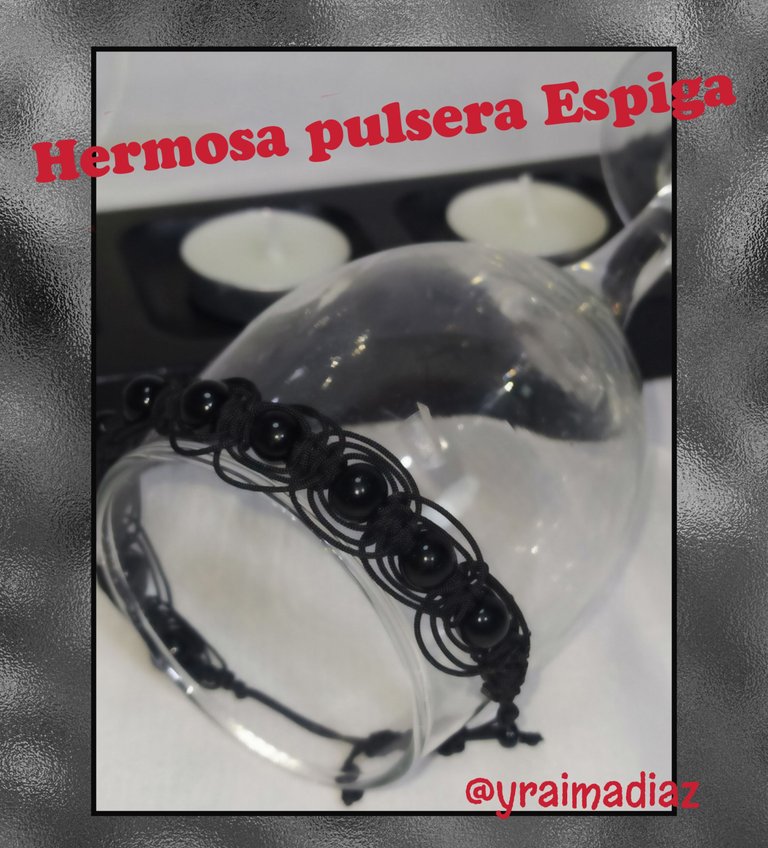
Today I have brought you a fantastic accessory to highlight the gentleman's look, it is a beautiful Herringbone Bracelet which I made using the flat knot technique.
El día de hoy les he traído un fantástico accesorio para resaltar el look de los caballeros, es una Hermosa Pulsera de Espiga la cual realicé utilizando la técnica del nudo plano.
I made this bracelet to give a gift to my partner, I have always thought that we should not wait for a special moment to give a gift or surprise someone, for me every day is special and perfect to build our memories and nothing better than with small details, which fill us with happiness.
Hice está pulsera para darle un obsequio a mi pareja, siempre he pensado que no debemos esperar algún momento especial para dar un regalo o sorprender a alguien, para mí todos los día son especiales y perfectos para ir construyendo nuestros recuerdos y nada mejor que con pequeños detalles, los cuales nos llenan de felicidad.
So I ask you to join me once again to make this beautiful detail and surprise my sweetheart.
Así que te pido me acompañes una vez más para realizar este hermoso detalle y sorprender a mi amorcito.
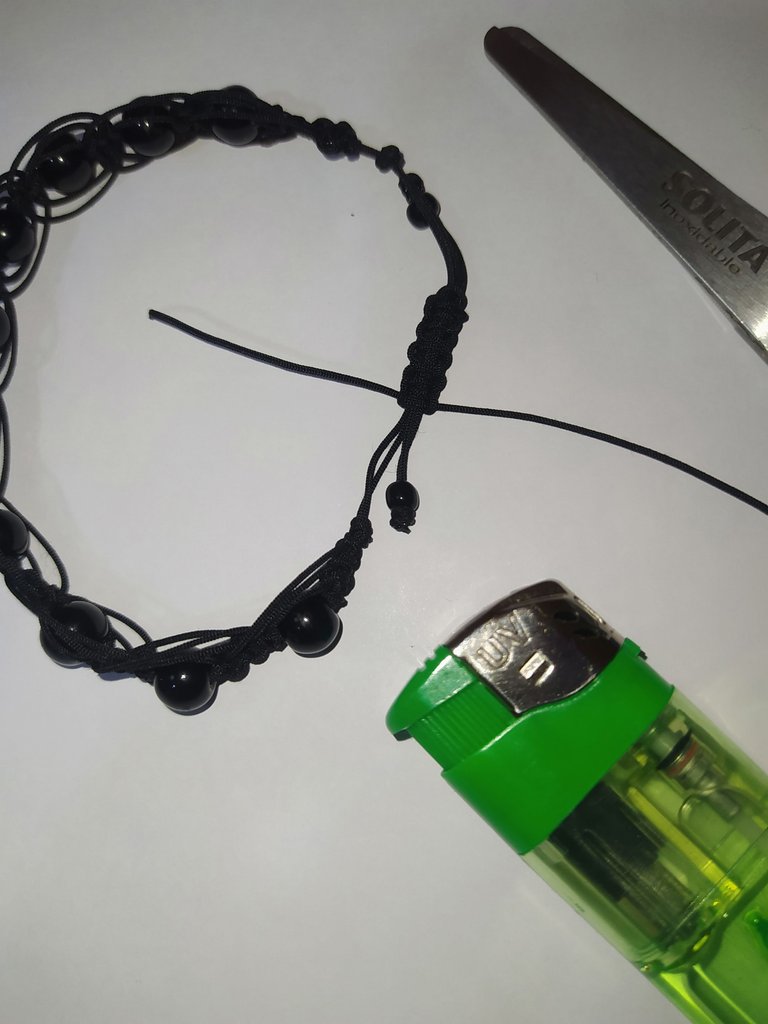
The materials I use are as follows.
Los materiales que utilice son los siguientes.
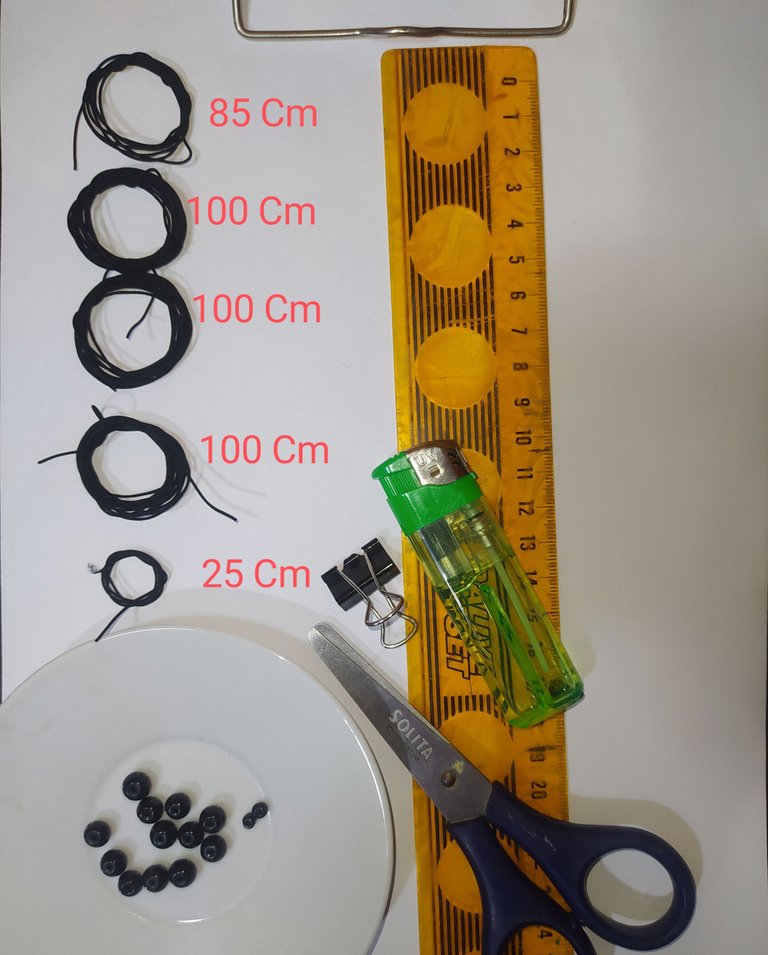
Materiales.
- 10 Cuentas de 4mm.
- 2 Cuentas de 2 mm
- 85 Cm hilo chino (hilo central)
- 3 hilos chino de 100 cm c/u
- 25 Cm hilo chino para el cierre corredizo.
Materials.
- 10 beads of 4mm.
- 2 beads of 2 mm.
- 85 cm Chinese thread (central thread).
- 3 Chinese threads of 100 cm each one.
- 25 Cm Chinese thread for the sliding clasp.
 |  |
|---|
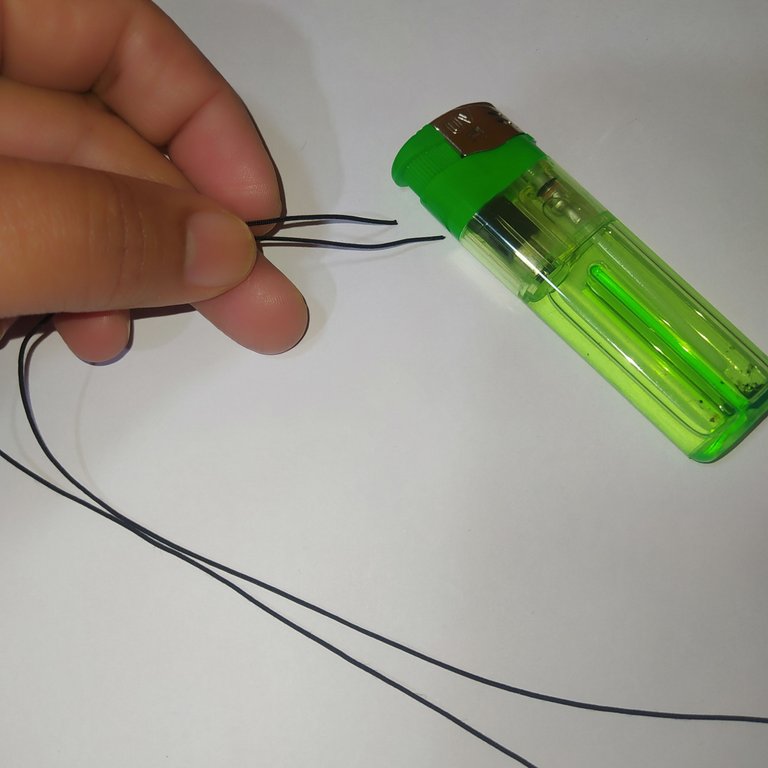
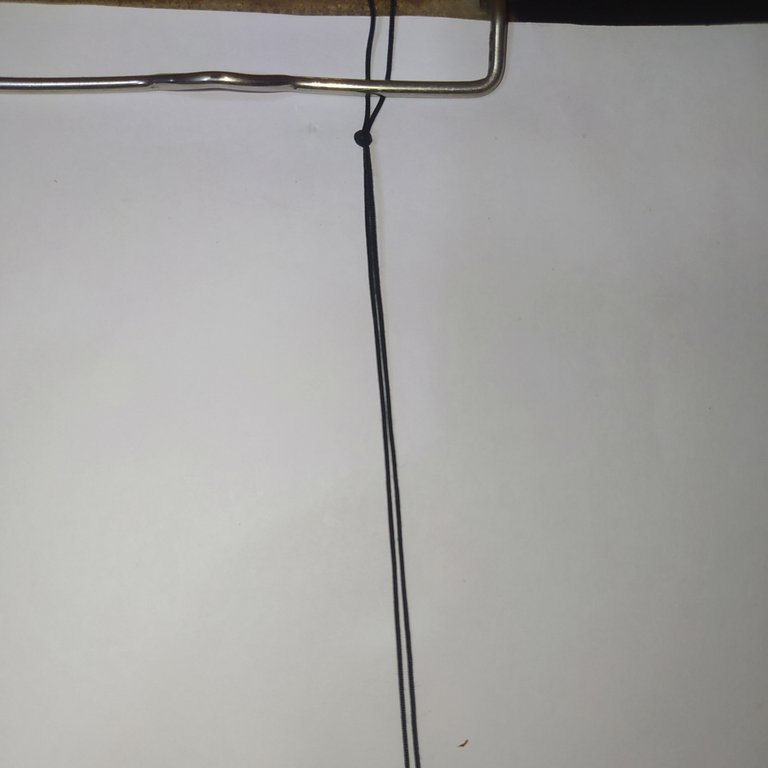
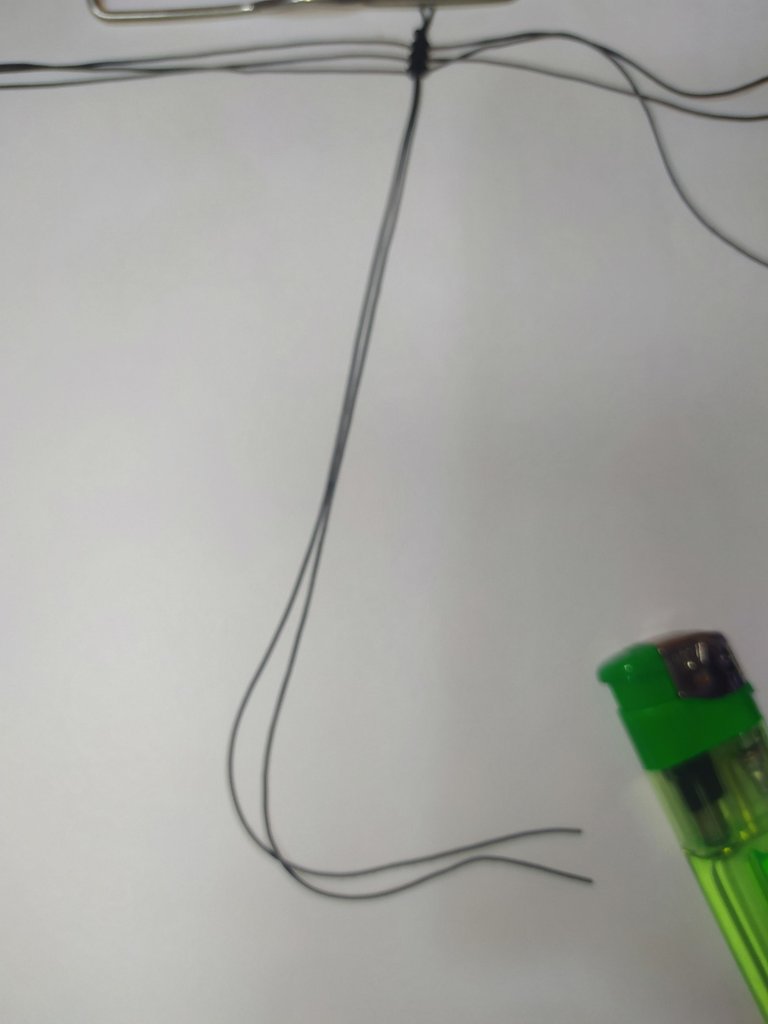
- We take the central thread and fold it in half.
- We burn the ends of the thread to place them very thin needle style (we burn and give small touches with our fingers in a twisted way so as not to burn ourselves).
- We must make sure to always burn the thread with the part of the blue or transparent flame.
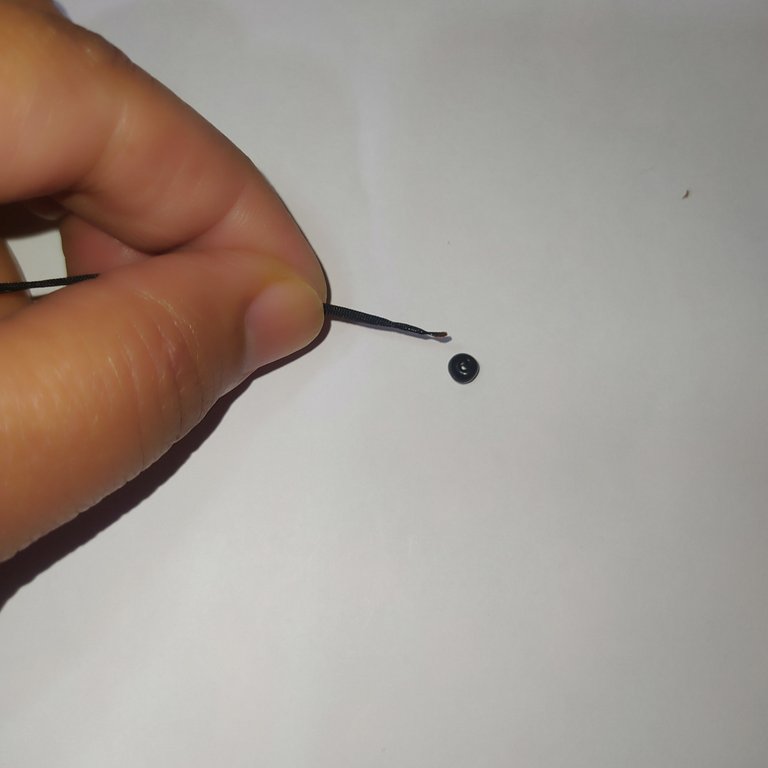
- We introduce the small bead that is going to be decorative in the stitches.
- Tomamos el hilo central y lo doblamos a la mitad.
- Quemamos las puntas del hilo para colocarlas muy finitas estilo aguja ( quemamos y damos pequeños toques con los dedos de forma entorchada para no quemarnos).
- Debemos asegurarnos de quemar siempre el hilo con la parte de la llama azul o transparente.
- Introducimos la cuenta pequeña que va a quedar de forma decorativa en las puntas.
 |  |
|---|
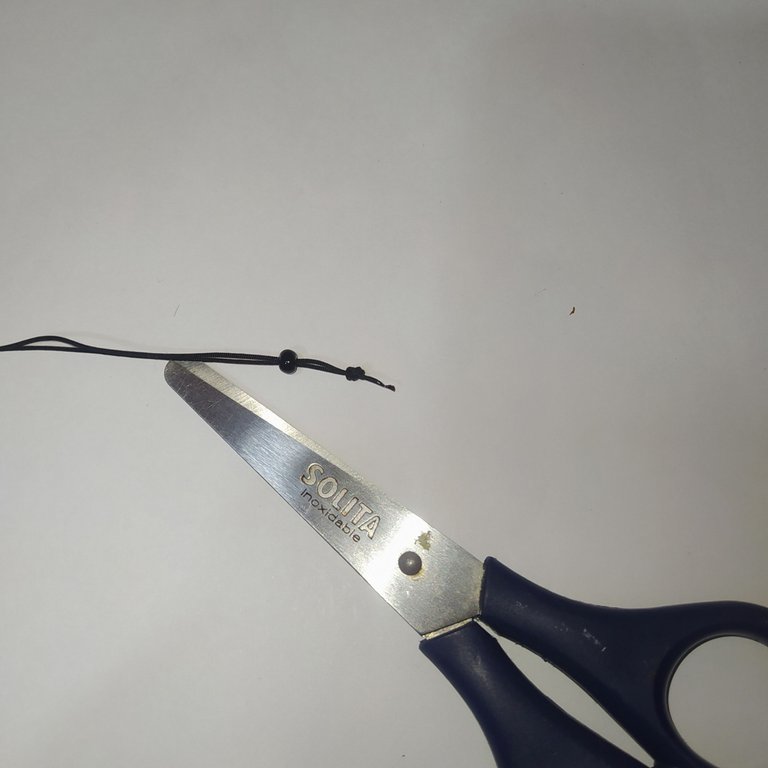
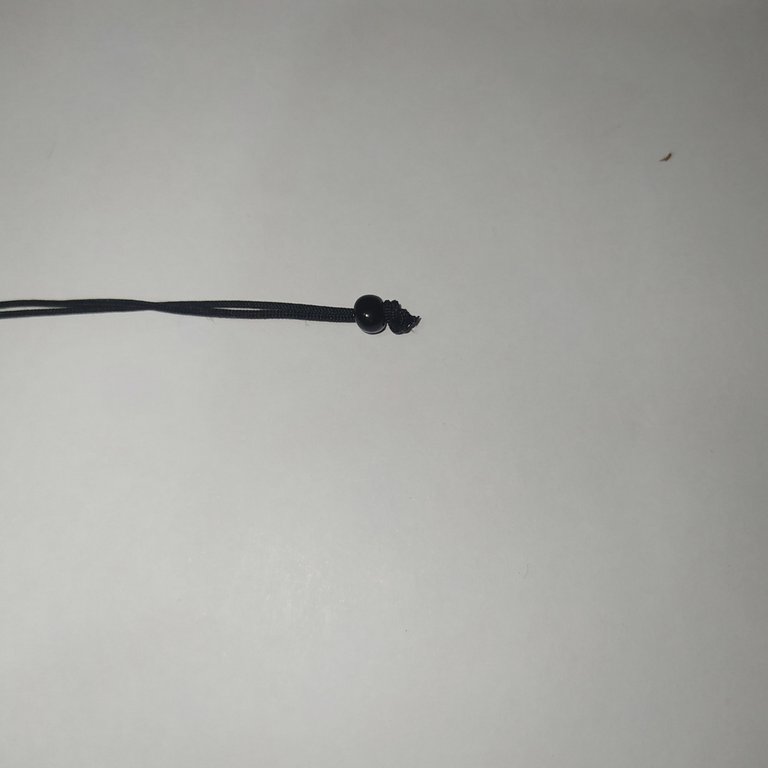
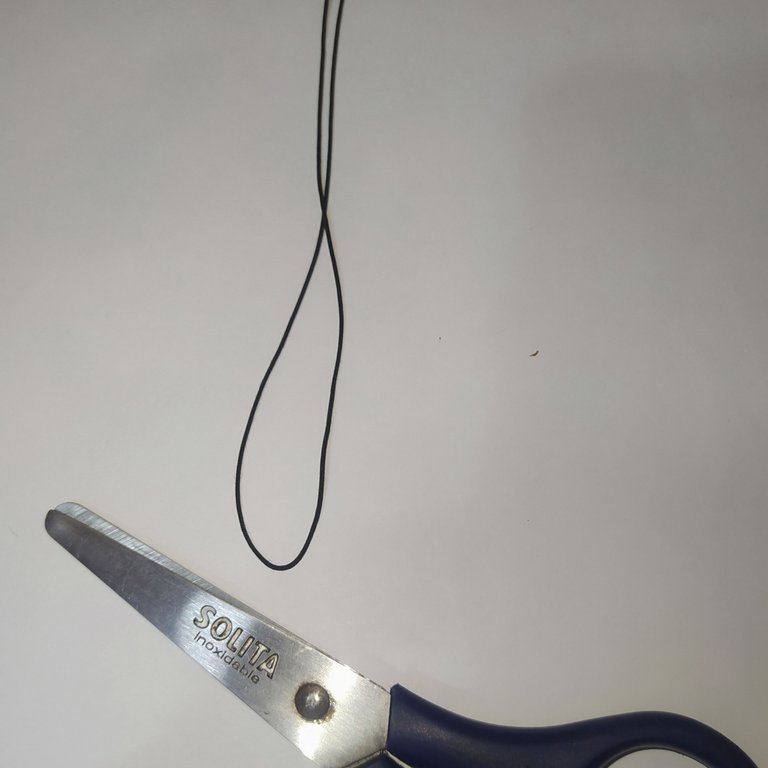
- We make a simple knot and bring it towards the ends as far as we can, tighten it tightly, then trim a little of the excess.
- Hacemos un nudo simple y lo llevamos hacia las puntas lo más que podamos, apretamos fuerte, luego recortamos un poco el excedente.
 |  |
|---|
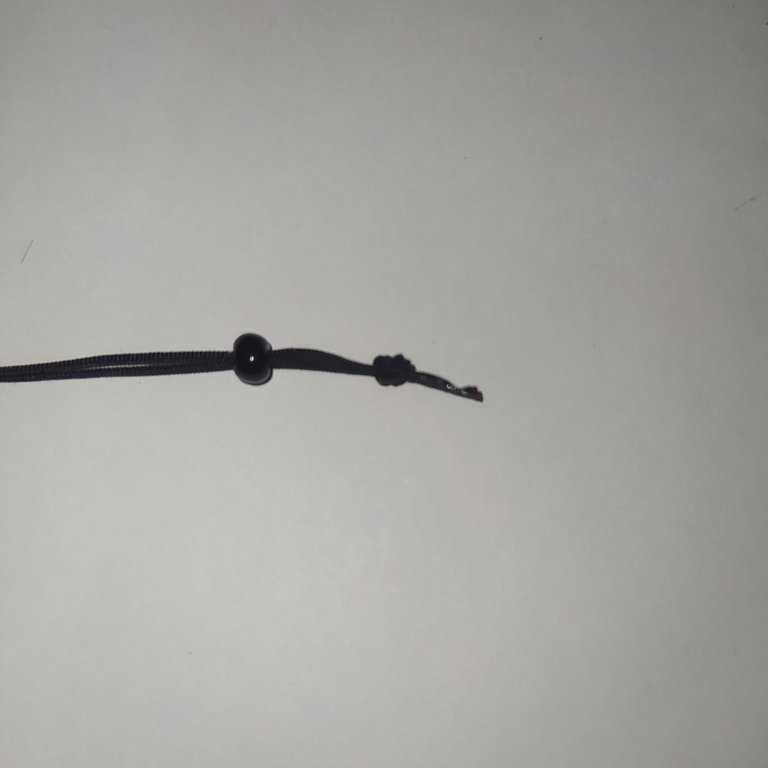
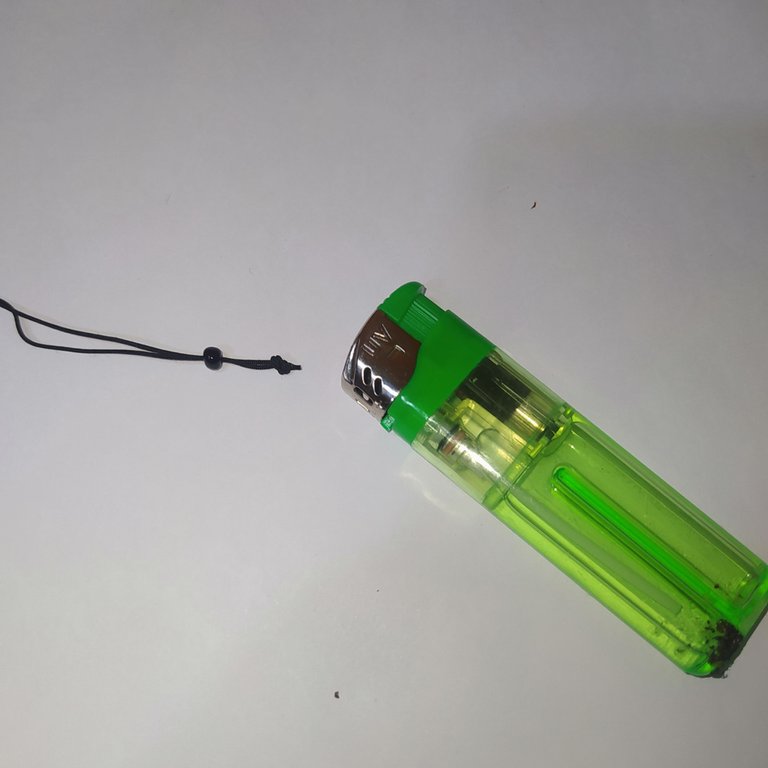
- Then we burn to seal
- Luego quemamos para sellar
 |  |  |
|---|
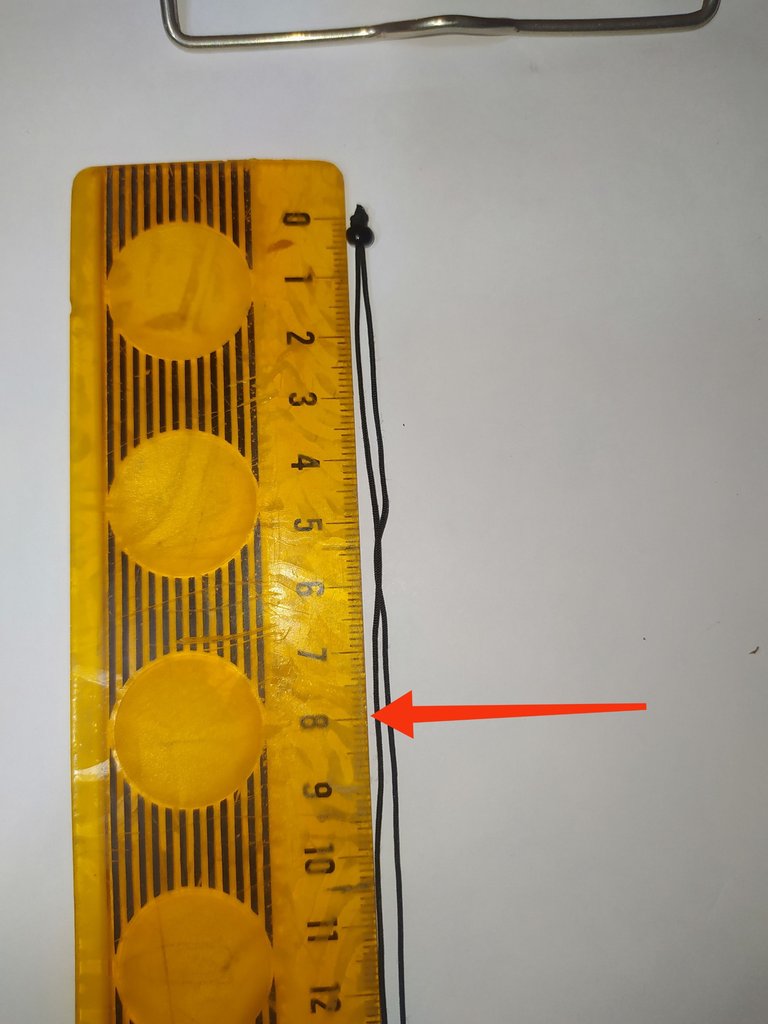
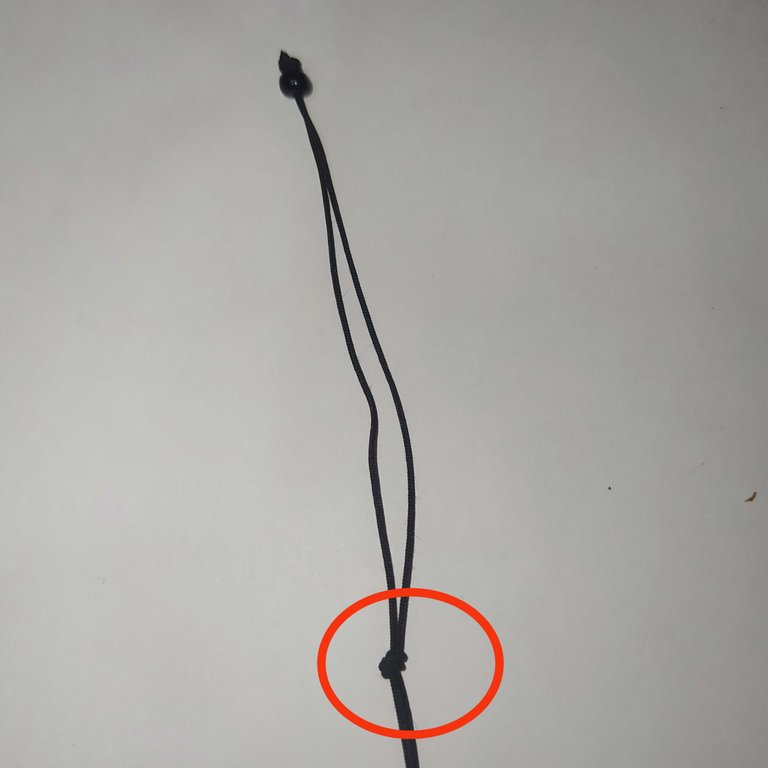
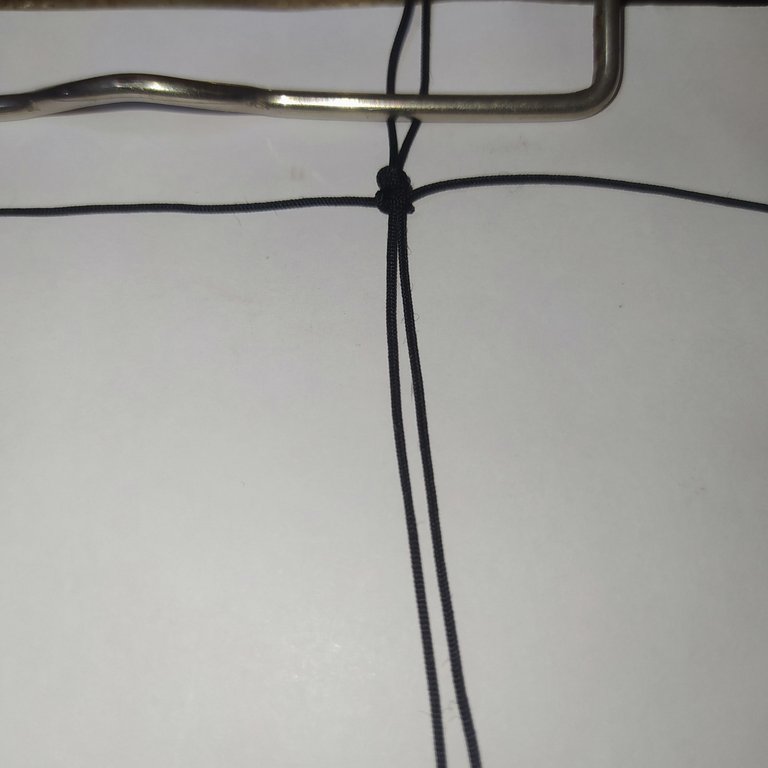
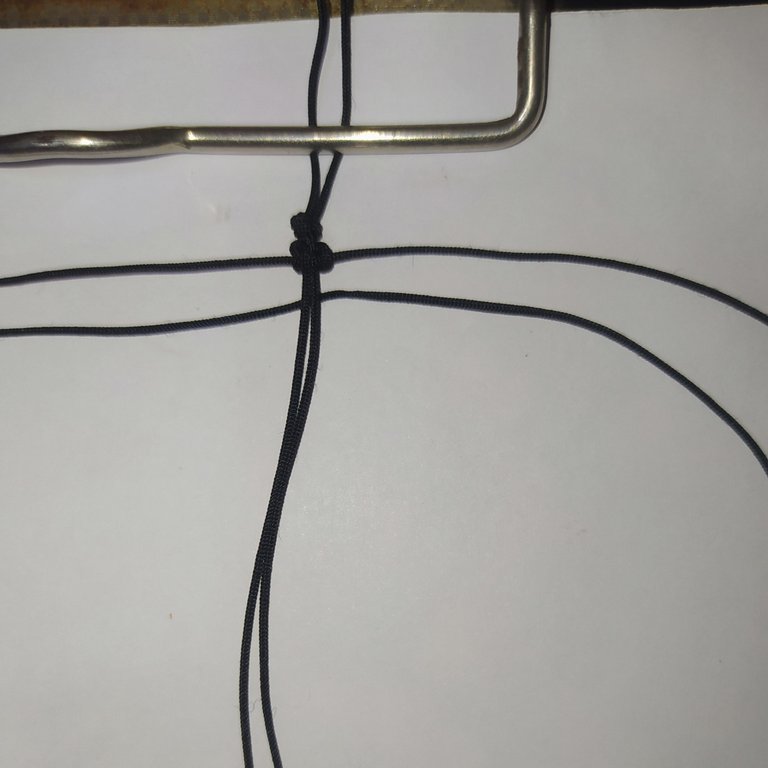
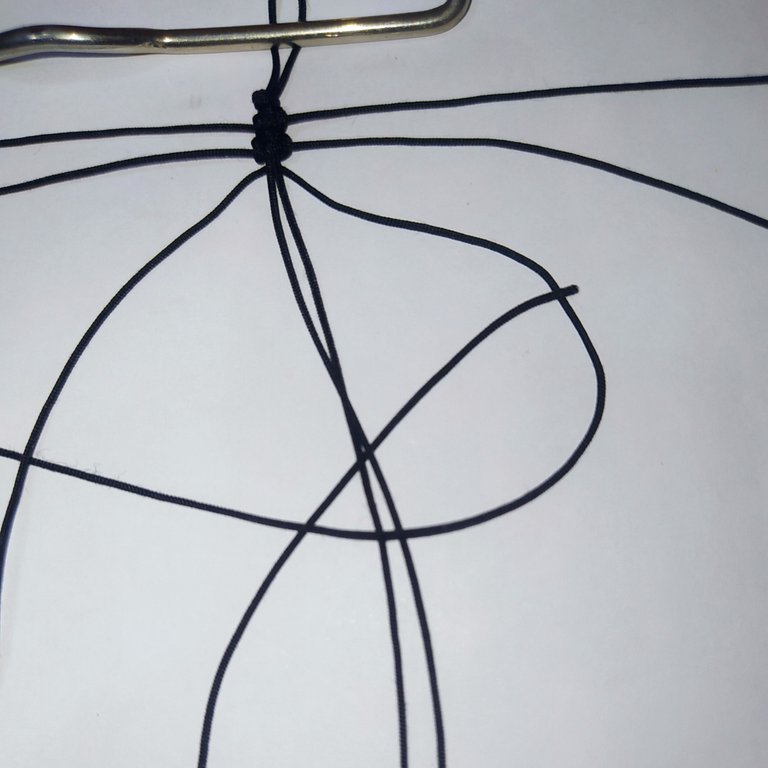
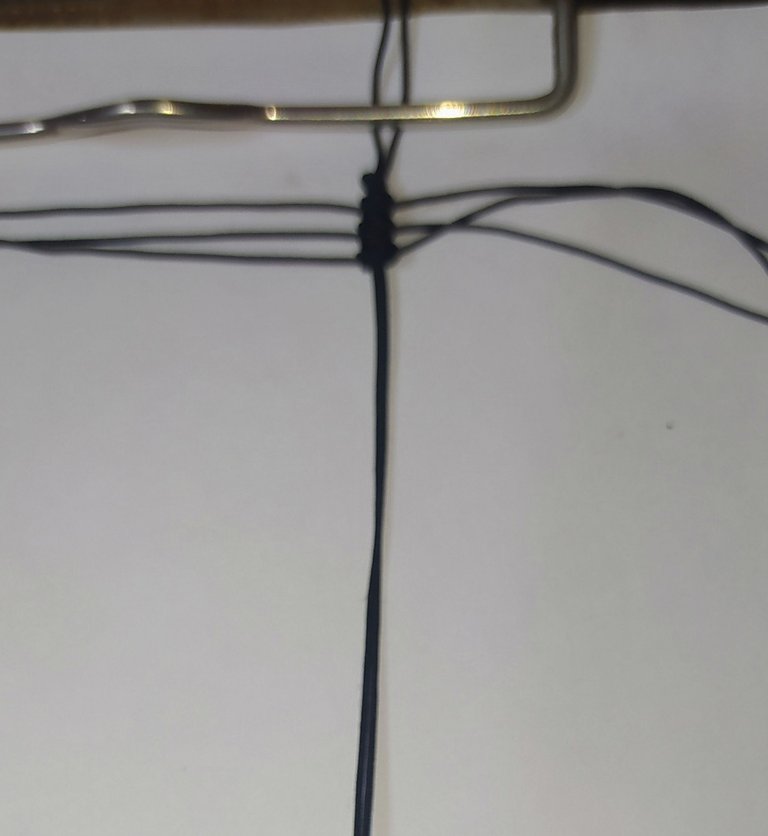
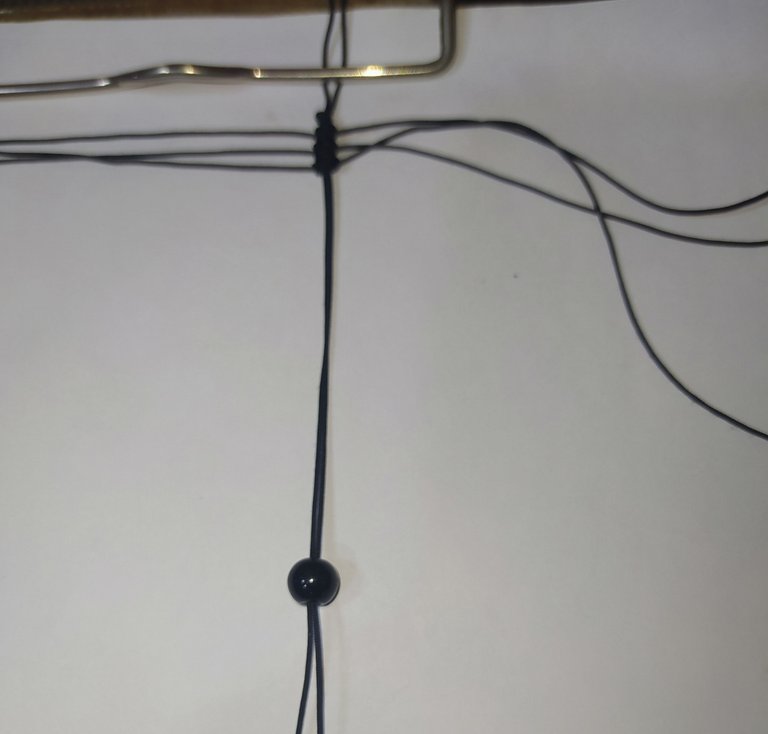
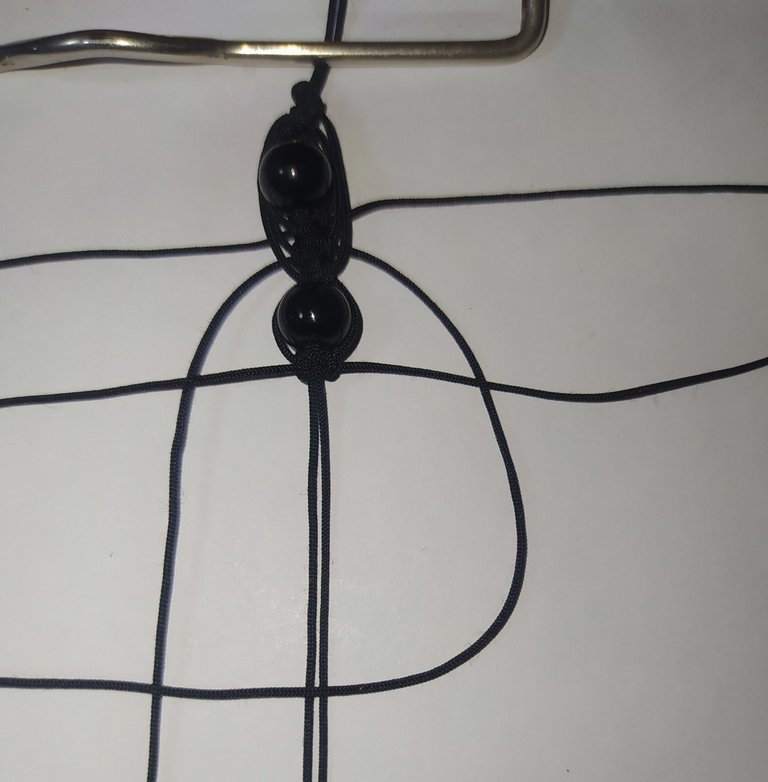
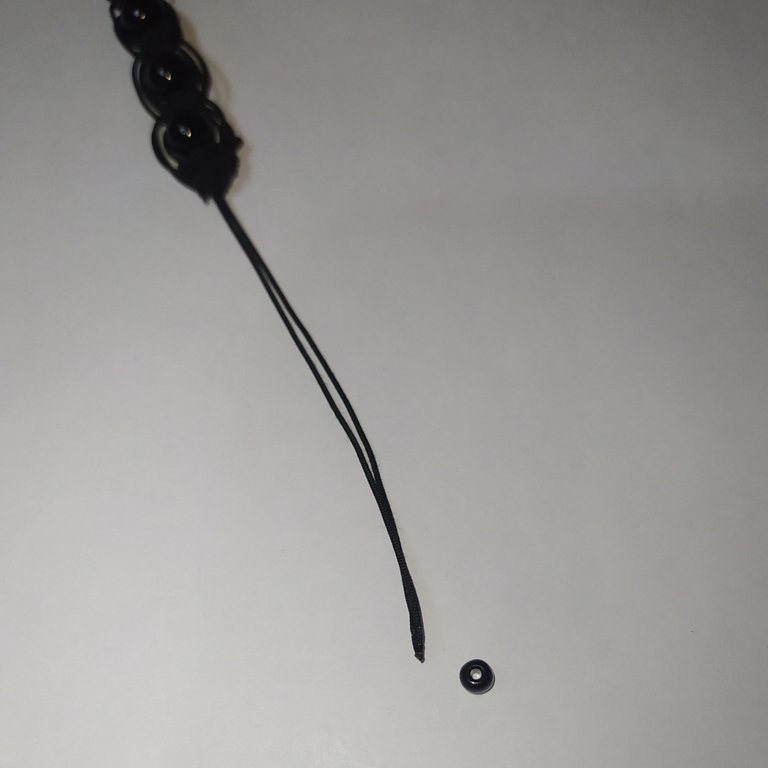
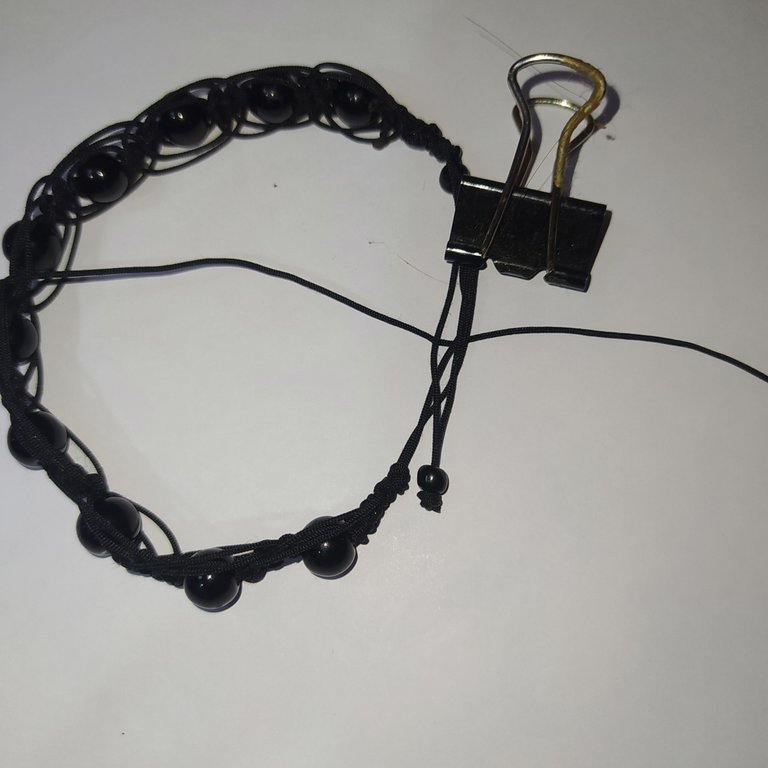
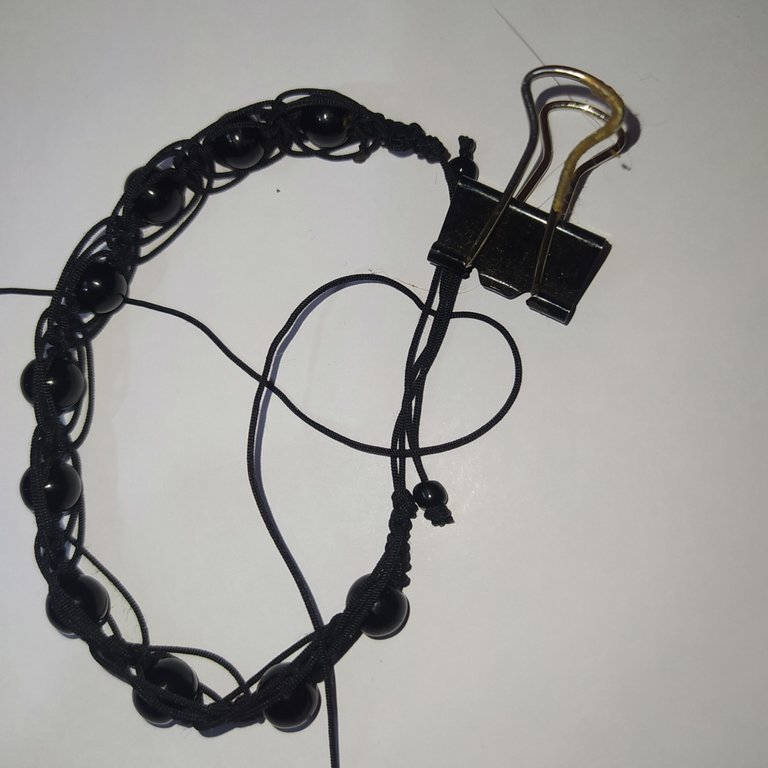
- Then we make a second knot
- We measure from the tip inward 8 cm that will make the space where we will make the slip knot at the end.
- We make a simple knot, we tighten it well.
- We place our threads on the board and secure them with the hook so that they do not come off.
- Luego hacemos un segundo nudo
- Medimos de la punta hacia adentro 8 cm que va hacer el espacio donde realizaremos el nudo corredizo al final.
- Hacemos un nudo simple, apretamos bien.
- Colocamos nuestros hilos en la tabla y aseguramos con el gancho para que no se nos salga.
 |  |  |
|---|
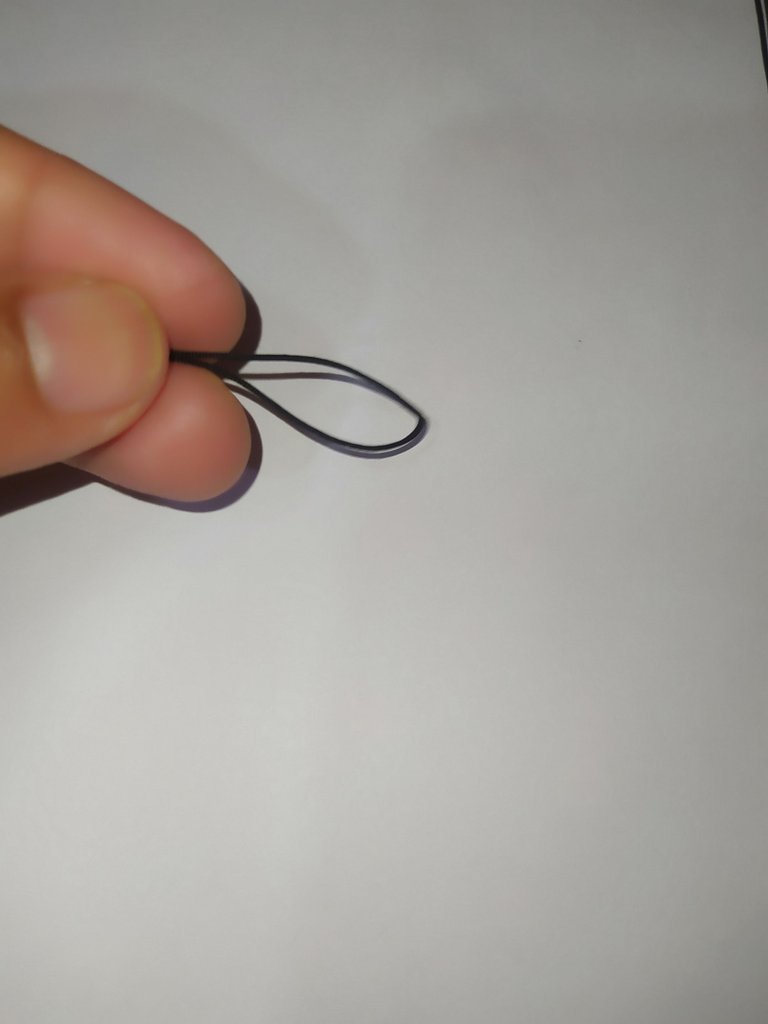
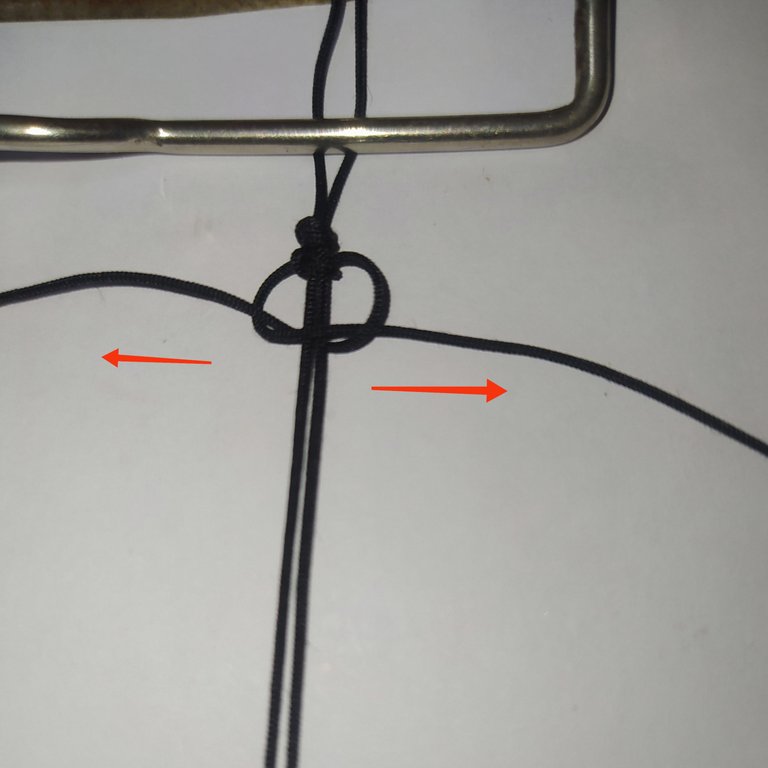
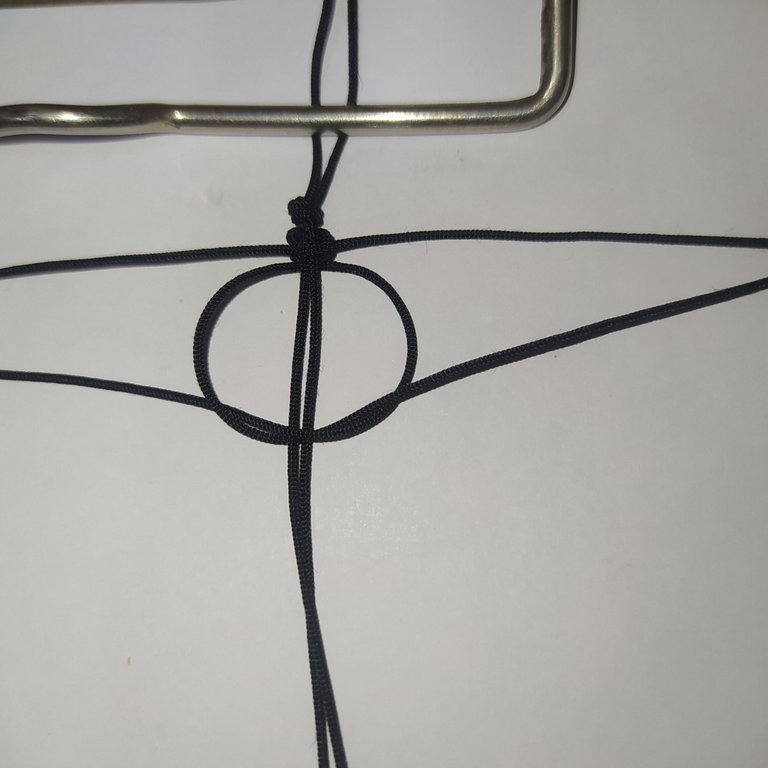
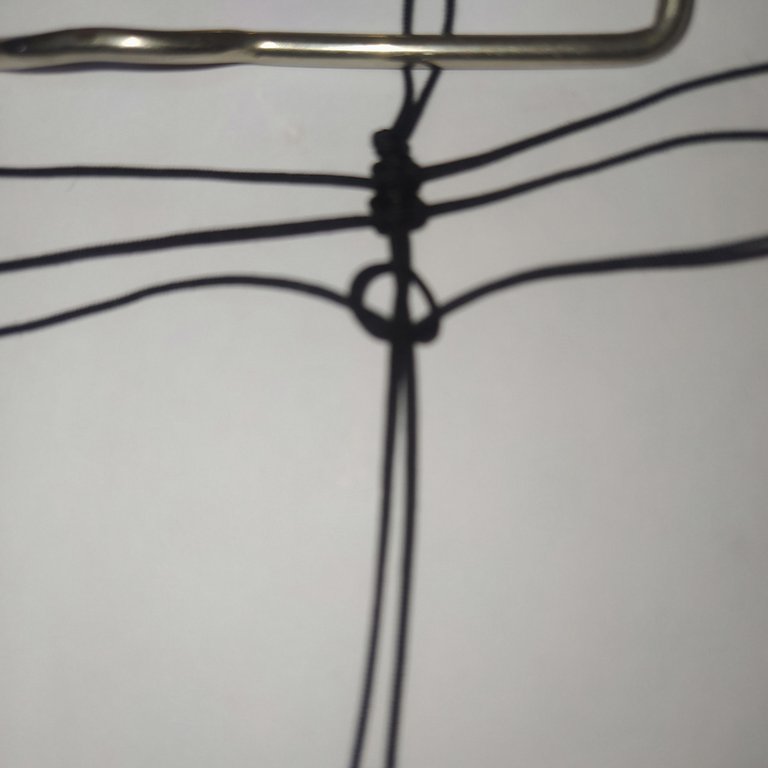
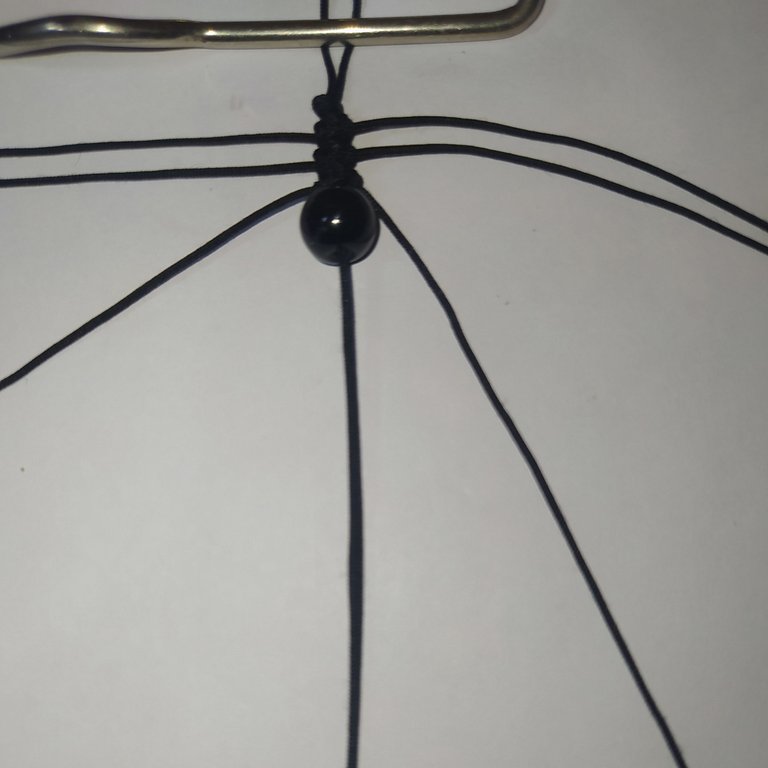
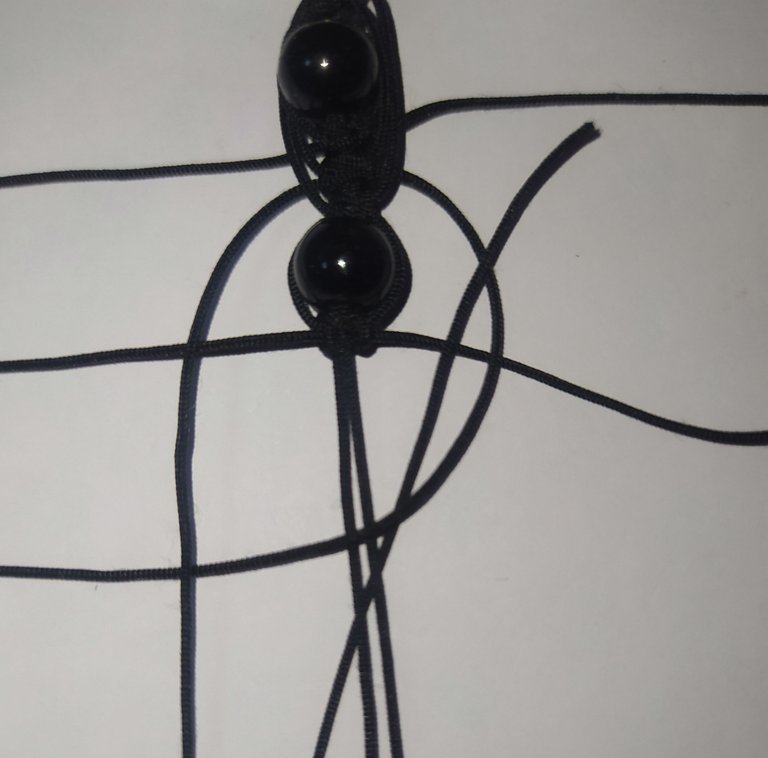
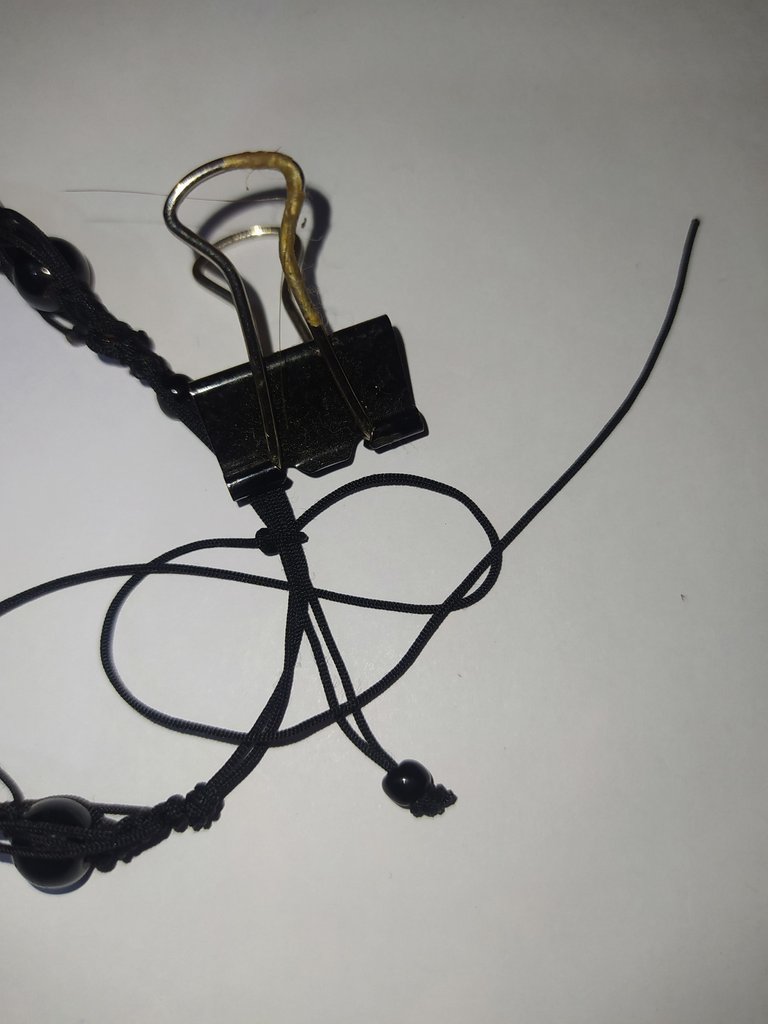
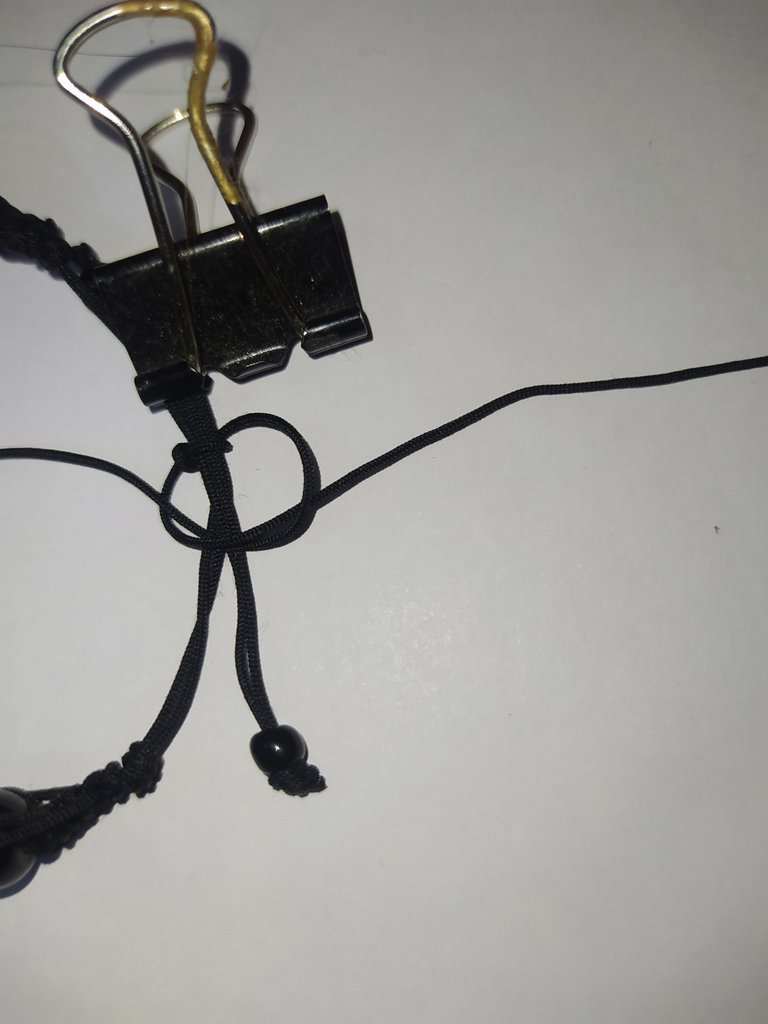
- We take the first 100 cm thread and join the ends to find the center of the thread.
- Then we pass it under the central threads making sure it is well centered.
- Tomamos el primer hilo de 100 cm unimos la puntas para encontrar el centro del hilo.
- Luego pasamos por debajo de los hilos centrales asegurándonos que quede bien centrado.
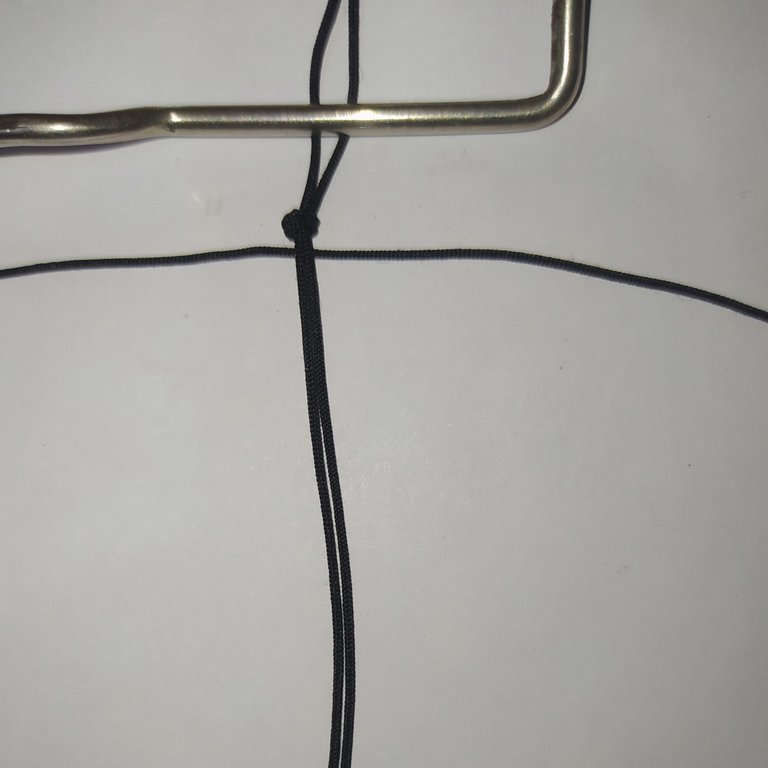
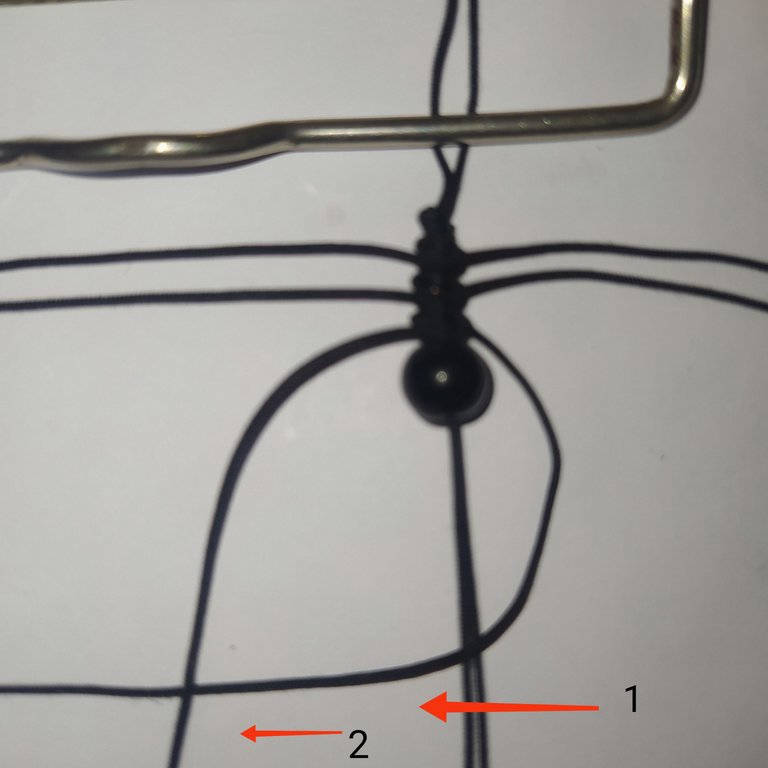
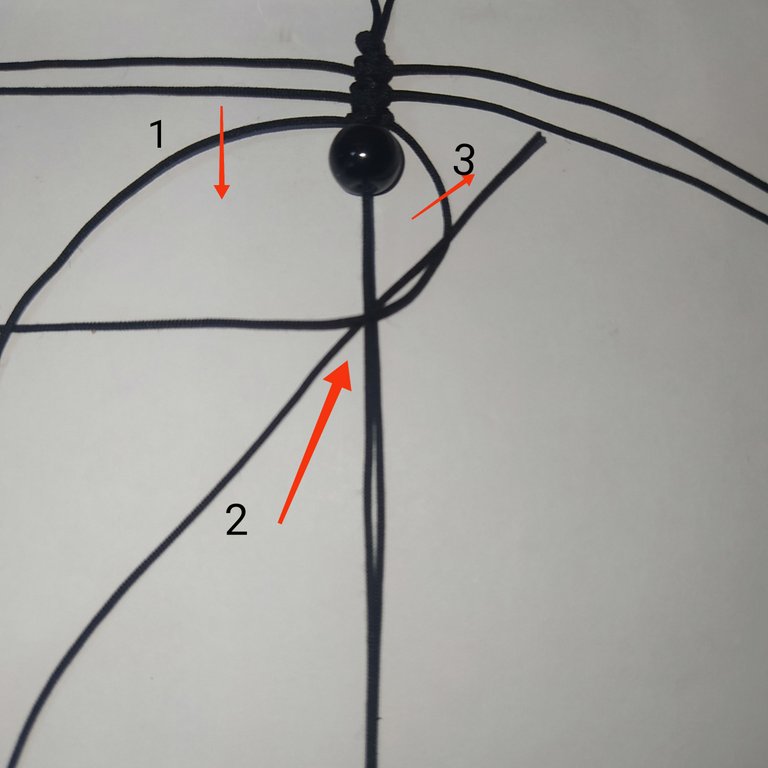
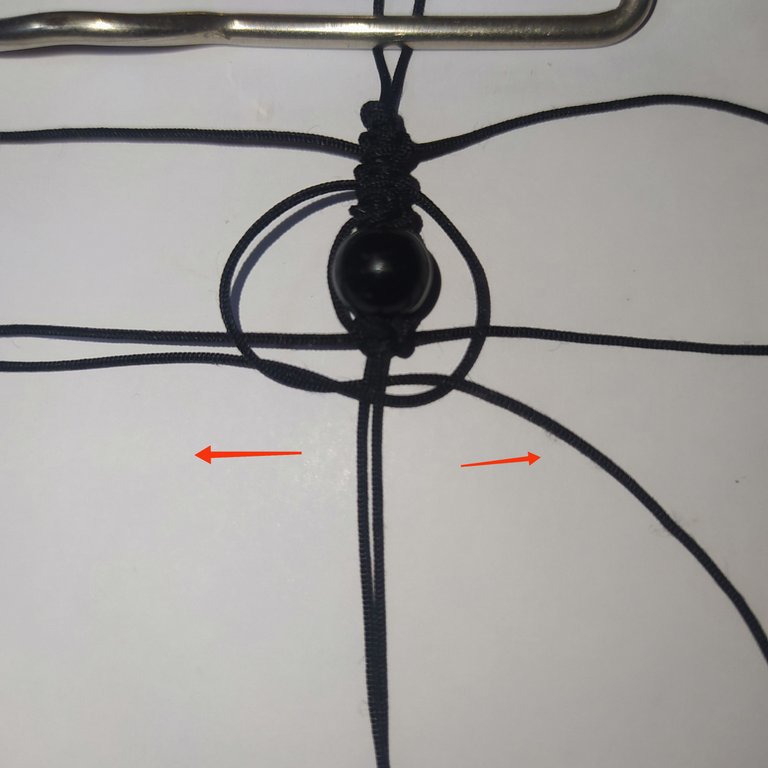
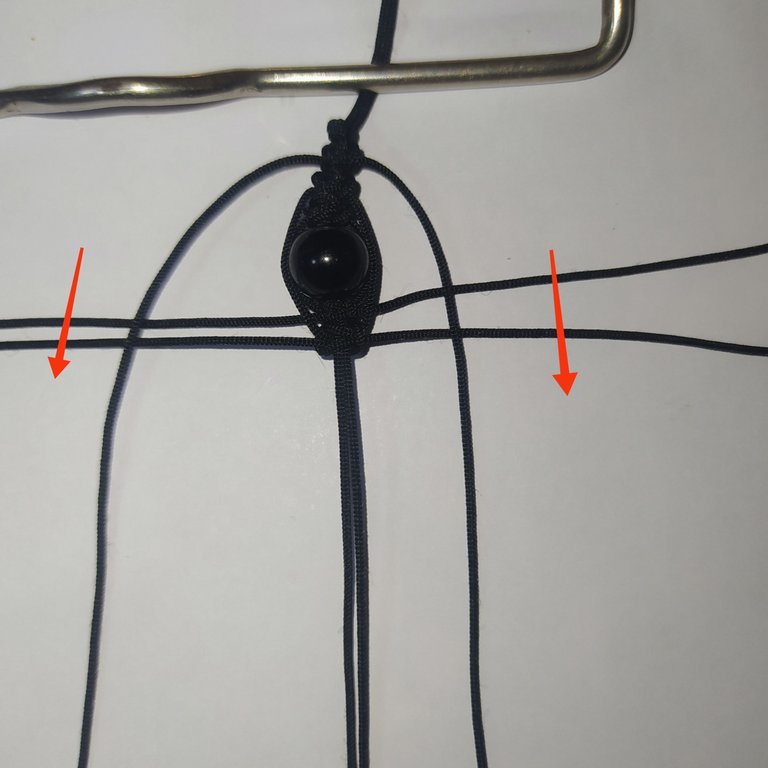
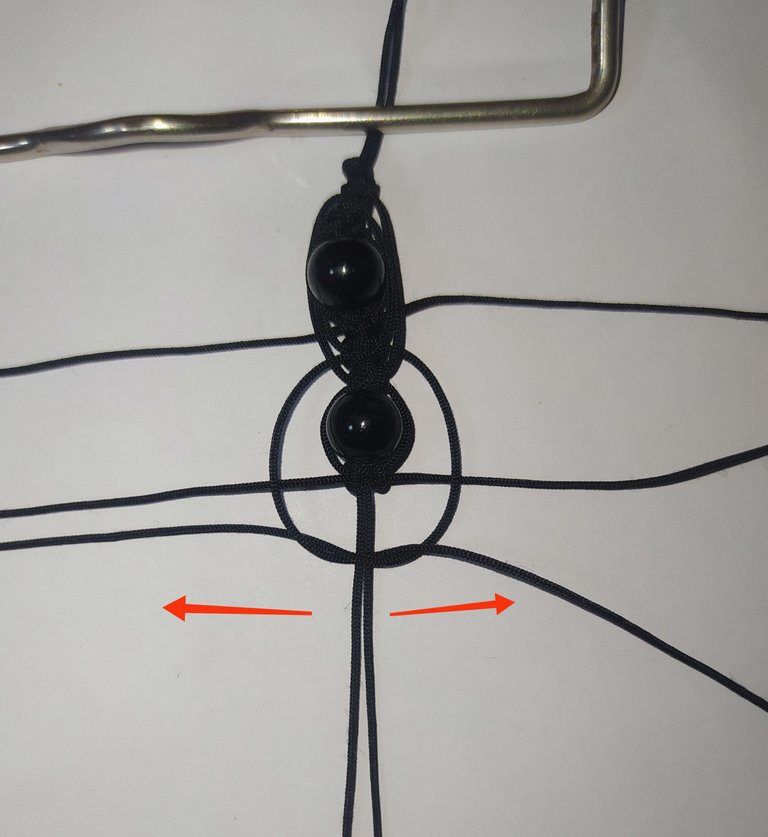
We start our weaving by making the Flat Knot.
Empezamos nuestro tejido realizando el Nudo Plano.
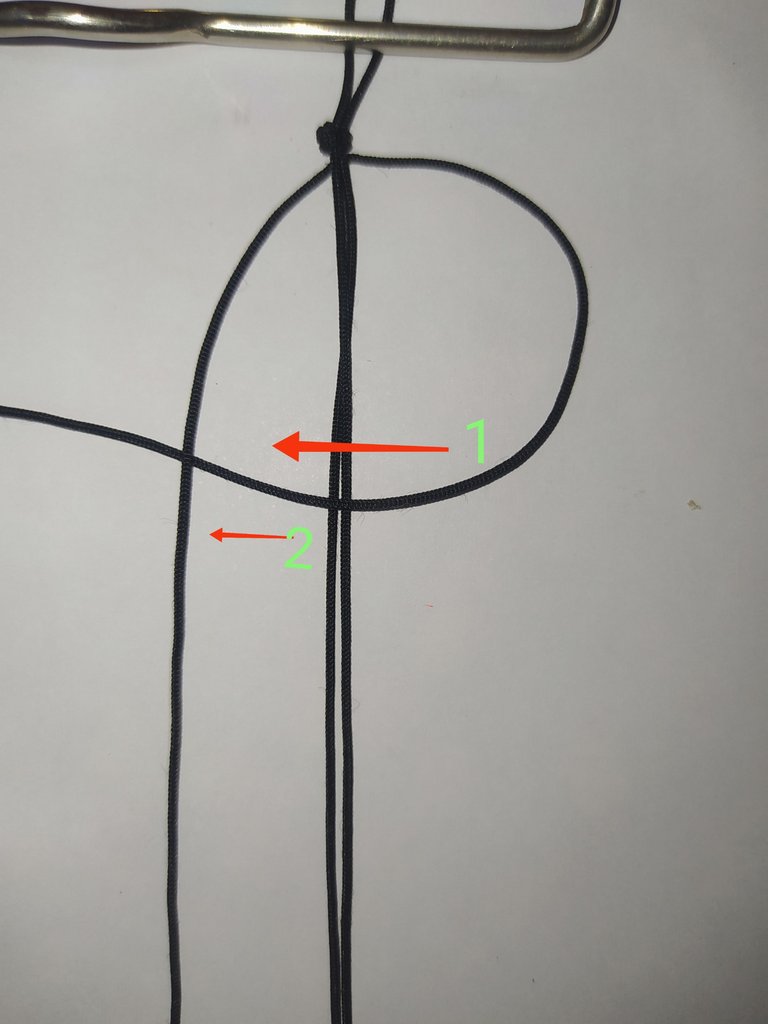
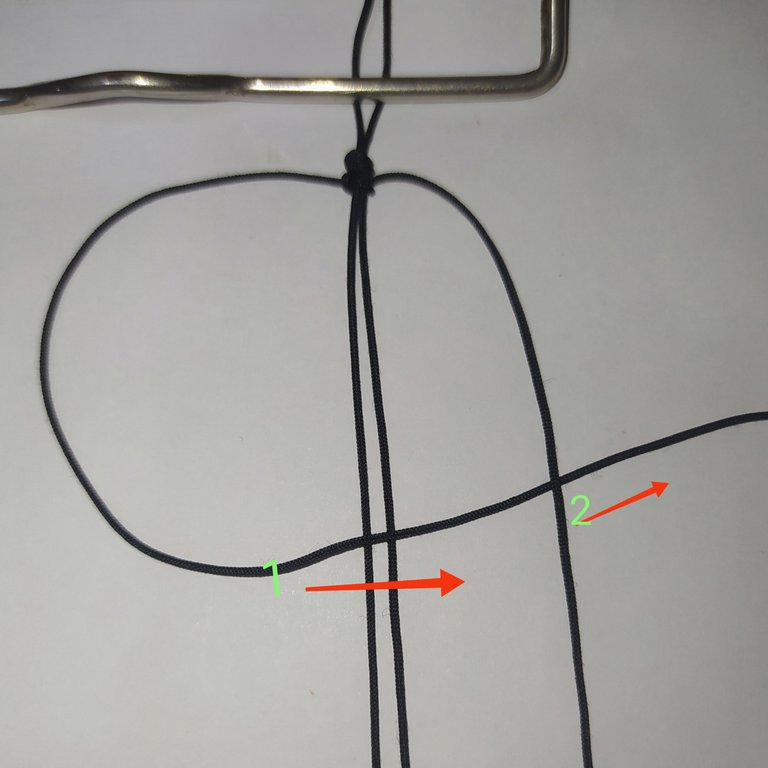
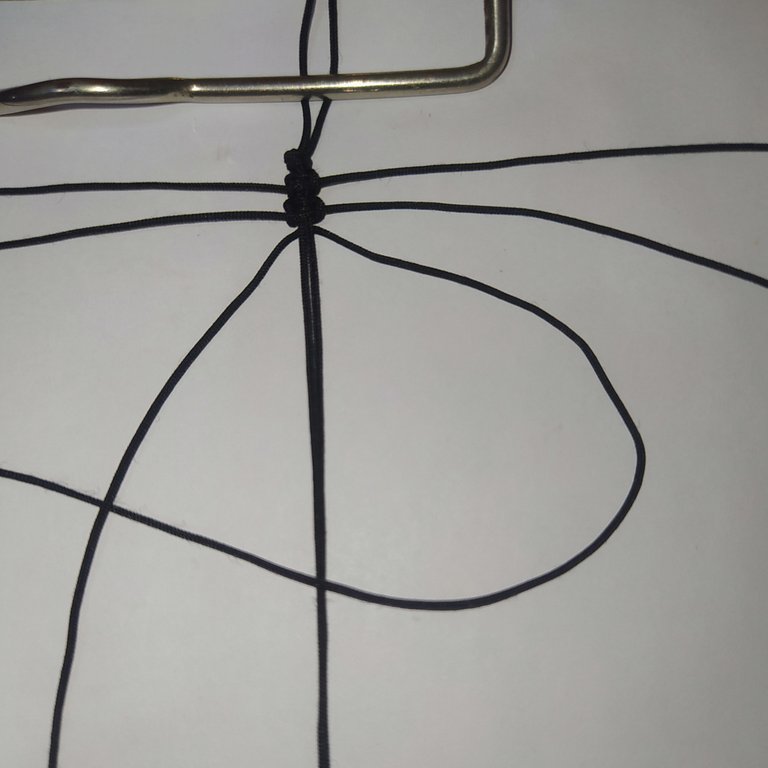
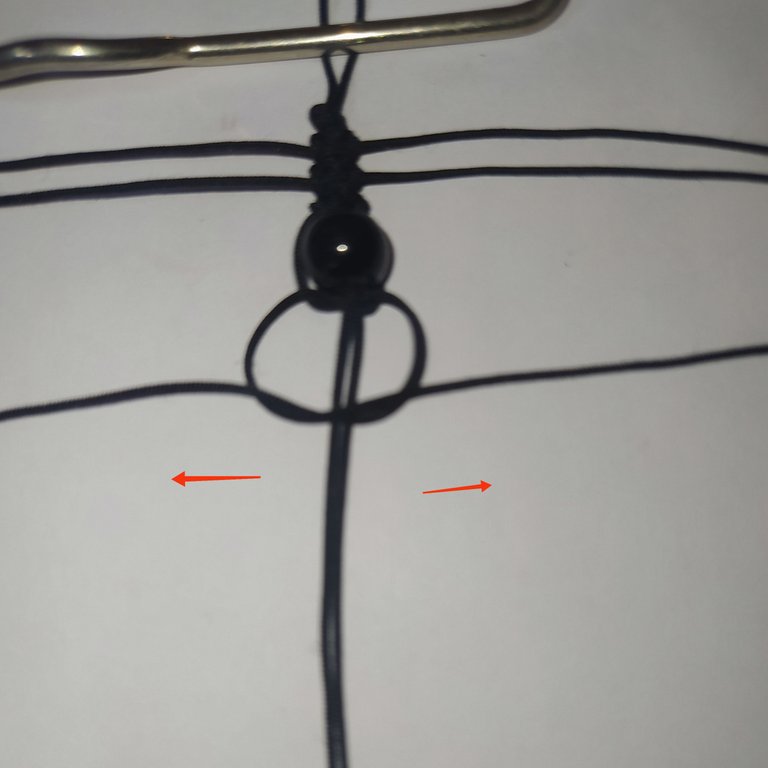
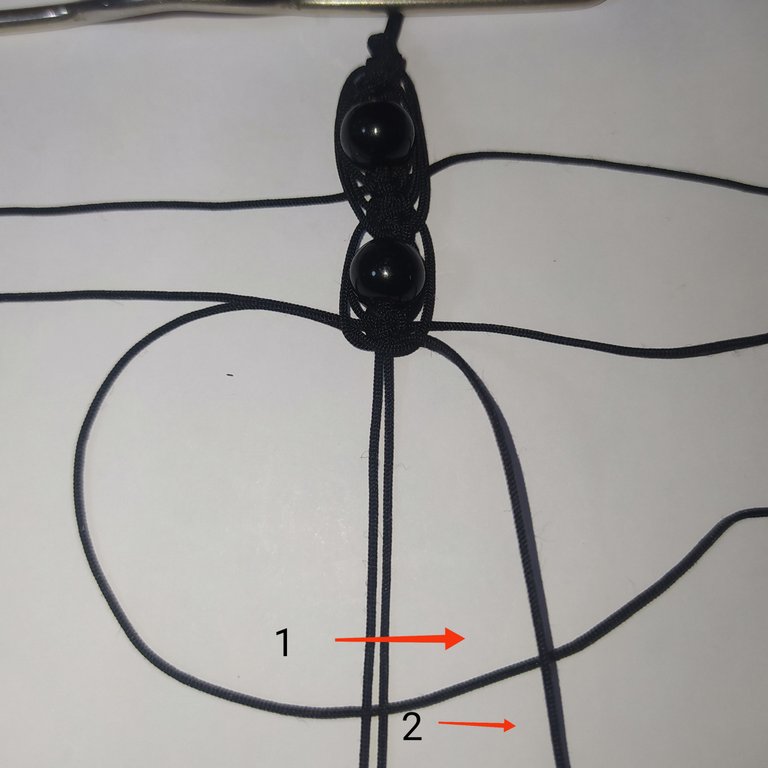
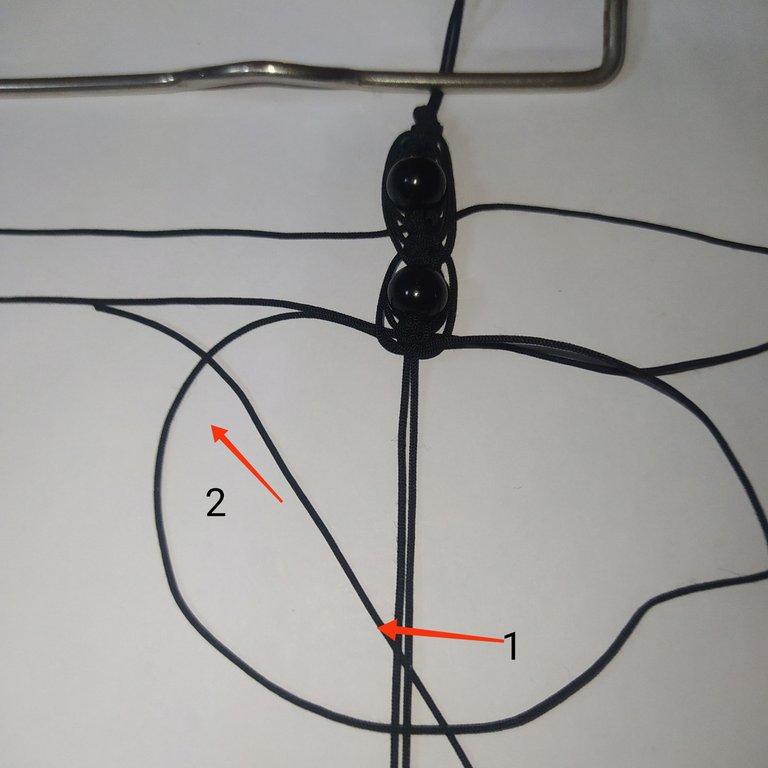
- To adjust this first 100 cm thread to our central thread the first thing we do:
- We pass the thread on the right over the central threads (indicated by number 1).
- And in turn under the thread on the left, (as indicated by number 2).
- Para ajustar este primer hilo de 100 cm a nuestro hilo central lo primero que hacemos:
- Pasamos el hilo de la derecha por encima de los hilos centrales (señalado por el número 1)
- Y a su vez por debajo del hilo de la izquierda, (como indica el número 2)
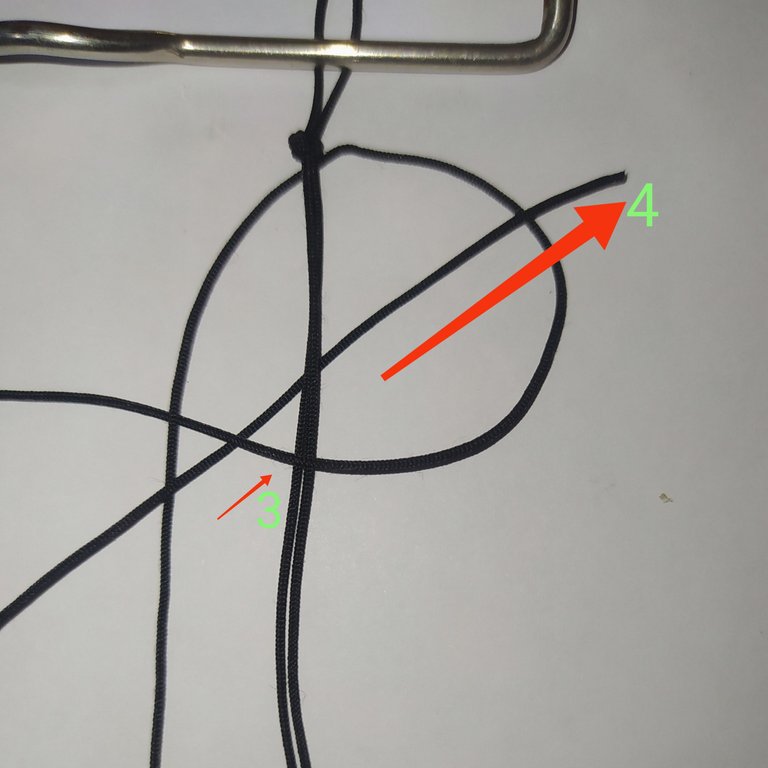
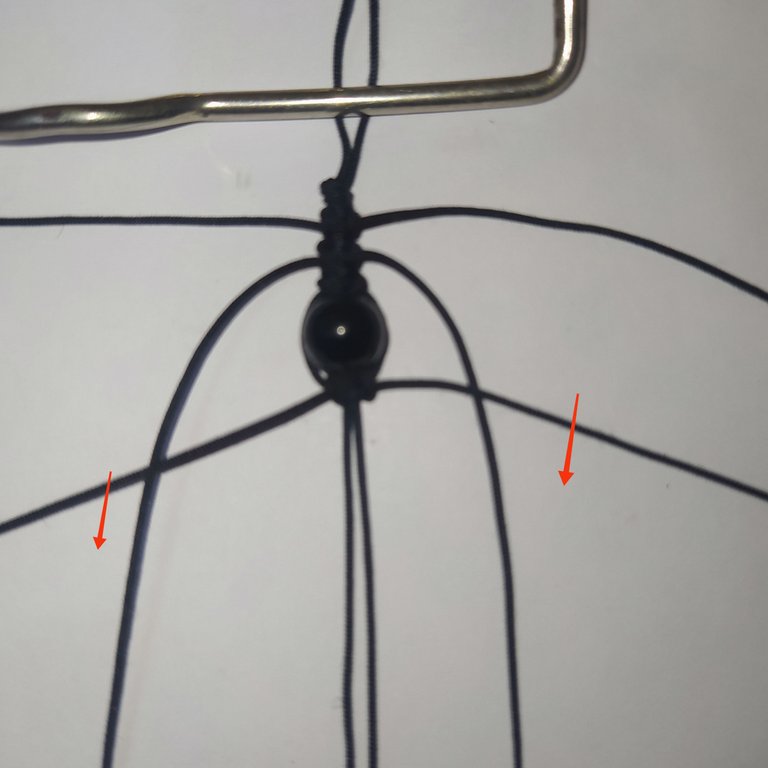
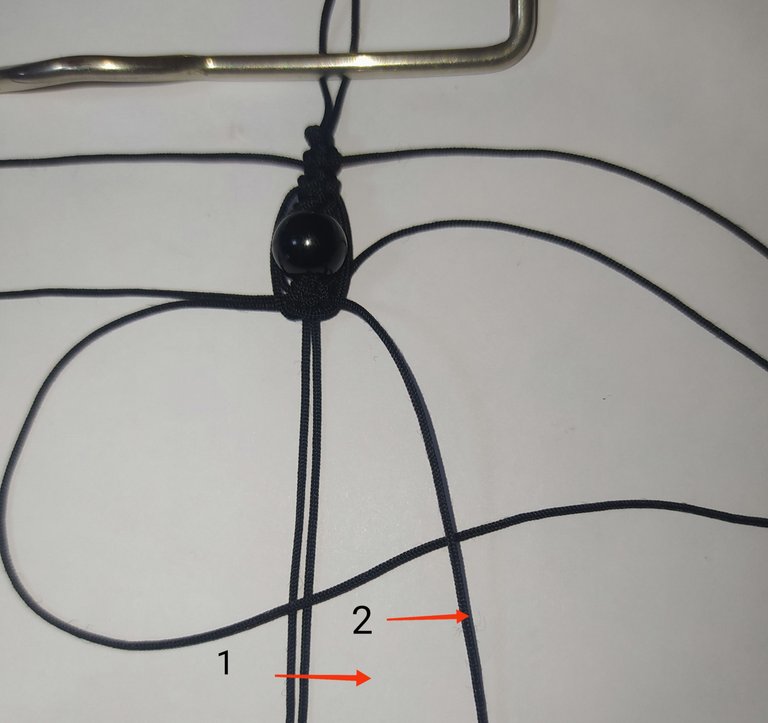
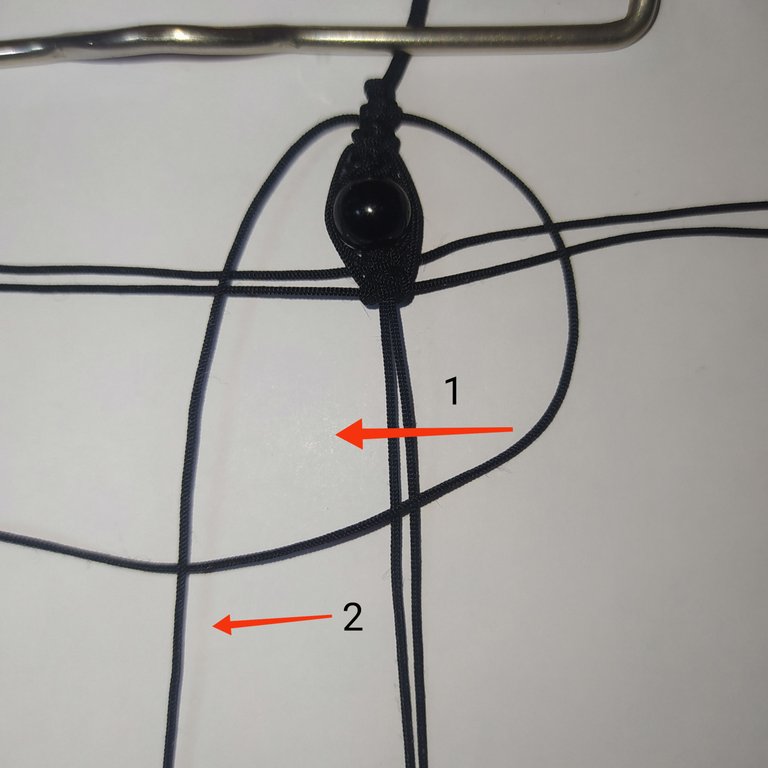
- Then the thread of the left we pass it under the central thread, (as it indicates number 3).
- We take it out over the thread on the right or through the hole that is formed, (as indicated by number 4).
- Luego el hilo de la izquierda lo pasamos por debajo del hilo central, (como lo indica el número 3)
- Lo sacamos por encima del hilo de la derecha o por el agujerito que se forma, (como señala el número 4)
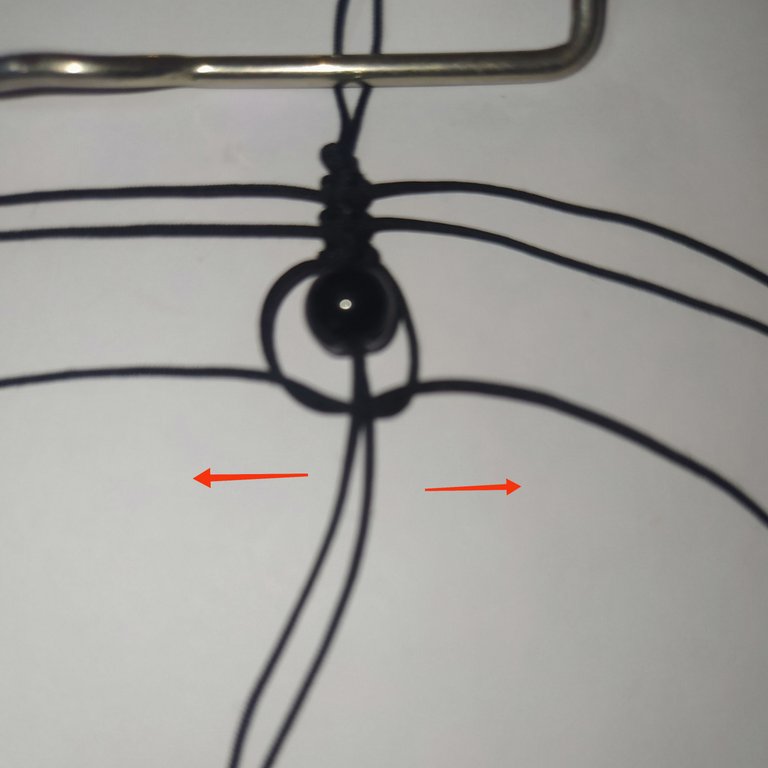
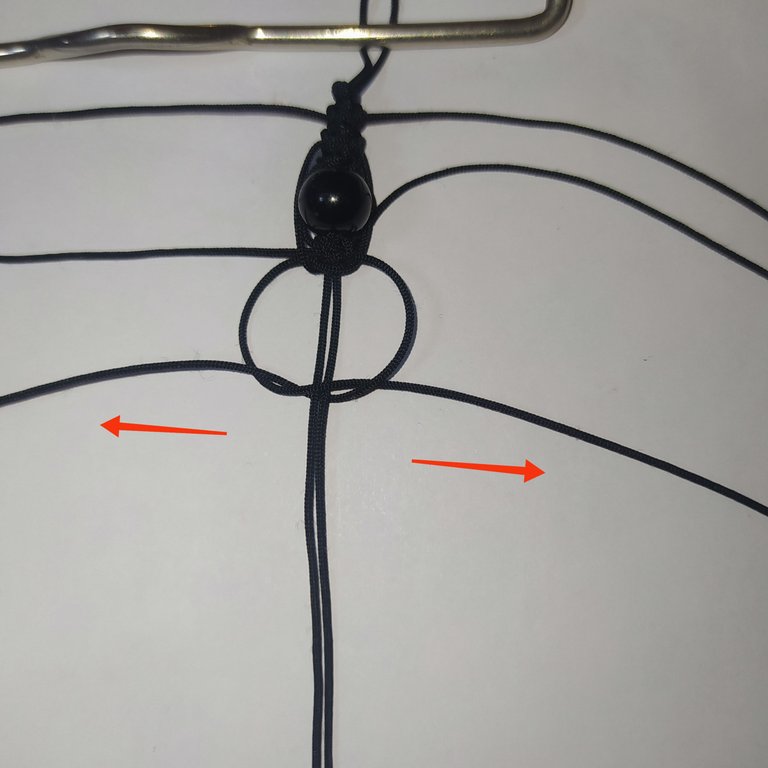
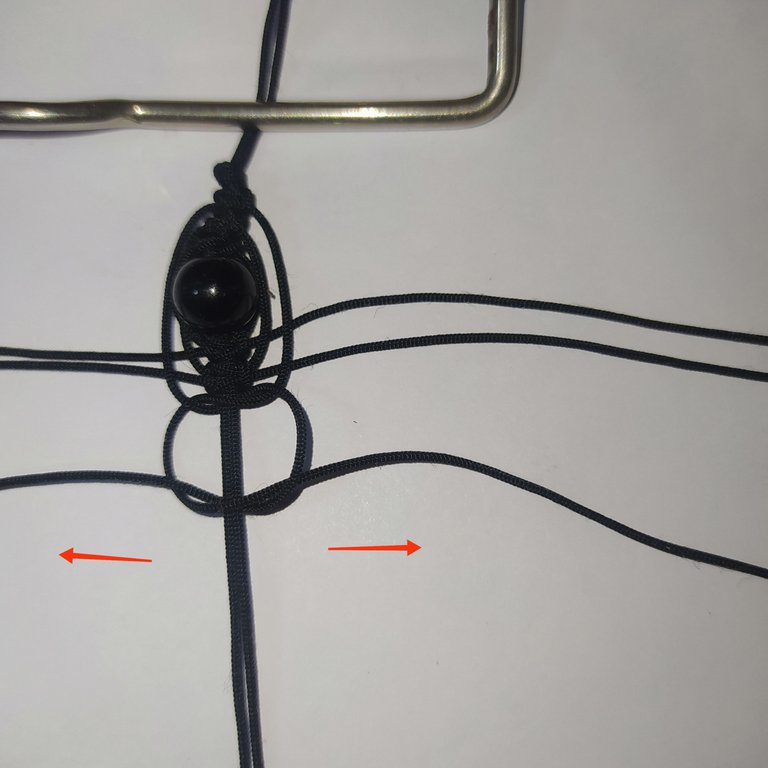
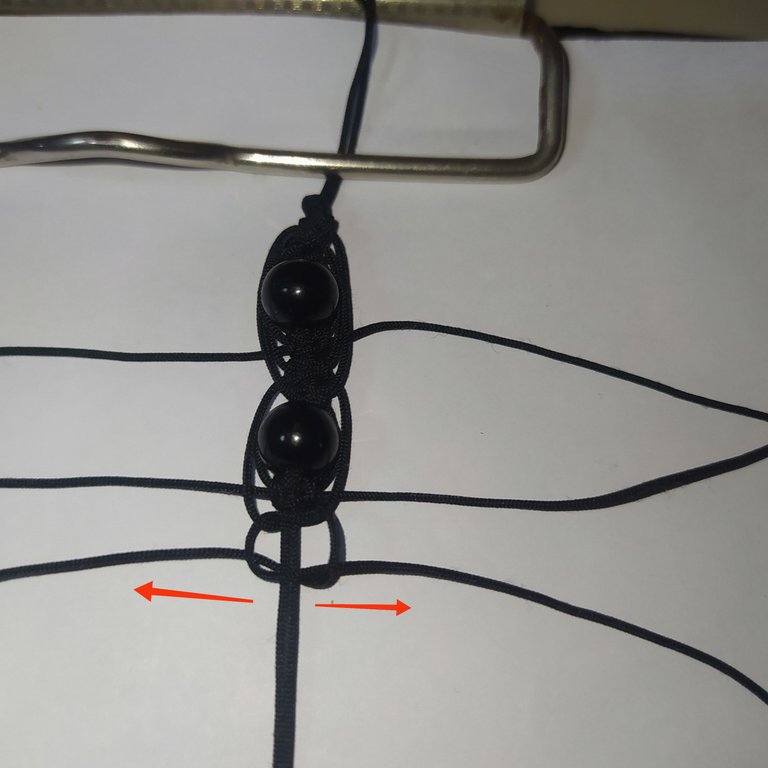
- Then we tighten this first flat knot by pulling the two ends of the thread.
- Tighten it tightly and pull it upwards, placing it as close as possible to the knot of the central thread.
- Luego apretamos este primer nudo plano halando los dos extremos del hilo.
- Apretamos fuerte y lo llevamos hacia arriba colocándolo lo más pegadito al nudo del hilo central.
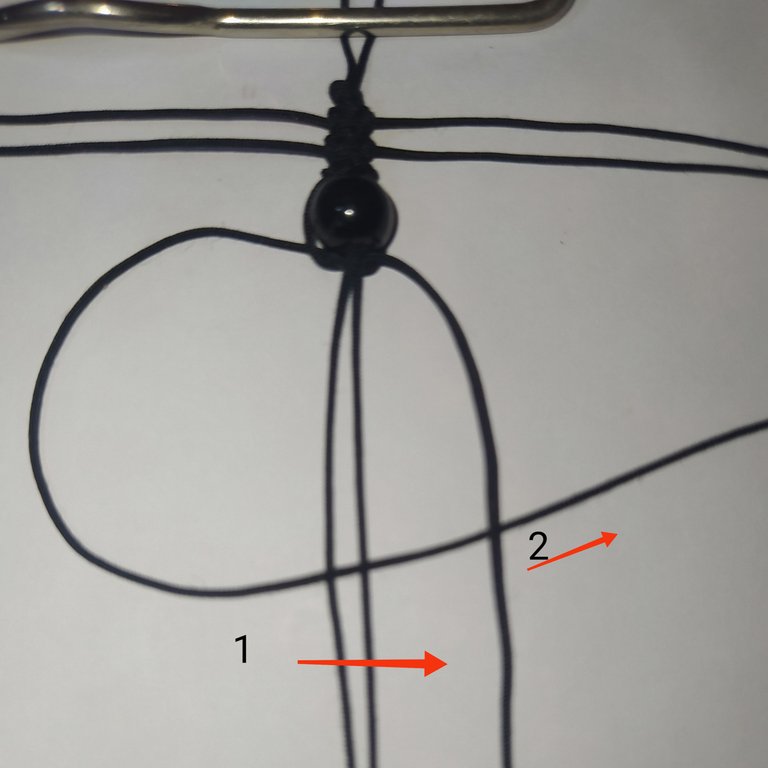
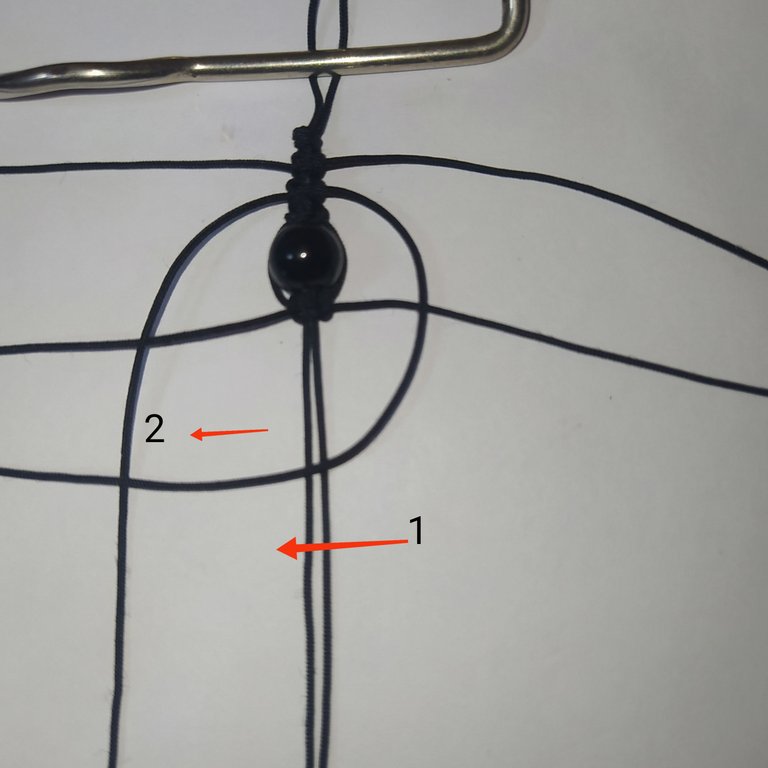
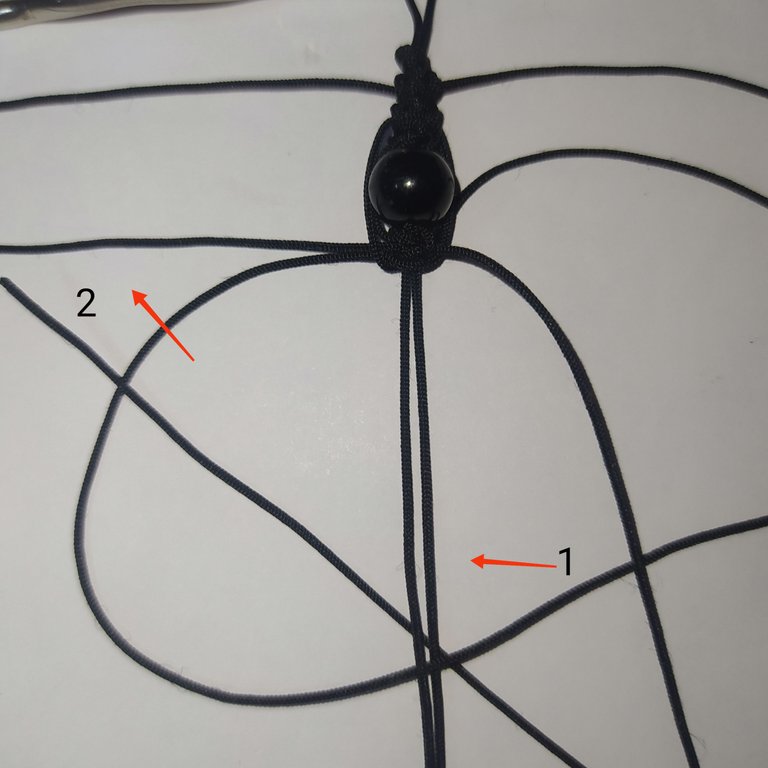
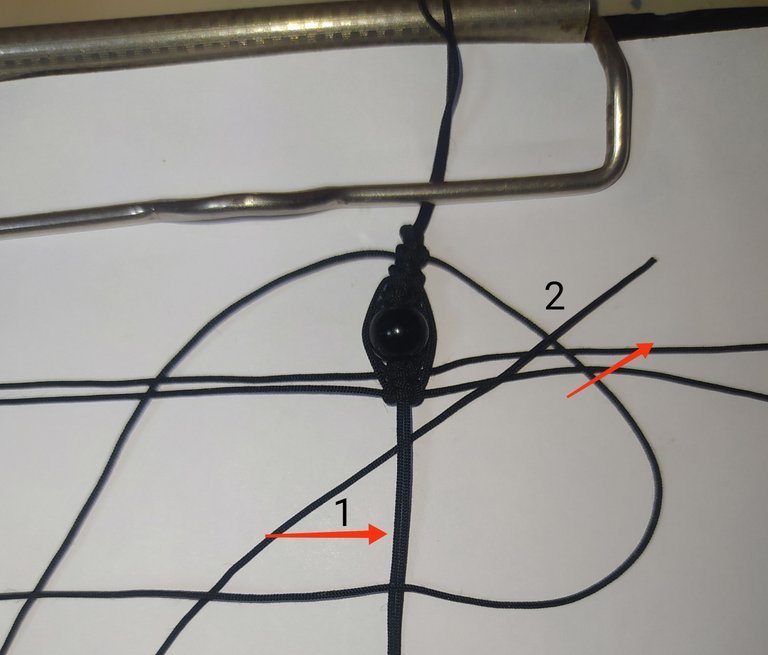
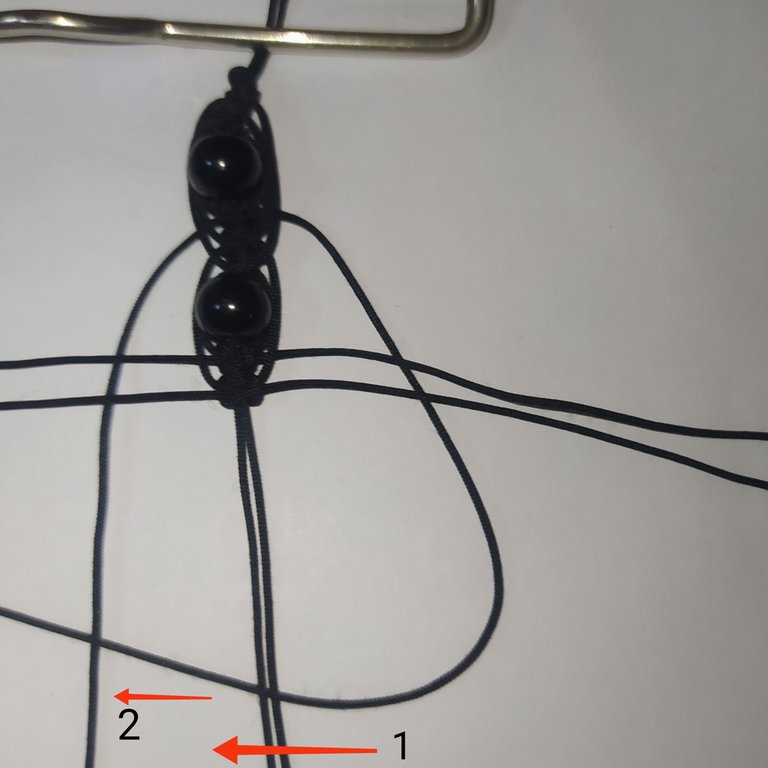
Now we will make the flat knot on the left side.
Ahora realizaremos el Nudo plano del lado izquierdo.
- We take the left yarn and pass it over the central yarns, (as indicated by number 1).
- Under the thread on the right (indicated by number 2).
- Tomamos el hilo de la izquierda y lo pasamos por encima de los hilos centrales, (como lo indica el número 1)
- Por debajo del hilo de la derecha (señalado por el número 2)
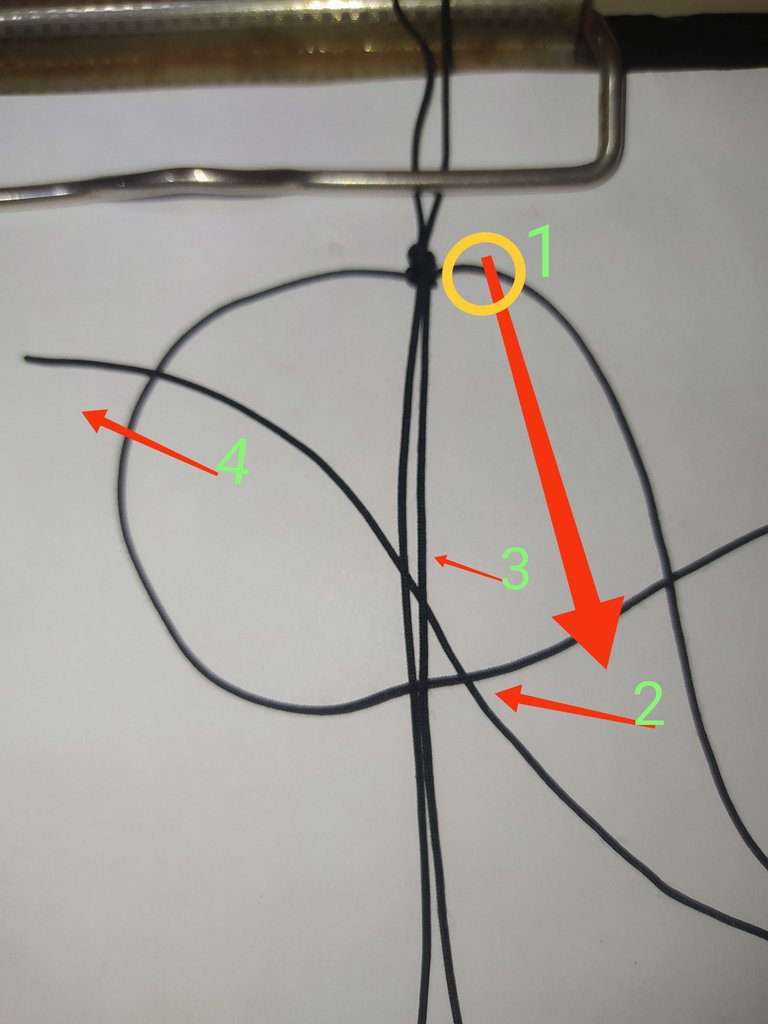
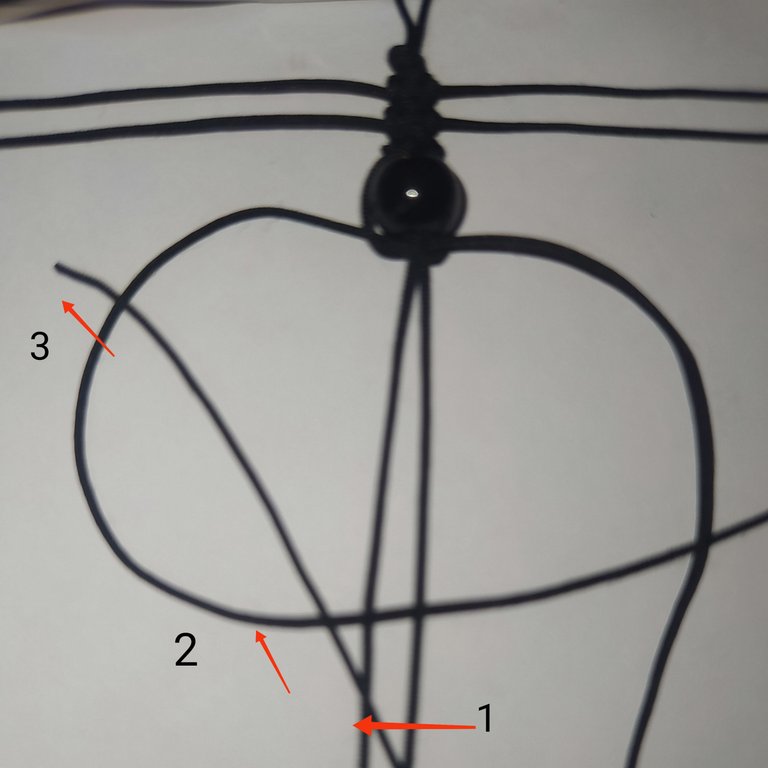
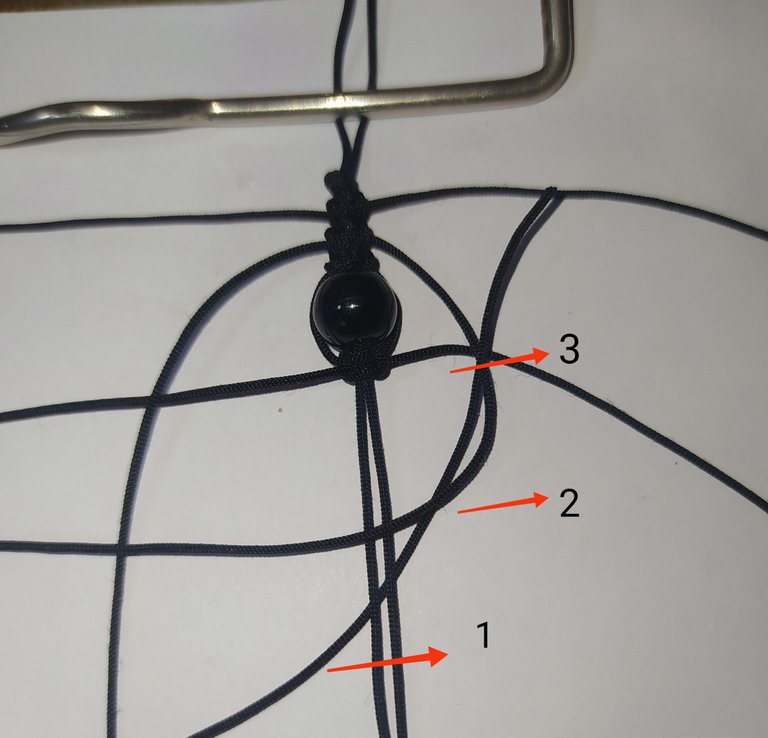
- We take the thread on the right (number 1).
- Pass it under the central threads (numbers 2 and 3).
- We pull it through the hole above the thread on the left (number 4).
- Tomamos el hilo de la derecha ( número 1)
- Lo pasamos por debajo de los hilos centrales ( números 2 y 3)
- Lo sacamos por encima por el agujerito por encima del hilo de la izquierda (número 4)
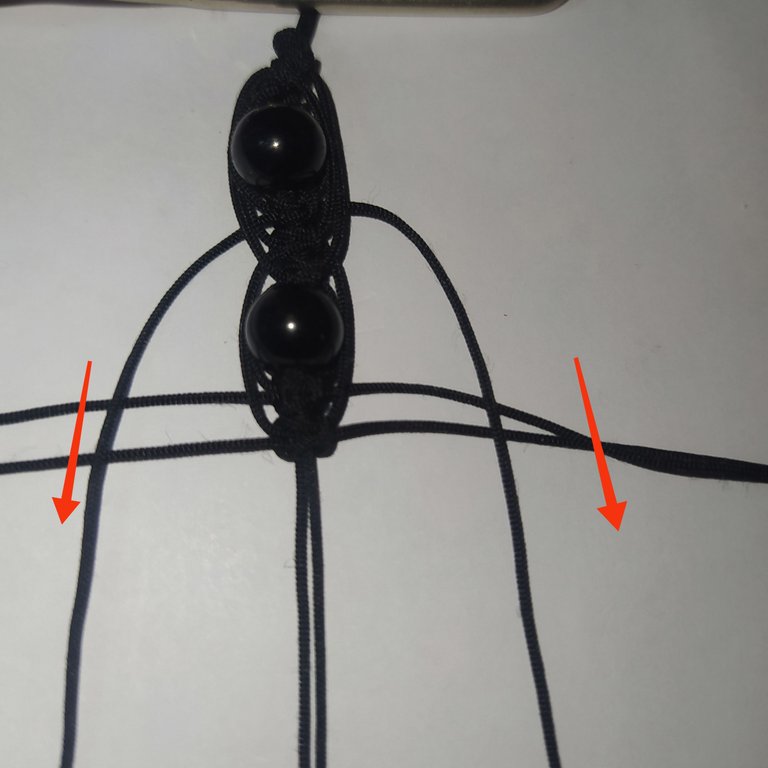
- We take the two ends of the yarns and pull.
In this way we make the second flat knot.
- Tomamos los dos extremos de los hilos y halamos.
De esta forma realizamos el segundo nudo plano.
We place the second 100 cm thread.
Colocamos el segundo hilo de 100 cm
- To center this second thread we do it in the same way as the first thread.
- Para centrar este segundo hilo lo hacemos de la misma forma que el primer hilo.
- We repeat the same technique to make the flat knots.
- Repetimos la misma técnica para realizar los nudos planos.
- Then we place the third 100 cm thread.
- Luego colocamos el tercer hilo de 100 cm
 |  |  |
|---|
- Repeat the same procedure with each 100 cm thread, making two flat knots with each of them (one on the right side and the other on the left side).
- Repetimos el mismo procedimiento con cada hilo de 100 cm realizando dos nudos planos con cada uno de ellos( uno del lado derecho y el otro del lado izquierdo).
 |  |
|---|
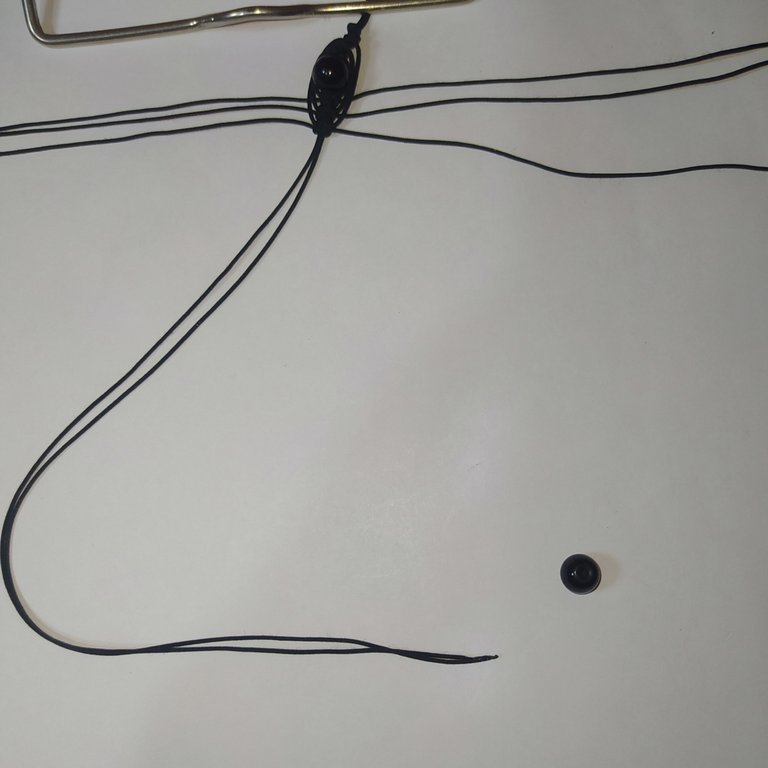
- We take the central thread at the bottom and cut it.
- Then we burn the ends to thin.
- Tomamos el hilo central en la parte de abajo y recortamos.
- Luego quemamos las puntas para adelgazar.
 |  |
|---|
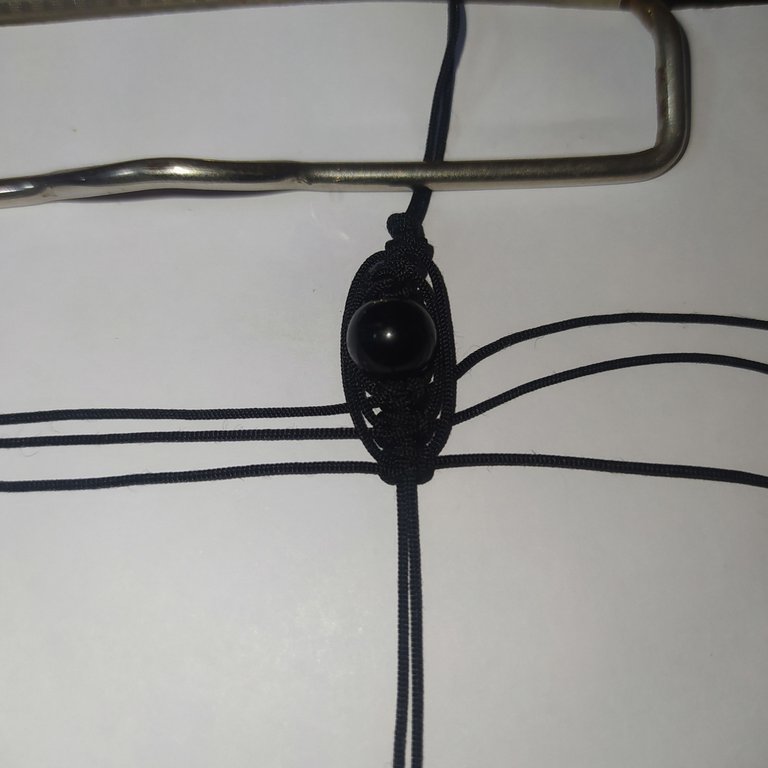
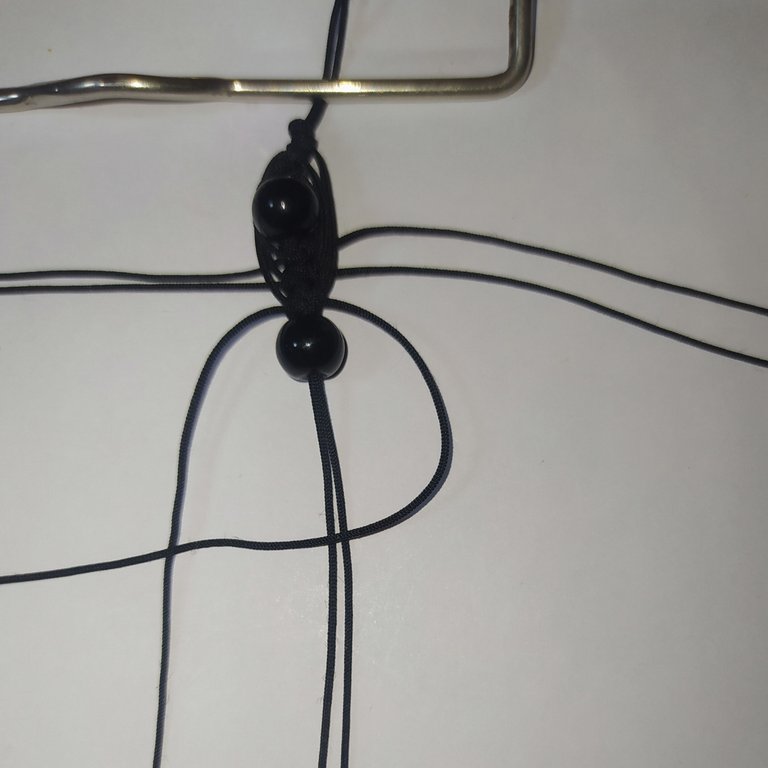
- We introduce the first bead of 4 mm.
- We place it well glued to the weave of the flat knots that we made.
- Introducimos la primera cuenta de 4 mm
- La colocamos bien pegado a el tejido de los nudos planos que realizamos.
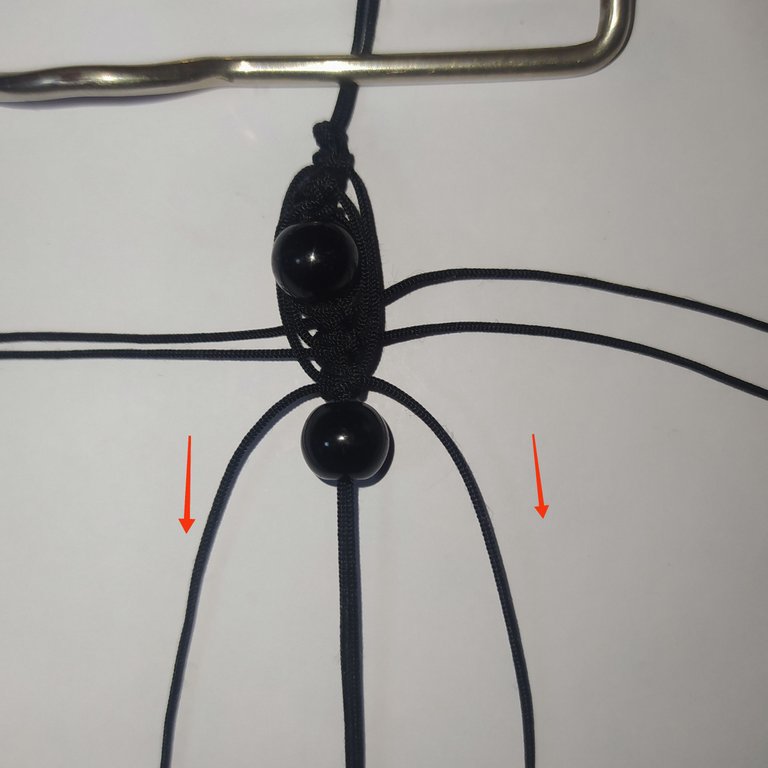
- We take the yarns that are at the bottom, and start making flat knots around our bead.
- Taking the thread on the right, passing over the central threads (1).
- Under the thread on the left (2).
- Tomamos los hilos que están en la parte inferior, y empezamos a hacer nudos planos rodeando nuestra cuenta.
- Tomando el hilo de la derecha pasando por encima de los hilos centrales (1).
- Por debajo del hilo de la izquierda(2)
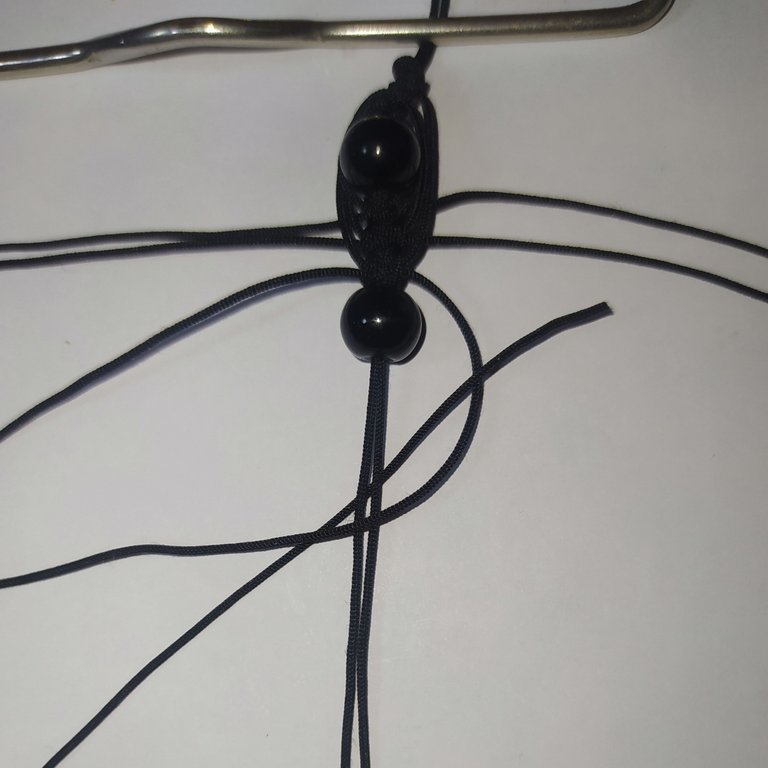
- Then we take the yarn on the left and pass it under the central yarns (1 and 2).
- And we pull it over the thread on the right (3).
- Luego tomamos el hilo de la izquierda y lo pasamos por debajo de los hilos centrales (1 y 2).
- Y lo sacamos por encima del hilo de la derecha (3)
- We pull both ends and we have our first knot.
- Halamos ambos extremos y tenemos nuestro primer nudo.
 |  |  |
|---|
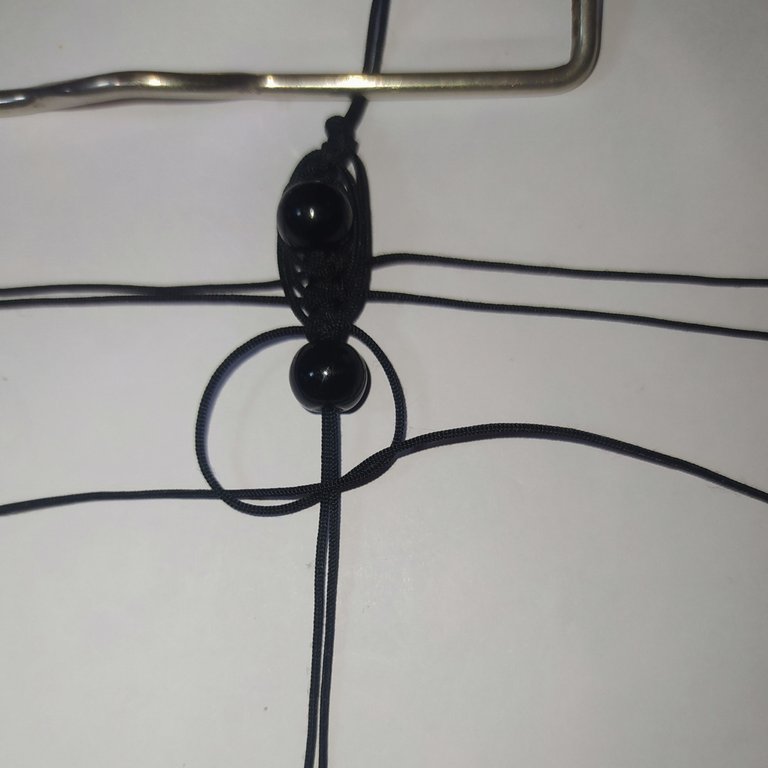
Left flat knot.
- We pass the left-hand yarn under the center yarns (1).
- Under the right-hand thread (2).
- Pass the right side yarn under the center yarns (1 and 2).
- We pull out over the left side yarn (3).
- Pull the threads and tie the first flat knot, then repeat to tie a second flat knot.
Nudo plano de la izquierda.
- Pasamos el hilo de la izquierda por debajo de los hilos centrales (1).
- Por debajo del hilo de la derecha (2).
- Pasamos el hilo del lado derecho por debajo de los hilos centrales (1 y 2).
- Sacamos por encima del hilo del lado izquierdo (3)
- Halamos los hilos y realizamos el
primer nudo plano, luego repetimos para realizar un segundo nudo plano
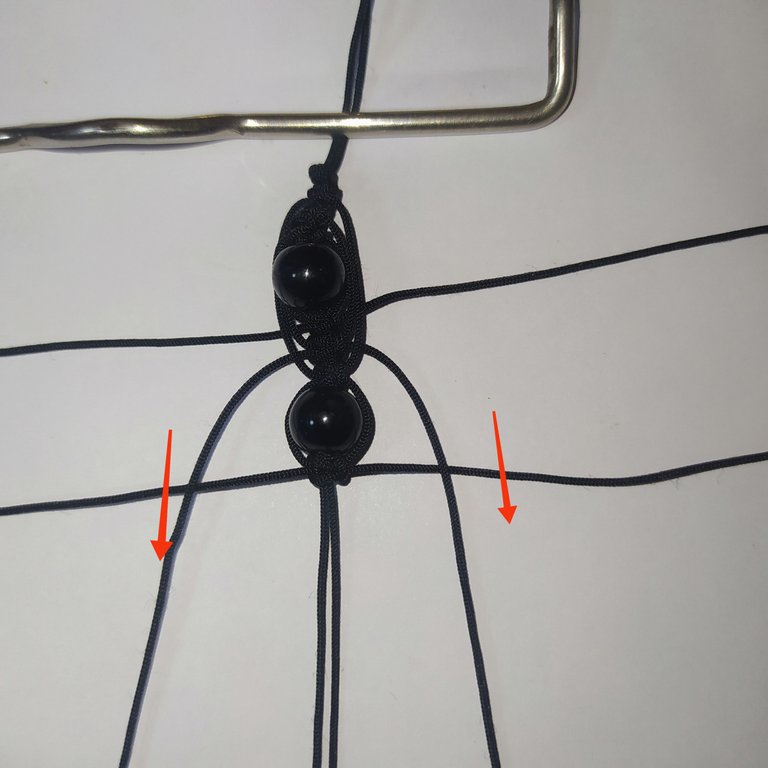
Second thread.
Segundo hilo.
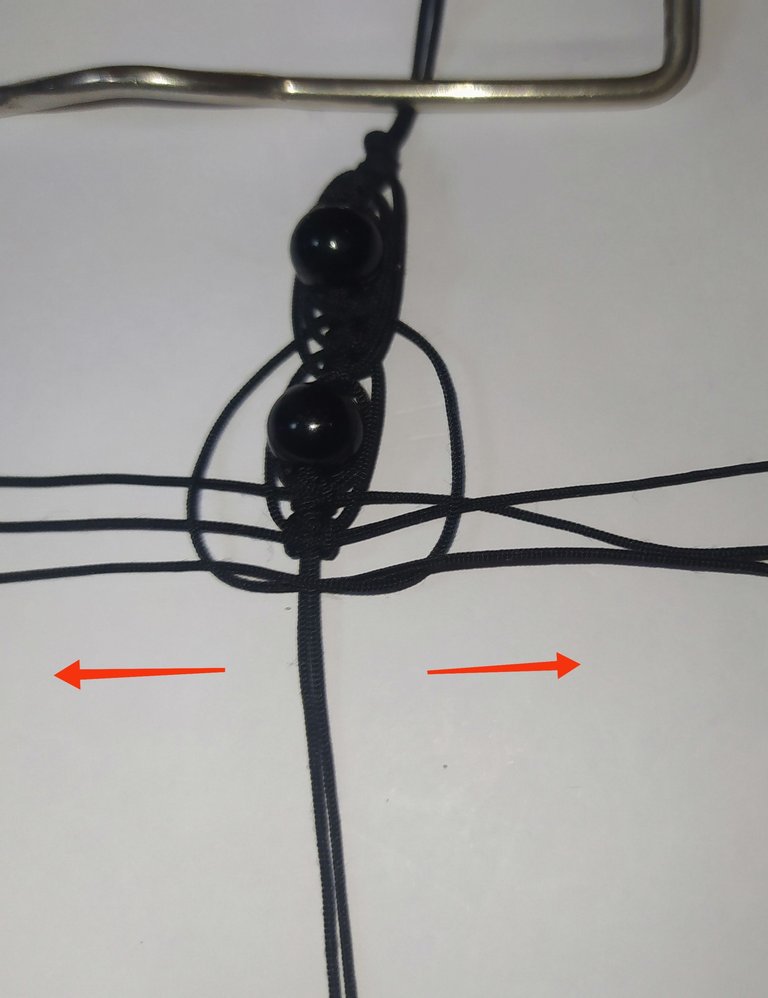
- We pass the yarns over the threads below.
- Pasamos los hilos por encima de los hilos de abajo
 |  |  |
|---|
Left side.
Lado izquierdo.
 |  |  |
|---|
- Repeat the same step by step as shown below.
- Repetimos el mismo paso a paso como muestro a continuación .
Third thread
Tercer hilo
- We take the third thread at the top and pass over the two threads.
- Tomamos el tercer hilo que está en la parte superior y pasamos por encima de los dos hilos
 |  |  |
|---|
- We begin to make the two flat knots as our below.
- We only have to repeat the same step by step using the flat knot technique.
- Empezamos a realizar los dos nudos planos como nuestro a continuación.
- Solo debemos repetir el mismo paso a paso empleando la técnica del nudo plano.
- Here I show how the first spike looks like.
- Aquí muestro como queda la primera espiga.
 |  |
|---|
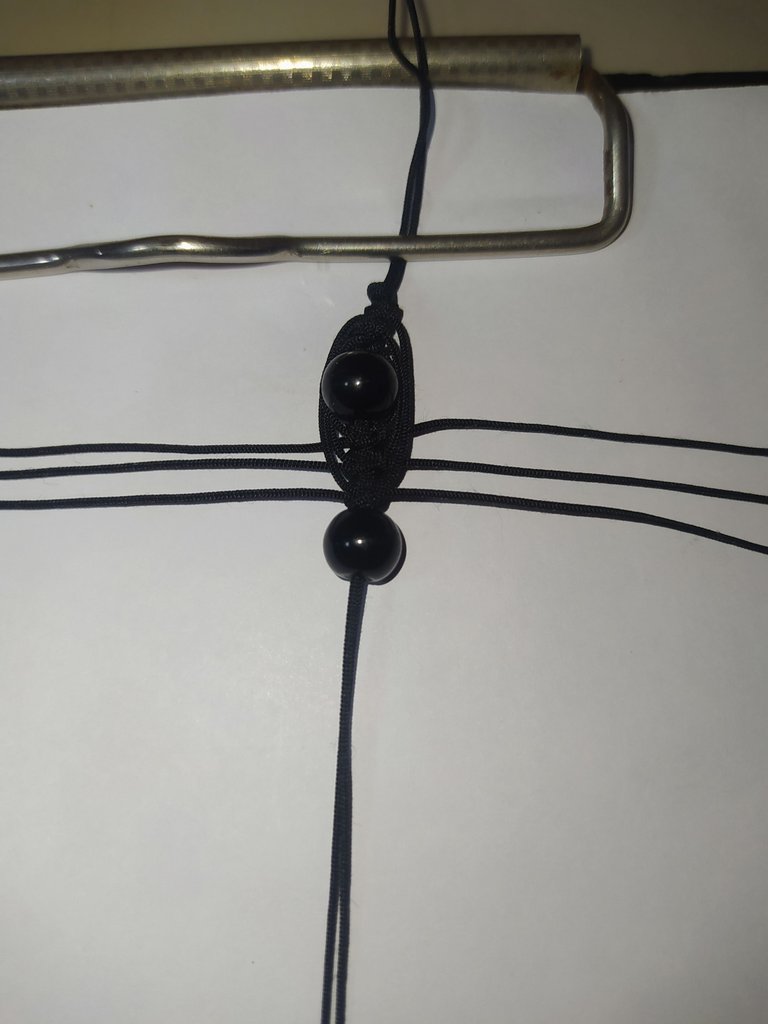
- Now we introduce our second bead and bring it up to where the fabric is.
- Ahora introducimos nuestra segunda cuenta y la subimos hasta donde está el tejido.
- We tie the knots again.
Always starting with the lower thread going around our bead and tying the knots on both sides.
- Hacemos nuevamente los nudos.
Empezando siempre con el hilo inferior rodeando nuestra cuenta y realizando los nudos de ambos lados.
 |  |  |
|---|
Second thread
Segundo hilo
- We pass the second thread over the previous fabric.
- Pasamos el segundo hilo por encima del tejido anterior.
 |  |  |
|---|
 |  |  |
|---|
- We tie two flat knots (always repeating what we have been doing, here I show you the step by step).
- Realizamos dos nudos planos (repitiendo siempre lo que venimos haciendo, aquí les muestro el paso a paso)
Third thread.
Tercer hilo.
- We pass the third thread over the other two threads.
- Pasamos el tercer hilo por encima de los otros dos hilos.
 |  |
|---|
- We repeat.
- Repetimos.

This leaves us with the second ear.
Así nos queda la segunda espiga.
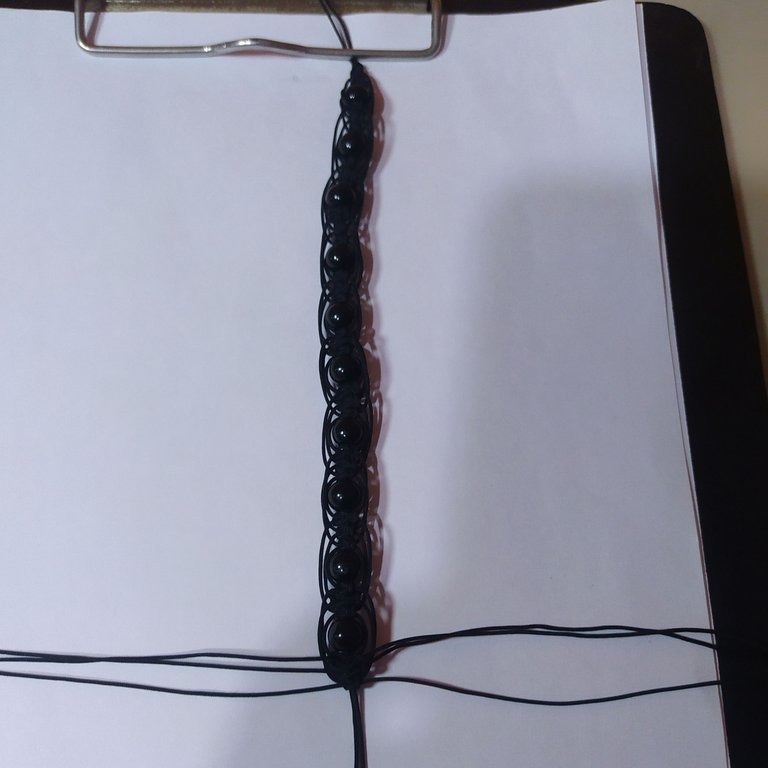
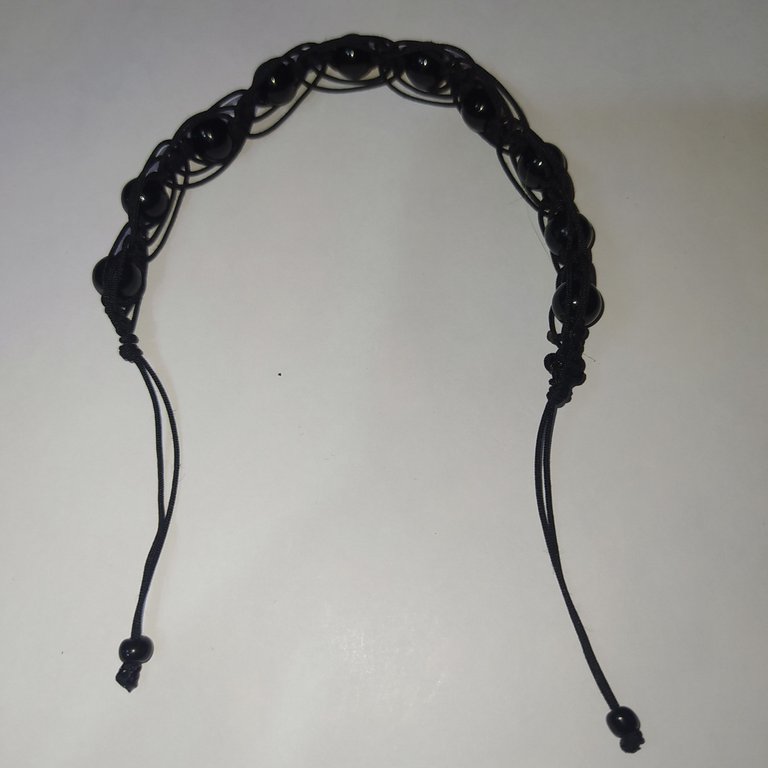
- Here is our bracelet all woven, with the desired length of 16 cm.
- Aquí nuestra pulsera toda tejida, con el largo deseado de 16 cm
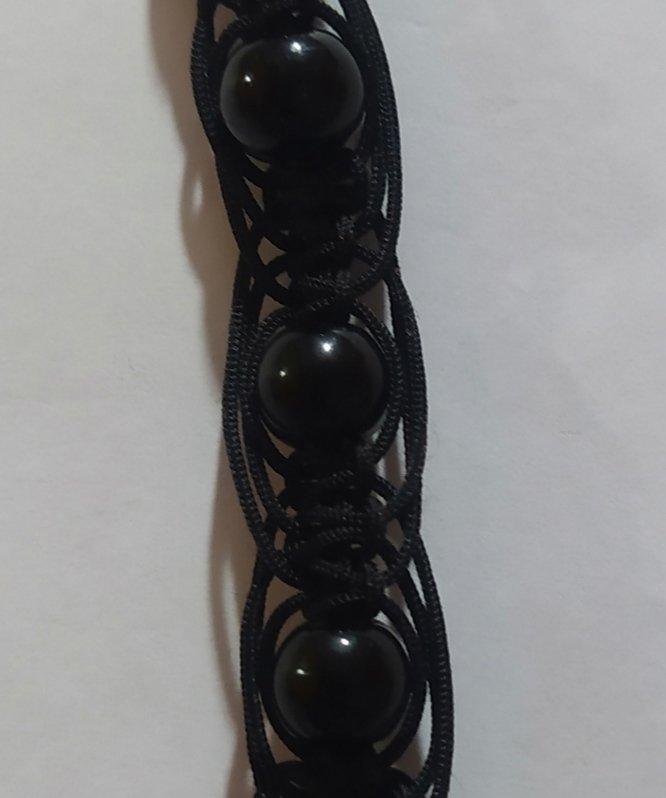
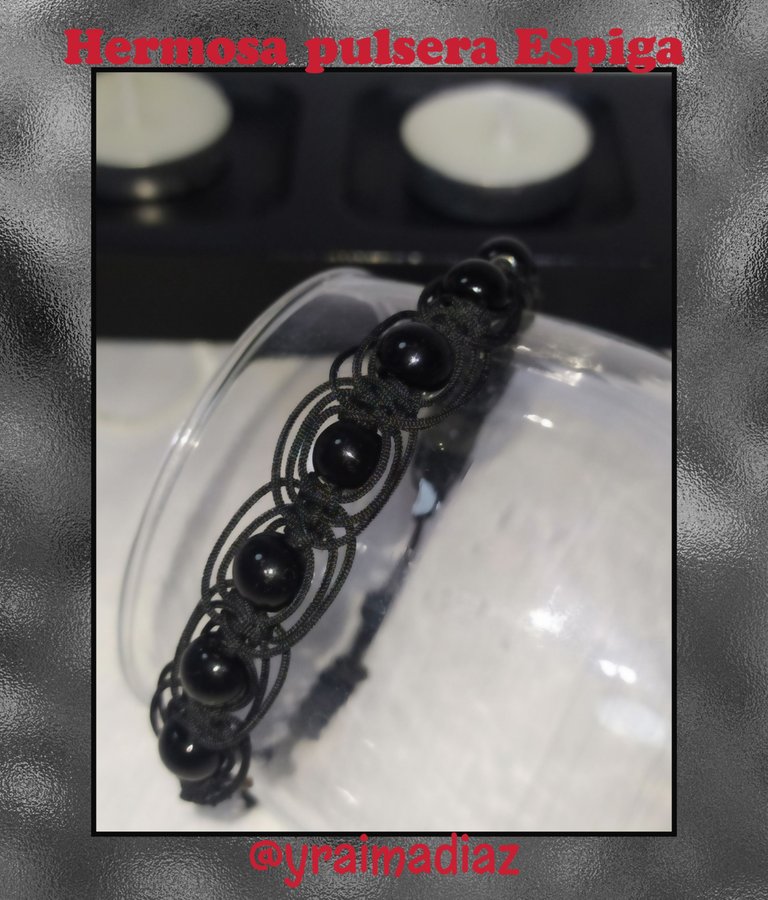
- Here we can better appreciate the beautiful weave which is making the similarity of a spike.
- Aquí podemos apreciar mejor el hermoso tejido el cual va haciendo la similitud de una espiga
 |  |  |
|---|
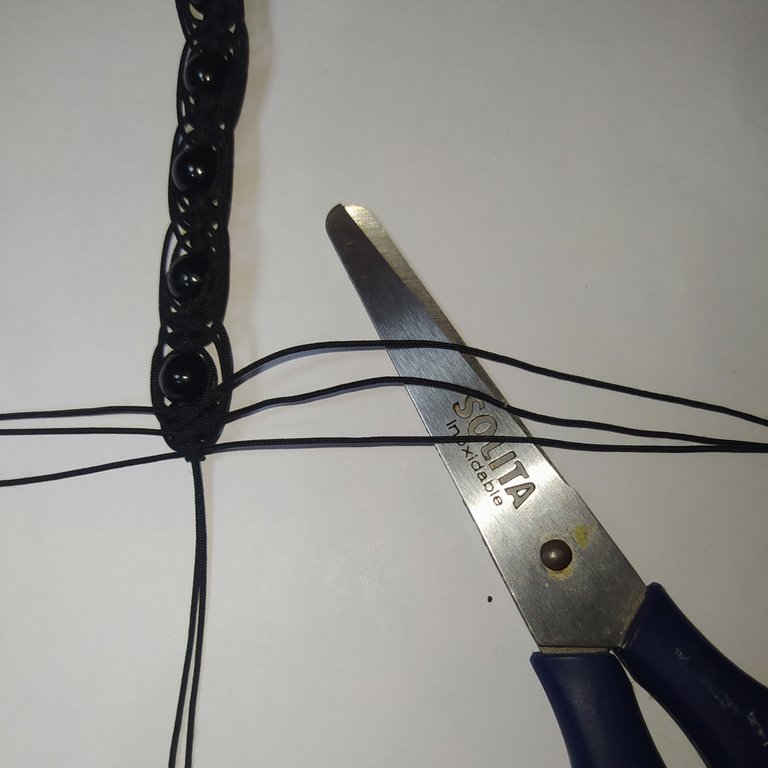
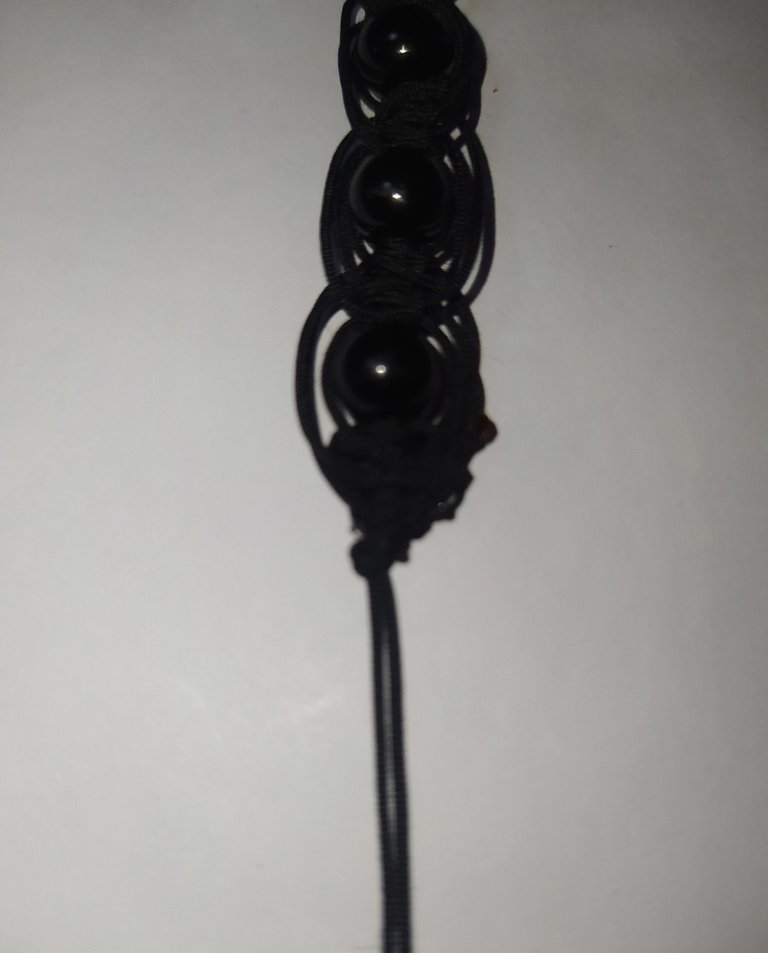
- We cut the 3 excess threads on both sides.
- Then we burn the ends of the threads to seal.
- Recortamos los 3 hilos excedentes de ambos lados.
- Luego quemamos las puntitas de los hilos para sellar.
 |  |
|---|
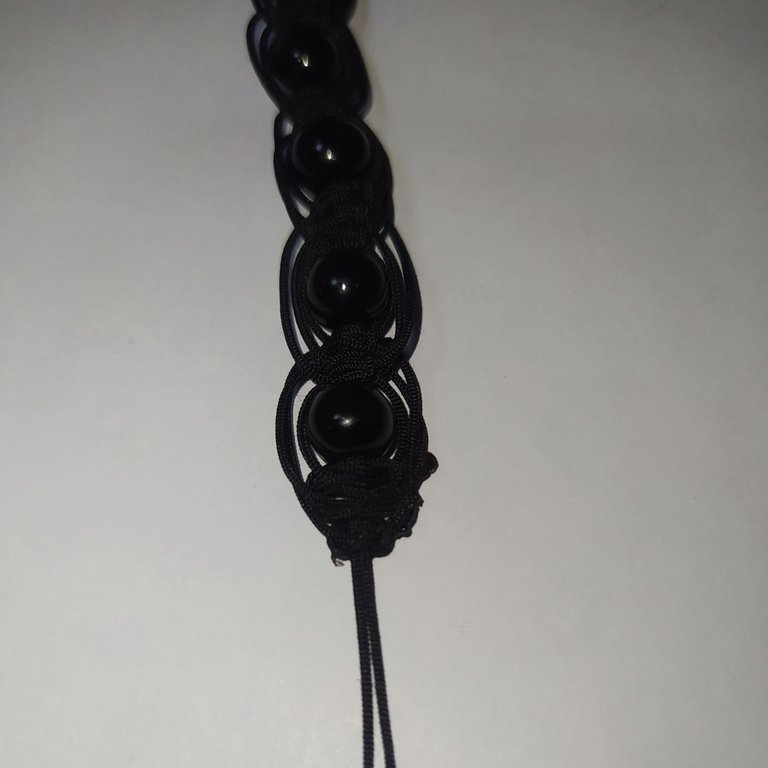
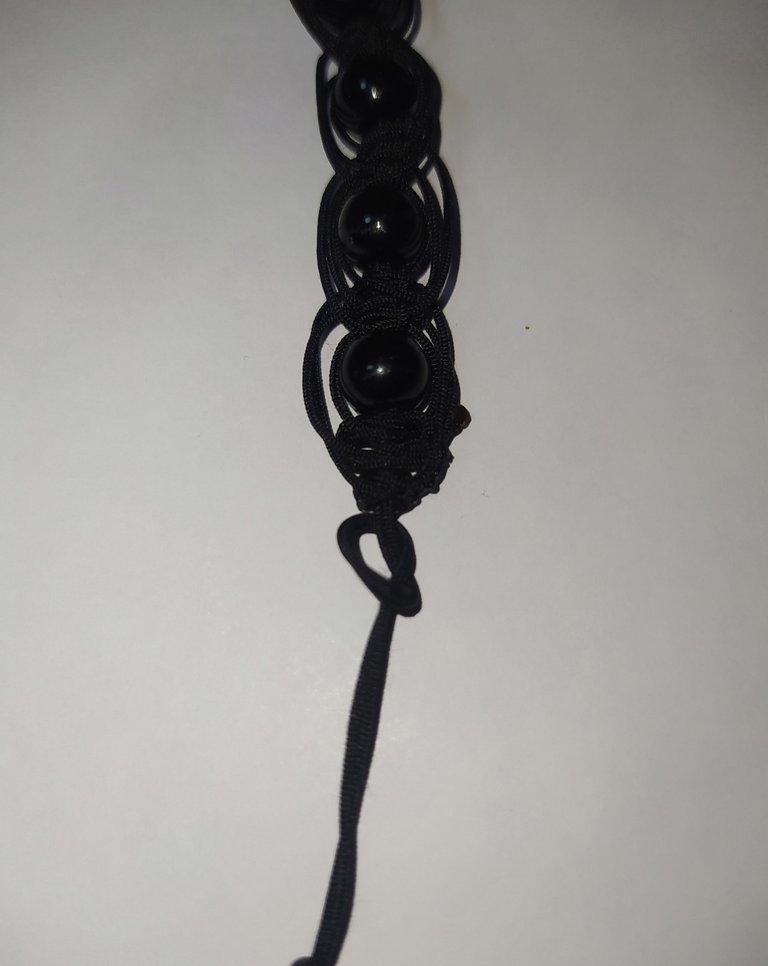
- With the central threads we will make a simple knot, to protect the seal that we have just made.
- Con los hilos centrales realizaremos un nudo sencillo, para protejer el sello que le acabamos de hacer.
 |  |
|---|
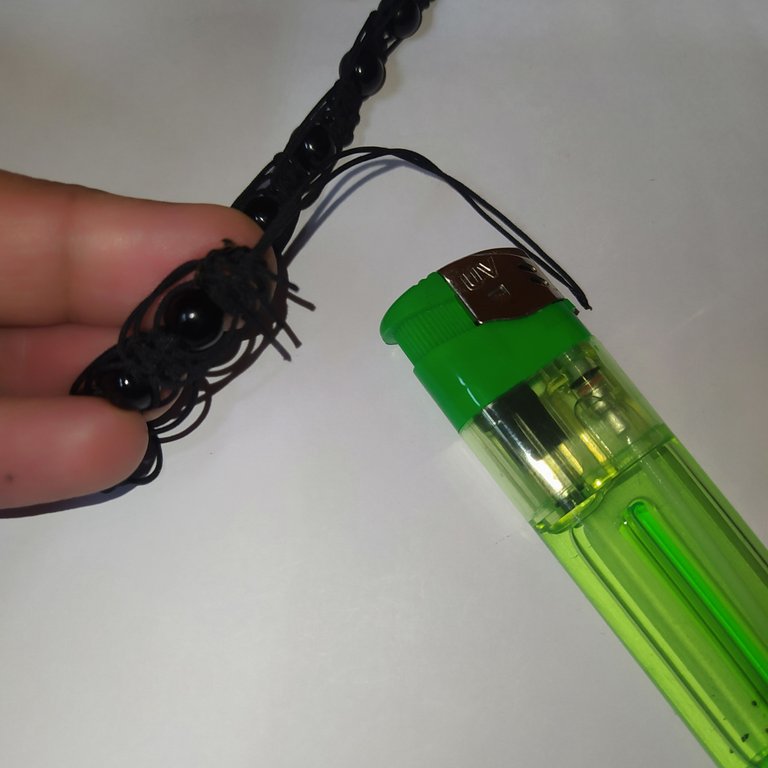
- We place the 2 mm bead, we tie the knot.
- Cut and seal with the lighter.
- Colocamos la cuenta de 2 mm, realizamos el nudo.
- Recortamos y sellamos con el encendedor.
- Look at the wonderful work done
- Miren el maravilloso trabajo realizado.
Cierre de la pulsera.
Bracelet closure.
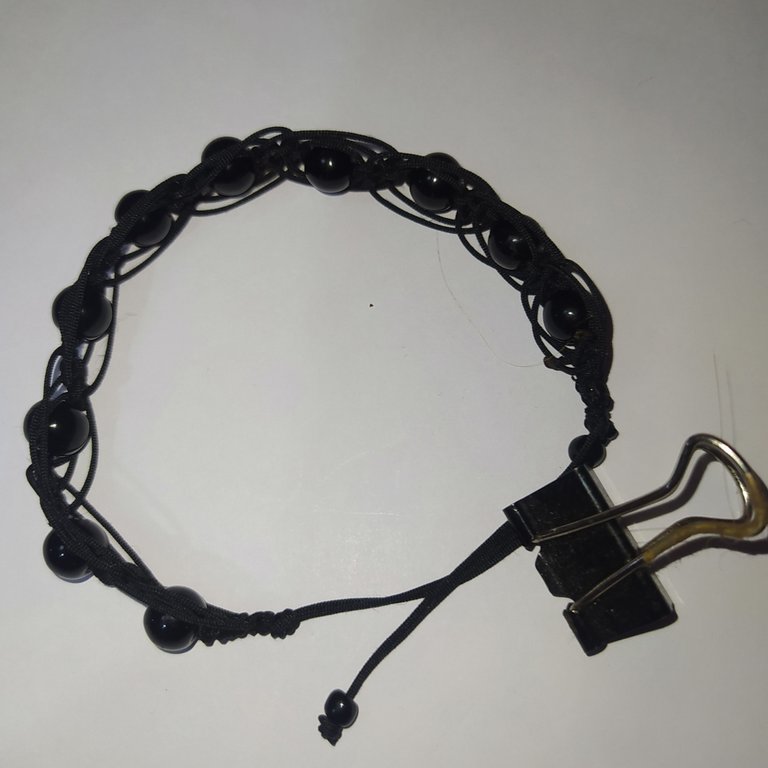
- We cross the threads at each end and secure them with a clamp.
- Cruzamos los hilos de cada extremo y para asegurar lo sujetamos con una pinza
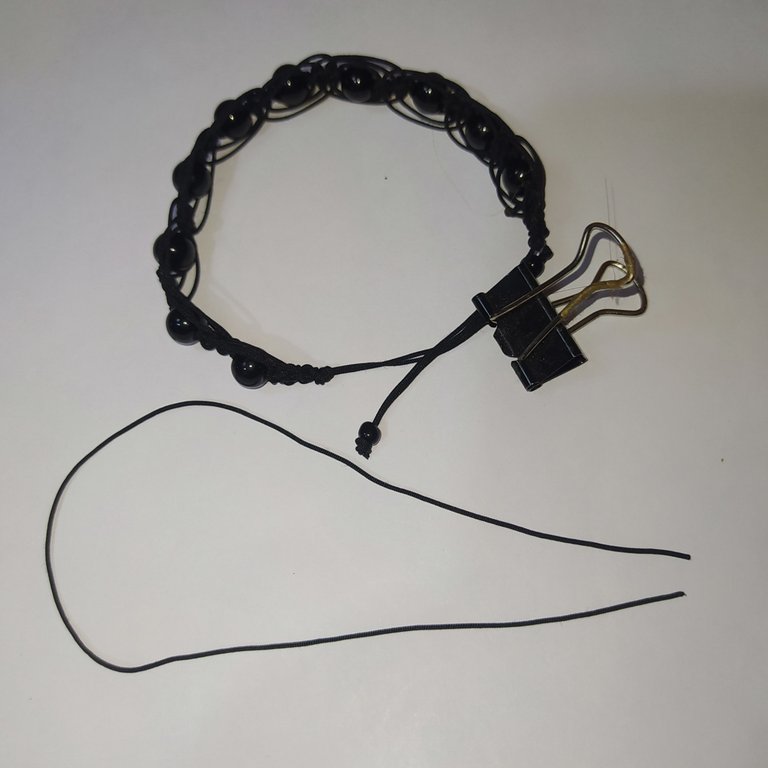
- We take the 25 cm thread.
- Tomamos el hilo de 25 cm.
Let's move on to the slip knot using the flat knot technique.
Pasemos a realizar el nudo corredizo utilizando la técnica del nudo plano.
 |  |
|---|
- Center the 25 cm yarn
- We pass it under the central yarns.
- Then we pass the thread on the right over and then under the thread on the left.
- Centramos el hilo de 25 cm
- Lo pasamos por debajo de los hilos centrales
- Luego el hilo de la derecha lo pasamos por encima y luego por debajo del hilo de la izquierda.
 |  |
|---|
- The thread on the left is passed under the central threads and pulled out over the thread on the right.
- We pull both ends.
Repeat this step on both sides several times until the desired size is obtained.
- El hilo de la izquierda lo pasamos por debajo de los hilos centrales y lo sacamos por encima del hilo de la derecha.
- Halamos ambos extremos.
Repetimos este paso de ambos lados varias veces hasta obtener el tamaño deseado.
- We trim and burn the tip to secure.
- Recortamos y quemamos la punta para asegurar.

- Sliding clasp of the finished bracelet.
- Cierre corredizo de la pulsera terminado.
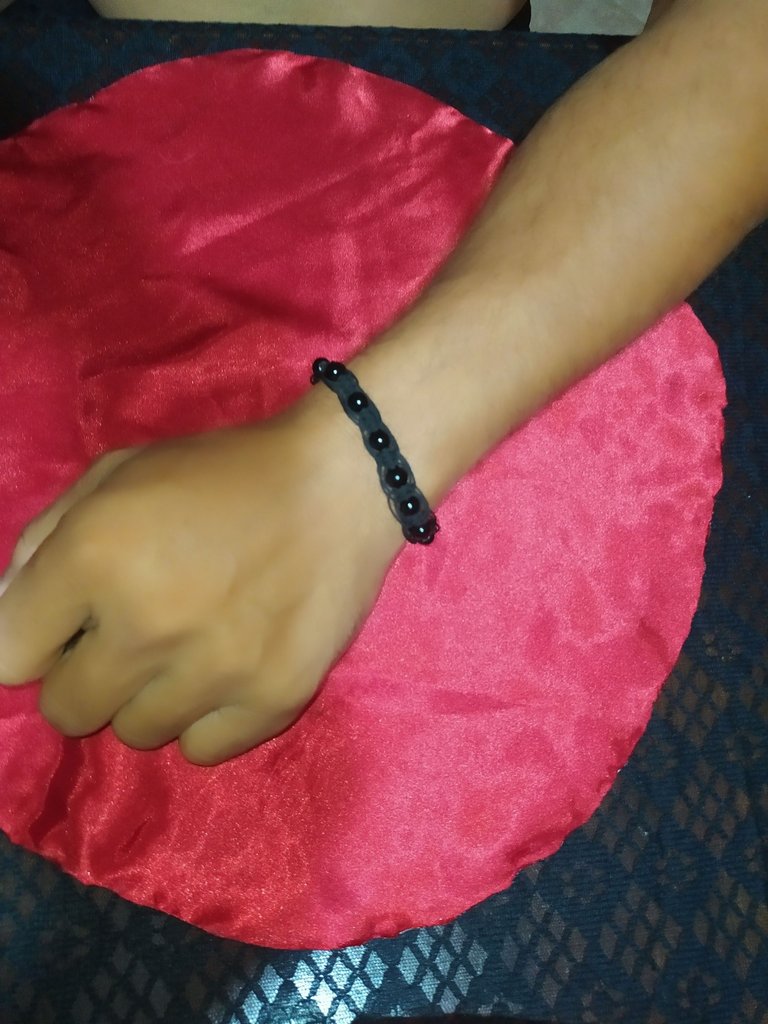
Below is my life partner showing off his beautiful gift which he loved.
A continuación mi compañero de vida luciendo su hermoso regalo el cual le encantó.
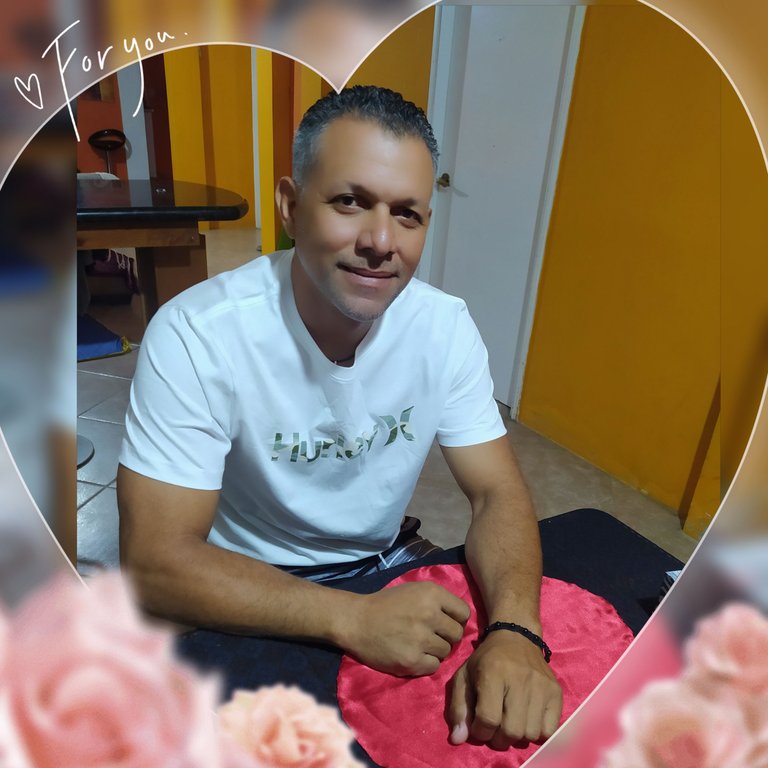
Thank you for joining me here and remember to dare to do anything in your life that fills you with joy and never stop smiling because smiling feeds our soul, we will read each other in the comments.
Gracias por haberme acompañado hasta aquí y recuerda atrévete a realizar cualquier cosa en tu vida que te llene de alegría y nunca dejes de sonreír ya que la sonrisa nos alimenta el alma, nos leemos en los comentarios.

Banner realizado en Meitu
Traductor Deepl.
Photos of my property taken with Xiaomi redmi note 8 phone.
Banner made in Meitu
Translator Deepl.
8 phone.
Banner made in Meitu
Translator Deepl.