ENGLISH VERSION
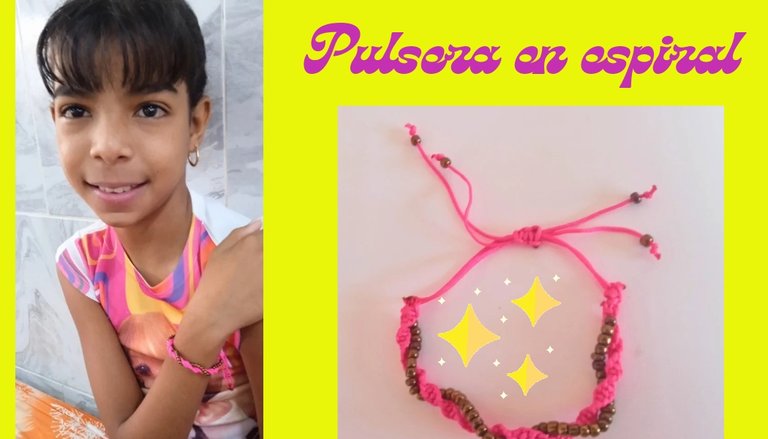
Hello hivers, it is a pleasure for me to publish again in this #Jewerly community and this time I was preparing a spiral-shaped bracelet to give to a friend who has been asking me for a bracelet for a while, but my baby got sick and told me If I gave the bracelet to her, she would recover faster and after hearing those beautiful words, so full of hope, I had no choice but to give the bracelet to my daughter, because children are like that.
Now I'll tell you how I did it, I can tell you that it is very easy and requires very few resources.

Materials
- 2 central strands of 75 cm long pink Chinese thread.
- 1 strand of 150 cm long pink Chinese thread.
- 30 small 3 mm pearls.
- 1 Matchbox.

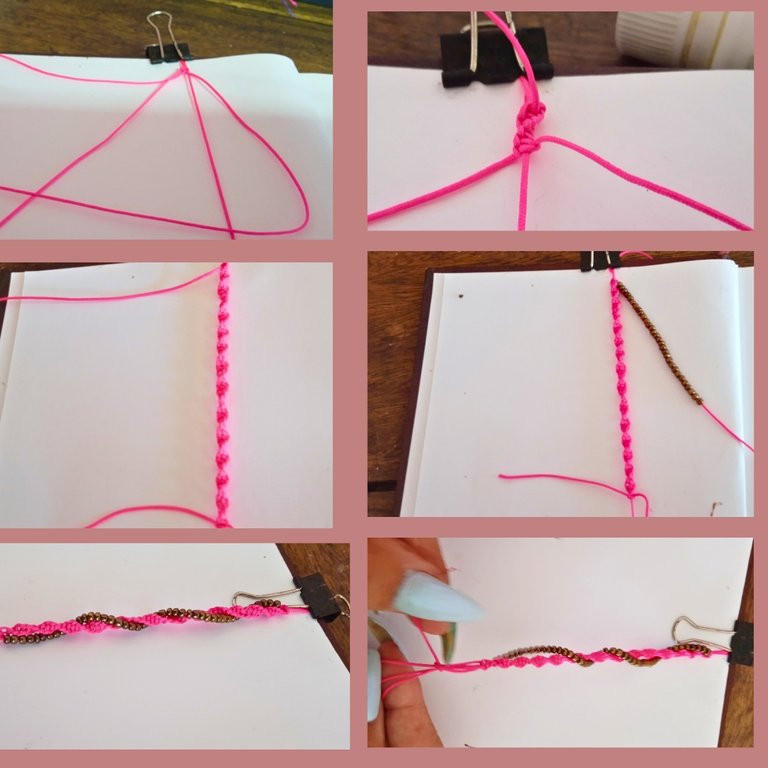
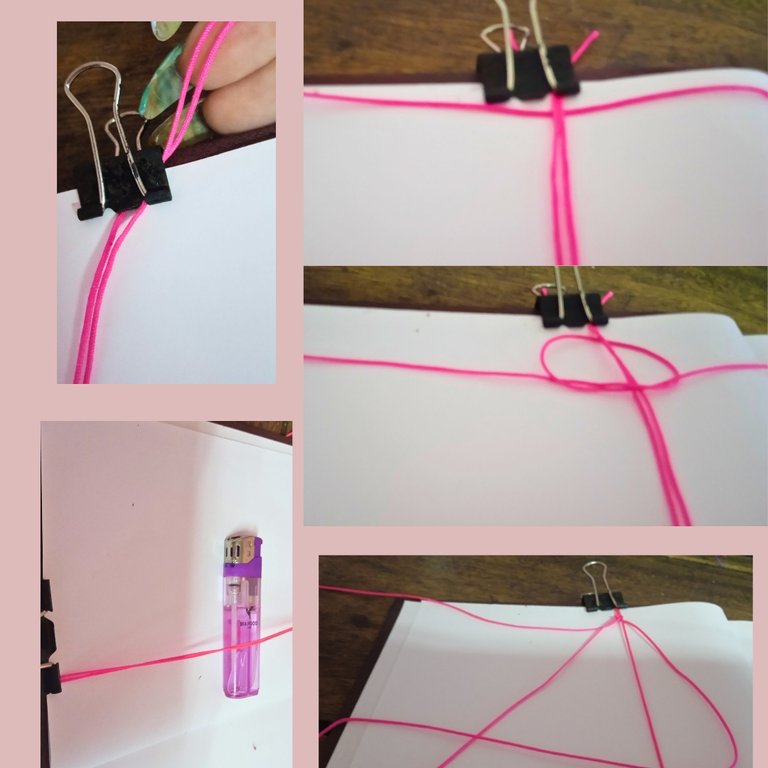
To begin, I took the 75 cm central threads and fixed them to the loop, leaving about 10 cm behind the loop and the other end I also fixed with another loop and underneath the threads I placed the matchbox to make it easier for me. work and pass the threads, then I took the 150 thread, look for the middle one and passed it under the central threads making the first stitch with the flat knot, then separated the four threads to rearrange them. From right to left he took the three threads and separated the fourth.

Then U began to weave the pulse but only to the right so that it begins to take the shape of the spiral. We take the thread on the right and pass it over the other two making the shape of a ring and with the third thread we pass it underneath. of the central threads and we take it out through the ring that we made with the first thread and we repeat this procedure in the same direction until we reach 50 cm.
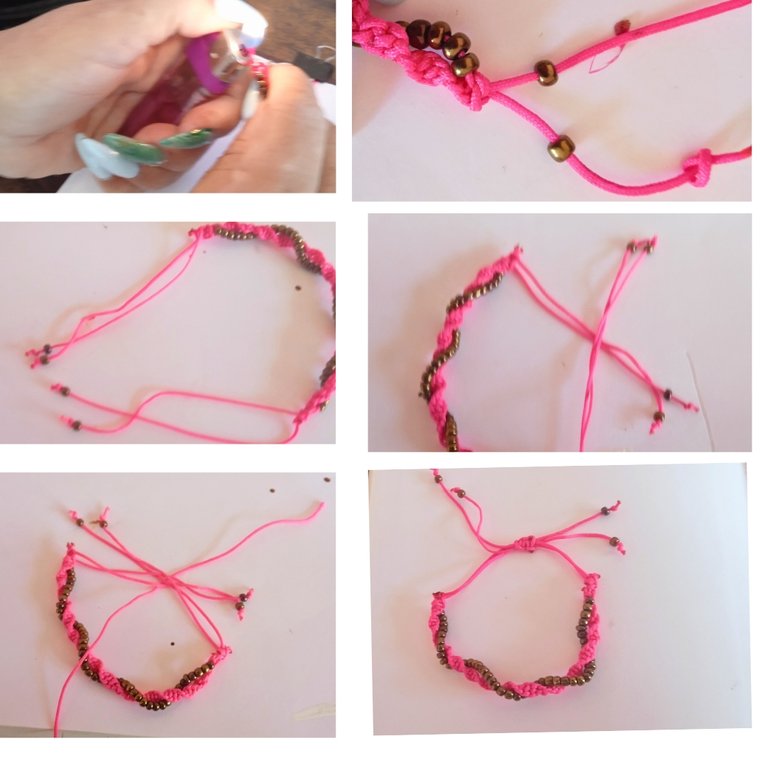
We continue with the fourth thread and we pass all the beads and then we wind it in the spiral that has been created when weaving for one side only, at the end we tie a knot and with the help of the Fosforera we cauterize all the ends, so that the fabric do not open.

Now it's the turn of the threads at the ends. We put a bead on it and we tie a simple knot and we tie it. We put both ends in an so that the hand can enter, we are going to make the simple knot but for both sides with six points and we cauterize the tips and this is the final result of my spiral-shaped bracelet, I hope you like it as much as my girl who changed it even the name and gave her the bracelet that cures her and that is because children are special.
VERSIÓN EN ESPAÑOL
Hola, hivers, es un placer para mí publicar nuevamente en esta comunidad de #Jewerly y esta vez estaba preparando una pulsa en forma de espiral para regalar le a una amiga que viene hace rato pidiéndome una pulsa, pero mi Bebita se enfermó y me dijo que si le daba la pulsera a ella, se recuperaba más rápido y tras después de oír esas lindas palabras, tan llenas de esperanza, no me quedo de otra que regalarle la pulsera a mi hija, y es que los hijos son así.
Ahora les cuento como fue la realicé, les adelanto que es muy fácil y lleva muy pocos recursos.

Materiales
- 2 hilos centrales de 75 cm de largo de hilo chino rosado.
- 1 hilo de 150 cm de largo de hilo chino rosado.
- 30 perlitas pequeñas de 3 mm.
- 1Fosforera.

Para comenzar tomé los hilos centrales de 75 cm y los fije a la presilla dejando unos 10 cm por detrás de la presilla y la otra punta también la fije con otra presilla y por debajo de los hilos coloqué la fosforera para que se me hiciera más fácil trabajar y pasar los hilos, luego tomé el hilo de 150 busque el medio y lo pasé por de bajo de los hilos centrales haciendo el primer punto con el nudo plano, luego separó los cuatro hilos para reorganizar los. De derecha a izquierda tomó los tres hilos y el cuarto lo separo.

Luego comenzó a tejer la pulsa pero solamente hacia la derecha para que empiece a tomar la forma del espiral, tomamos el hilo de la derecha lo pasamos por encima de los otros dos haciendo la forma de una argolla y con el tercer hilo lo pasamos por debajo de los hilos centrales y lo sacamos por la argolla que hicimos con el primer hilo y repetimos este procedimiento hacia la misma dirección hasta llegar a los 50 cm.
Continuamos con el cuarto hilo y pasamos todas las perlitas y luego lo vamos enrrollando en el espiral que se ha creado al tejer para un solo lado, al final le hacemos un nudo y con ayuda de la Fosforera cauterisamos todas las puntas, para que el tejido no se abra.

Ahora toca el turno a los hilos de las puntas le ponemos una perlita y le hacemos un nudo sencillo y quemamos, ponemos ambas puntas en forma de X y pasamos por debajo un hilo de 25 cm con el cual vamos a realizar el cierre de manera corredizo para que pueda entrar la mano, vamos hacer el nudo simple pero para ambos lados con seis puntos y cauterizamos las puntas y este es el resultado final de mi pulsera en forma de espiral, espero que les guste tanto como a mí niña que le cambio hasta el nombre y le puso la pulsera que la cura y es que los niños son especiales.
The photos were taking with my Phone and editated with**
CANVA
Las fotos fueron tomadas por mi teléfono y editadas en
canva
Translated by Deepl.com
Traducido por Deepl.com


