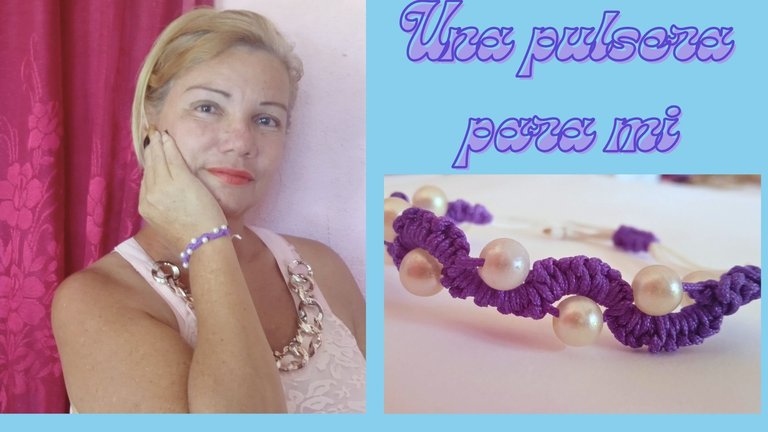

Hello, greetings to everyone and especially to those of this beautiful #Jewerly community where today I have the pleasure of posting again to show you a bracelet that I made for myself, since whenever I make something I leave it to my daughter, but This time I decided to keep it and thus decorate my hands. And I can even combine it with clothes or with another ornament that we like so much and makes us look more feminine.
To make the pulsa I used very few materials, since it is very easy and simple to make.

Hola, un saludo para todos y en especial a los de esta linda comunidad de #Jewerly donde hoy tengo el placer de publicar nuevamente para mostrar le una pulsera que confeccione para mi, ya que siempre que hago algo se lo dejo a mi niña, pero esta vez decidí quedarme con ella y así adornar mis manos. Y hasta puedo combinar con la ropa o con otro adorno que tanto nos gusta y nos hace ver más femeninas.
Para realizar la pulsa utilicé muy pocos materiales, ya que es muy fácil y sencilla de hacer.
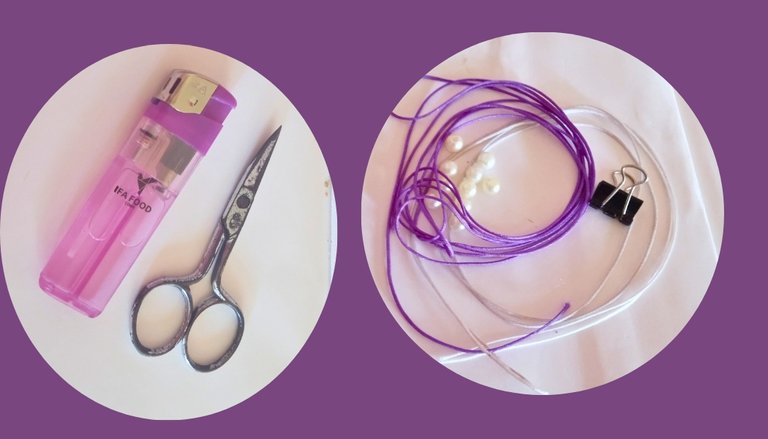
Materiales
- 2 metros de hilo chino blanco.
- 2 metros de hilo chino morado.
- 75 cm de hilo chino morado.
- 10 perlas blancas.
- 1 Fosforera.
- 1 tijera.
Materials
- 2 meters of white Chinese thread.
- 2 meters of purple Chinese thread.
- 75 cm of purple Chinese thread.
- 10 white pearls.
- 1 Matchbox.
- 1 scissors.
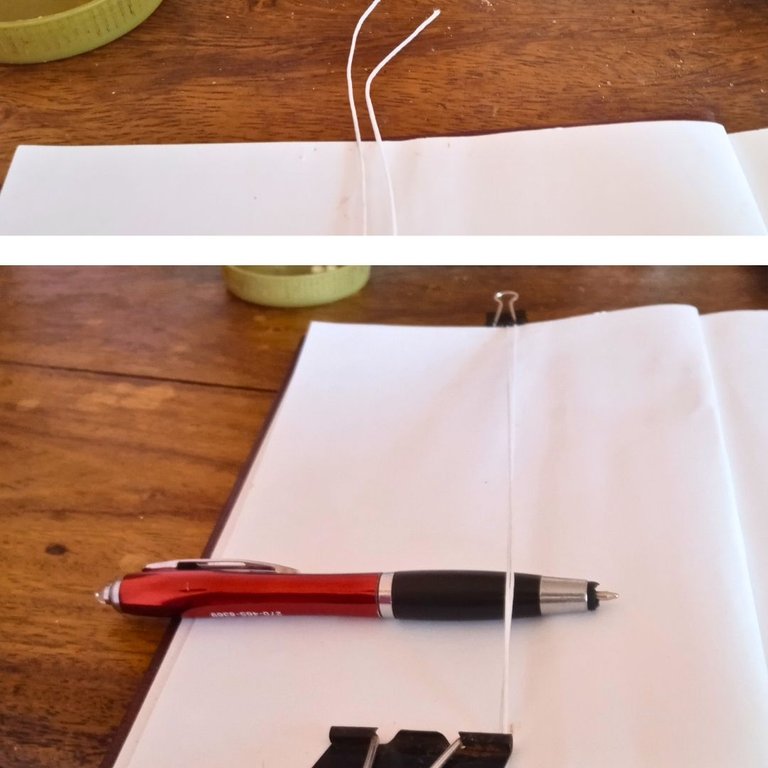
Comienzo cortando el hilo blanco a un metro y uniendo las puntas, luego dejo una distancia prudencial para hacer el cierre que puede ser entre 8 y 10 centímetros, teniendo en cuenta el ancho de la mano de cada persona, luego presillamos en ambos extremos y pongo un bolígrafo o un lápiz también puede ser, para poder pasar los hilos por debajo con facilidad. Así queda preparado los hilos guías de mi pulsera.
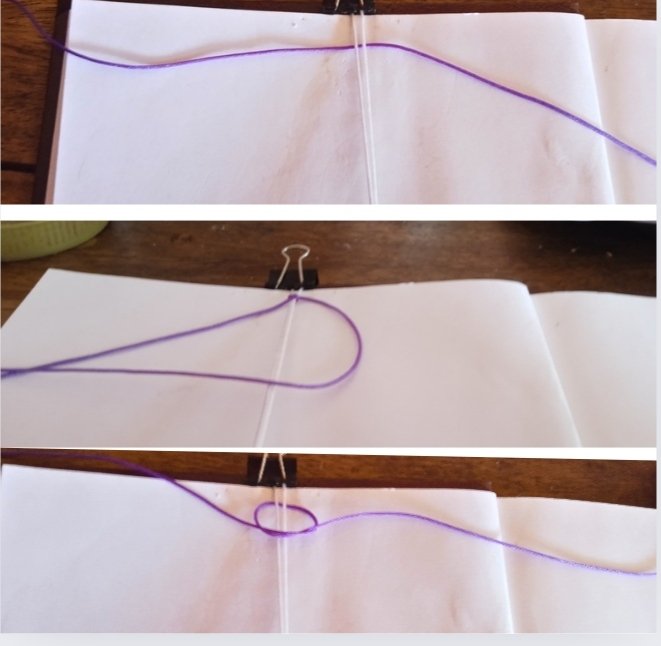
Seguidamente tomo el hilo morado y lo doblo a la mitad pasándolo por debajo de los hilos guías y realizó un nudo simple y así quedan enlazados los hilos para tejer de ambos lados.
I start by cutting the white thread to one meter and joining the ends, then I leave a reasonable distance to make the closure, which can be between 8 and 10 centimeters, taking into account the width of each person's hand, then we clip both ends and I can also put a pen or pencil, so I can pass the threads underneath easily. This is how the guide threads of my bracelet are prepared.
Next, I took the purple thread and folded it in half, passing it under the guide threads and made a simple knot and thus the threads for knitting on both sides are linked.
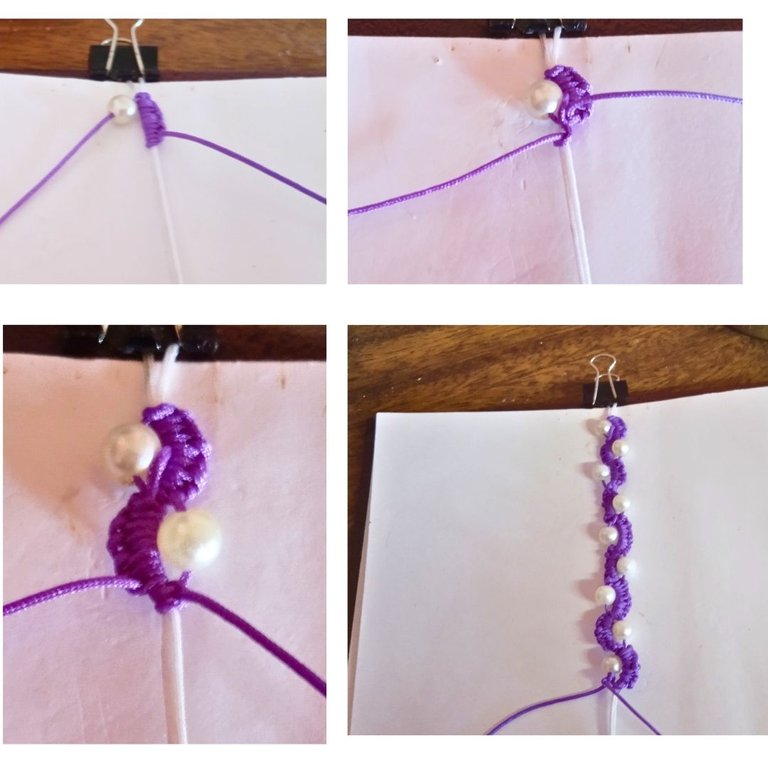
Tomamos el hilo morado de la derecha y pasamos por debajo de los dos hilos blancos y se realizan 12 nudos simples, de forma tal que el cierre del nudo quede para la parte de afuera e introducimos una perla blanca por el lado de la izquierda y amarramos al final de los 12 nudos y con ayuda del dedo colocamos los nudos en forma de un semicirculo alrededor de la perla, luego repetimos el mismo prosedimiento pero los nudos ahora serán del lado izquierdo y la perla del lado derecho y así sucesivamente hasta colocar las 10 perlas, por lo cinco serian del lado izquierdo y cinco del lado derecho.
We take the purple thread on the right and pass under the two white threads and make 12 simple knots, so that the closure of the knot is on the outside and we introduce a white pearl on the left side and We tie at the end of the 12 knots and with the help of our finger we place the knots in the shape of a semicircle around the pearl, then we repeat the same procedure but the knots will now be on the left side and the pearl on the right side and so on until we place the 10 pearls, so five would be on the left side and five on the right side.
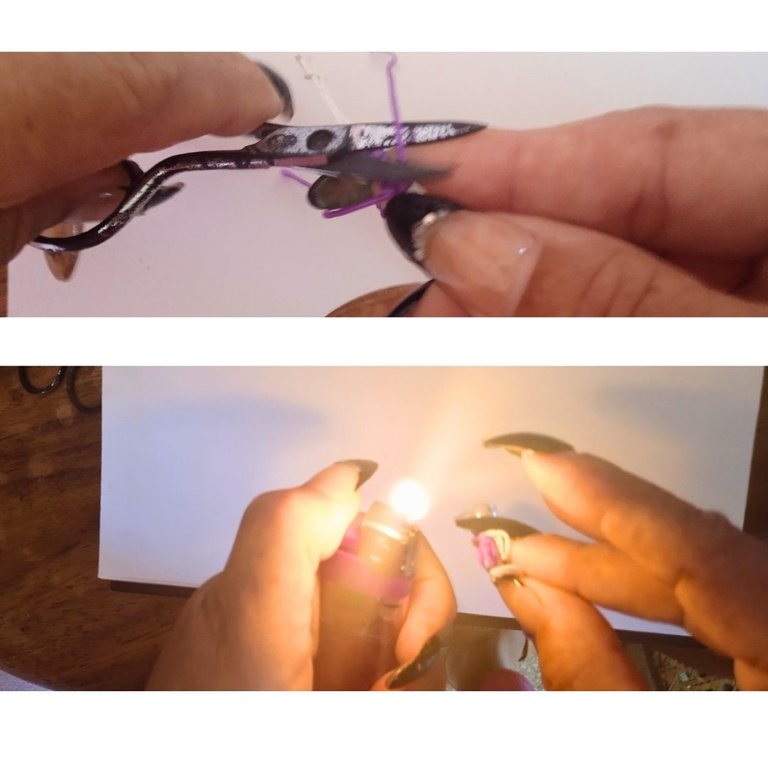
Luego pasamos a recortar con ayuda de la tijera todos los hilos sobrantes y con la Fosforera sellamos los últimos puntos, este es un paso muy importante porque si no queda bien sellado, en pocos días se empezará a destejer la pulsera y si das mucho calor puedes quemar la pulsera, por lo que este es un paso que lleva mucha precisión.
Then we proceed to trim all the excess threads with the help of scissors and with the Fosforera we seal the last stitches, this is a very important step because if it is not sealed well, in a few days the bracelet will begin to unweave and if you get too hot you can burn the bracelet, so this is a step that requires a lot of precision.
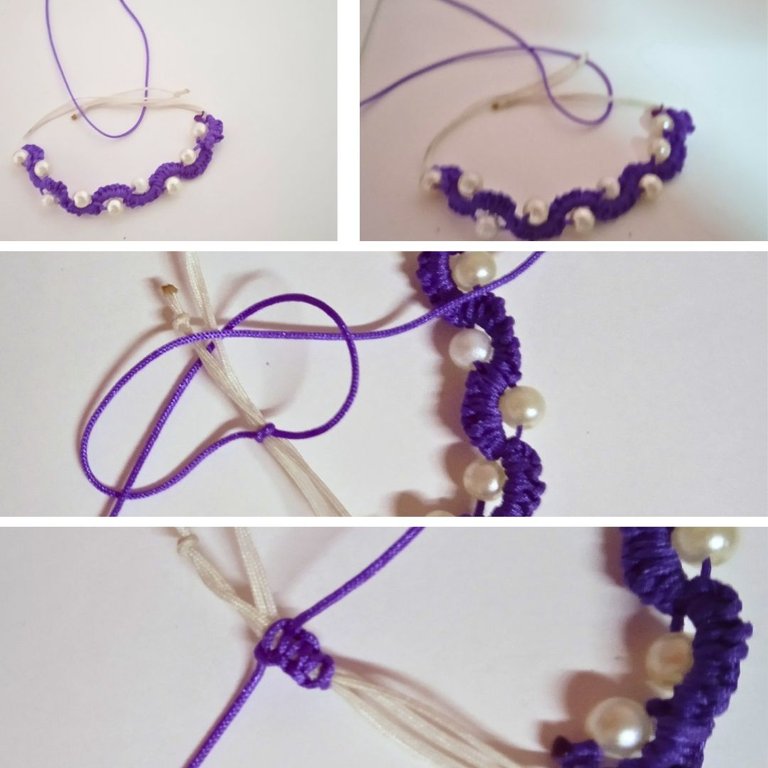
Finalmente vamos a realizar el cierre, para hacerlo ponemos los dos extremos de la pulsa uno encima del otro y pasamos el hilo morado de 75 cm por debajo para empezar a realizar cinco o seis nudos plano o punto de macrame, donde pasamos el extremo derecho morado por encima de los hilos blanco haciendo la forma de una argolla y con el otro extremo morado, pasamos por debajo de los hilos blanco y lo sacamos por el otro lado donde se formó la argolla y ajustamos y aquí tenemos nuestro primer punto y así realizamos el cierre de la pulsera ya que este nudo permite que los hilos del medio se deslice para ambos lados.
Finally we are going to make the closure, to do so we put the two ends of the pulse one on top of the other and pass the 75 cm purple thread underneath to start making five or six flat knots or macrame stitch, where we pass the right end purple above the white threads making the shape of a ring and with the other purple end, we pass under the white threads and we take it out on the other side where the ring was formed and we adjust and here we have our first point and thus we make the closure of the bracelet since this knot allows the middle threads to slide to both sides.
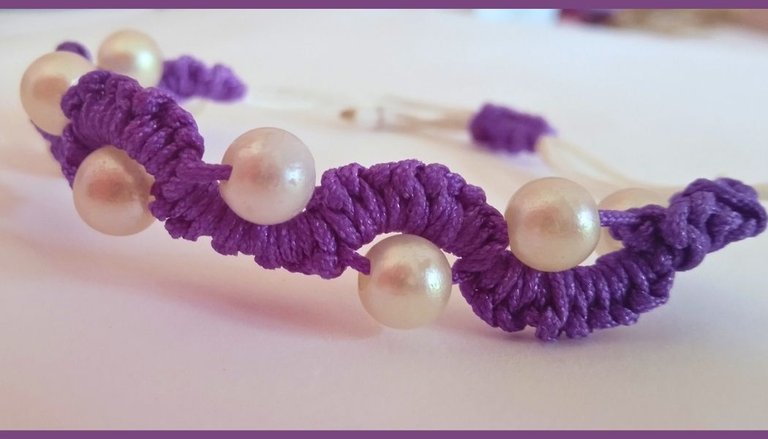
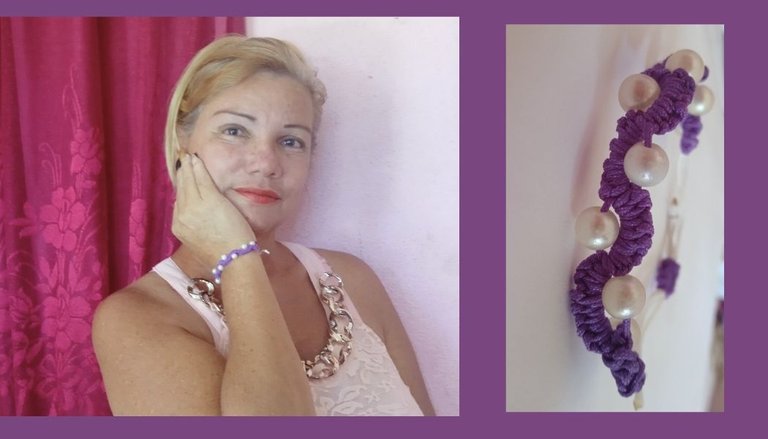
Y este es el resultado final de mi trabajo espero que les guste tanto como a mí y si te decides hacerla verás que sencillo es, pero con un resultado muy gratificante que te ayudará alegrarte el día. Por eso les deseo un lindo y feliz día para todos.
And this is the final result of my work, I hope you like it as much as I do and if you decide to do it you will see how simple it is, but with a very rewarding result that will help you brighten your day. That's why I wish you all a nice and happy day.
The photos were taking by me with my pnone and editated with
CANVA
Las fotos fueron tomadas por mi teléfono y editadas en
canva
Translated by Deepl.com
Traducido por Deepl.com
The photos were taking and editated with
CANVA
Las fotos fueron tomadas y editadas en
canva
Translated by Deepl.com


