🦜 ¡Hola, querida comunidad de HoloZing! Espero que estén pasando un gran día hoy.
Hoy comparto con ustedes mi tercer Fan Art del juego y esta vez he decidido hacer a una de mis criaturas favoritas, la cual es Chirple. En esta ocasión me decidí por hacer algo diferente de mi estilo, como dije en un post anterior, estoy aprendiendo de técnicas diferentes y es qué, aunque tenga un estilo de dibujo definido, también es bueno aprender de más técnicas y dejar volar la imaginación, digamos que salir un poco de mi zona de confort.
La técnica que voy a usar es el Pixel Art. Hace un par de días me descargué una aplicación llamada Libresprite y empecé haciendo un par de dibujos supersencillos, los cuales también animé. Pero justo hoy decidí probar y hacer a Chirple en este estilo de dibujo, ya que soy fan de Pokémon y el estilo pixelado me encanta. Decidí probar y hacerlo en este estilo. Debo aclarar que soy muy principiante en esto, por lo cual habrá muchos errores, pero aun así puse todo mi esfuerzo y creo que la animación salió decente jaja.
Así que sin nada más que decir, los dejo con el paso a paso.
- 🦜 Hello, dear HoloZing community! I hope you are having a great day today.
- Today I share with you my third Fan Art of the game and this time I decided to do one of my favorite creatures, which is Chirple. This time I decided to do something different from my style, as I said in a previous post, I'm learning different techniques and that's why, although I have a defined drawing style, it's also good to learn more techniques and let my imagination fly, let's say to get out of my comfort zone a little bit.
- The technique I'm going to use is Pixel Art. A couple of days ago I downloaded an application called Libresprite and I started making a couple of super simple drawings, which I also animated. But just today I decided to try and make Chirple in this style of drawing, since I'm a Pokémon fan and I love the pixel style. I decided to try and do it in this style. I must clarify that I'm very beginner in this, so there will be many mistakes, but I still put all my effort and I think the animation came out decent haha.
- So without anything else to say, I leave you with the step by step.

PROCESO | PROCESS
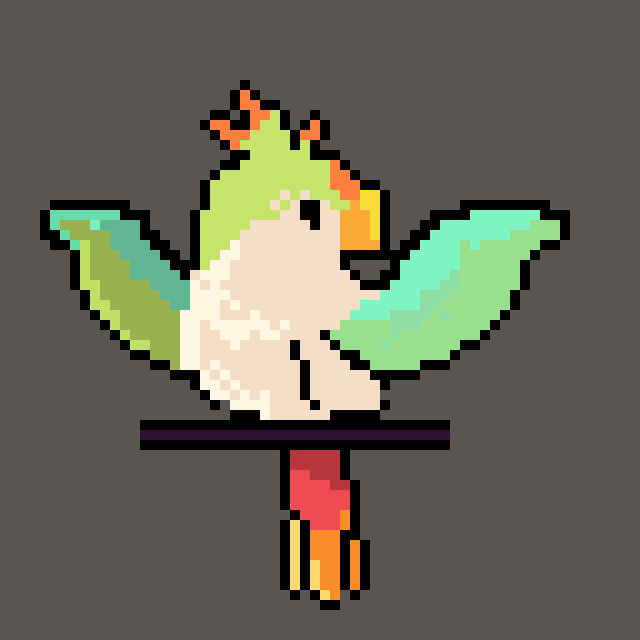
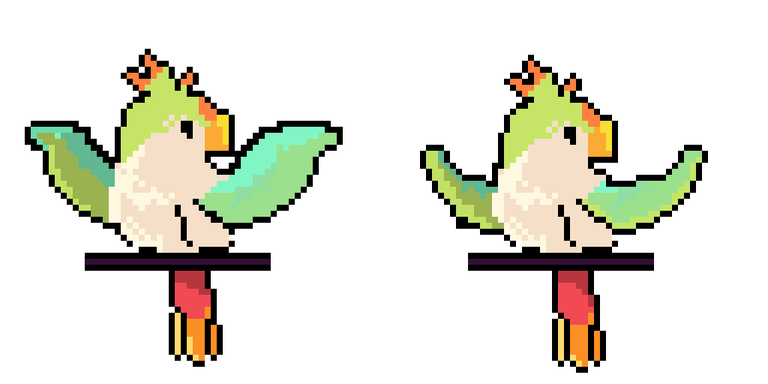
Lo primero que hice fue hacer el contorno del personaje, dado que el área de trabajo son píxeles tuve que reducir su forma original y omitir bastantes detalles, hice una silueta simple, pero que funciona. Luego le agregué una especie de soporte para que no estuviera flotando y por último le agregué las alas en una capa diferente.
Esta aplicación me permite dibujar por capas, lo cual es bueno porque a la hora de animar te facilita bastante las cosas, por eso dibuje las alas en capas diferentes, ya que estás son las que tendían el movimiento.
- The first thing I did was to make the outline of the character, since the working area is pixels I had to reduce its original shape and omit a lot of details, I made a simple silhouette, but it works. Then I added a kind of support so he wasn't floating and finally I added the wings in a different layer.
- This application allows me to draw by layers, which is good because when it comes to animate it makes things much easier, that's why I drew the wings in different layers, since these are the ones that tend the movement.
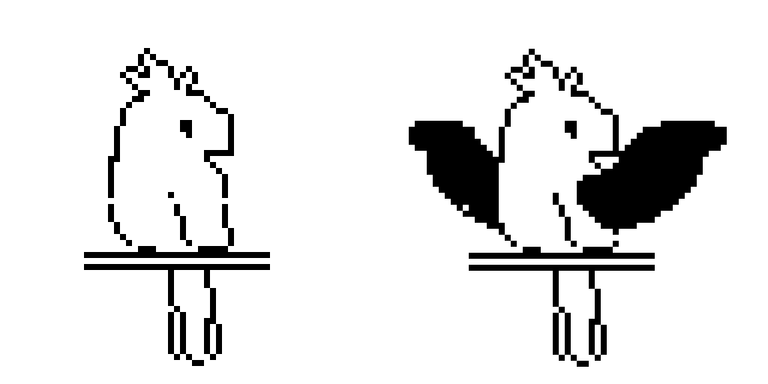
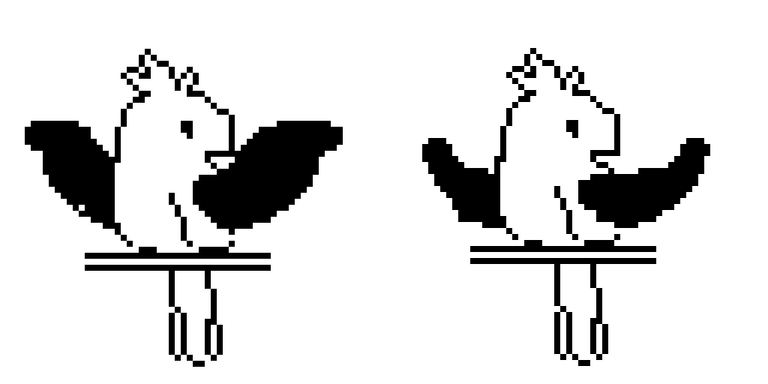
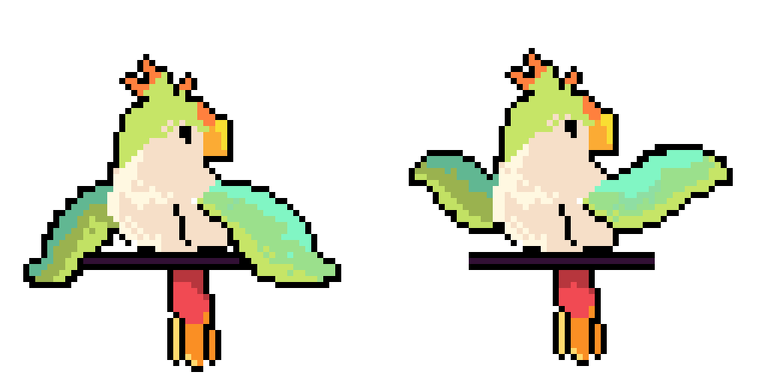
Una vez que tenía al personaje separado por capas, empecé a realizar la animación, para ello baje un poco la cabeza del personaje usando la herramienta de selección y después dibujé las alas un poco rectas, pero con caída, dado que las puntas de las alas tienen que estar más altas que la base, para dar esa sensación de que están bajando.
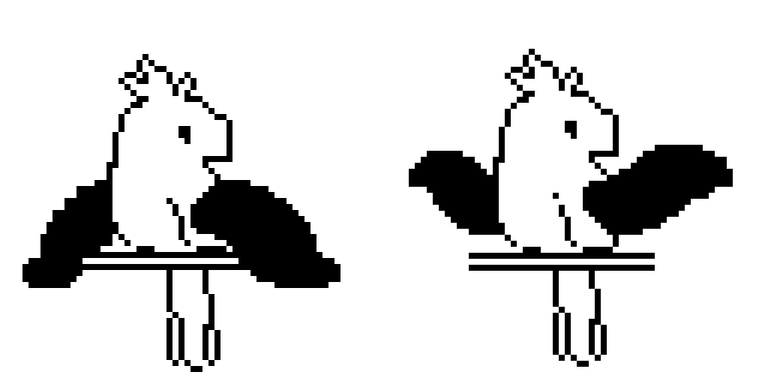
Después hice las alas totalmente abajo, para ello solo utilicé la primera forma de las alas y las puse boca abajo jaja. Por último, hice las alas en reposo, son muy similares a la primera forma, pero estas están un poco más abajo.
- Once I had the character separated by layers, I started to make the animation, for this I lowered a little the head of the character using the selection tool and then I drew the wings a little straight, but with fall, since the tips of the wings have to be higher than the base, to give that sensation that they are falling.
- Then I did the wings all the way down, for this I just used the first wing shape and put them upside down haha. Finally, I made the wings at rest, they are very similar to the first shape, but these are a little lower.
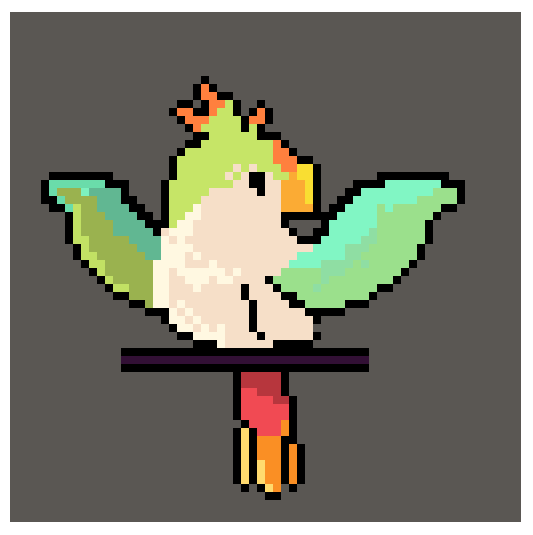
Cómo último le apliqué el color al dibujo, esto lo hice en una capa diferente, también utilicé los colores originales de Chirple y lo único "difícil" es que tuve que colorear las alas fotograma por fotograma. Para finalizar le agregué un fondo gris porque ese fondo blanco me parecía muy simple.
En futuras versiones haré el fondo un poco más detallado, aún estoy aprendiendo a hacer esto, así que no me quise complicar tanto.
- Lastly I applied the color to the drawing, I did it in a different layer, I also used the original Chirple colors and the only "difficult" thing is that I had to color the wings frame by frame. To finish I added a gray background because that white background seemed too simple.
- In future versions I will make the background a little more detailed, I'm still learning how to do this, so I didn't want to complicate it so much.
🦜 ¡Y listo! Eso es todo amigos, espero que les haya gustado mi animación de Chirple, aún estoy aprendiendo, así que cualquier sugerencia es más que bienvenida.
¡Un saludo! Y nos vemos en el próximo post.
- 🦜 And that's it! That's all folks, I hope you liked my Chirple animation, I'm still learning, so any suggestions are more than welcome.
- Best regards! And see you in the next post.
Instagram:@artbygover

Separador y Fotos editadas en Canva
Photos edited in Canva