
It's been a while since I last posted content related to electronic equipment repair and maintenance. Although it is one of my favorite hobbies, I can't spend my life trying to rescue everything I see. Although the above statement is true and carries a lot of weight, every now and then I do spend time on a component that I know, once repaired, will have an extended life.
That said, I send a big hello to everyone in the community who reads me and invite you to join me in witnessing how I got my hands on this PC cabinet fan, which, after a bit of work, is now 100% working and with a new look. Let's start...
Ya ha pasado algo de tiempo desde la última vez que publiqué contenido relacionado con reparaciones y mantenimiento de equipos electrónicos. Aunque es uno de mis pasatiempos favoritos, no puedo pasar la vida intentando rescatar todo lo que veo. A pesar de que la afirmación anterior es cierta y tiene mucho peso, de vez en cuando dedico tiempo a algún componente que sé que, una vez reparado, tendrá una vida útil prolongada.
Dicho esto, les envío un enorme saludo a todos los integrantes de la comunidad que me leen y los invito a acompañarme para que sean testigos de cómo llegó a mis manos este ventilador de gabinete de PC, el cual, tras un poco de trabajo, quedó funcionando al 100% y con una nueva imagen. Comencemos…


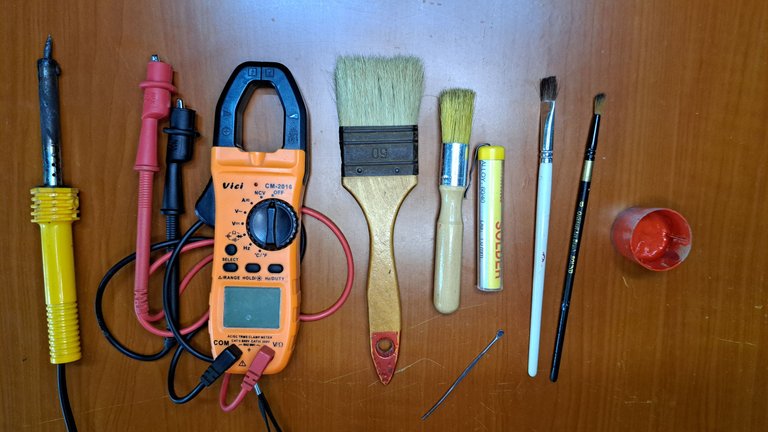
Tools // Herramientas
| ✔️ Soldering iron | ✔️ Cautín |
| ✔️ Solder with flux | ✔️ Estaño con fundente |
| ✔️ Voltmeter | ✔️ Voltímetro |
| ✔️ Brushes with non-conductive bristles | ✔️ Brochas con pelos no conductivos |
| ✔️ Paint Brushes | ✔️ Pinceles para pintar |
| ✔️ Red paint | ✔️ Pintura roja |
| ✔️ Extraction tool | ✔️ Herramienta de extracción |
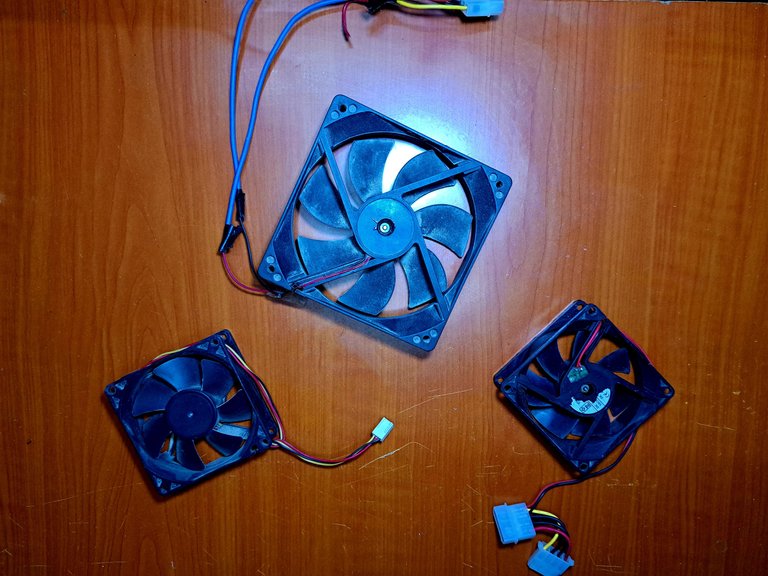
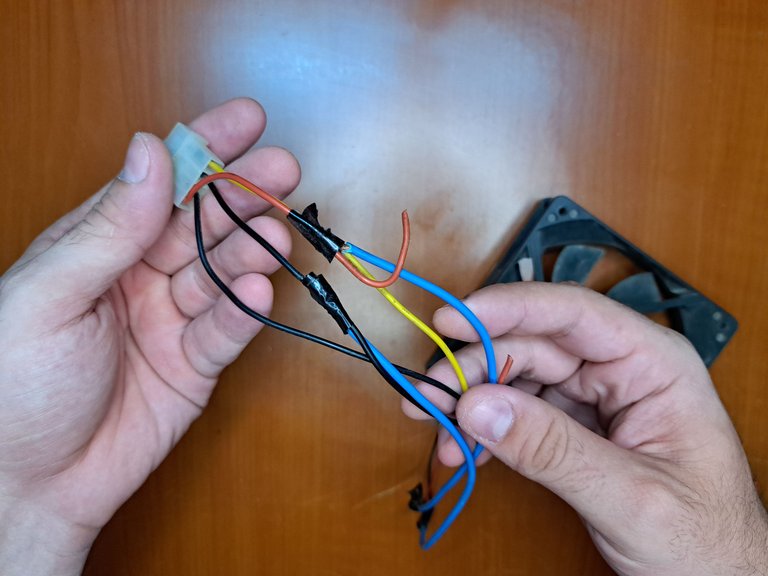
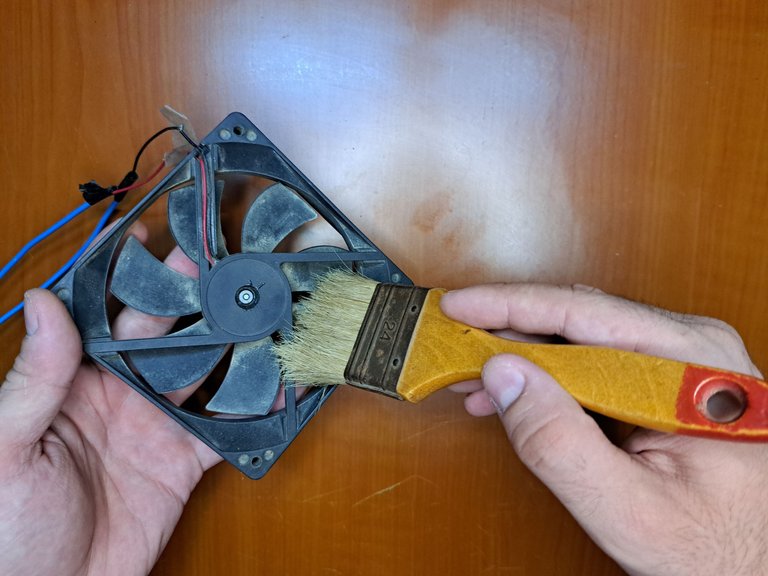
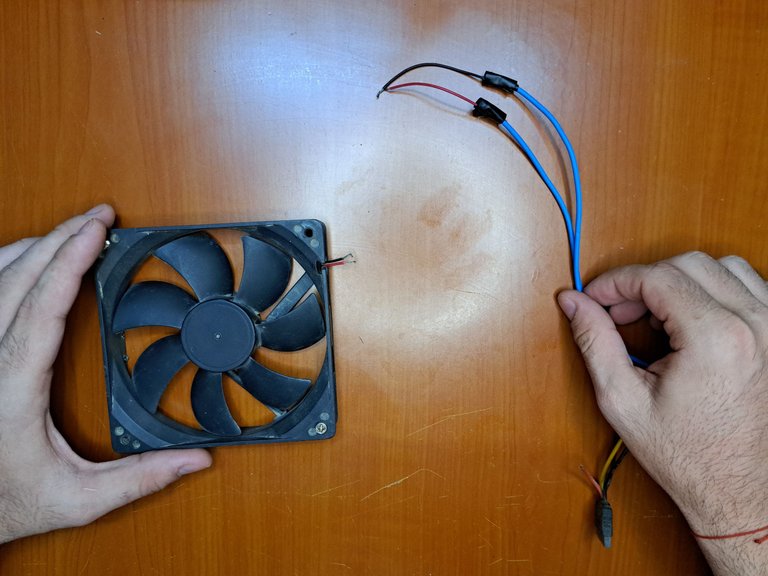
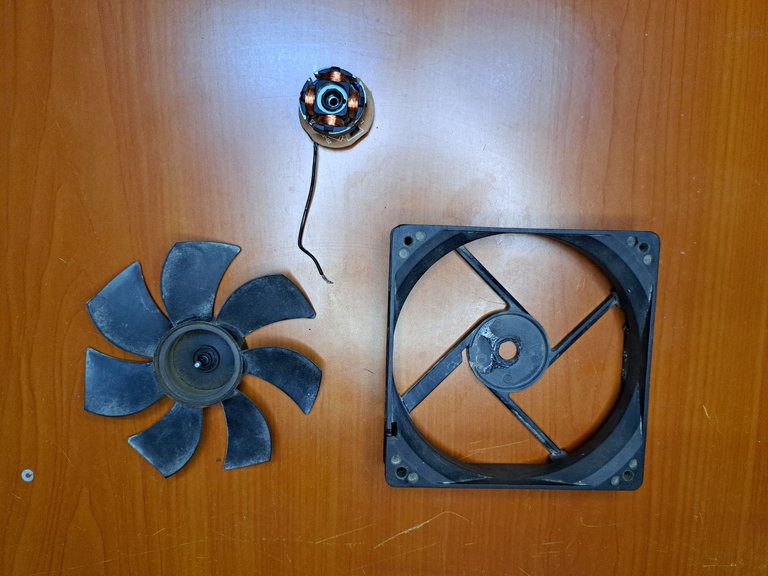
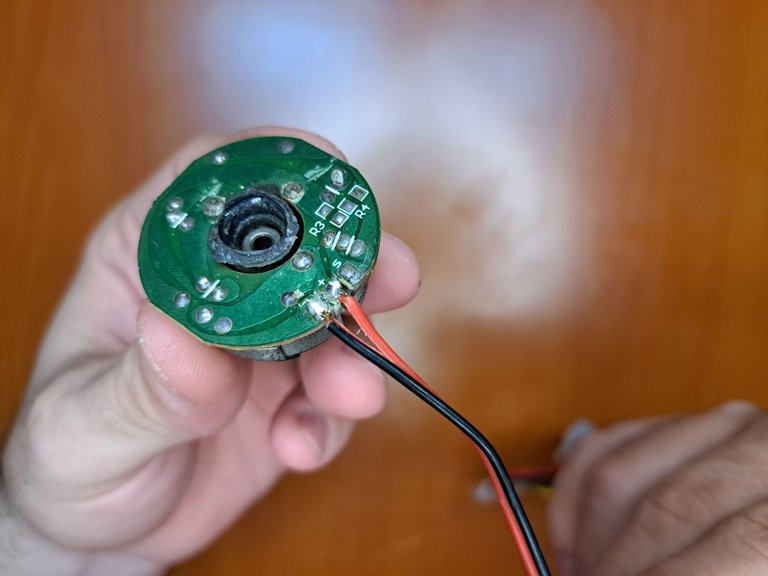
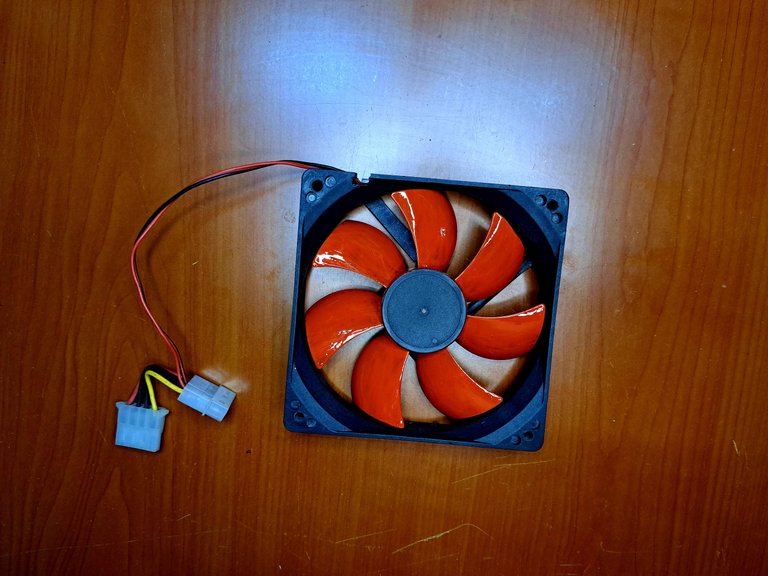
As I was telling you, I got my hands on a fan that is used in desktop computer cabinets. The first thing I did was to check it little by little, since at first sight I doubted that it really worked. As you can see in the pictures, they tried to lengthen the power connectors on the fan and did it in the most shoddy and dangerous way possible. Luckily, I had other fans that were smaller in size, but had two-way power sockets compatible with the big one.
Como les contaba, a mis manos llegó un ventilador que es utilizado en gabinetes de ordenadores de escritorio. Lo primero que hice fue revisarlo poco a poco, ya que a simple vista dudaba de que realmente funcionara. Como pueden ver en las imágenes, al ventilador le intentaron alargar los conectores de alimentación y lo hicieron de la manera más chapucera y peligrosa posible. Por suerte, contaba con otros ventiladores de menor tamaño, pero con tomas de alimentación de dos vías compatibles con el grande.
 |  |
 |  |  |
 |  |
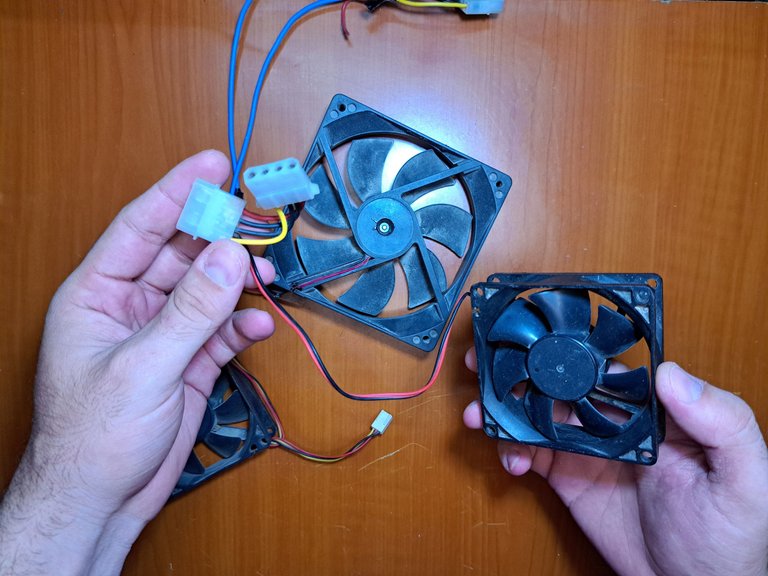
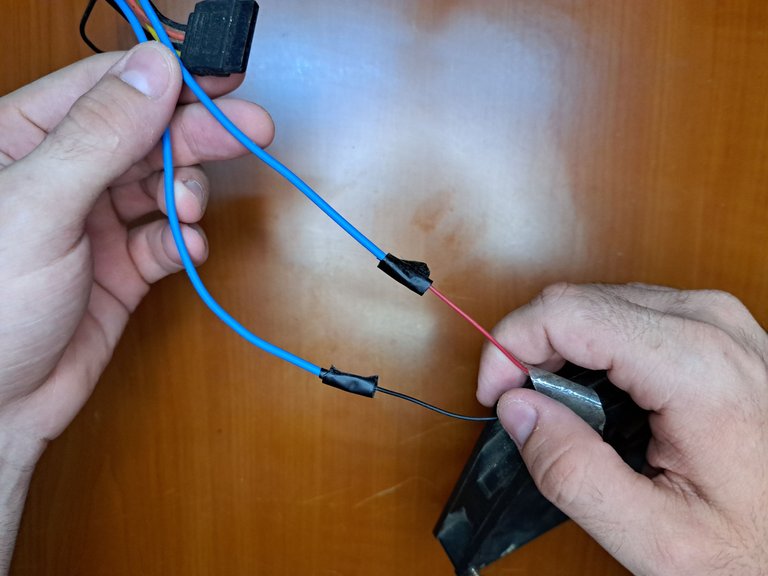
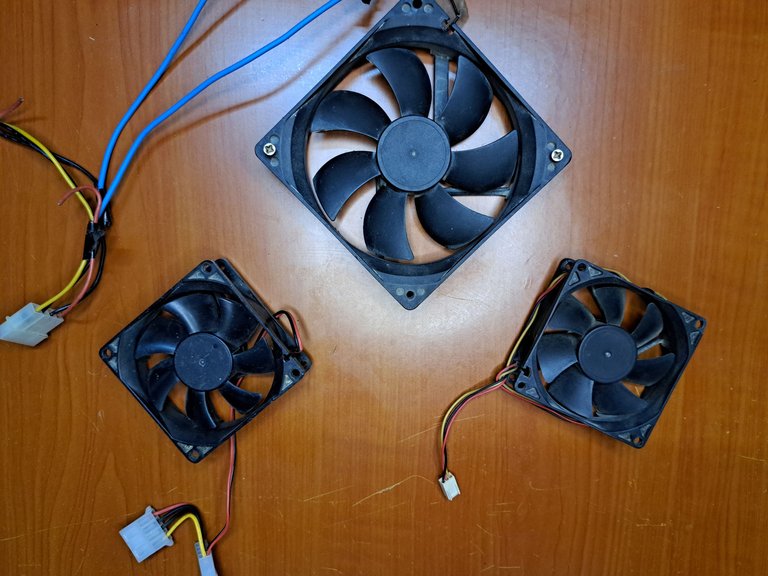
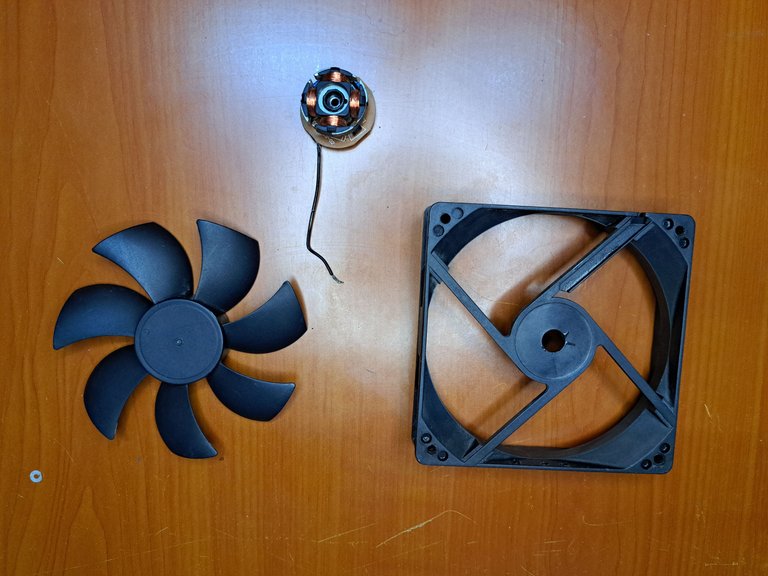
Once the main problem was identified, my next step was to apply a superficial cleaning for hygienic reasons and to make my work a little easier. Once the fans were cleaned, I checked the sockets of the small fans, since they were not the same, and I chose the wide socket that is connected to the power supply, since the other one is connected directly to the motherboard.
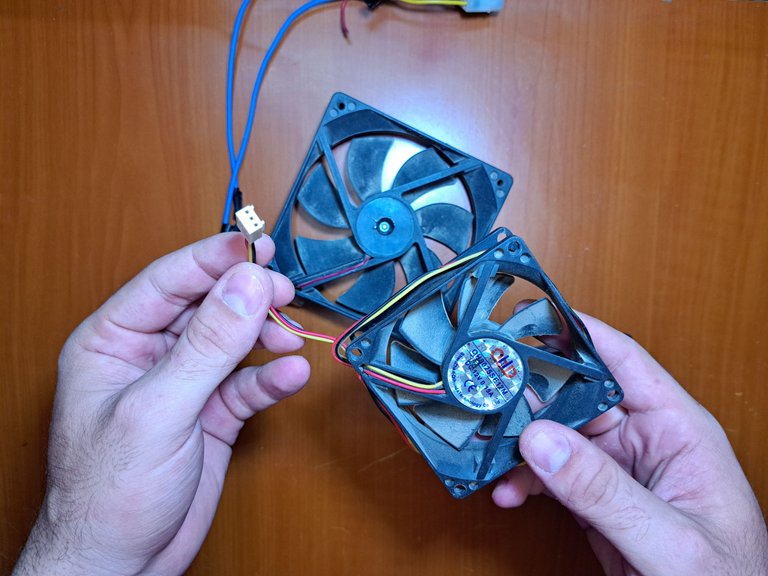
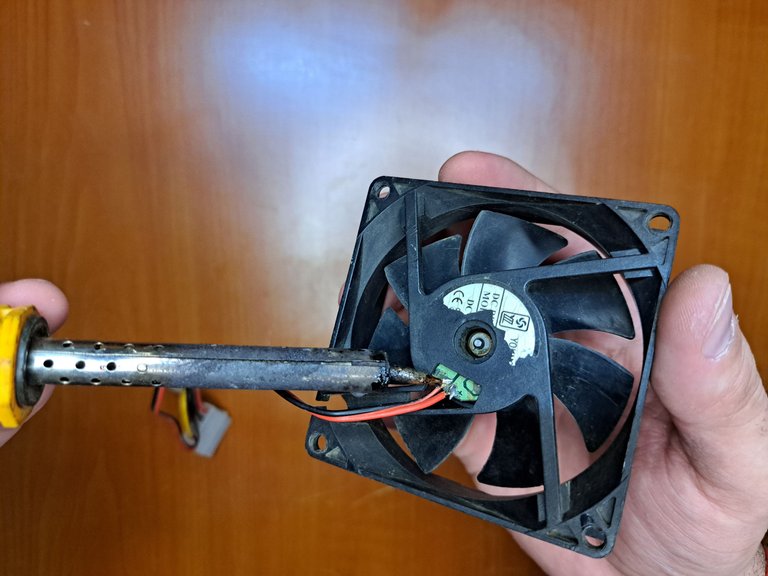
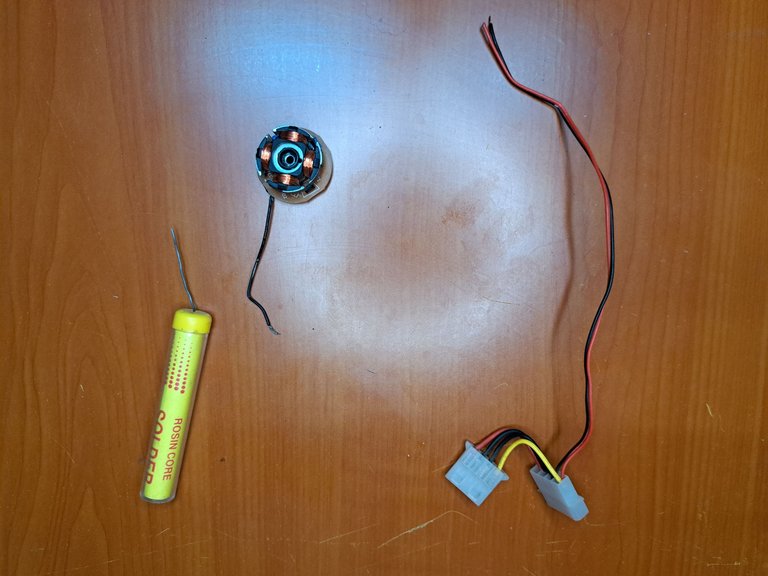
Next, using a soldering iron and flux, I removed the power supply lines from the small fan and then connected them to the big one.
Una vez identificado el problema principal, mi siguiente paso fue aplicar una limpieza superficial por cuestiones de higiene y para facilitarme un poco el trabajo. Una vez limpios los ventiladores, revisé las tomas de los pequeños, ya que no eran iguales, y escogí la toma ancha que va conectada a la fuente de alimentación, pues el otro se conecta directamente a la placa madre.
Seguidamente, empleando un cautín y fundente, retiro las líneas de alimentación del ventilador pequeño para luego conectarlas al grande.
 |  |
 |  |
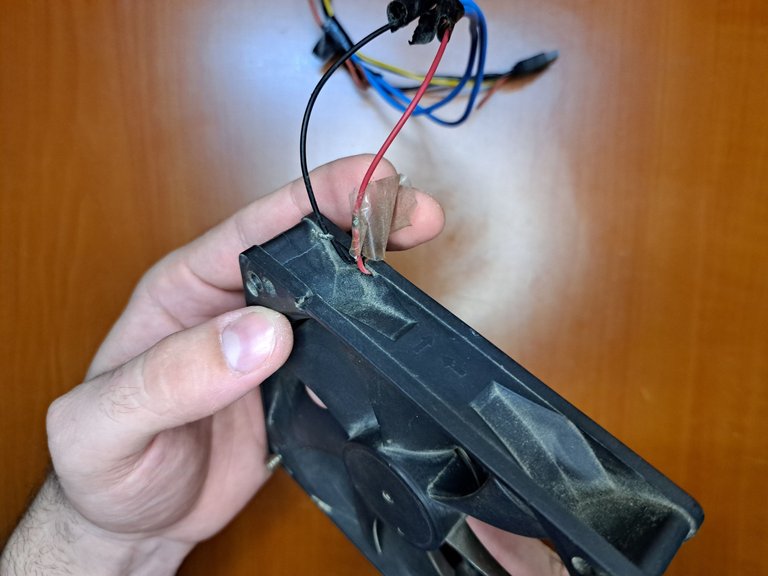
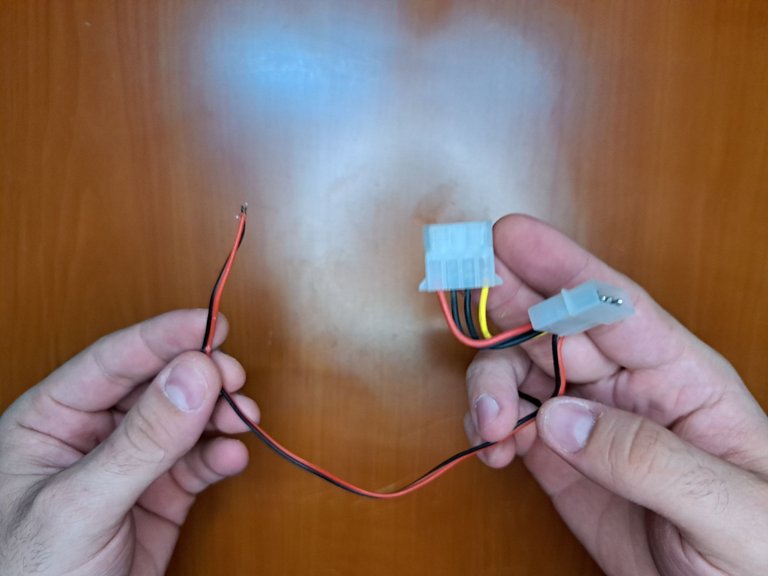
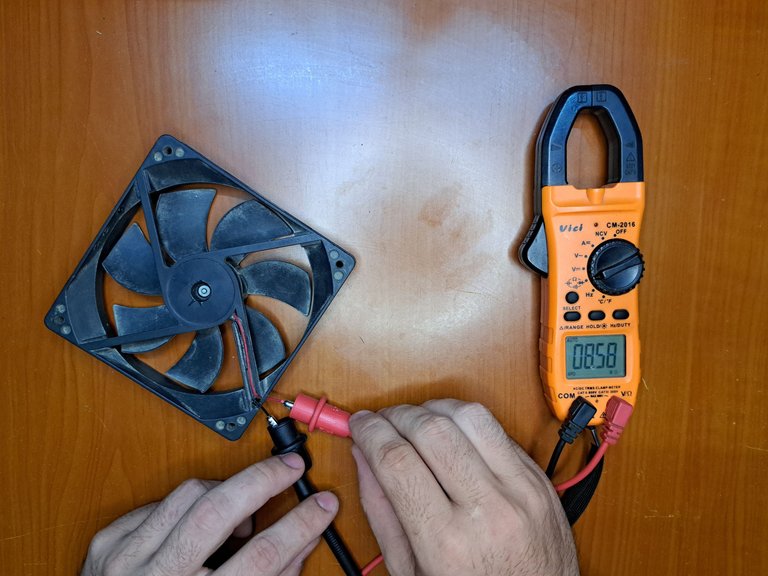
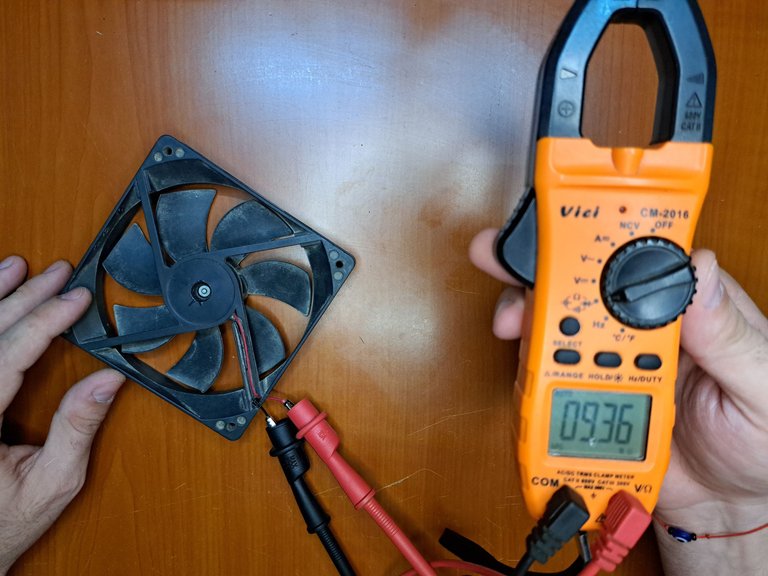
With the power cable ready to be inserted, I proceed to remove the tangle of artfully joined wires and proceed to make some continuity measurements, since, as I said earlier, I wasn't sure if the motor was working. Luckily, it didn't mark short circuit and there didn't seem to be any anomalies. In case anyone is wondering, I decided not to connect the fan with the cable it came with, since I didn't want to risk a short circuit burning out the motor.
Con el cable de alimentación listo para ser insertado, procedo a quitar el enredo de cables unidos por arte y procedo a hacer algunas mediciones de continuidad, ya que, como dije anteriormente, no estaba seguro de si el motor funcionaba. Por suerte, no marcaba cortocircuito y no parecía haber ninguna anomalía. Por si alguien se lo pregunta, decidí no conectar el ventilador con el cable que traía, puesto que no quise arriesgarme a que un cortocircuito quemara el motor.
 |  |
 |  |
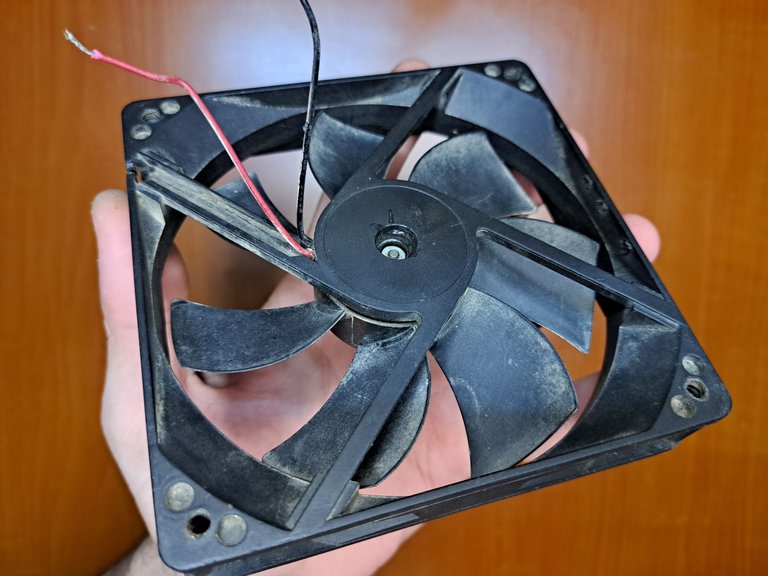
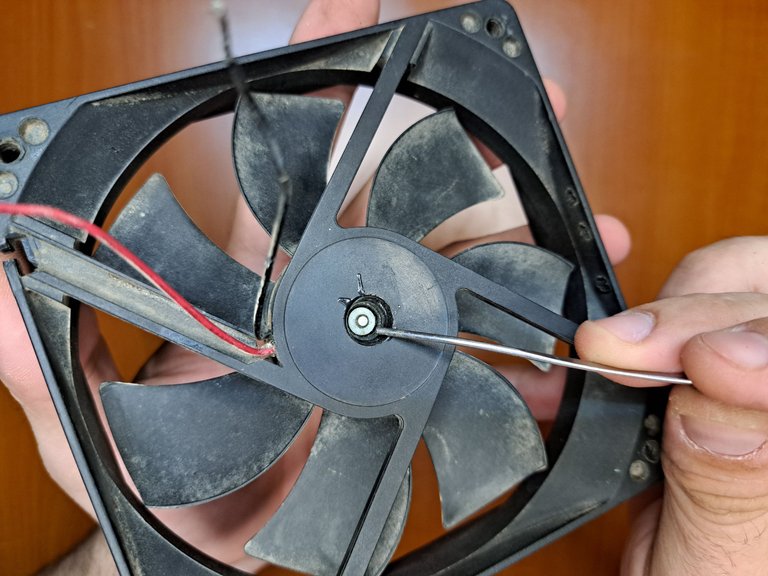
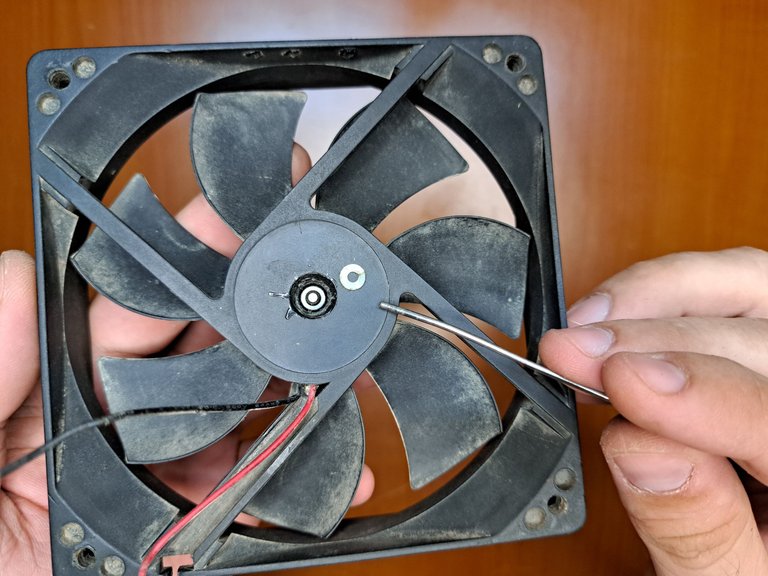
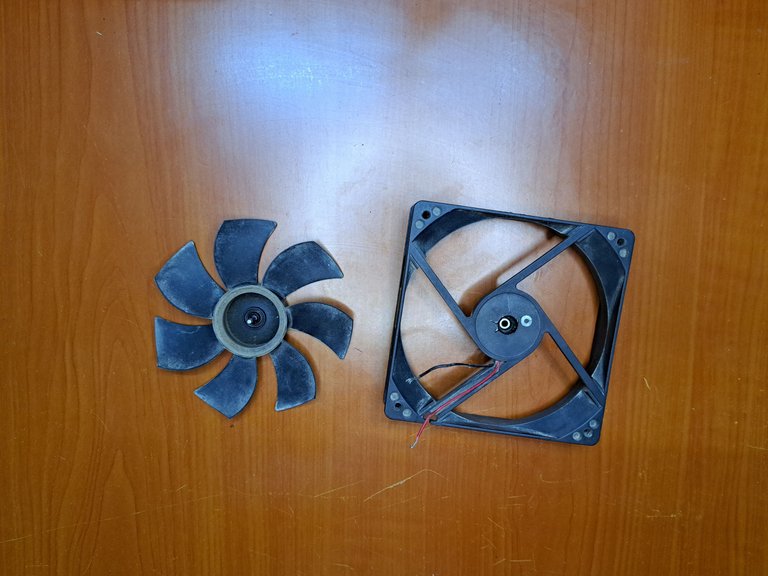
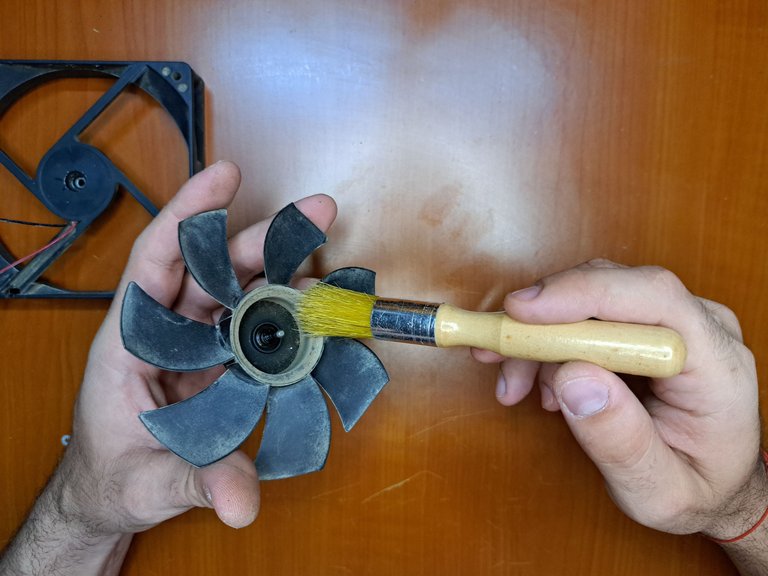
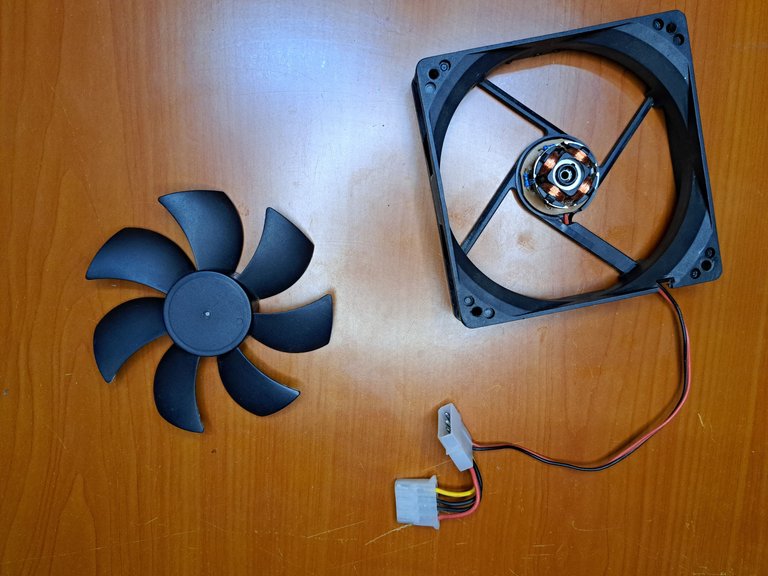
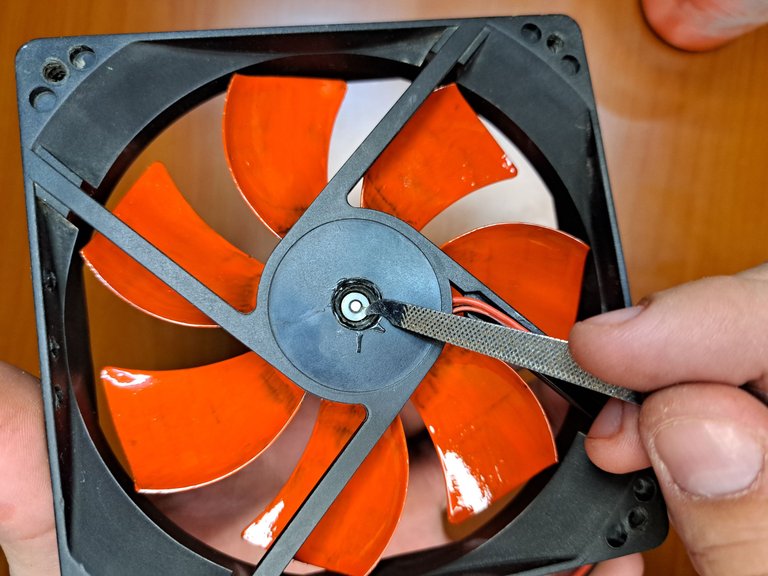
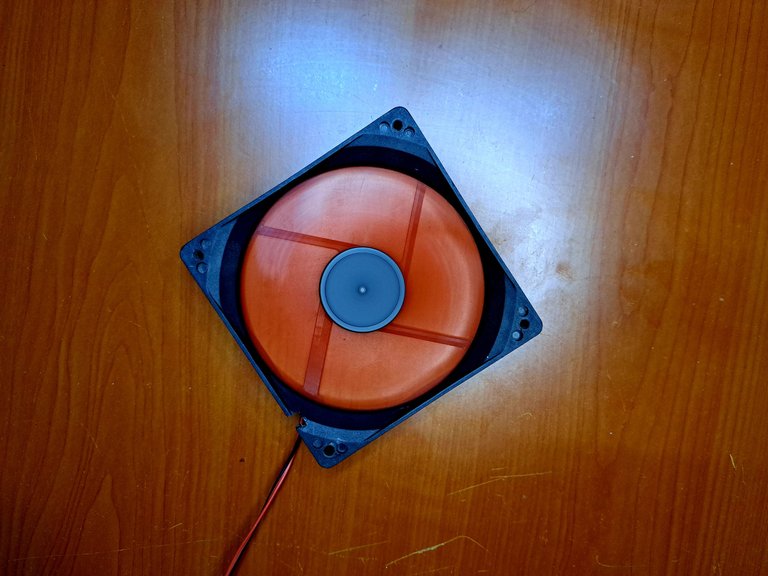
The next step was to disassemble the fan completely, having two main objectives. First, I had to access the junction between the motor plate and the vent line, which was not visible to the naked eye. Secondly, I wanted to give it a thorough cleaning, since, as you can see, the fan was still very dirty.
Using a thin metal tool, I was able to remove the plastic ring that holds the center of the fan blade shaft and subsequently I was able to remove the motor from the housing. Although I must admit that a small accident occurred in this part, which I will fix later with acrylic glue.
El siguiente paso consistía en desarmar el ventilador por completo, teniendo dos objetivos principales. En primer lugar, debía que acceder a la unión entre la placa del motor y la línea de ventilación, la cual no estaba a simple vista. En segundo lugar, quería darle una limpieza en profundidad, ya que, como pueden ver, el ventilador aún seguía muy sucio.
Utilizando una herramienta metálica fina, pude retirar la anilla plástica que sujeta el centro del eje de las aspas del ventilador y posteriormente pude retirar el motor del armazón. Aunque debo admitir que en esta parte ocurrió un pequeño accidente, que más adelante solucionaré con pegamento acrílico.
 |  |
 |  |  |
 |  |
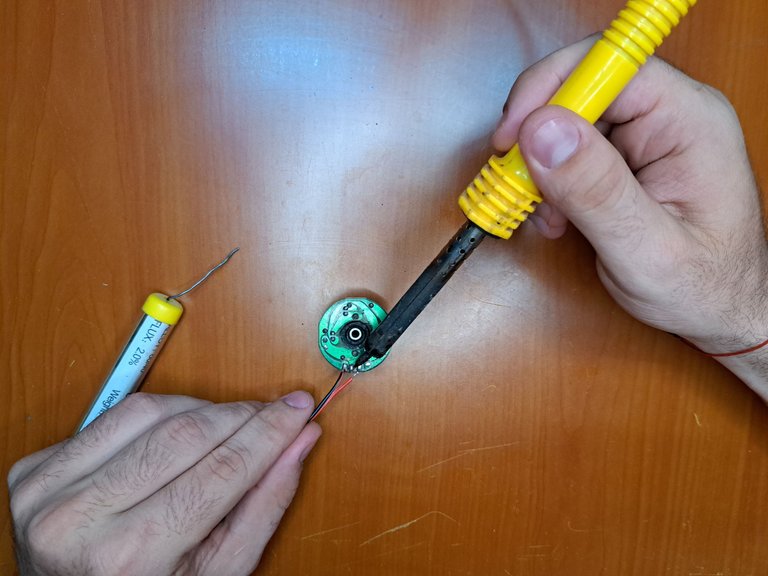
While the blades and housing were being finished off, I took the motor to replace the remnants of the old power line with the new one. When I made sure the soldering was as good as possible, I reassembled the motor into the housing using some acrylic glue and a little graphite powder.
Mientras las aspas y la carcaza se terminaban de sacar, tomé el motor para reemplazar los restos de la antigua línea de alimentación por la nueva. Cuando me aseguré de que la soldadura hubiese quedado lo mejor posible, reensamblé el motor en la carcaza utilizando un poco de pegamento acrílico y un poco de polvo de grafito.
 |  |
 |  |
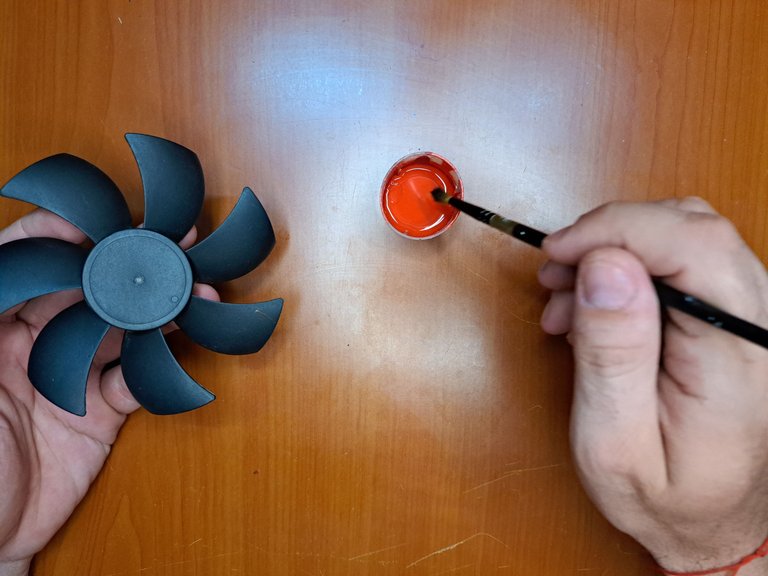
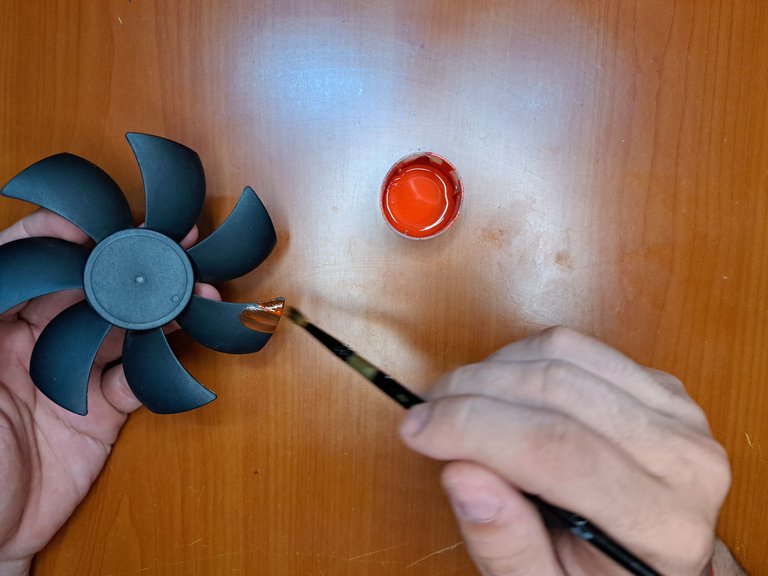
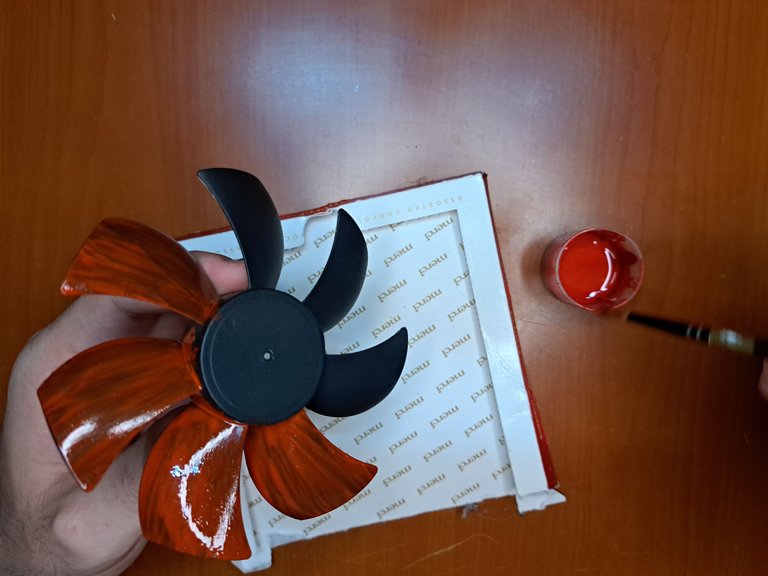
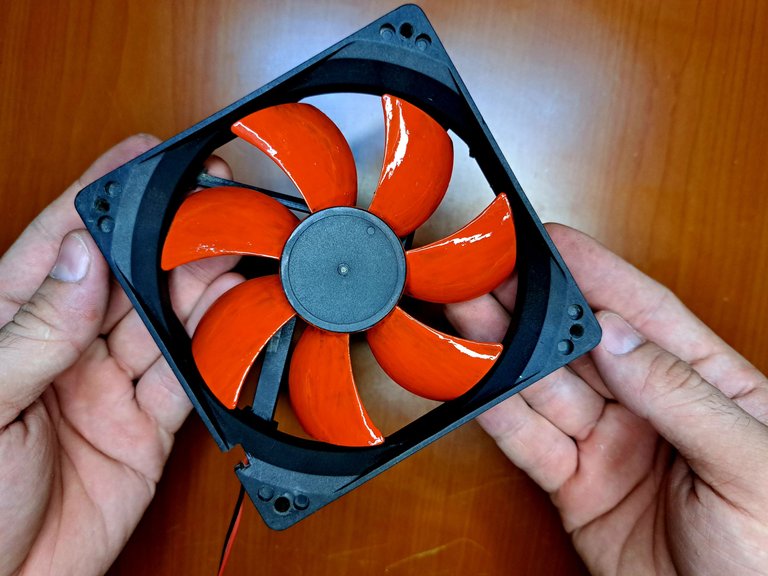
Everything was ready to assemble the fan and test it to see if it finally worked. The thing is that I didn't really like that black plastic color that caught my attention and, besides, I recently saw in a video that if you paint only the blades of a fan, when they rotate they will create a nice pattern.
So I got down to work and took some white paint to apply it using my homemade airbrush, but due to life, the airbrush compressor did not want to work and I had no choice but to use a fine bristle brush that does not leave marks on the paint.
Ya todo estaba listo para armar el ventilador y probarlo para ver si por fin funcionaba. La cuestión es que no me terminaba de gustar ese color negro plástico que llamaba la atención y, además, hace poco vi en un video que si le pintas solo las aspas a un ventilador, al girar estas crearán un bonito patrón.
Así que me puse manos a la obra y tomé un poco de pintura blanca para aplicarla utilizando mi aerógrafo casero, pero por cuestiones de la vida, el compresor del aerógrafo no quiso funcionar y no me quedó más opción que utilizar un pincel de cerdas finas que no deja marcas en la pintura.
 |  |  |
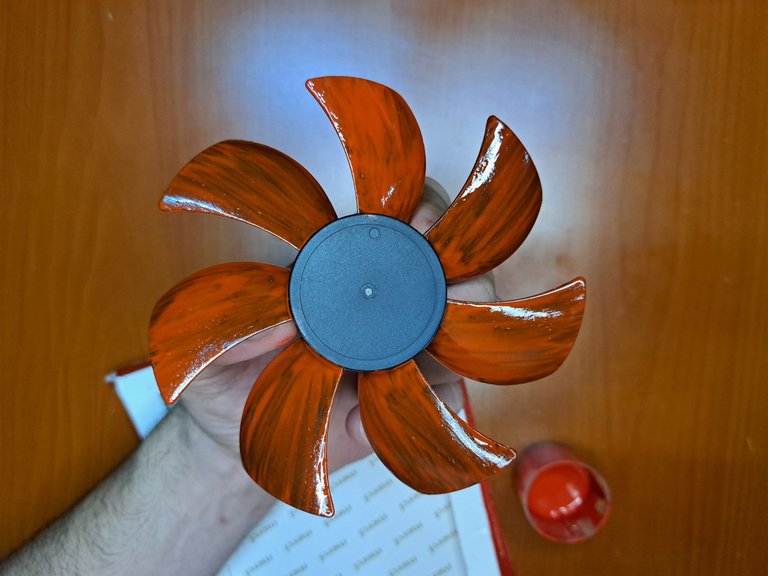 |  |
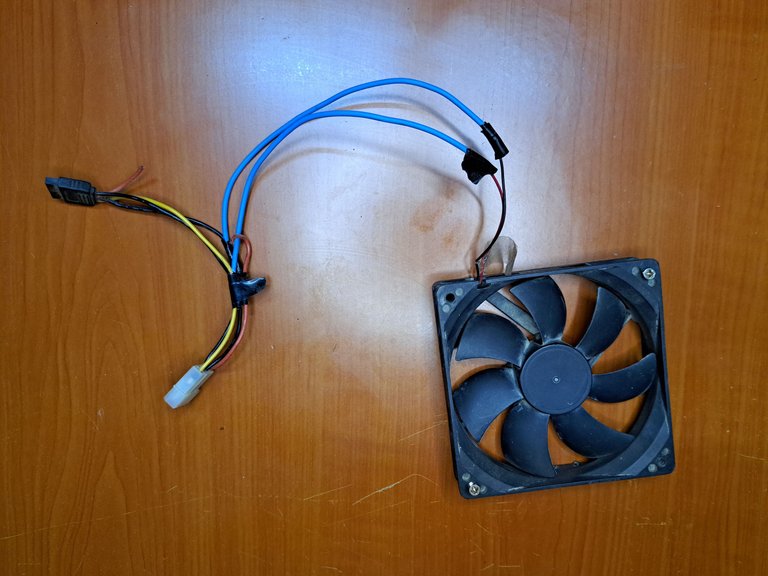
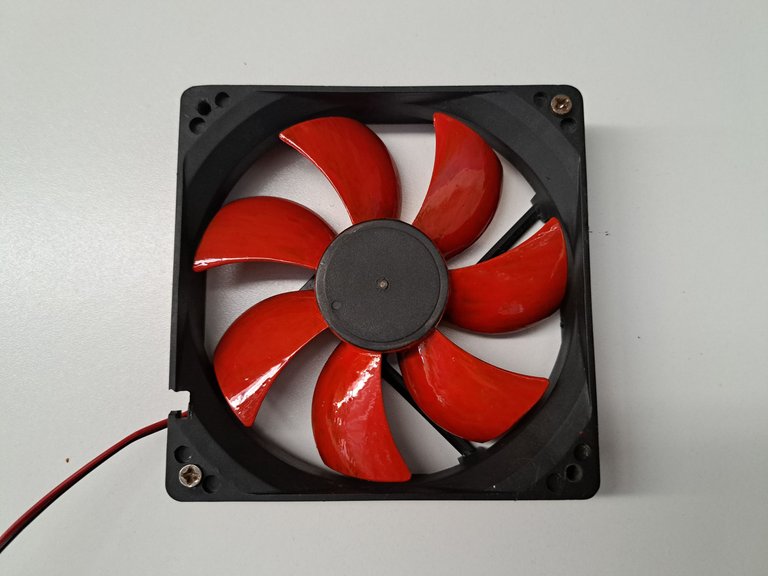
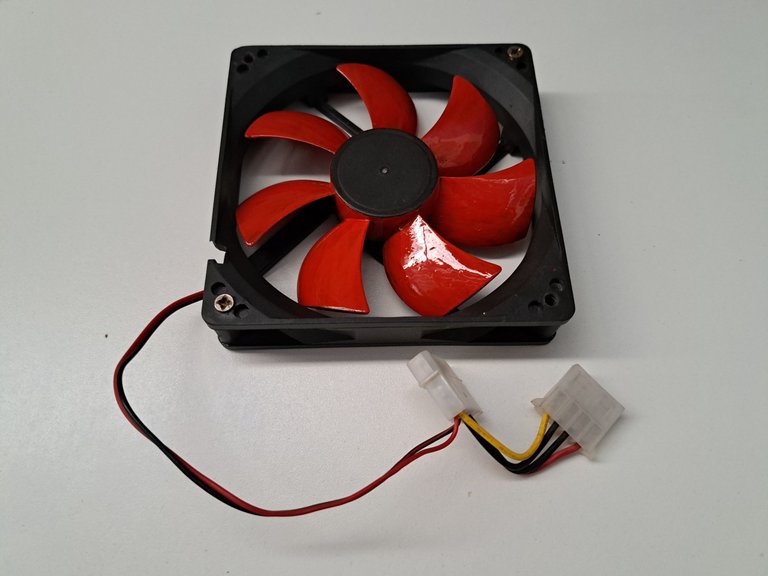
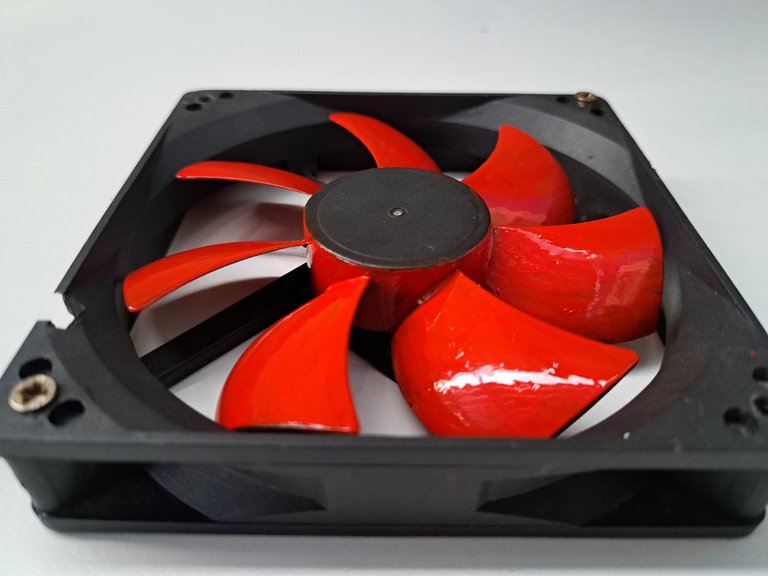
After waiting for the paint to dry a bit, I reassembled the fan and was ready to test it. I looked for an old power supply that I used as a test source and prayed that all this work was not in vain and the fan would work.
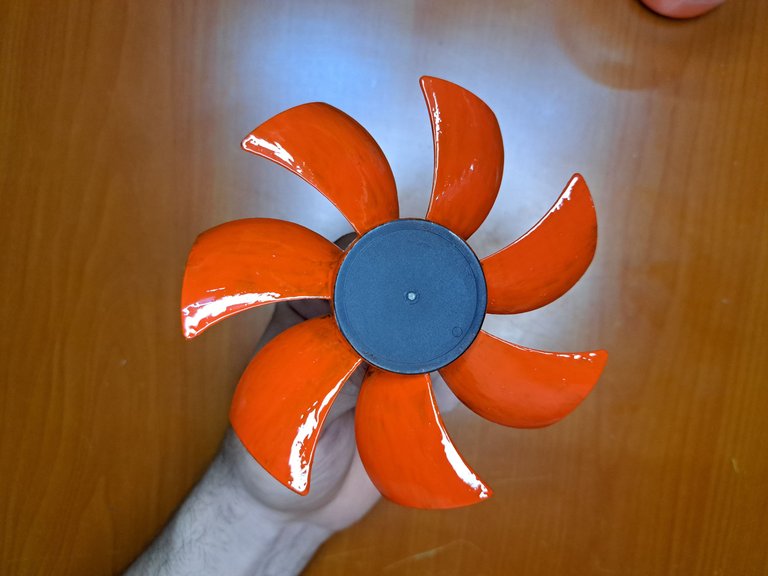
And so it did, at first contact it turned on, made no noise and there was no vibration, which indicated that everything was in place. I was also surprised by how well the red blades look when the fan is spinning, it looks as if they are being illuminated by a red LED.
Después de esperar a que la pintura secase un poco, reensamblé el ventilador y ya estaba listo para probarlo. Busqué una antigua fuente de alimentación que utilicé como fuente de prueba y recé para que todo este trabajo no fuese en vano y el ventilador funcionara.
Y así fue, al primer contacto encendió, no hacía ruido y no había vibraciones, lo cual indicaba que todo había quedado en su lugar. También quedé sorprendido por lo bien que se ven las aspas rojas cuando el ventilador está girando, parece como si estuviesen siendo iluminadas por un LED rojo.
 |  |
 |  |
This way we reach the end of this tutorial, which more than a tutorial, was a kind of narrated anecdote where I shared with you step by step the procedure to repair and recondition a PC cabinet fan. I hope you enjoyed the process and I encourage you to leave me in the comments your opinion about the publication. I wish you the best of days.
De esta forma llegamos al final de este tutorial, que más que un tutorial, fue una especie de anécdota narrada donde les compartí paso a paso el procedimiento para reparar y reacondicionar un ventilador de gabinete de PC. Espero que hayan disfrutado del proceso y los animo a que me dejen en los comentarios su parecer respecto a la publicación. Les deseo la mejor de las jornadas.
⚜️ Finished Work // Trabajo Terminado ⚜️
 |  |
 |  |
Thank you very much for reading my post. If you liked it, please leave a comment and consider following me so you don't miss my next posts. I'd love to know your opinion and your thoughts about the topic I discussed in this post, see you in the next one!
Credits and Resources // Créditos y Recursos
Translated by DeepL
Images captured with my Samsung Galaxy A53


Posted Using InLeo Alpha
