Greetings friends who love handicrafts! I welcome you once again to my Bricolaje DC Workshop. This time I would like to make a personalized DIY stamp for my cards.
I really like to attach a business card of my brand to each of the crafts I make, especially if they are intended for sale. Last year I made the my business card design, as my work is mostly DIY, I like to make them by hand.
The problem with making them by hand is that they don't all look the same and it takes me a lot of time to make a set of 10 cards, for example. To save time, I wanted to make a stamp that would give me a guide for the drawing and the letters and finally make it easier to highlight the details with a marker. Join me as I show you how I made this DIY stamp.
¡Saludos amigos amantes de las artes manuales! Les doy la bienvenida una vez más a mi Taller Bricolaje DC. En esta oportunidad me gustaría realizar un sello DIY personalizado para mis tarjetas.
Me gusta mucho colocar una tarjeta de presentación de mi marca a cada una de las manualidades que realizo, sobre todo si están destinadas a la venta. El año pasado hice el diseño de mi tarjeta de presentación, como mi trabajo es más que todo DIY, me gusta hacerlas a mano.
El problema de hacerlas manual, es que no todas quedan igual y me quita mucho tiempo hacer un conjunto de 10 tarjetas, por ejemplo. Para ahorrar tiempo, quise hacer une sello que me de la guía del dibujo y las letras y que finalmente sea más fácil remarcar los detalles con un plumón. Acompáñenme y les muestro como hice este sello DIY.
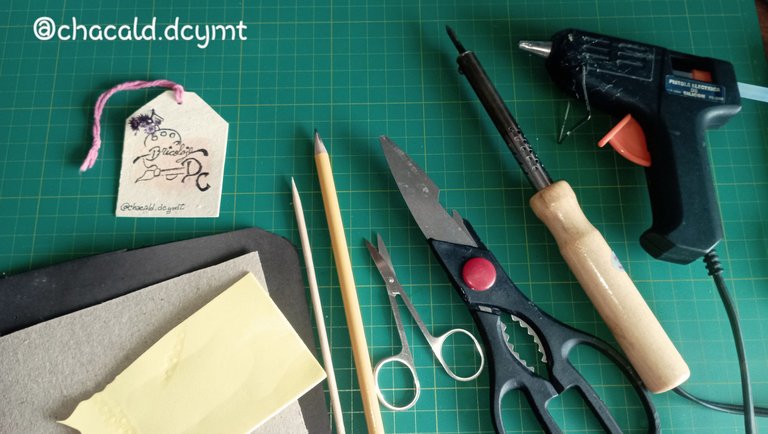
Materials:
Pieces of foamy
Large and small scissors
Skewer stick
Caution:
Silicone gun
Thick cardboard
Pencil
Sheet of tracing paper
Cardboard
Watercolor
Black gel pen with 0.5 millimeter tip
Materiales:
Trozos de foamy
Tijera grande y pequeña
Palito de brocheta
Cautín
Pistola de silicón
Cartón grueso
Lápiz
Hoja de papel vegetal (para calcar)
Cartulina
Acuarela
Bolígrafo de gel color negro punta 0.5 milímetros
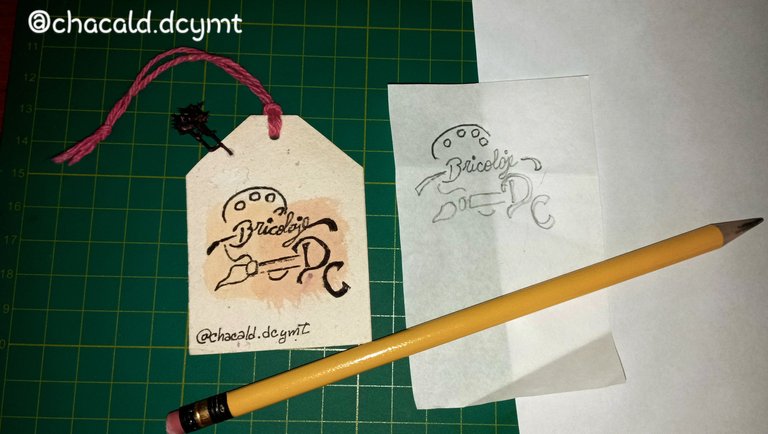
The first thing to do is to transfer the drawing and the letters from the original to the tracing paper.
Lo primero que debemos hacer es transferir el dibujo y las letras del original al papel de calcar.
 |  |
|---|
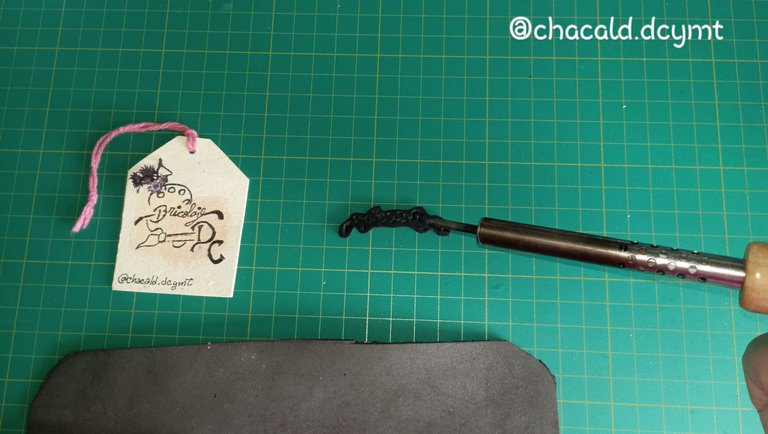
Transfer the design to the foami so that it is upside down, mirror effect. With the small scissors we are going to cut each of the pieces of the stamp, that is to say, the letters and the elements separately.
With the soldering iron we are going to mark the letters, we must be very careful not to burn the foamy too deep so that it does not break.
Transferimos el diseño al foami que quede al revés, efecto espejo. Con la tijera pequeña Vamos a cortar cada una de las piezas del sello, es decir, las letras y los elementos por separado.
Con el cautín vamos a remarcar las letras, debemos tener mucho cuidado de no quemar muy profundo el foamy para que no se rompa.
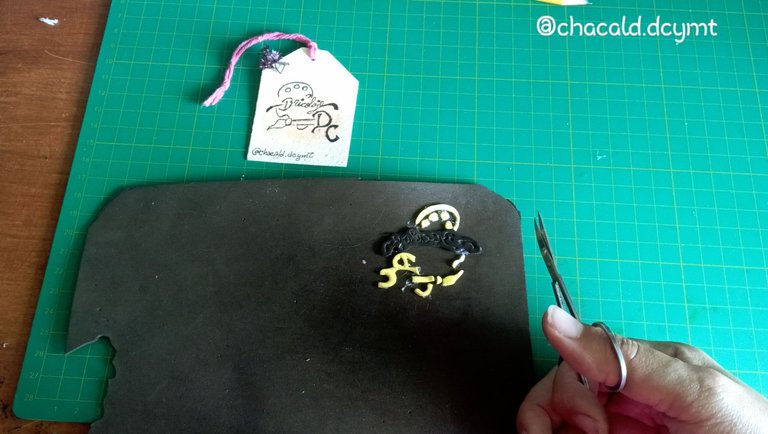
Once we have all the pieces that make up the stamp, we will take a piece of foamy and with the hot silicone gun, we glue piece by piece imitating the original design.
With the small scissors we cut out the pieces.
Una vez que tenemos todas las piezas que conforman el sello, vamos a tomar un trozo de foamy y con la pistola de silicón bien caliente, pegamos pieza por pieza imitando el diseño original.
Con la tijera pequeña recortamos.
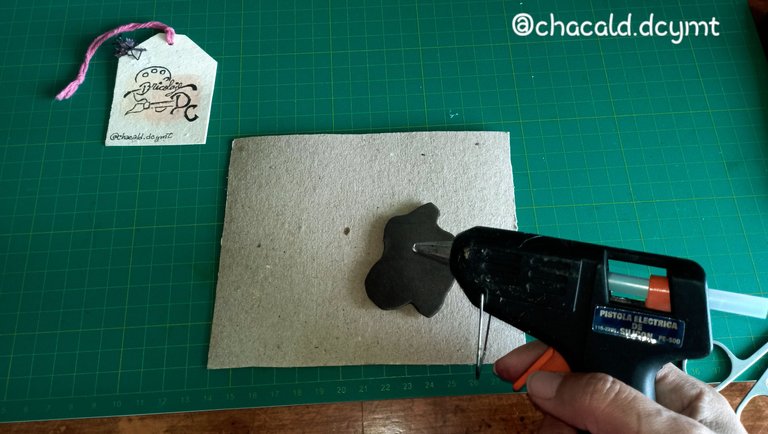
We take the cardboard, glue the stamp to give it a firm base. We can make a tab on the back of the cardboard so we can hold it at the time of placing the ink.
Tomamos el cartón, pegamos el sello para darle una base firme. Podemos hacer una pestaña por la parte posterior del cartón y así podremos sujetarlo al momento de colocar la tinta.
With the large scissors we cut the cardboard without leaving too much space to leave the stamp, this way we will not mark unnecessary edges.
Con la tijera grande cortamos el cartón sin dejar mucho espacio que sobre salga del sello, asi no se marcarán bordes innecesarios.
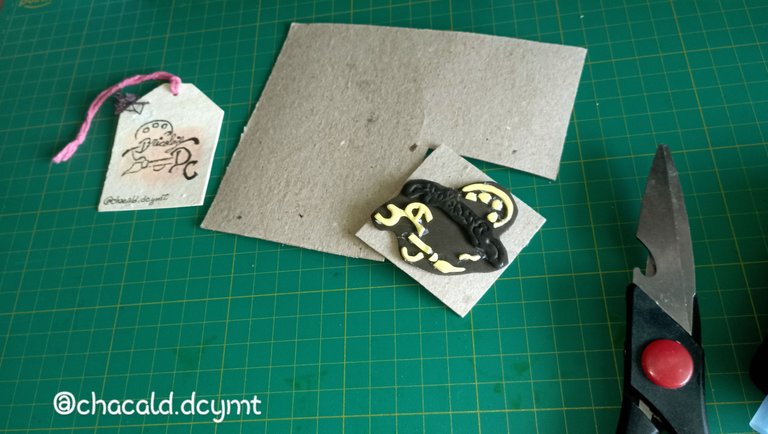
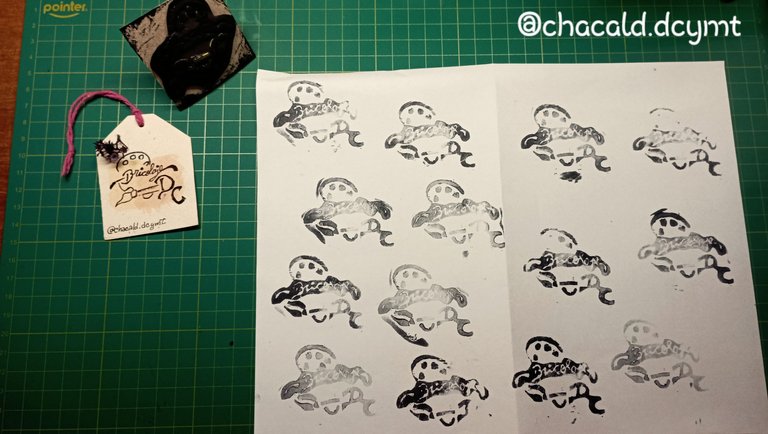
And now we have our stamp ready to stamp paper and business cards.
Y ya tenemos listo nuestro sello para estampar papel y tarjetas de presentación.
This is an economical way to print our brand stationery that we can then use for wrapping orders and of course for business cards. We can use recycled material and have several to replace in case of deterioration or loss.
I hope you like my project. I encourage you to give it a try, since nothing is better than making our DIY stamps. See you next time. Bye!
Esta es una forma económica de estampar la papelería de nuestra marca que luego podemos utilizar para envolver los pedidos y por supuesto para las tarjetas de presentación. Podemos utilizar material de reciclaje y tener varios para remplazarlo en caso de deterioro o pérdida.
Espero que les guste mi proyecto. Les recomiendo se animen a intentarlo, ya que nada es mejor que hacer nuestros sellos DIY. Nos vemos en una próxima oportunidad. Chao!

If you are not yet supporting the baton of the artisans' house, I invite you to follow this link.
Si todavía no estas apoyando el testigo de la casa de los artesanos, te invito a pasar por siguiente enlace.


Original content by the author.
Resources: App: Canva / Giphy / Inshot
📷 Redmi 10 Smartphone
Translation done with Deepl.com
✿ All Rights Reserved || © @chacald.dcymt 2024✿
💌 Discord: chacald.dcymt#3549
X: @chacald1
Reddit: chacald
_
Contenido original del autor.
Recursos: App: Canva / Giphy / Inshot
📷 Redmi 10 Smartphone
Traducido con Deepl.com
✿ Todos los Derechos Reservados || © @chacald.dcymt 2024✿
💌 Discord: chacald.dcymt#3549
X: @chacald1
Reddit: chacald