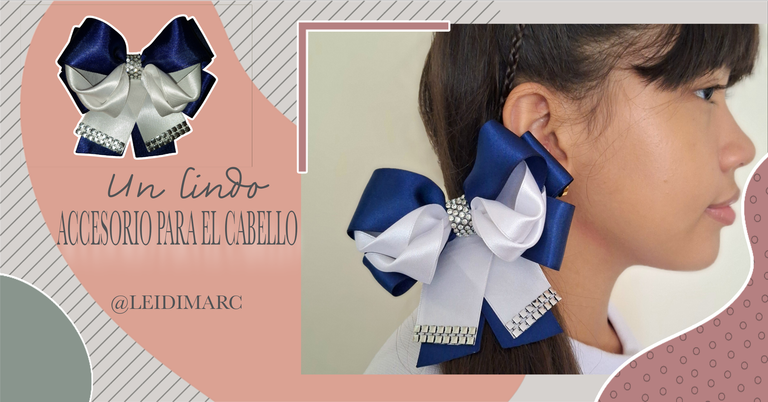
Hola, mi gente linda de @needleworkmonday, feliz inicio de semana una vez más por acá, deseándoles que tengan unos días maravillosos, que puedan seguir creando, mostrándonos tantas cosas lindas como siempre lo hacen aquí en la comunidad.
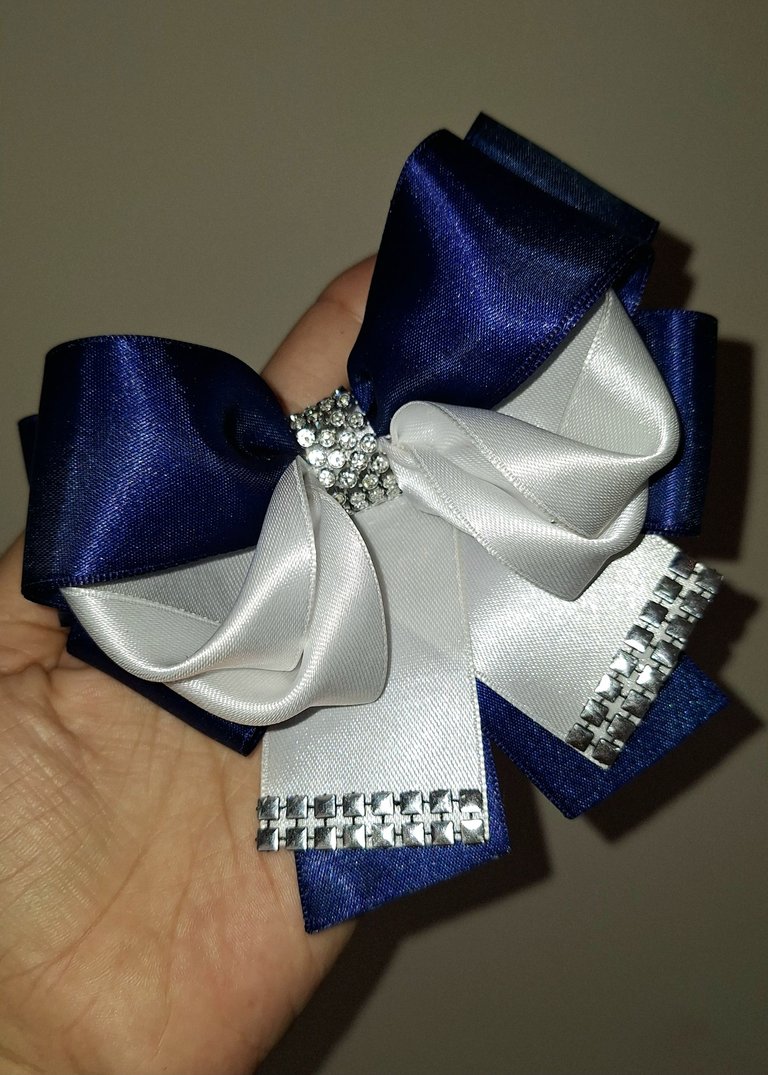
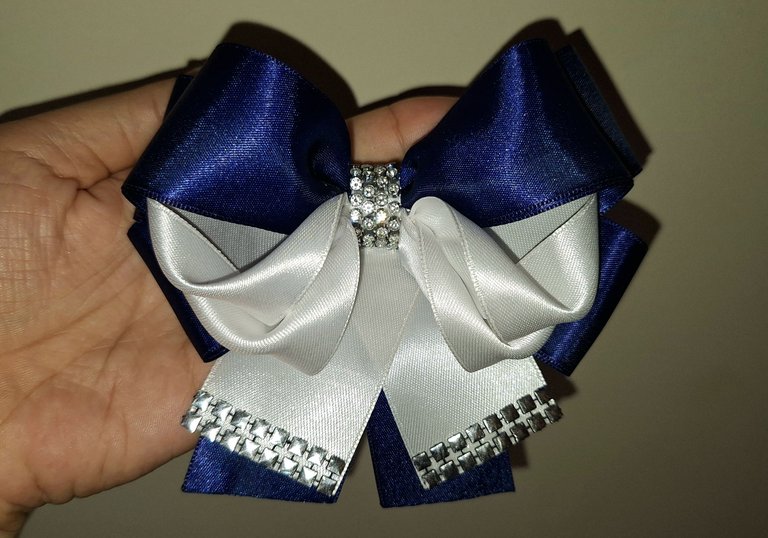
Hace días atrás estuve mostrando algunos lazos que le hice para el cabello a mis niñas Ámbar y Arianna. Hoy les voy a mostrar un lazo que estuve realizando que me pidió la abuela de mi sobrina, me dijo que le hiciera algunos lacitos con los colores del colegio que son blanco y azul marino.
Las cintas ya las tenía, sin embargo, estuve haciendo unas compras que creo que ya les mostré no sé, de algunas cositas para poder complementarlos, en este caso unos apliques plateados que tienen en el centro y en las puntas este lazo y otras cosas que compré para decorar los otros, ya que me encargó varios y hoy les voy a mostrar cómo estuve realizando este.
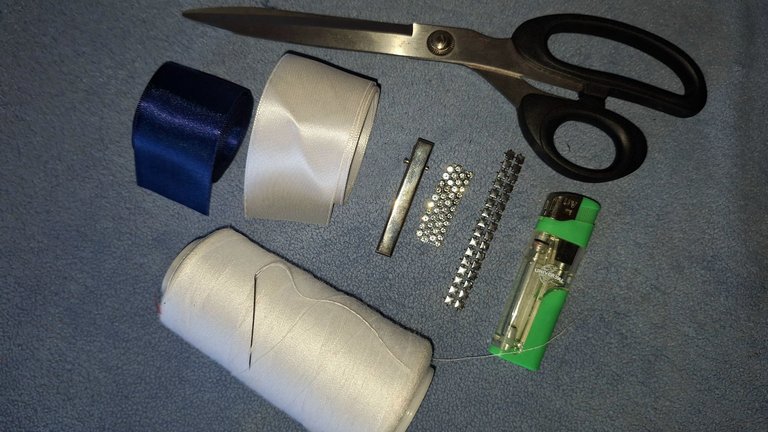
Para este lindo proyecto estuve utilizando: Cinta de raso en colores blanco y azul marino. Pinza tipo caimán. Aplicaciones en color plateado. Hilo y aguja. Silicona y tijera.
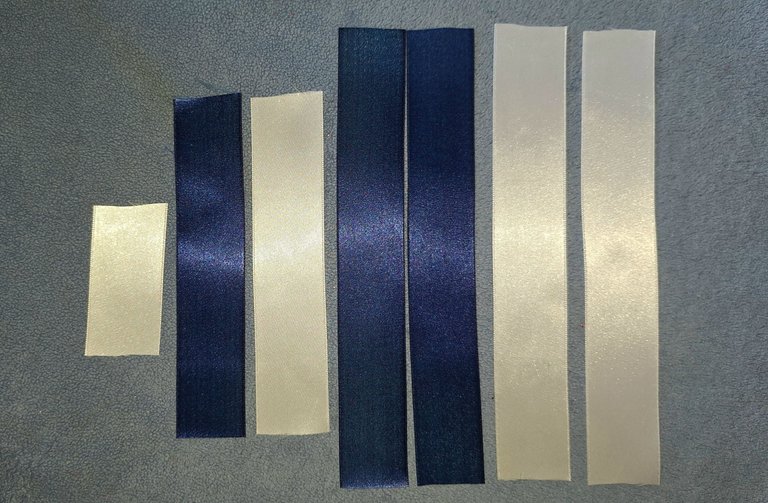
Estuve cortando cuatro trozos de cinta de raso de 24 cm, dos en blanco y dos en azul, dos de 15 cm, una de cada color, dos de 18 cm, de cada color y una de 8 cm para el centro del lazo en blanco.
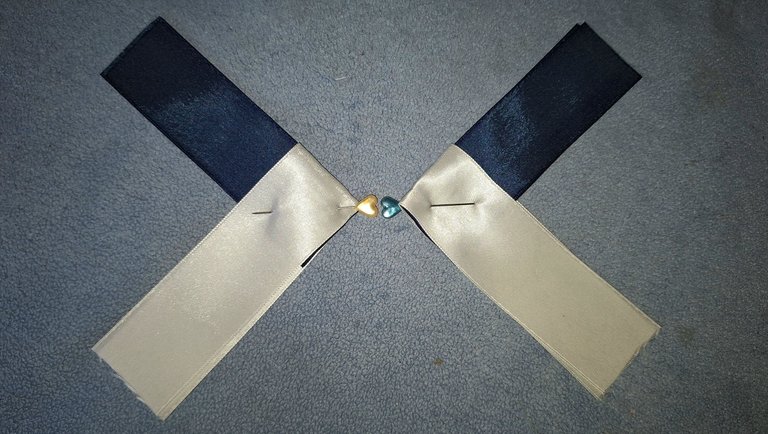
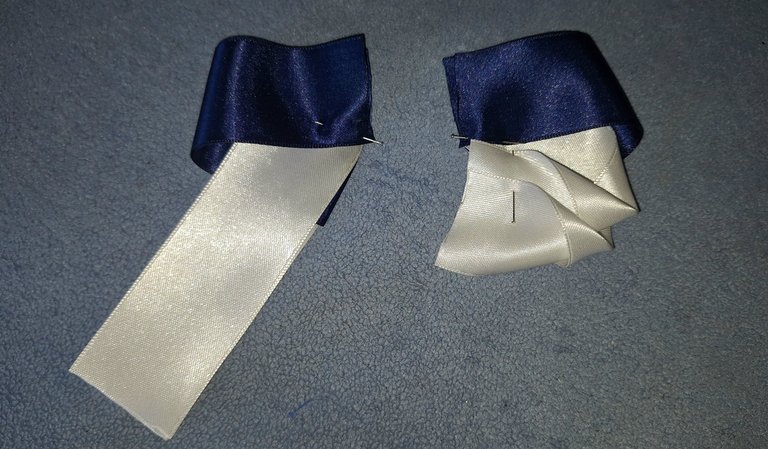
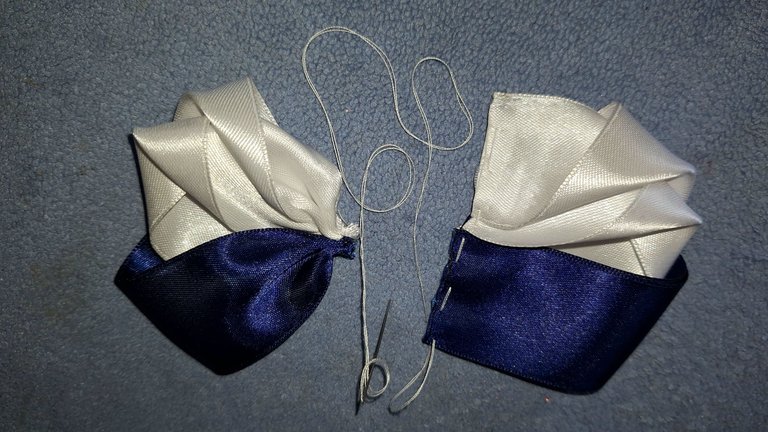
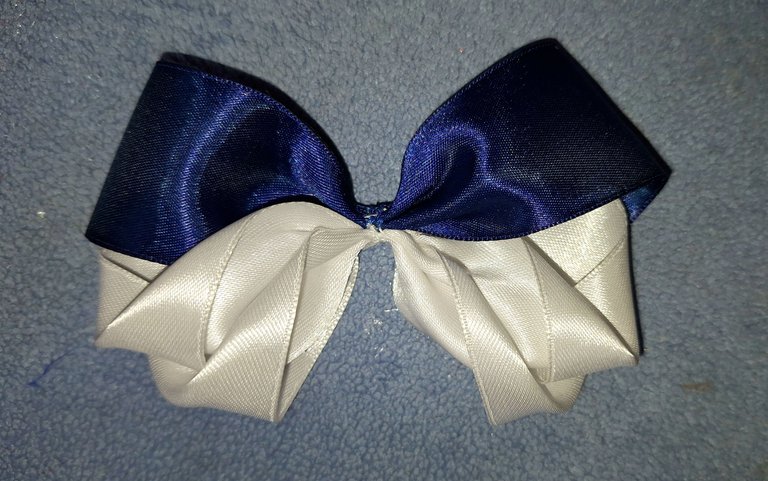
Para formar el lazo frontal, pueden ver cómo lo hice paso a paso en las fotos. Para cada lado usé una tira de 24 cm de cada color, los dobles y metí una dentro de la otra, formando una V.
Luego las esquinas las llevé hacia el centro, primero la azul y luego la blanca. Le giré hacia adentro una de las puntas y la llevé hacia el centro. Con la otra hice lo mismo, pero la posicioné 1 cm alejada del centro.
Después hice 10 puntadas, es preciso hacerlas tal cual, agarrando todas las partes de la cinta, para que forme un bonito pliegue. Una vez listas las dos partes, las uní con más puntadas para asegurar bien.
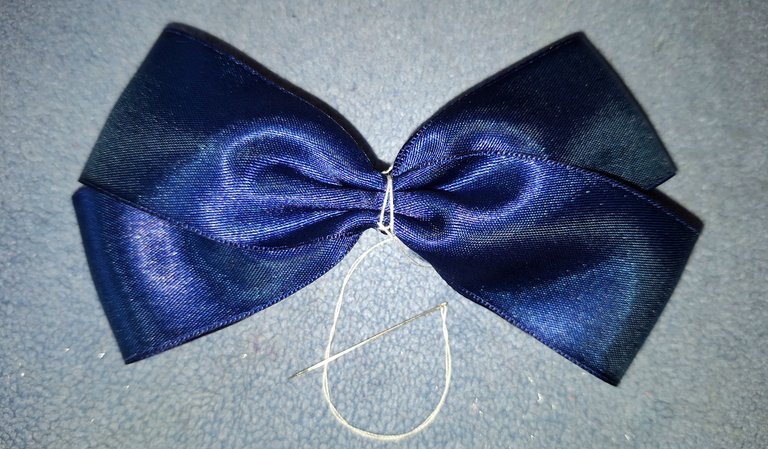
Ahora hice un lazo base con las cintas azules de 15 cm, es solo doblar a la mitad, unir y luego entrelazar las dos piezas y ya está formando el lazo.
Con las piezas de 18 cm le hice unas puntas o colitas, que decoré en las puntas y también decoré el centro y le puse su pinza. Quedando un hermoso accesorio para el cabello.
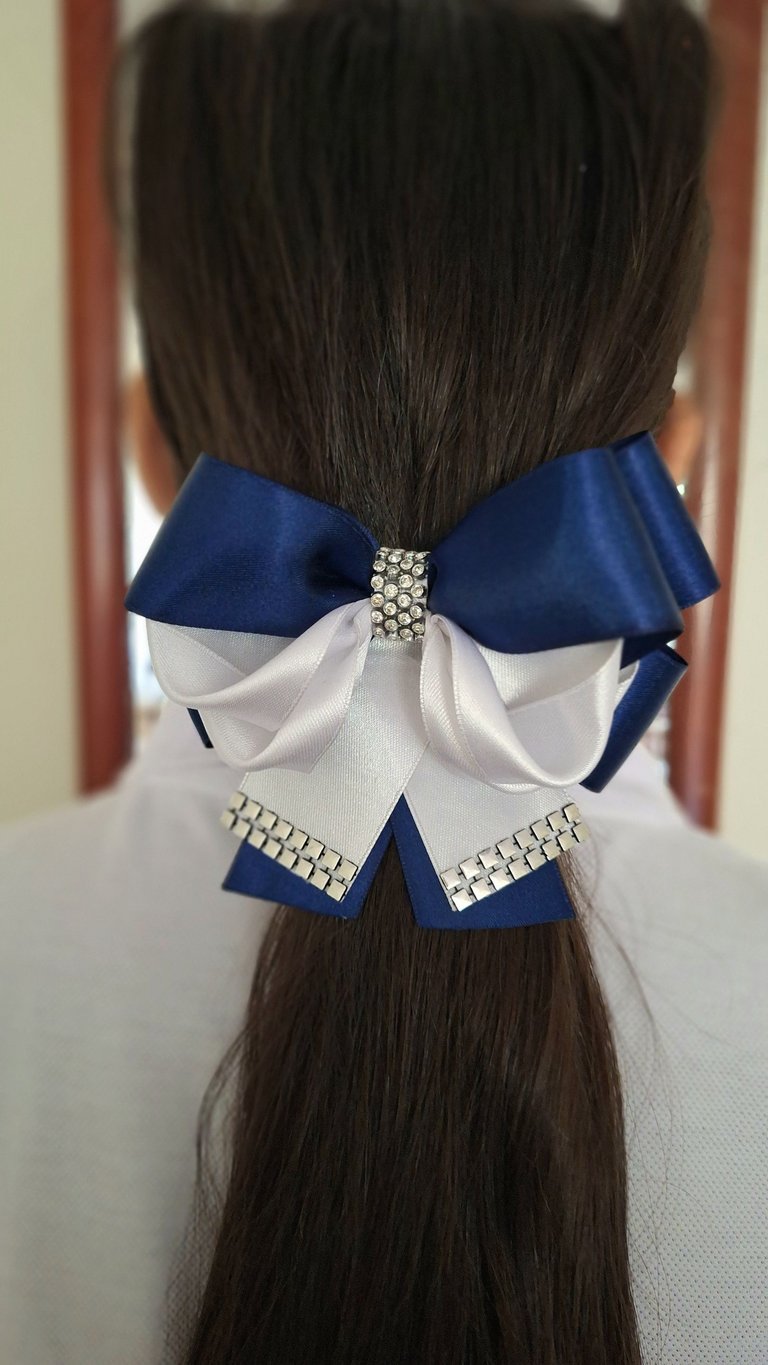
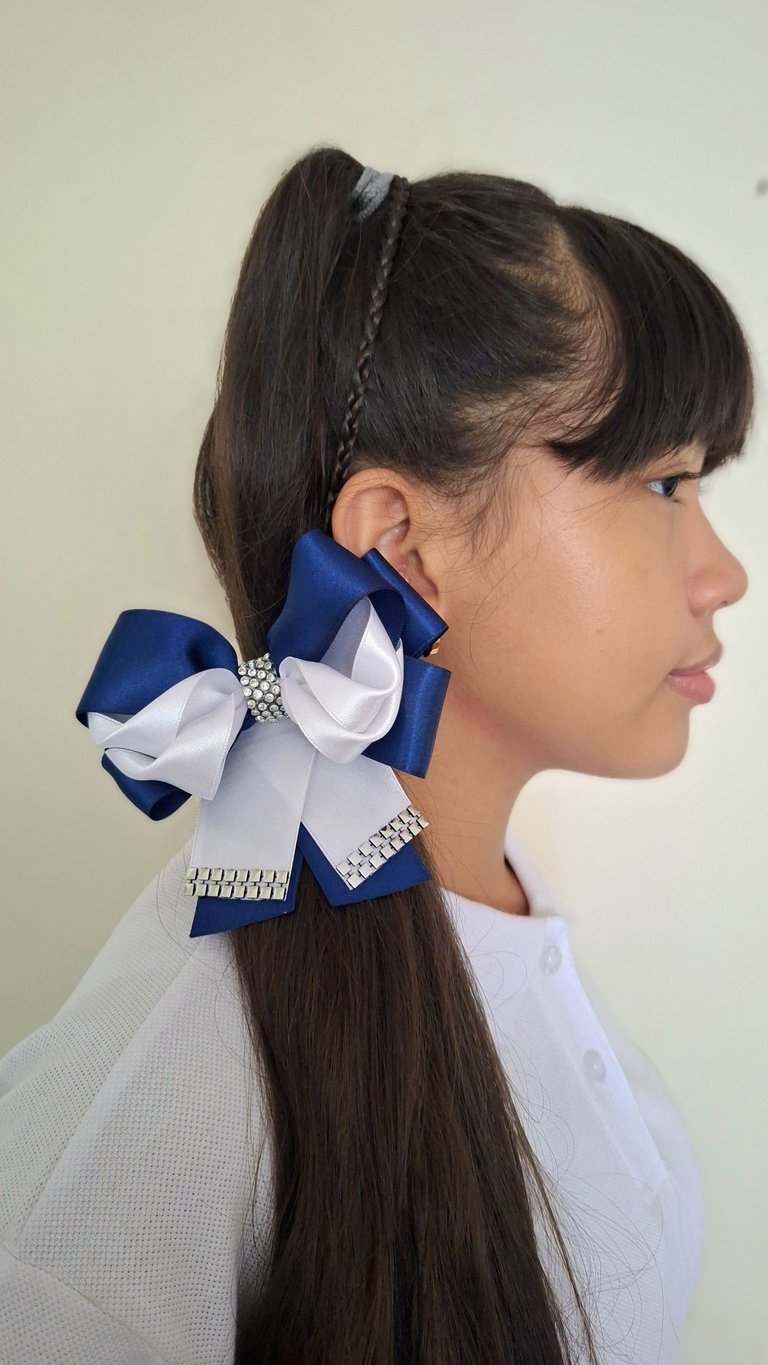
Miren cómo le quedó a mi princesa @ariannamc, también quería uno para ella, aunque seguro le hago de otro modelo y así mostrarles cómo lo hago.
A mí me gustó mucho el resultado y, si lo hacen en otros colores, queda aún más bonito. Yo lo vi en colores navideños y quedó genial.
¿Qué tal les pareció? Espero que les haya gustado mi creación de hoy. Ya les estaré mostrando los otros lazos que hice, en el próximo lunes de costura. Gracias por su visita. Dios les bendiga.


A cute hair accessory

Hello, my beautiful people of @needleworkmonday, happy start of the week once again here, wishing you to have wonderful days, that you can continue creating, showing us so many beautiful things as you always do here in the community.
A few days ago I was showing you some bows I made for the hair of my girls Amber and Arianna. Today I am going to show you a bow that my niece's grandmother asked me to make, she told me to make some ribbons with the school colors which are white and navy blue.
I already had the ribbons, however, I was making some purchases that I think I already showed you some little things to complement them, in this case some silver appliques that have in the center and at the ends this bow and other things I bought to decorate the others, as she ordered me several and today I'll show you how I was making this one.


For this beautiful project I was using: Satin ribbon in white and navy blue colors. Alligator clip. Silver applications. Thread and needle. Silicone and scissors.
I cut four pieces of satin ribbon of 24 cm, two in white and two in blue, two of 15 cm, one of each color, two of 18 cm, of each color and one of 8 cm for the center of the bow in white.


To form the front loop, you can see how I did it step by step in the photos. For each side I used a 24 cm strip of each color, folded them and put one inside the other, forming a V shape.
Then I brought the corners to the center, first the blue one and then the white one. I turned one of the ends inward and brought it to the center. With the other one I did the same, but I positioned it 1 cm away from the center.
Then I made 10 stitches, it is necessary to make them as they are, holding all the parts of the ribbon, so that it forms a nice fold. Once the two parts were ready, I joined them with more stitches to secure them well.


Now I made a base loop with the 15 cm blue ribbons, just fold in half, join and then intertwine the two pieces and you are forming the loop.
With the 18 cm pieces I made some tips or tails, which I decorated at the tips and I also decorated the center and put its clip. It is a beautiful hair accessory.
Look how it looked on my princess @ariannamc, I also wanted one for her, although I'm sure I'll make another model and show you how I do it.
I really liked the result and if you do it in other colors, it looks even prettier. I saw it in Christmas colors and it looked great.
How did you like it? I hope you liked my creation today. I will be showing you the other bows I made, in the next Sewing Monday. Thanks for your visit. God bless you all.

Mi blog es familiar, de mi día a día, en donde puedo subir fotos de niños u otras personas de mi entorno, NO autorizo a usar mis fotografías sin mi autorización.
My blog is a family blog, of my daily life, where I can upload photos of children or other people around me, I do NOT authorize you to use my photos without my authorization.
Dispositivo | Device | Samsung Galaxy A54
Fotos editadas en: |Photos edited in | CC Express for Picsart / Canva
Separadores hechos en | Separators made in | CC Express for Samsung
Traducción con | Translation with| DeepL

