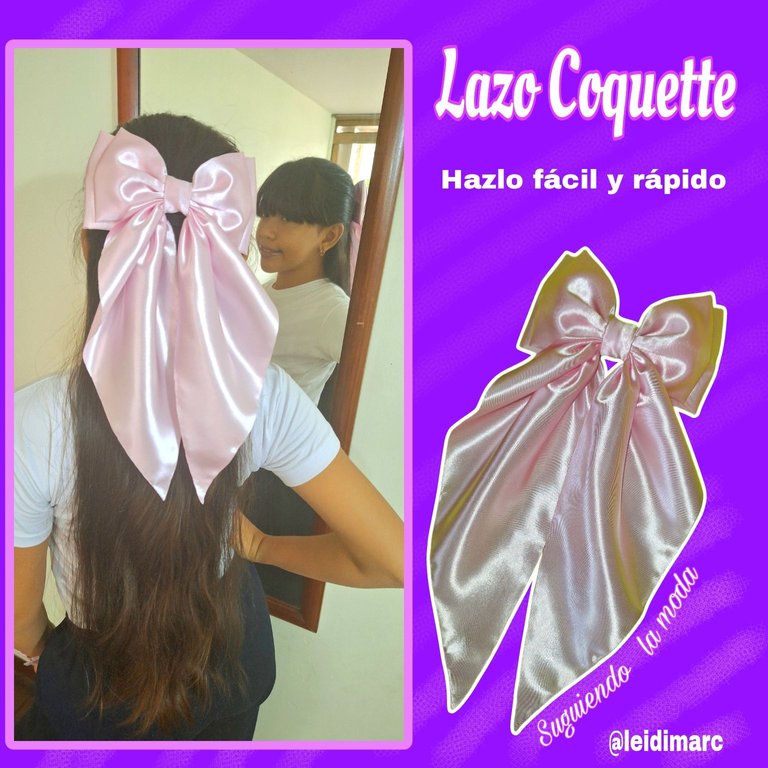
Un gusto pasar por aquí mis queridos amigos de @needlewordmonday, infinitas bendiciones para todos. Espero tengan una semana maravillosa. El día de hoy sigo con esta moda que esta en tendencia y son los lazos Coquette, son varias cosas las que la definen, pero he visto que estos lazos se están llevando mucho.
Y para variar, ya que siempre le hago lazos a mis princesas, esta vez no es para ellas, aunque @ariannamc, mi princesa hermosa es la que lo modela. Este lazo lo hice a pedido de mi sobrina, que sabiendo que se algo sobre la elaboración de lazos, me dijo que le hiciera uno.
Estuve buscando entre mis retazo de telas guardados y no tenia de este tono rosado que ella quería, así que su mamá me lo compró y yo me puse manos a las telas. Se que en Internet hay mucho material al respecto, yo misma he visto unos cuantos, pero ya que estas aquí acompáñame y te enseño cómo lo hice.
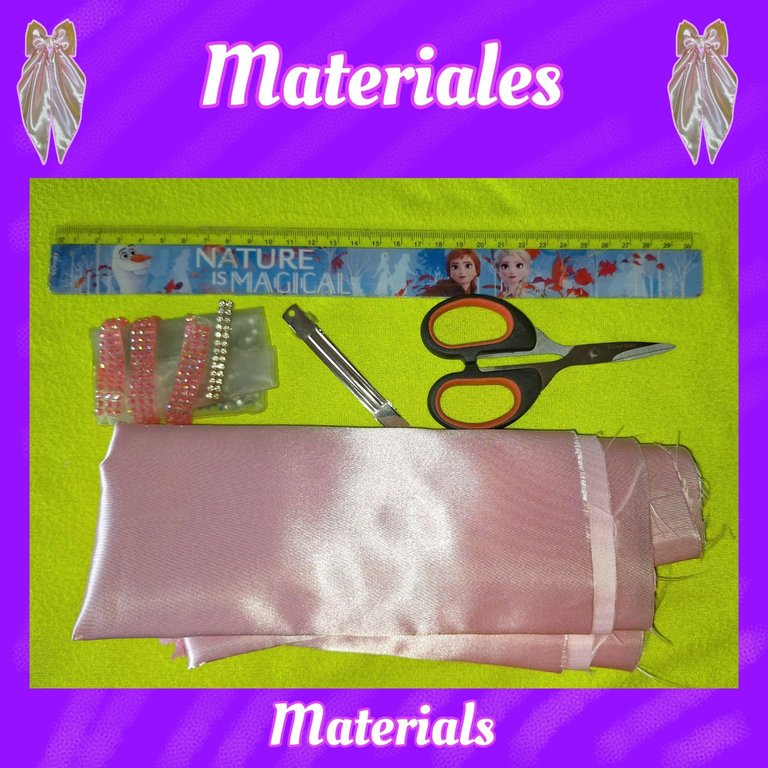
Los materiales que estuve utilizando para este proyecto fueron: Tela de razo, de color rosa pálido (40 cm de ancho). Pinza o gancho de cabello. Silicona. Hilo y aguja. Tijera y regla. Encendedor y pistola de silicona.
Procedimiento
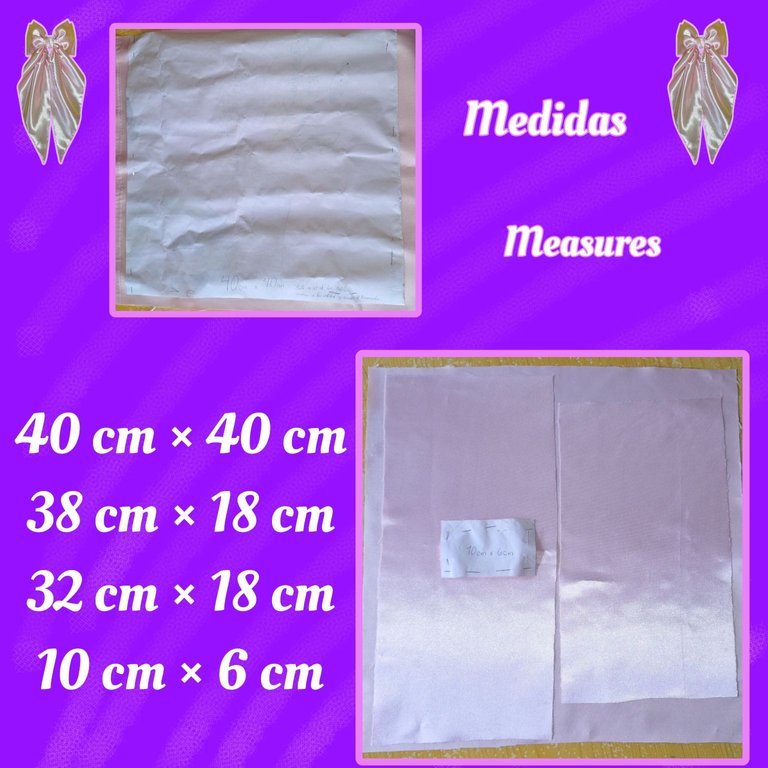
Lo primero que hice fue hacer unos patrones, con las medidas que les muestro en la imagen, esto con el fin de poder cortar con mayor precisión cada pieza.
Cada patrón lo fui pegando con alfileres, en este caso use agujas a la tela, luego las recorte. Quedaron parejas .
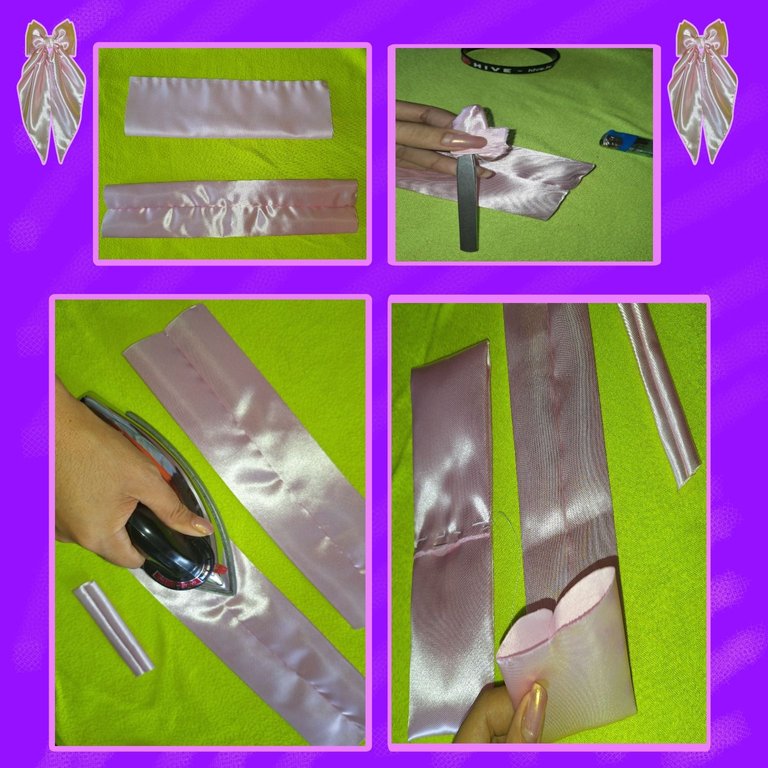
Ahora cosí a mano cada una de las piezas, enfrentando los derechos. Luego con la ayuda de la tijera procedí a voltearlo.
Le pase la plancha para asentarlo bien, dejando el lado de la costura por el medio. Marque la mitad de la pieza por donde se va coser el lazo.
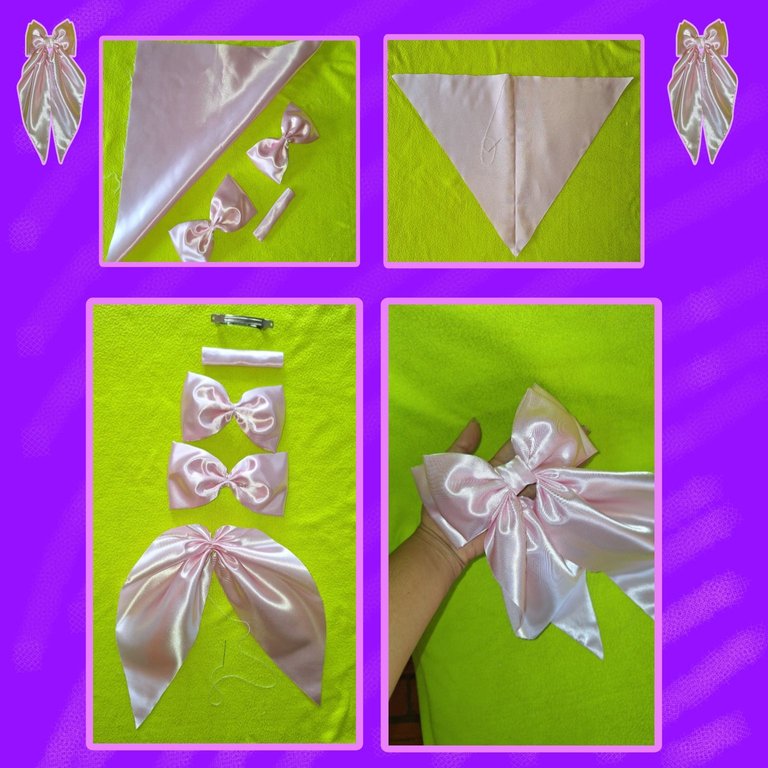
Arme los dos lazos y el cuadrado de 40 cm x 40 cm, lo doble a la mitad, formando un triángulo, lo corté y con uno de los triángulos le pase costura desde la punta hacia el centro, con unos espacios entre cada puntada de un centímetro aproximadamente.
Esto para formar la cola del lazo. Ya solo quedaba ir armando cada pieza. La base, encima el lazo más pequeño y debajo de estos dos las colas. Por la parte de atrás le cosí y pegue la pinza, para finalizar colocando la pieza más pequeña en el centro.
Como ven no le puse más decoraciones como tenía pensado, así se veía muy lindo y tierno.
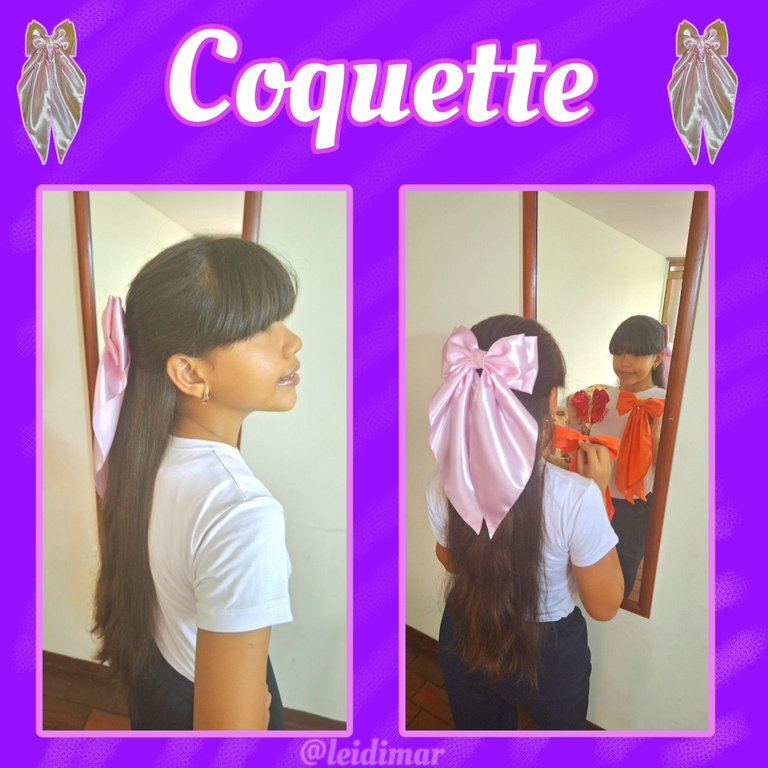
Y así lo modelo mi princesa Arianna, se le ve muy lindo, ahora ella quiere que le haga uno blanco. Como ven en sus manos, ya hace tiempo que saliera esta moda ya le había hecho de estos lazos, tanto en tela como en cinta.
Lo había hecho en los días de Carnavales, pero apenas ayer se lo llevé a mi sobrina Maria Ysabel y quwdo encantada, quiere que le haga otros, es una linda princesa de 17 años, con una linda cabellera en la que lucirá este bonito accesorio para el cabello que está de moda.
Una vez publicado, le pasaré este paso a paso, que es tan fácil de hacer, que a lo mejor se anime hacerlo ella misma, si no con gusto, le hago otro, si me trae la tela, jejeje.
Pocas veces son las que sigo la moda, pues no me gusta verme igual que los demás, pero está con los lazos me encantó y ya quiero hacer otros par mis princesas y tal vez me los ponga también. Ya lo verán en mi blog.
Espero que les haya gustado y puedan hacerlo en casa. Hasta próxima...


Lazo Coquette / Make it easy and quick

A pleasure to stop by my dear friends from @needlewordmonday, infinite blessings to all. I hope you have a wonderful week. Today I continue with this fashion that is trending and they are the Coquette bows, there are several things that define it, but I have seen that these bows are being worn a lot.
And for a change, since I always make bows for my princesses, this time it is not for them, although @ariannamc, my beautiful princess is the one who models it. I made this bow at the request of my niece, who, knowing that I know something about making bows, told me to make one for her.
I was looking through my fabric scraps and I didn't have the pink color she wanted, so her mom bought it for me and I started working on it. I know there is a lot of material on the Internet, I've seen a few myself, but since you are here join me and I'll show you how I did it.

The materials I was using for this project were: Loop fabric, pale pink (40 cm wide). Hair clip or hook. Silicone. Thread and needle. Scissors and ruler. Lighter and silicone gun.

Procedure
The first thing I did was to make some patterns, with the measurements shown in the image, this in order to be able to cut more accurately each piece.
Each pattern was glued with pins, in this case I used needles to the fabric, then I cut them out. They were even.

Now I sewed each of the pieces by hand, facing the right sides. Then with the help of the scissors I proceeded to turn it over.
I ironed it well, leaving the side of the seam in the middle. Mark the middle of the piece where the loop will be sewn.

Assemble the two loops and the 40 cm x 40 cm square, fold it in half, forming a triangle, cut it and sew one of the triangles from the tip to the center, with spaces between each stitch of about one centimeter.
This is to form the tail of the bow. Now all that was left was to assemble each piece. The base, the smaller loop on top and under these two the tails. On the back I sewed and glued the clip, to finish by placing the smallest piece in the center.
As you can see I didn't put more decorations as I had planned, so it looked very cute and cuddly.

And this is how my princess Arianna modeled it, it looks very cute, now she wants me to make her a white one. As you can see in her hands, I had already made these bows for her some time ago, both in fabric and ribbon.
I had done it during the Carnival days, but just yesterday I took it to my niece Maria Ysabel and she loved it, she wants me to make her other ones, she is a pretty princess of 17 years old, with a beautiful head of hair in which she will wear this beautiful hair accessory that is in fashion.
Once published, I will pass her this step by step, which is so easy to make, that maybe she will do it herself, if not, I will gladly make her another one, if she brings me the fabric, hehehe.
I rarely follow fashion, because I don't like to look the same as everyone else, but I loved this one with the bows and I already want to make others for my princesses and maybe I'll wear them too. You will see it on my blog.
I hope you liked it and you can make it at home. See you next time...

Dispositivo | Device | Samsung Galaxy A20
Fotos editadas en: |Photos edited in | CC Express for Picsart / Canva
Separadores hechos en | Separators made in | CC Express for Samsung
Traducción con | Translation with| DeepL

