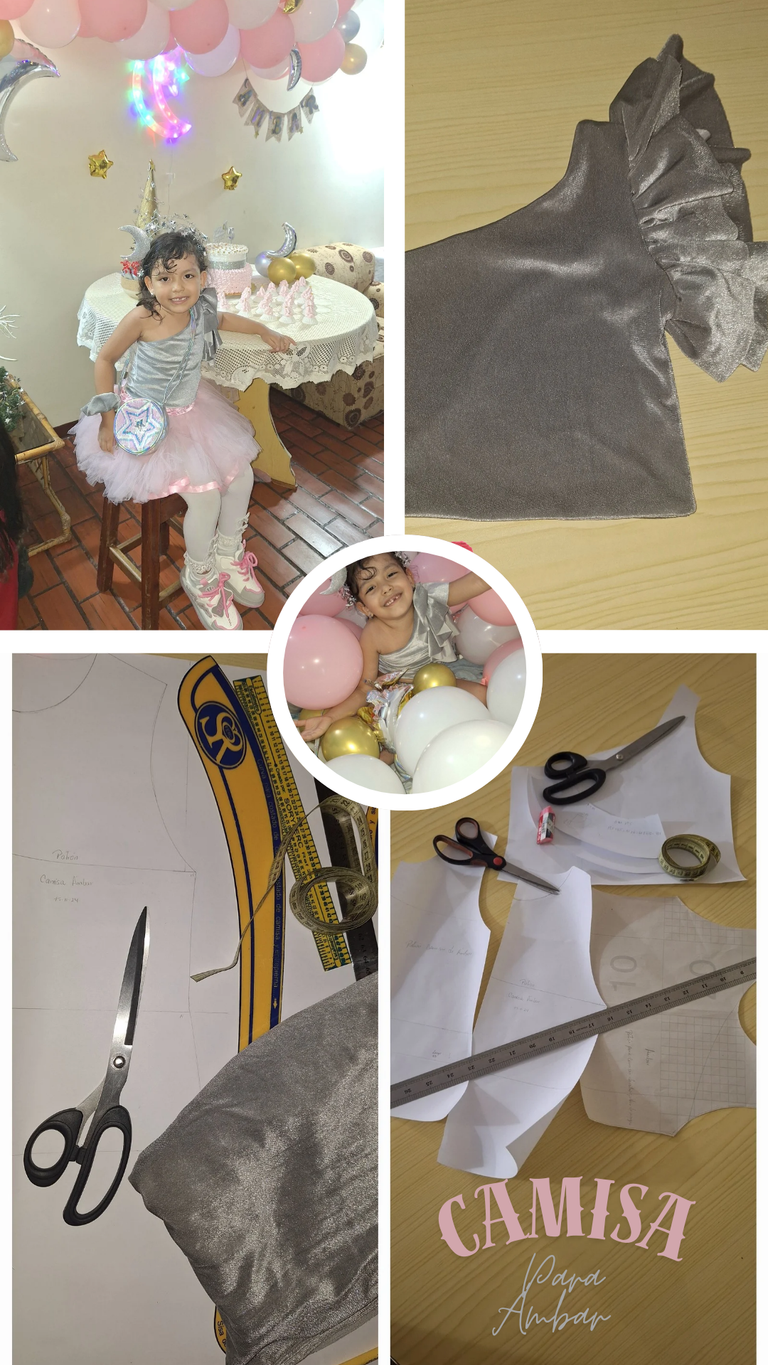
Saludos y bendiciones, mi gente bella de @needleworkmonday, espero que este mes sea de muchas alegrías y creaciones lindas para los estrenos. Hace días les mostré cómo le hice unas scrunchies a mi princesa Ámbar y les quedé debiendo cómo le hice la camisa, porque ya hace meses les mostré cómo le hice el tutú.
Para hacer esta camisa, primero fue un proceso para escoger el modelo, me gustaban unos bellos y aunque se veían difíciles, quiero hacerle prendas lindas a mis niñas, pero esta hija mía es bien especial con la ropa, no todo le gusta y por más que le mostraba modelos más elaborados no quería, ella es de lo que se vea más cómodo y sencillo.
Al final la convencí de hacerle este modelo, que también se veía lindo y lo mejor era forrado por dentro, así no le molestan las costuras.
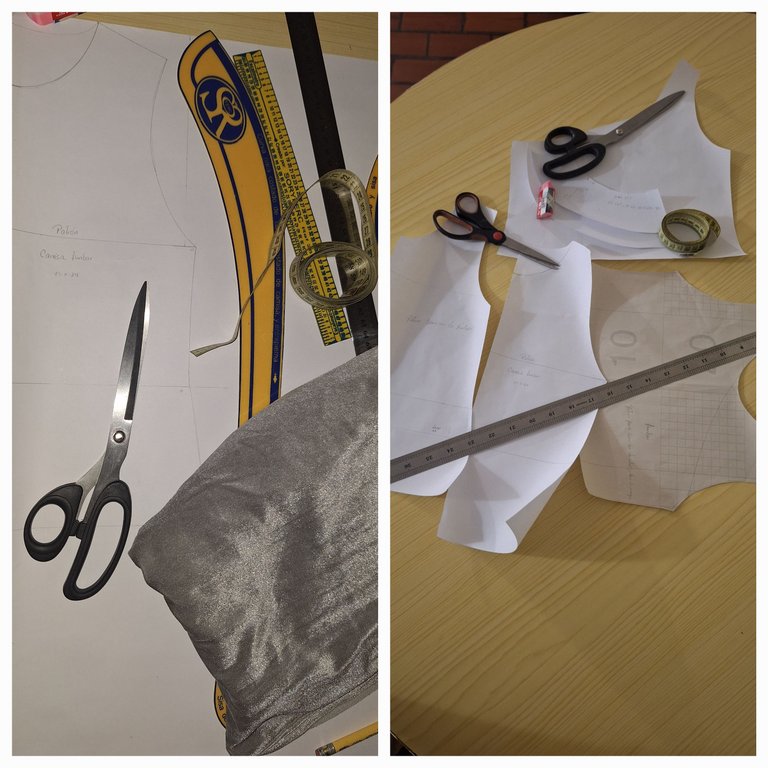
Para empezar con esta creación, le tomé las medidas y le hice un patrón de camisa básica; a partir de ahí, le hice el patrón de esta blusa asimétrica de un solo hombro con olanes en las mangas.
El patrón lo hice varias veces, ya que lo veía pequeño. Al final, después de varios intentos, vi que, con hacerlo con las medidas tomadas, de que sale bien, sale.
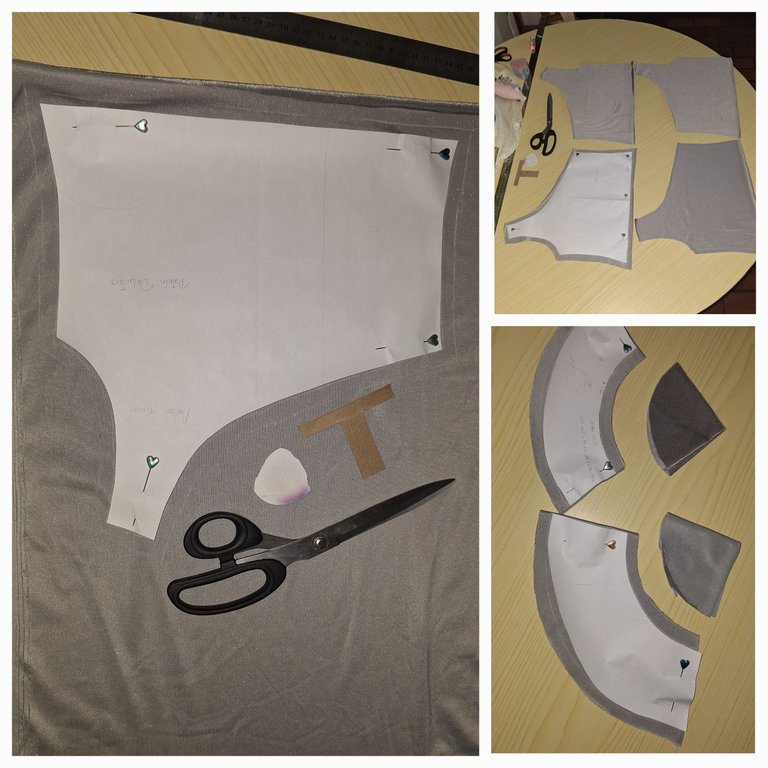
Luego coloqué con alfileres los patrones en la tela, tanto la camisa, como los olanes, los cuales hice tomando la medida de la sisa.
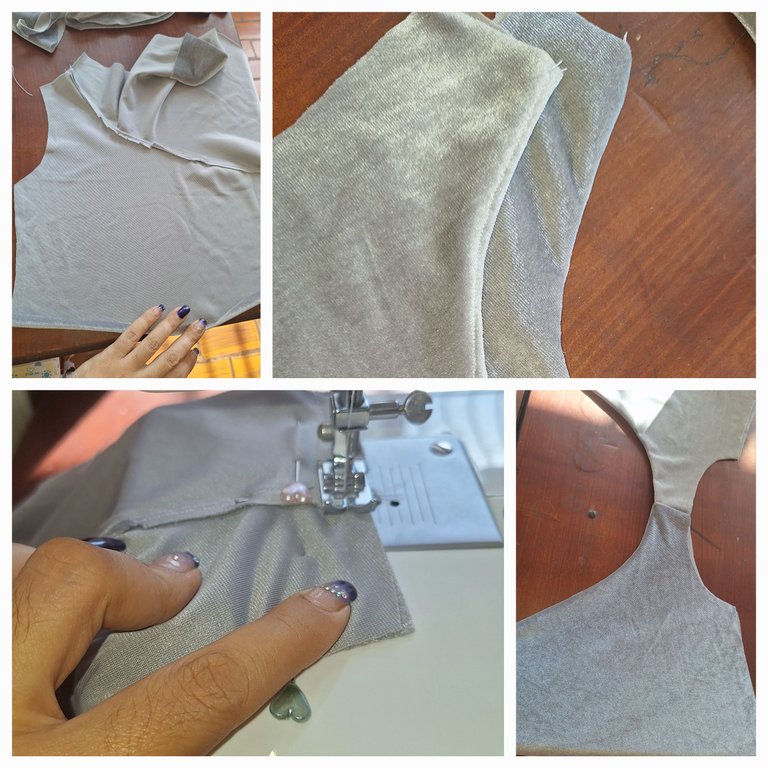
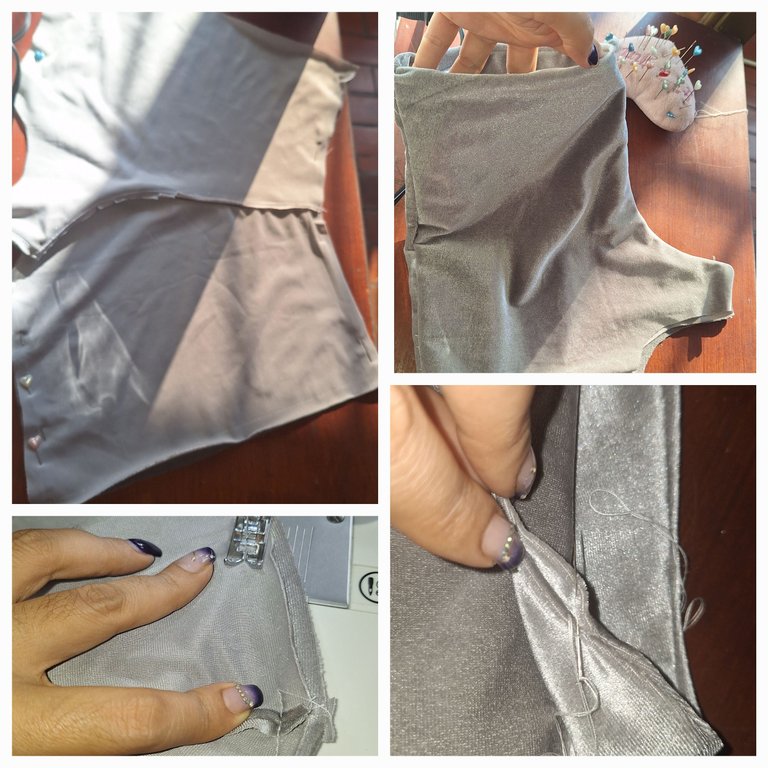
Saqué dos piezas por delante y por atrás, para el forro de la misma tela, enfrenté los derechos y pasé a coser a máquina, luego le hice una costura de refuerzo para que quede bien asentada la costura.
Después cosí la parte de los hombros y los costados. Cuando iba a embonar, que nos es más que forrar la prenda, me confundí toda y me salió mal, para variar, je, je, je
Luego busqué las maneras de hacerlo bien, hasta que me quedó como era y yo feliz, porque le había agarrado la vuelta. Fueron horas en eso, je, je, je.
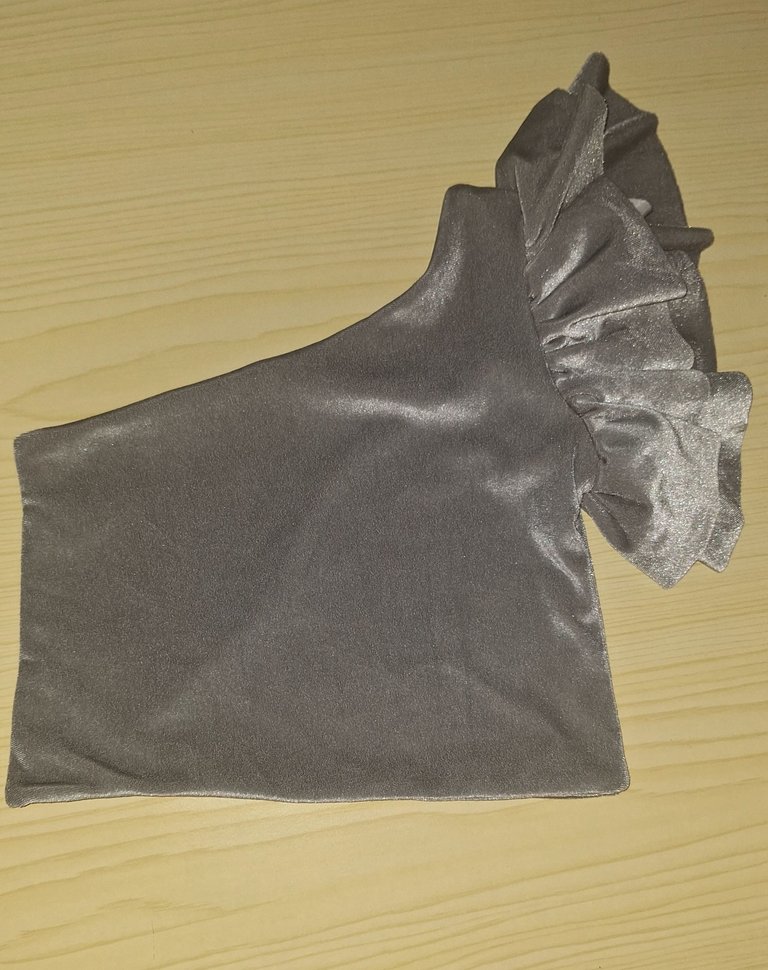
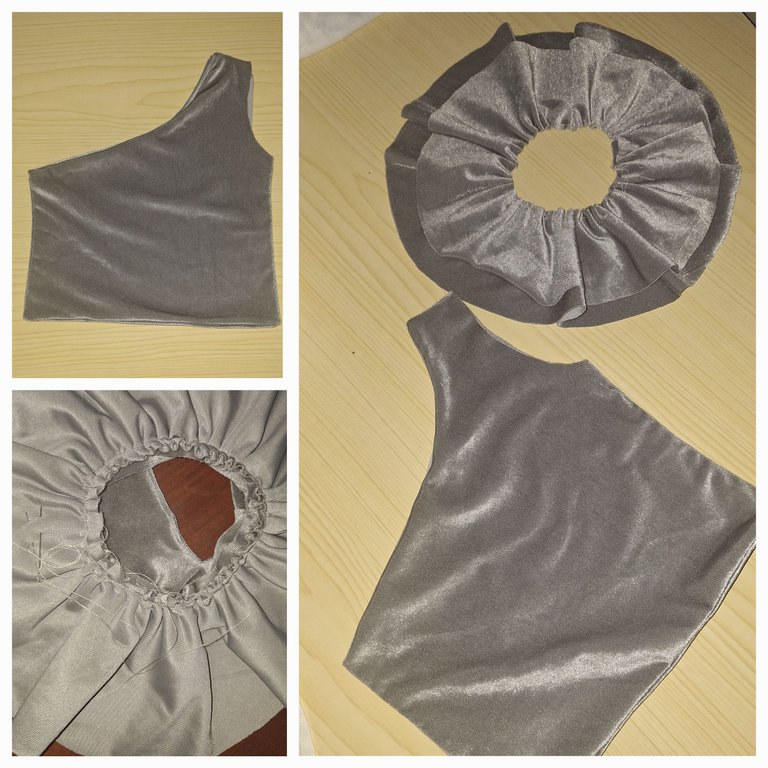
Ahora me faltaba la manga, hice dos olanes uno más grande que otro y los superpuse, los batieron y arruche un poco para que tuvieran más volumen y luego lo cosí a la sisa, que por cierto, aunque no se ve en las fotos, le puse un bie elástico a todo el alrededor de la costura, para que no le maltratara y no correr el riesgo que en plena fiesta se quitara la camisa y me diera algo, je, je, je.
Y aunque se ve fácil, siempre pasan cosas. Se tranca la máquina, se gasta el hilo. La máquina no cose bien, por un lado, cosí por el lado que no era y para completar le quedó grande como 3 veces y tuve que resolver. Al final estuvo lista, después de una buena amanecida, je, je, je.
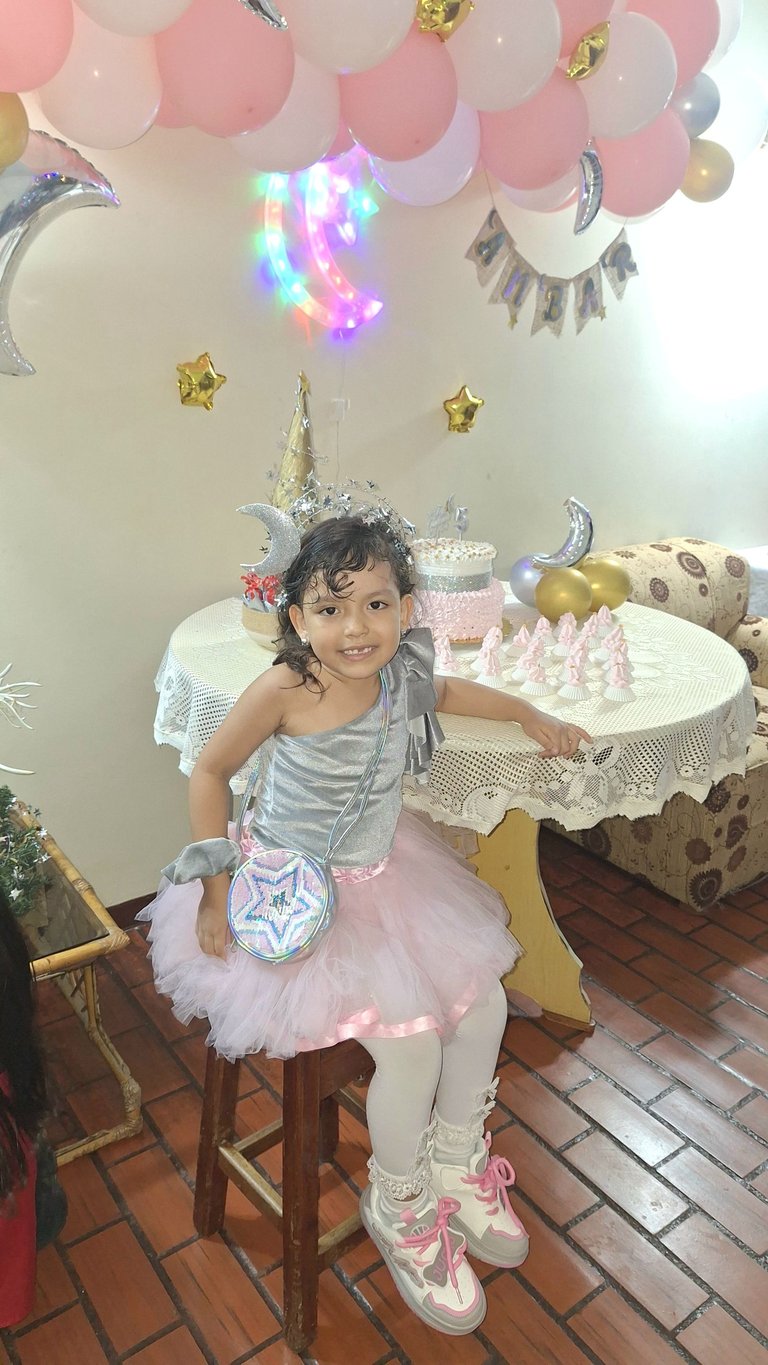
Lo importante es que la termine y que mi hija la lució como toda una princesa en su cumpleaños. Que, por cierto, escogí ese color gris en gamuza, porque ella quería su cumpleaños de luna y ese color me pareció bien. Al combinarlo con rosado, le quedó precioso.
Bueno, amigos, esto ha sido todo por hoy. Luego les muestro lo que le hice a mi hija @ariannamc, también le quedó bello.
Que pasen un mes de diciembre maravilloso y lleno de alegrías. Dios les bendiga, gracias por visitar mi blog.


Shirt for Amber

Greetings and blessings, my beautiful people of @needleworkmonday, I hope this month will be one of many joys and cute creations for the premieres. Days ago I showed you how I made some scrunchies for my princess Amber and I still owe you how I made her shirt, because months ago I showed you how I made her tutu.
To make this shirt, first was a process to choose the model, I liked some beautiful ones and although they looked difficult, I want to make nice clothes for my girls, but this daughter of mine is very special with clothes, she doesn't like everything and even though I showed her more elaborate models she didn't want to, she likes what looks more comfortable and simple.
In the end I convinced her to make this model, which also looked nice and the best part was that it was lined on the inside, so the seams don't bother her.


To start with this creation, I took her measurements and made a basic shirt pattern; from there, I made the pattern for this asymmetrical one-shoulder blouse with ruffles on the sleeves.
I made the pattern several times, as it looked small. In the end, after several attempts, I saw that, if I did it with the measurements taken, it would work.
Then I pinned the patterns on the fabric, both the shirt and the buttonholes, which I did by taking the armhole measurement.


I took out two pieces for the front and back, for the lining of the same fabric, I faced the right sides and sewed by machine, then I made a reinforcement seam so that the seam would be well sewn.
Then I sewed the shoulders and sides. When I was going to join, which is nothing more than lining the garment, I got all mixed up and it came out wrong, for a change, heh, heh, heh, heh, heh.
Then I looked for ways to get it right, until I got it just the way it was and I was happy, because I had got the hang of it. It took hours, heh, heh, heh, heh.


Now I needed the sleeve, I made two frills, one bigger than the other and I overlapped them, whipped them and ruined them a little so that they had more volume and then I sewed it to the armhole, which by the way, although you can't see it in the photos, I put an elastic band all around the seam, so that I wouldn't mistreat it and not run the risk of taking off the shirt in the middle of the party and give me something, heh, heh, heh, heh.
And although it looks easy, things always happen. The machine crashes, the thread wears out. The machine does not sew well, on one side, I sewed on the wrong side and to complete it was too big 3 times and I had to solve it. In the end it was ready, after a good morning, heh, heh, heh, heh.
The important thing is that I finished it and that my daughter wore it like a princess on her birthday. Which, by the way, I chose that gray color in suede, because she wanted her birthday moon and that color seemed right to me. Combining it with pink made it look beautiful.
Well, friends, that's all for today. Later I will show you what I made for my daughter @ariannamc, it also looked beautiful.
Have a wonderful and joyful month of December. God bless you, thank you for visiting my blog.

Mi blog es familiar, de mi día a día, en donde puedo subir fotos de niños u otras personas de mi entorno, NO autorizo a usar mis fotografías sin mi autorización.
My blog is a family blog, of my daily life, where I can upload photos of children or other people around me, I do NOT authorize you to use my photos without my authorization.
Dispositivo | Device | Samsung Galaxy A54
Fotos editadas en: |Photos edited in | CC Express for Picsart / Canva
Separadores hechos en | Separators made in | CC Express for Samsung
Traducción con | Translation with| DeepL
