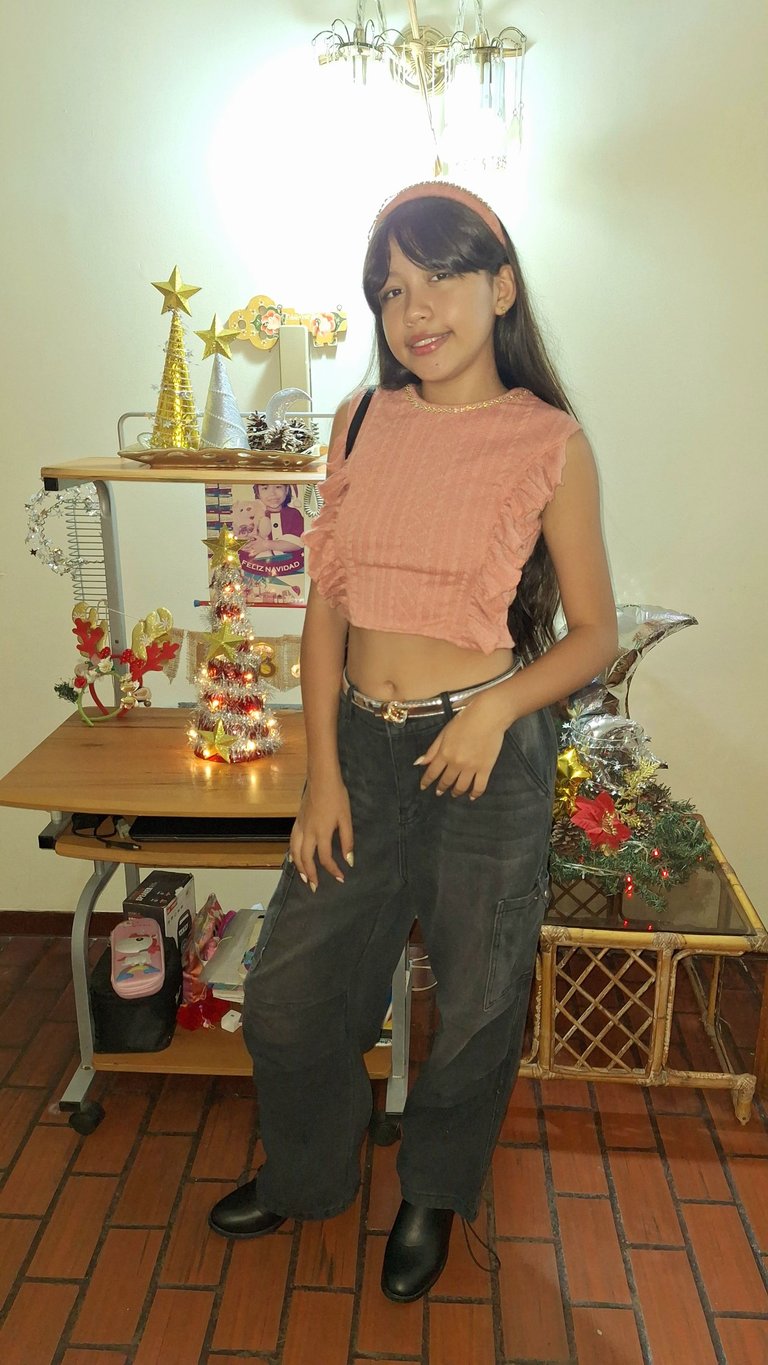
Hola, mi gente de @needleworkmonday, otra vez por aquí en este lunes de costura. Muchas bendiciones en esta nueva semana. Espero que hayan disfrutado sus días libres, por las fechas decembrinas y de año nuevo. Ahora hay que seguir creando, je, je, je.
Hoy les quiero compartir cómo estuve haciéndole una linda camisa a mi princesa @ariannamc, para que la luciera el 24 de diciembre y así recibir una linda Navidad con un lindo outfit.
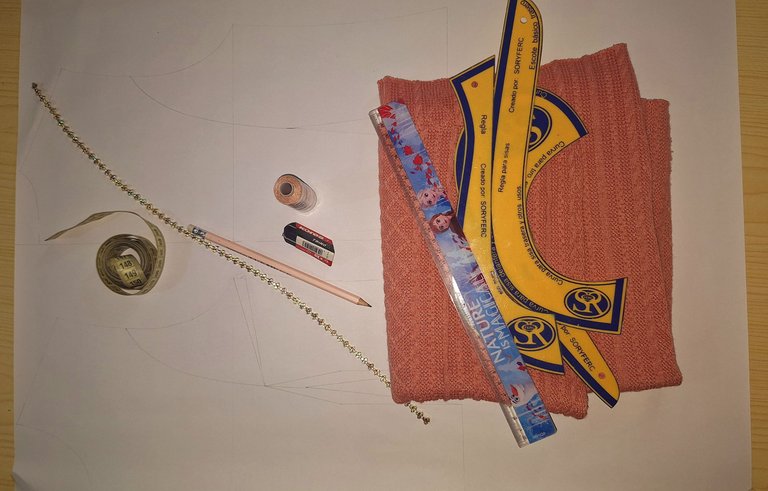
Para su elaboración, primero hice los patrones, así hacerla a su medida y le quedará ajustada al cuerpo. Use una tela de color guayaba, que ella misma escogió.
Es como tejida, un poco gruesa y a la vez muy suave. Ella quería que le colocara un accesorio en dorado en el cuello con dorado y brillante.
Herramientas que me ayudaron en este proyecto: reglas, tijeras, hilos, agujas, papel, alfileres, tiza de sastre, lápiz, gama, cinta metrica y mi máquina de coser.
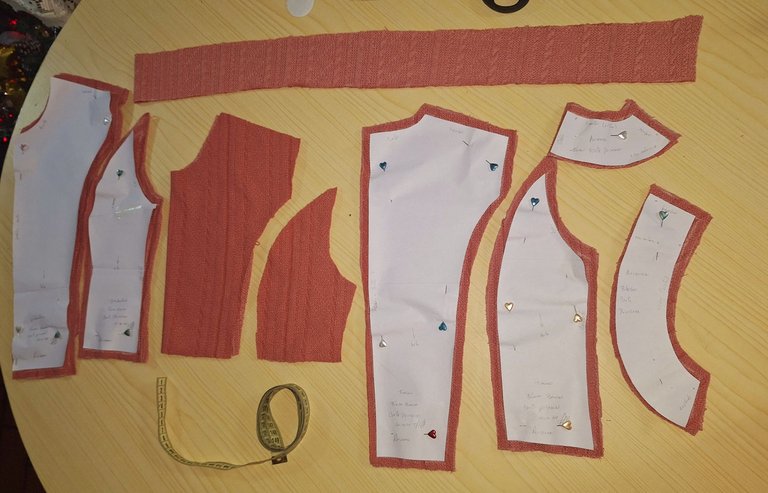
Luego corte todas las partes de los patrones, por la parte de adelante y por detrás, con las técnicas de corte princesa. Me gusta mucho cómo queda ceñido al cuerpo.
Después marqué con la tiza cada patrón sobre la tela. También le hice forro por la parte de adelante y vista por la parte de atrás y así pulir las costuras.
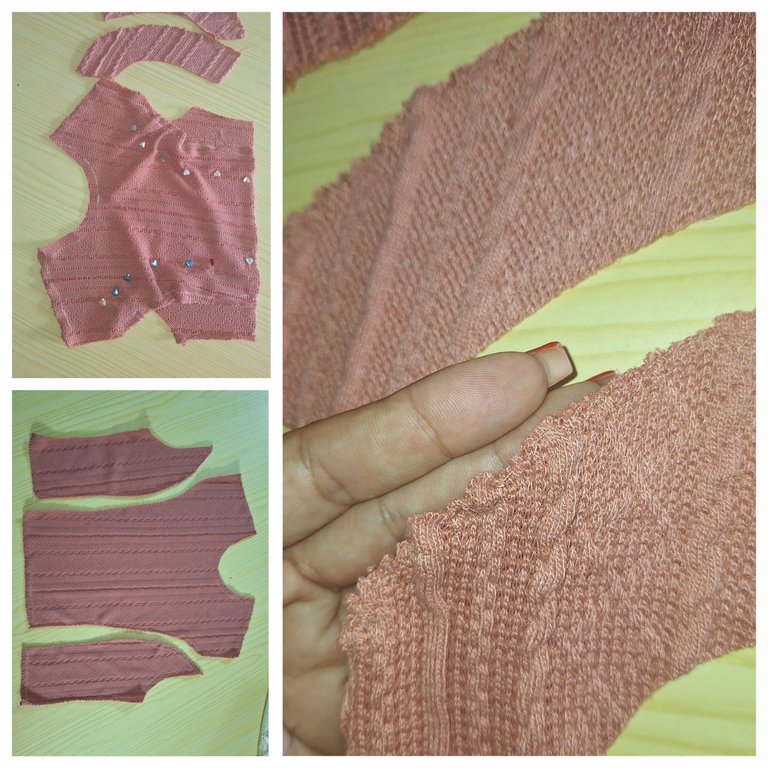
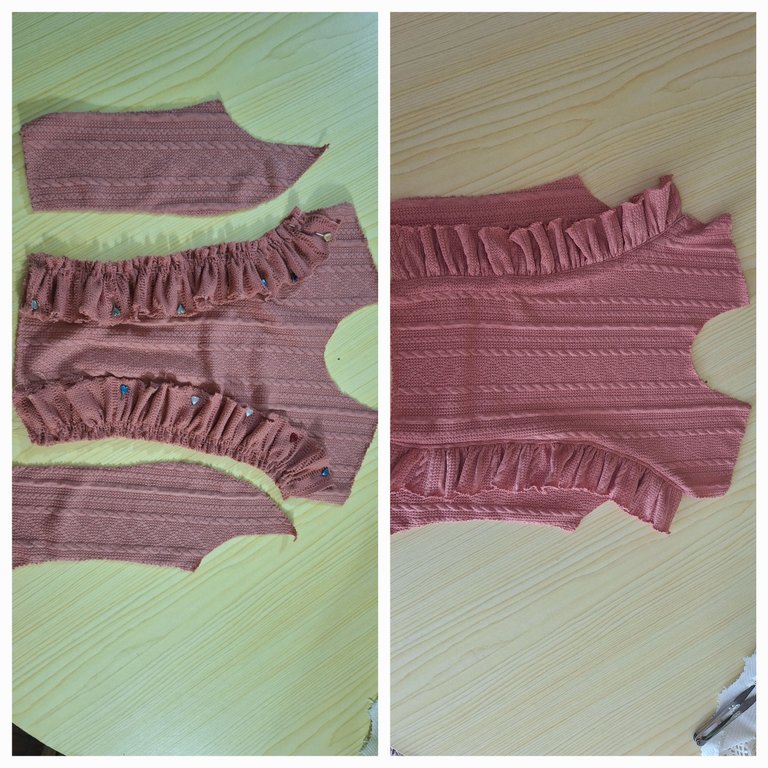
Ahora le pasé costura zigzag por todo el alrededor de la tela, ya que no tengo remachadora. Bueno, sí tengo, pero está dañada. Uno de estos días la mando arreglar.
Empecé a juntar todas las piezas con costuras, no sin antes fruncir la tela que iba por el corte princesa.
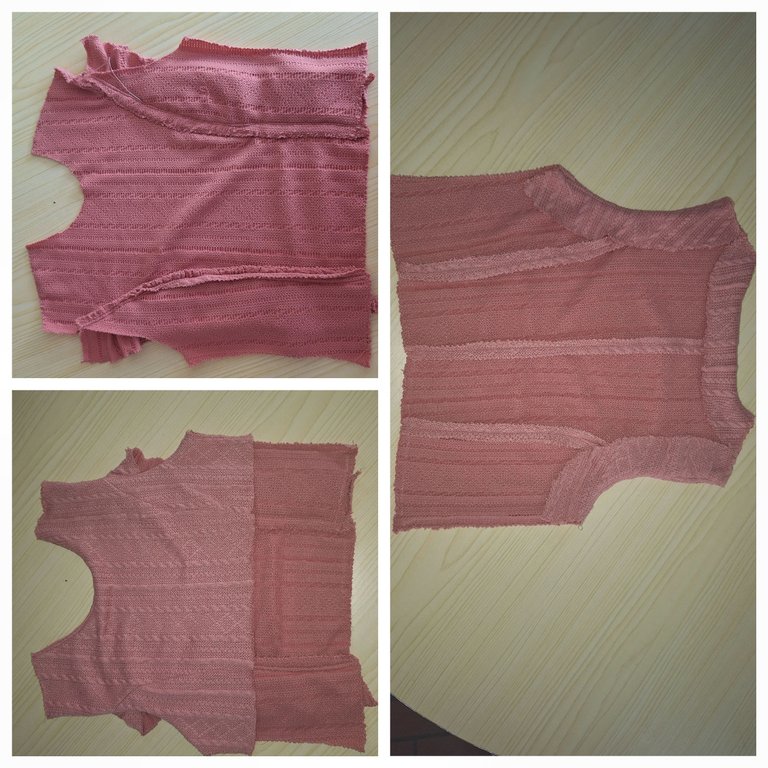
Luego le cosí el forro y las vistas. Como ven, se nota muy bonito por fuera, como por dentro, es que esta es una parte importante de mis costuras, que se vean prolijos por todos lados.
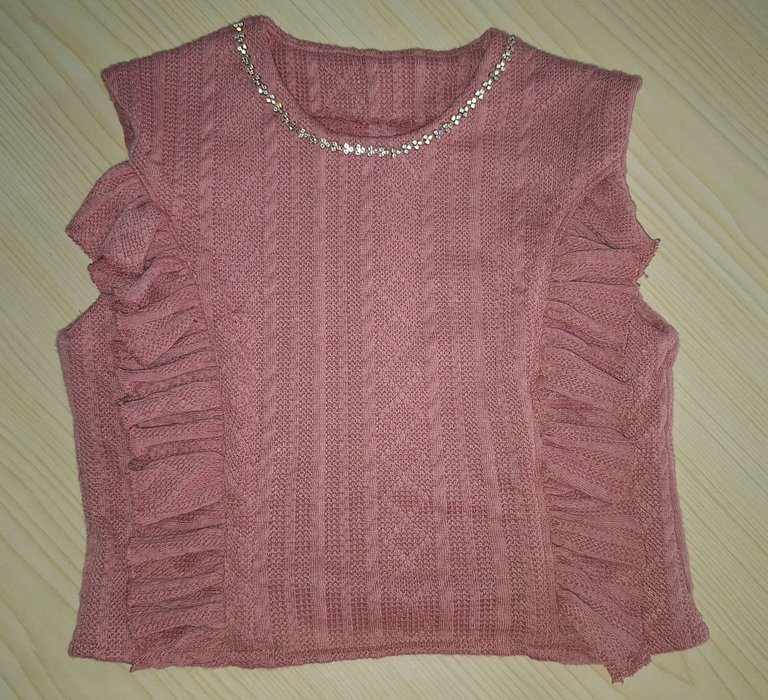
Una vez lista, le cosí la decoración en la parte del cuello, que la hizo ver más linda y a mi princesa le quedó preciosa. También le hice un cintillo a juego con su camisa.
Esta camisa, a pesar de todo, fue fácil de hacer; llevó su tiempo, porque se remataron todas las costuras y las vistas llevan doble costura.
Y lo bueno que la terminé el 23 y el 24, no estuve cociendo como si lo hice el 31.
Miren qué linda quedó mi princesa. ¿Qué les pareció la blusa? A mi me encantó y ya quiero hacerle este modelo en otras telas y colores.
Ahora sí, me despido agradeciendo su visita. Será hasta una próxima publicación, que tengo varias por compartirles.


Shirt, princess cut for Arianna

Hello, my @needleworkmonday people, here again on this sewing Monday. Many blessings on this new week. I hope you have enjoyed your days off, for the Christmas and New Year. Now we have to keep on creating, heh, heh, heh.
Today I want to share with you how I was making a nice shirt for my princess @ariannamc, so she could wear it on December 24 and receive a nice Christmas with a nice outfit.

To make it, first I made the patterns, so I could make it to her size and it will fit her body. I used a guava-colored fabric, which she chose herself.
It is like a woven fabric, a little thick and at the same time very soft. She wanted me to accessorize the neckline with gold and glitter.
Tools that helped me in this project: rulers, scissors, thread, needles, paper, pins, tailor's chalk, pencil, range, tape measure and my sewing machine.

I then cut out all the pattern parts, front and back, using princess cutting techniques. I really like the way it fits close to the body.
Then I marked each pattern on the fabric with chalk. I also lined the front and the back to polish the seams.


Now I zigzag stitched all around the fabric, since I don't have a riveter. Well, I do, but it's damaged. One of these days I'll have it fixed.
I started to join all the pieces with seams, but not before gathering the fabric that was going through the princess cut.
Then I stitched the lining and the views. As you can see, it looks very nice on the outside, as well as on the inside, because this is an important part of my sewing, that they look neat on all sides.


Once ready, I sewed the decoration on the neck part, which made it look prettier and my princess looked beautiful. I also made a headband to match her shirt.
This shirt, in spite of everything, was easy to make; it took some time, because all the seams were finished and the views are double stitched.
And the good thing is that I finished it on the 23rd and 24th, I wasn't sewing as I did on the 31st.
Look how pretty my princess turned out. What did you think of the blouse? I loved it and I already want to make her this model in other fabrics and colors.
Now I say goodbye and thank you for your visit. I'll see you in the next post, I have several more to share with you.

Mi blog es familiar, de mi día a día, en donde puedo subir fotos de niños u otras personas de mi entorno, NO autorizo a usar mis fotografías sin mi autorización.
My blog is a family blog, of my daily life, where I can upload photos of children or other people around me, I do NOT authorize you to use my photos without my authorization.
Dispositivo | Device | Samsung Galaxy A54
Fotos editadas en: |Photos edited in | CC Express for Picsart / Canva
Separadores hechos en | Separators made in | CC Express for Samsung
Traducción con | Translation with| DeepL