
Hello, hello greetings to all today I join this wonderful contest brought to us by the #jewelry community which is about making an accessory inspired by our country
Hola, hola saludos para todos hoy me uno a este maravilloso concurso que nos ha traído la comunidad #jewelry el cual trata de realizar un accesorio inspirado en nuestro país
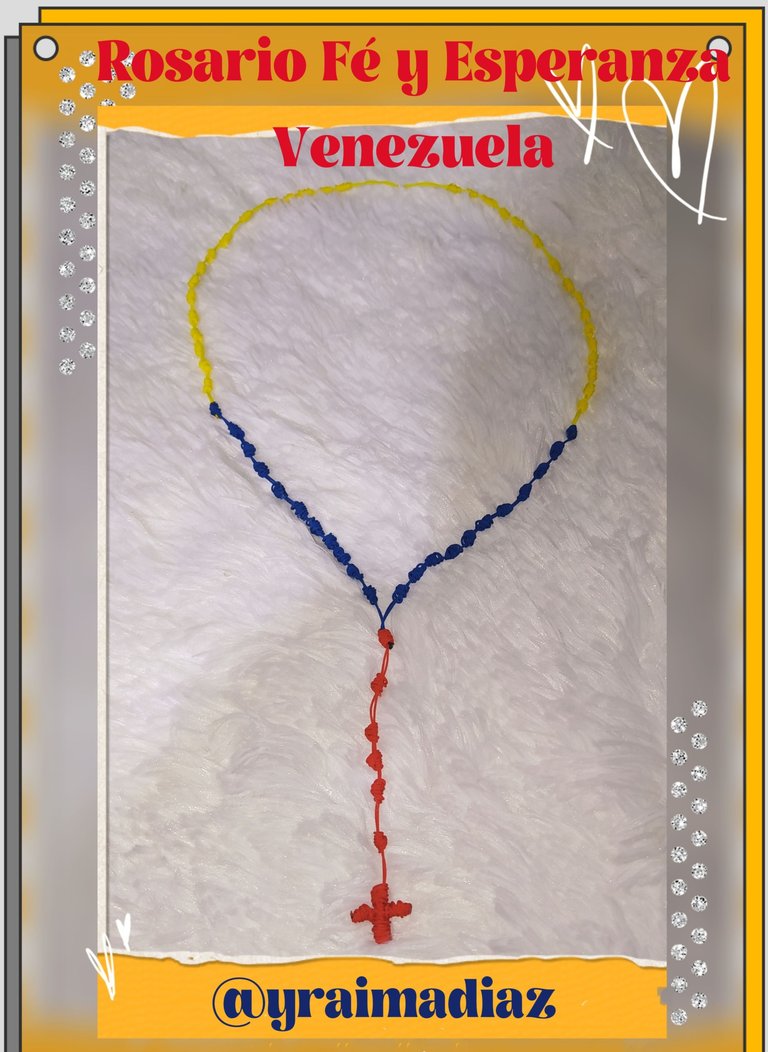
That is why today I have brought you a Rosary of Faith and Hope inspired by the colors of the flag of my country Venezuela, our tricolor inspires us and transmits to each one of us Venezuelans what each color means to us.
Yellow symbolizes the richness and fertile lands of Venezuela.
Blue represents the Caribbean Sea that covers Venezuela's maritime coasts.
Red represents the blood shed in the struggle for the independence of our country.
Por eso hoy les he traído para participar un Rosario de Fé y Esperanza inspirado en los colores de la bandera de mi país Venezuela,nuestro tricolor nos inspira y transmite a cada uno de los Venezolano lo que significan para nosotros cada color.
El Amarillo simboliza las riquezas y las tierras fértiles Venezolanas.
El Azul representa el Mar Caribe que cubre las costas marítimas de Venezuela.
El Rojo representa la sangre derramada en la lucha por la independencia de nuestro país.
I am making this beautiful Rosary using the Franciscan knot technique, for this I will be using Chinese thread which I doubled to be able to appreciate all its terminations.
Each knot of this Rosary symbolizes the faith, hope and union of every Venezuelan in the world.
Este Hermoso Rosario lo estoy realizando utilizando la técnica del nudo franciscano para ello estaré utilizando hilo chino el cual puse doble para poder apreciar todas sus terminaciones.
Cada nudo de este Rosario simboliza la fé, esperanza y unión de cada Venezolano en el mundo.
Here is the list of the materials to be used and the step-by-step instructions.
Por acá les comparto la lista de los materiales a utilizar y su paso a paso.
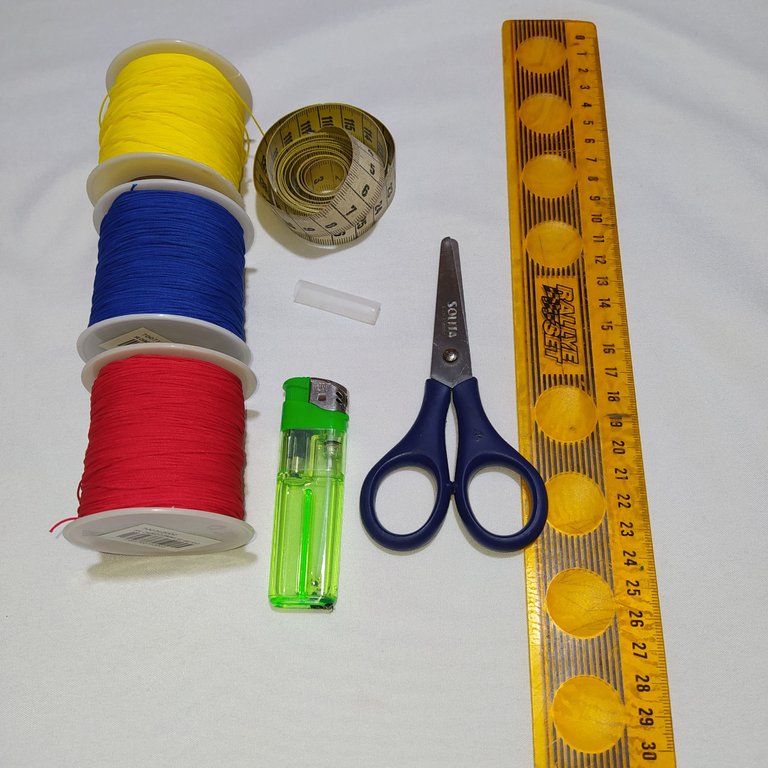
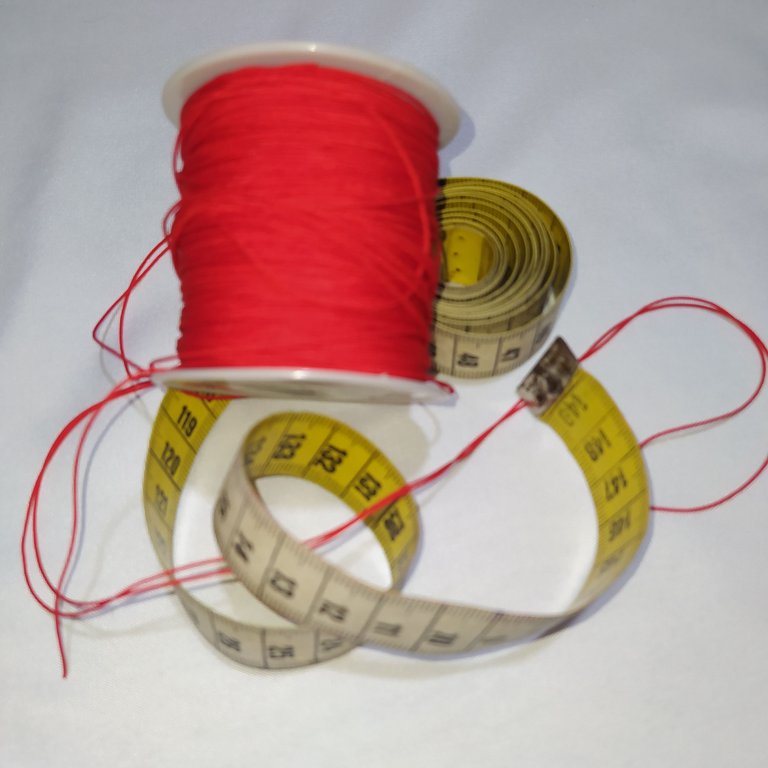
Materiales.
- Hilo chino amarillo
- Hilo chino azul.
- Hilo chino rojo.
- Cinta métrica.
- Regla.
- Tijera.
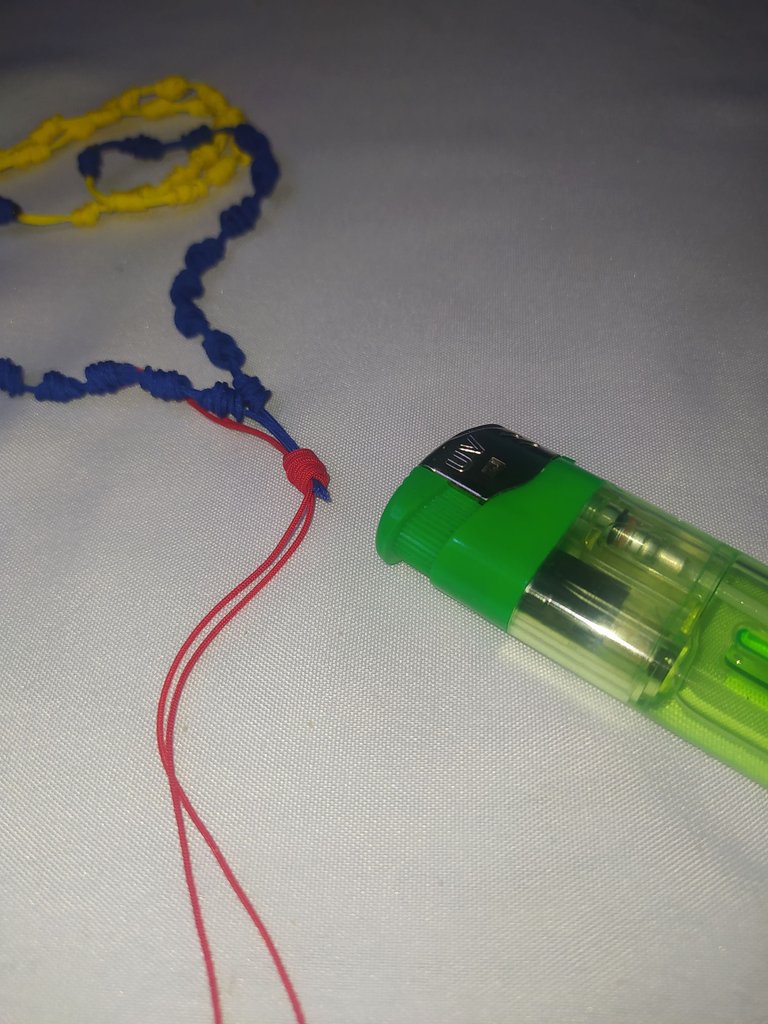
- Encendedor.
- Pitillo.
Materials.
- Yellow Chinese thread
- Blue Chinese thread.
- Red Chinese thread.
- Tape measure.
- Ruler.
- Scissors.
- Lighter.
- Straw.
 |  |  |
|---|
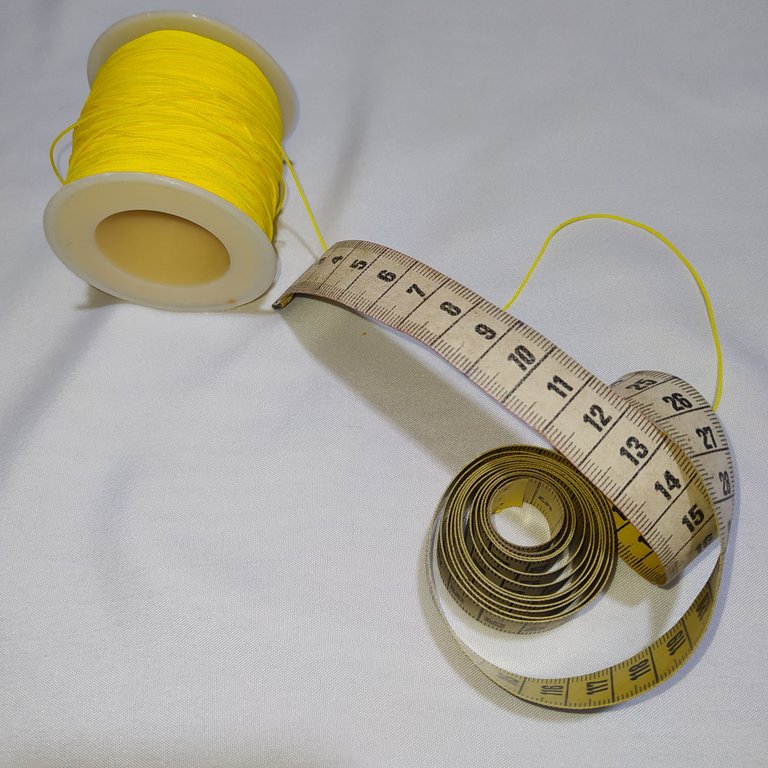
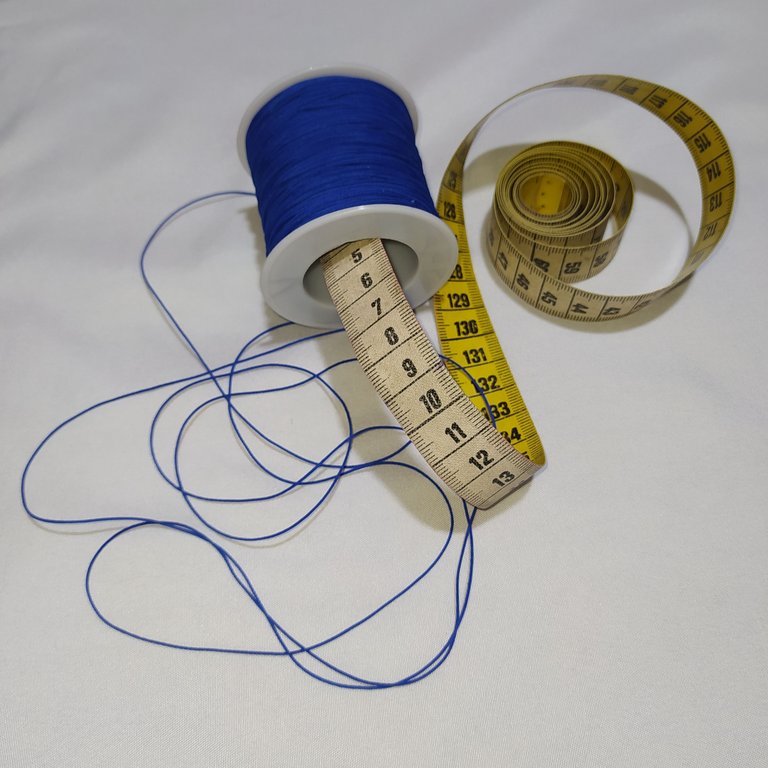
- The first thing to do is to measure the amount of thread to be used with the help of a tape measure.
- Lo primero que haremos será medir con ayuda de la cinta métrica la cantidad de hilo a utilizar.
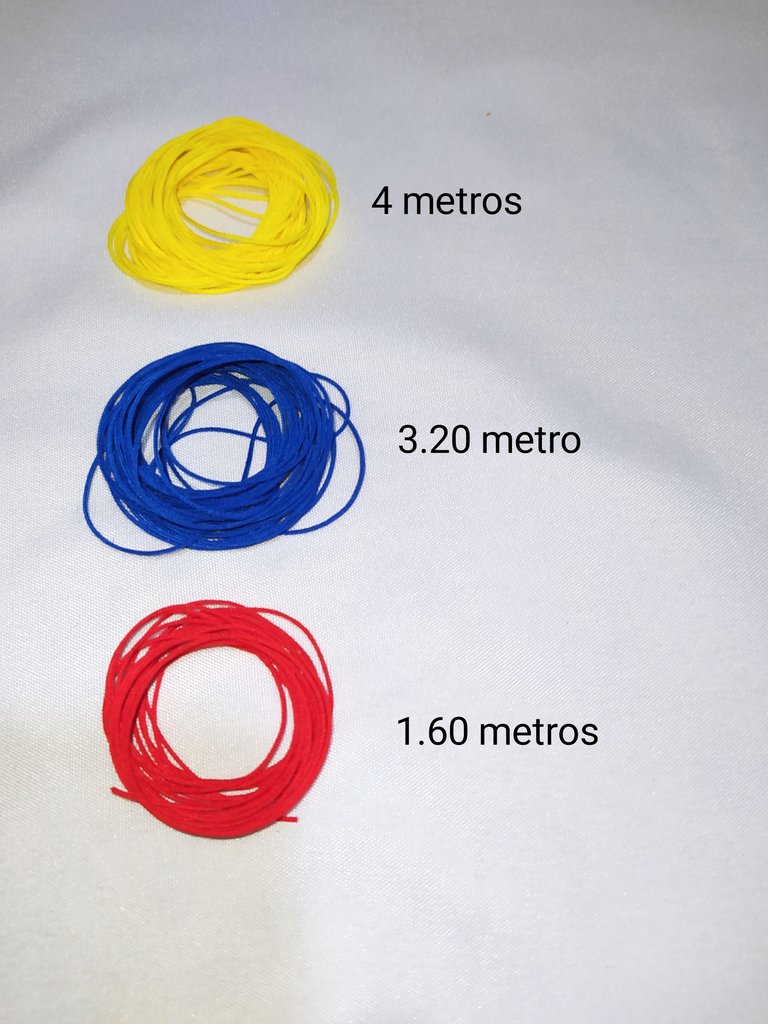
- Yellow yarn 4 meters.
- Blue thread 3.20 meters.
- Red thread 1.60 meters.
- Hilo amarillo 4 metros.
- Hilo azul 3.20 metros.
- Hilo rojo 1.60 metros.
Let's move on to the step-by-step procedure for its preparation.
Pasemos al paso a paso para su elaboración.
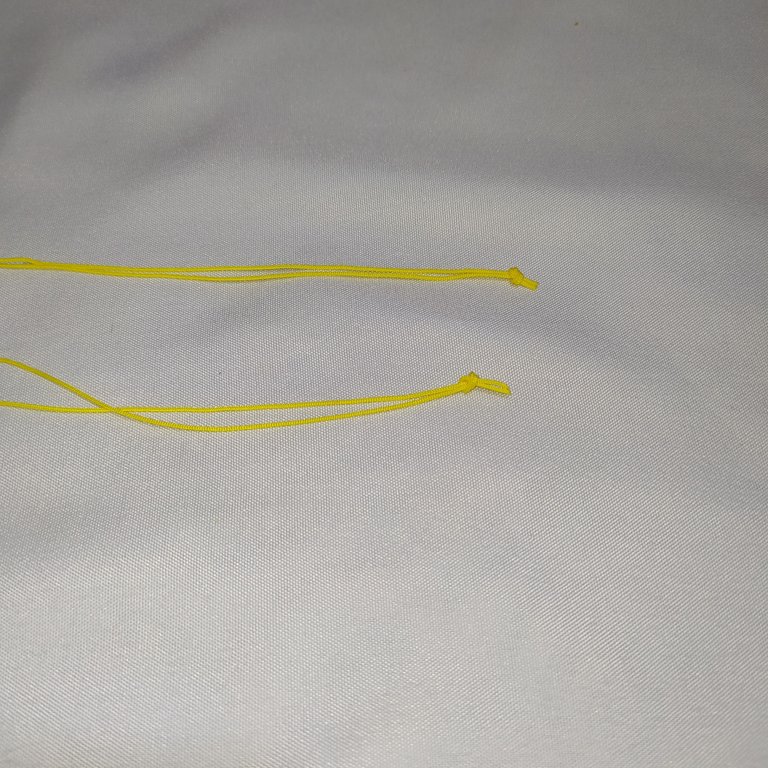
💛 Let's start with the yellow thread.
💛 Vamos a empezar con el hilo amarillo.
 |  |
|---|
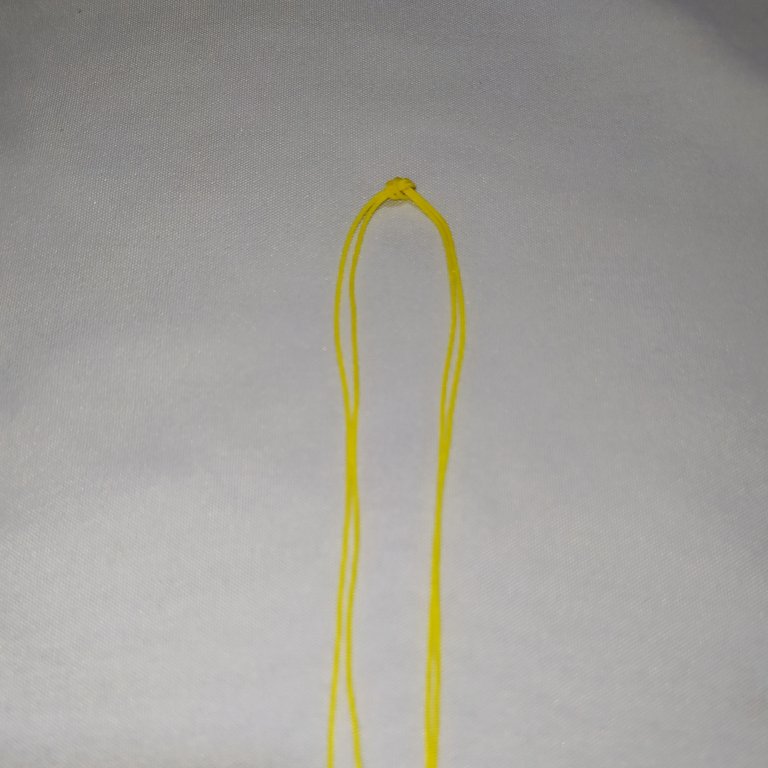
- To find the center of the thread, we join the ends of the thread.
- We place the double thread and we make a simple knot, which will be the guide or divider thread (this knot at the end of the rosary we must remove).
- Also made a knot at the ends.
- Para encontrar el centro del hilo, para ello unimos sus puntas
- Colocamos el hilo doble y hacemos un nudo sencillo, el cual será el hilo guía o divisor.( Este nudo al finalizar el rosario debemos quitar)
- También le realizó un nudo en las puntas.
Franciscan knot technique.
Técnica del nudo franciscano.
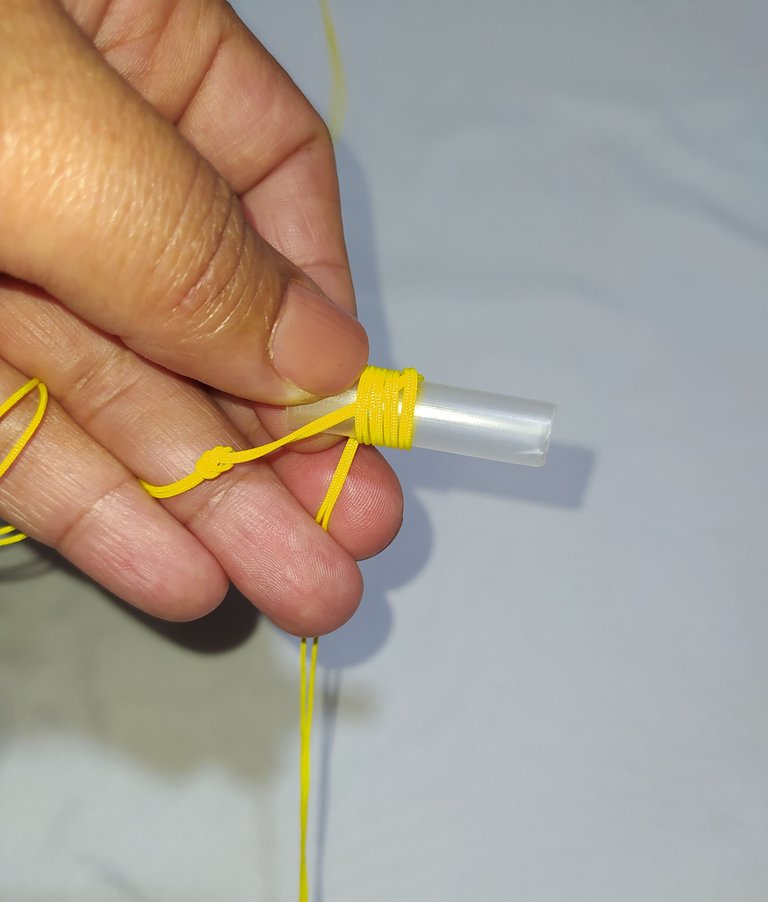
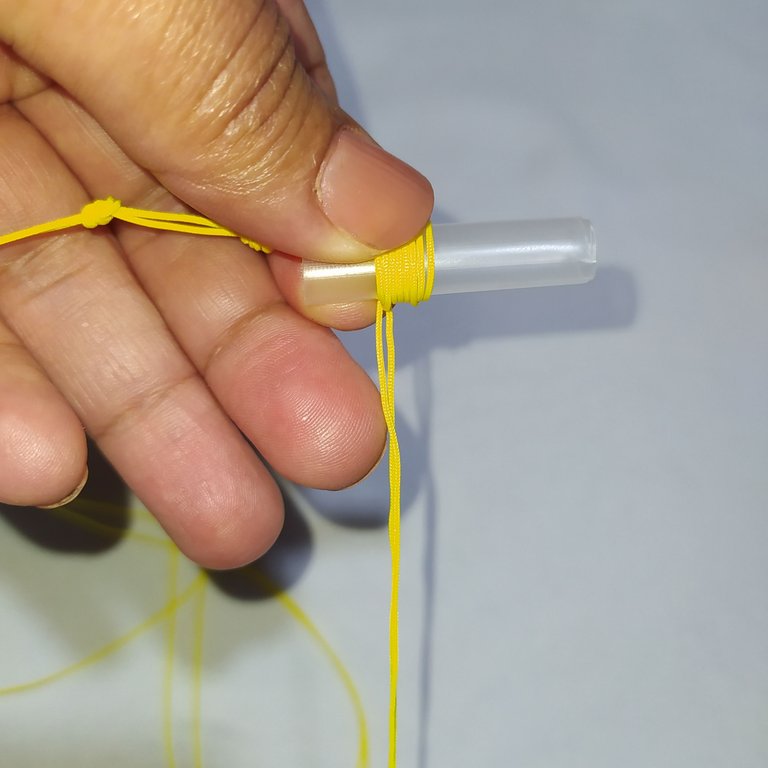
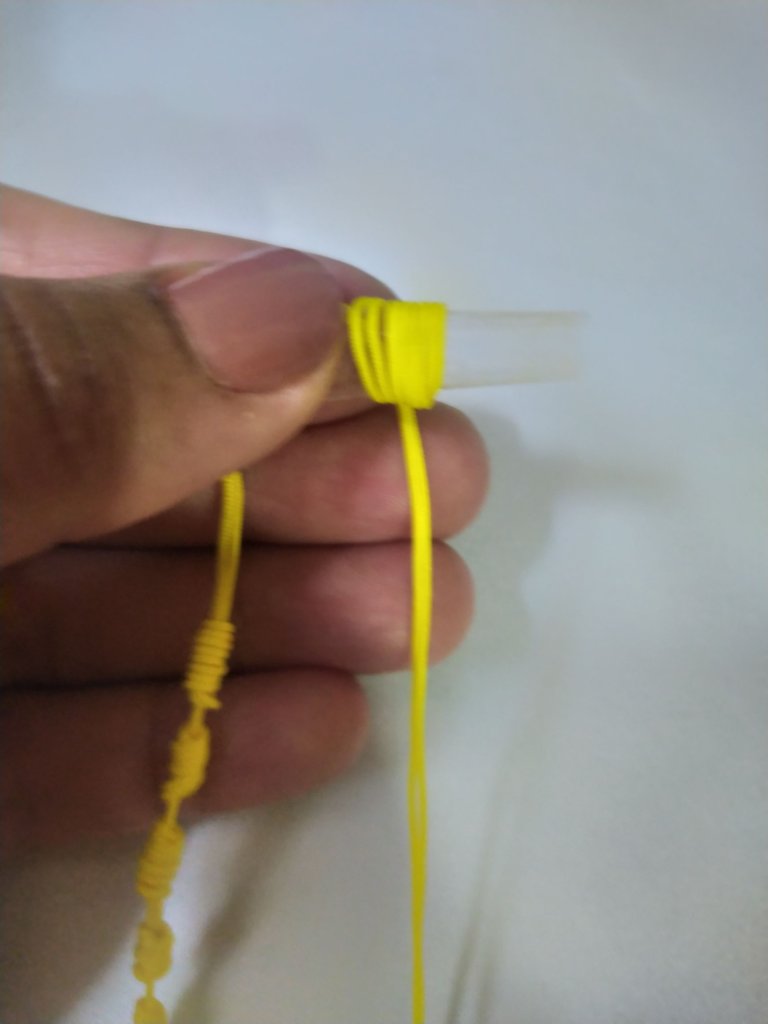
- We take the thread and place it on top of the straw and twist it 4 times, from right to left.
- Tomamos el hilo y colocamos encima del pitillo y le damos 4 vueltas, de derecha hacia la izquierda
 |  |
|---|
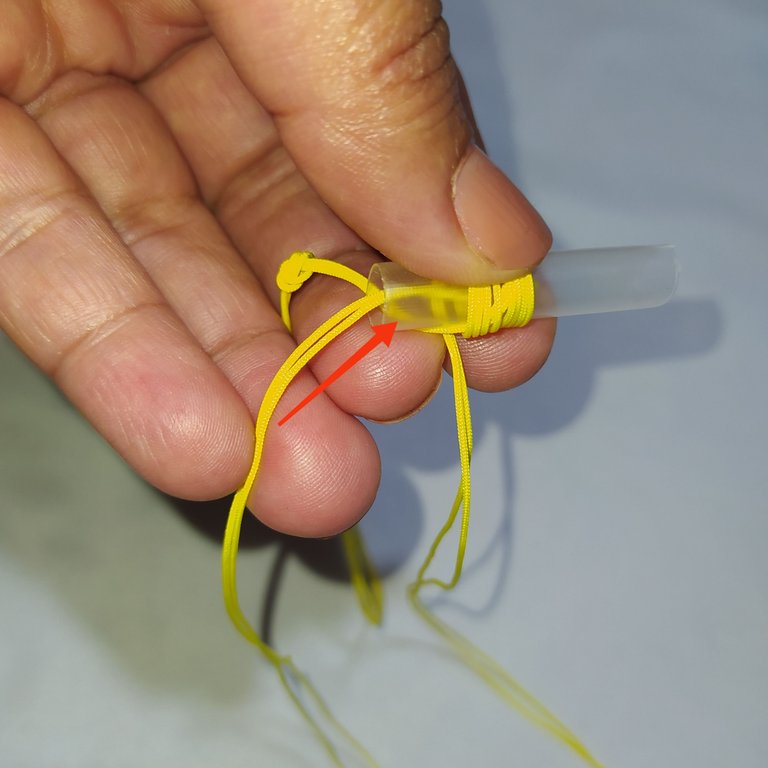
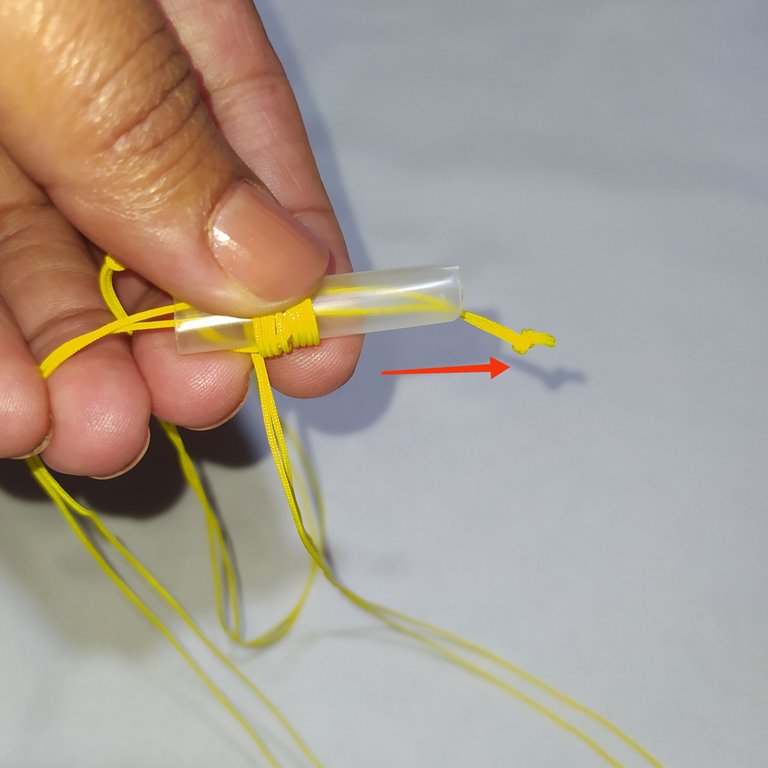
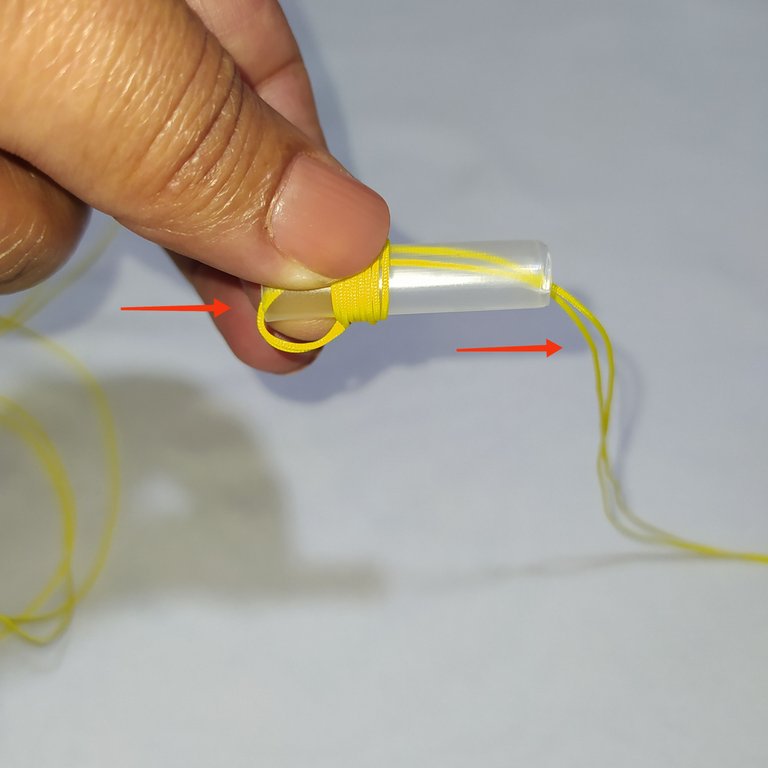
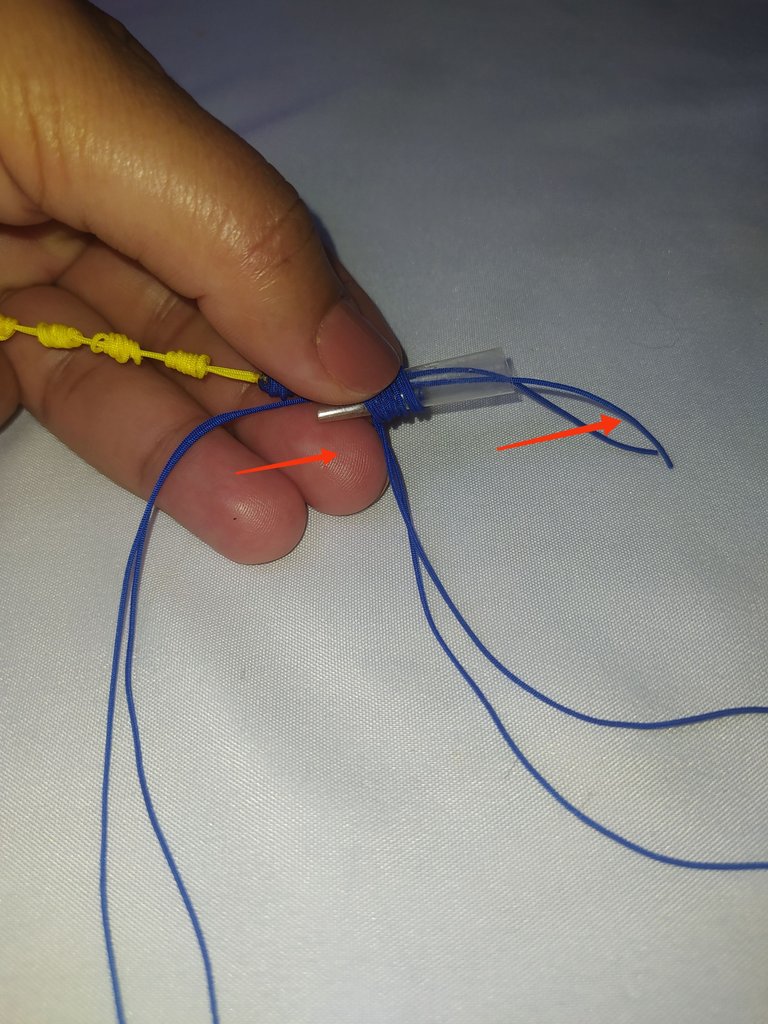
- Insert the end of the thread through the left side of the hole of the straw and then pull it out through the other end of the straw as shown in the photo.
- Introducimos la punta del hilo por el lado izquierdo del orificio del pitillo y luego sacamos por el otro extremo del pitillo como muestro en la foto.
 |  |
|---|
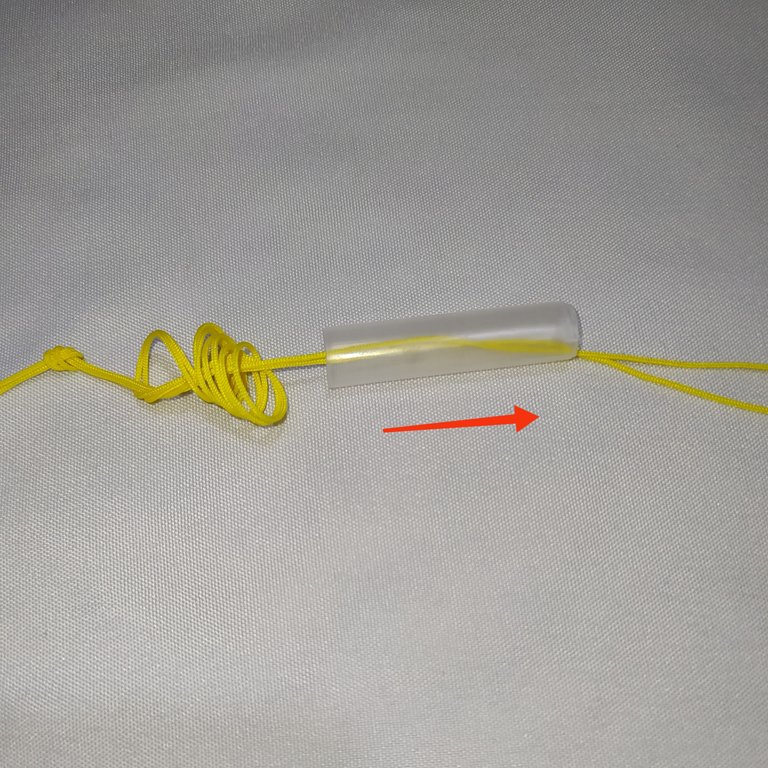
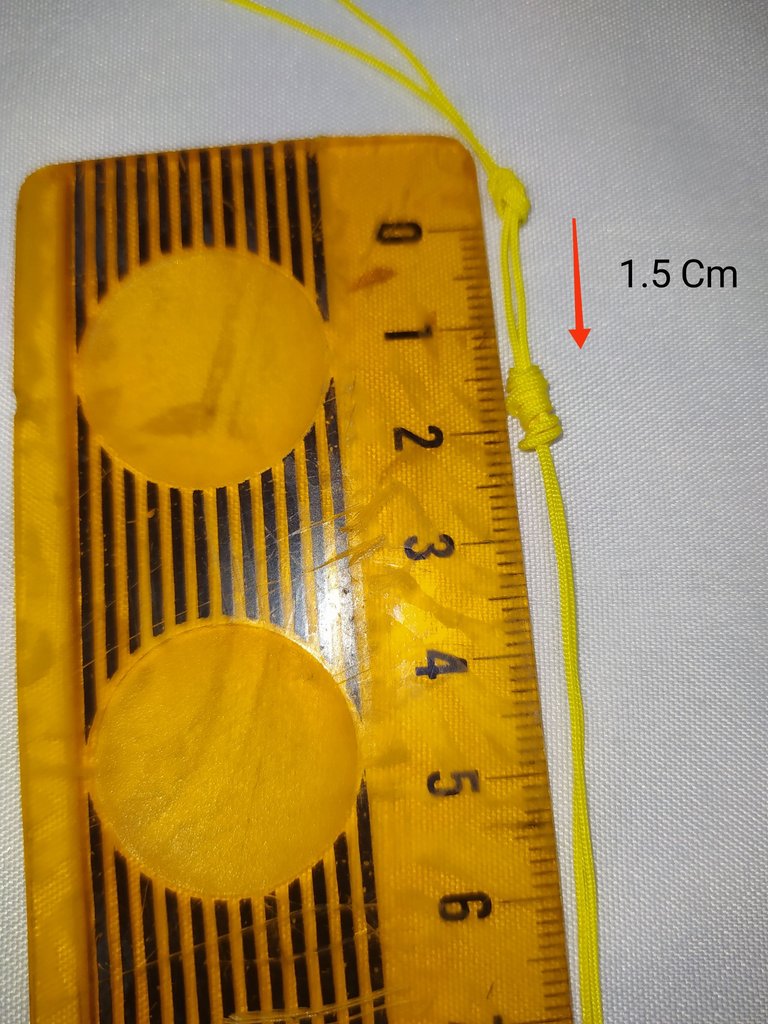
- Then I slowly pull out the straw and tighten the threads.
- Then I pull the end of the threads to form the knot.
- We must leave 1.5 centimeters of the thread guide to the first knot.
- Luego voy sacando el pitillo con lentitud y voy apretando los hilos.
- Luego halo la punta de los hilos para ir formando el nudo.
- Debemos dejar 1.5 centímetros del hilo guia al primer nudo.
 |  |  |
|---|
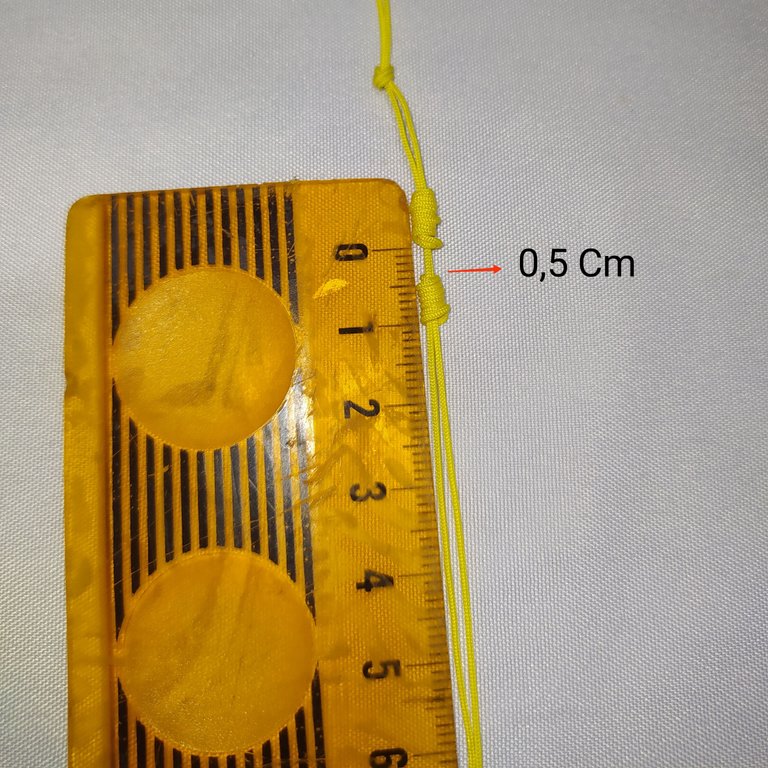
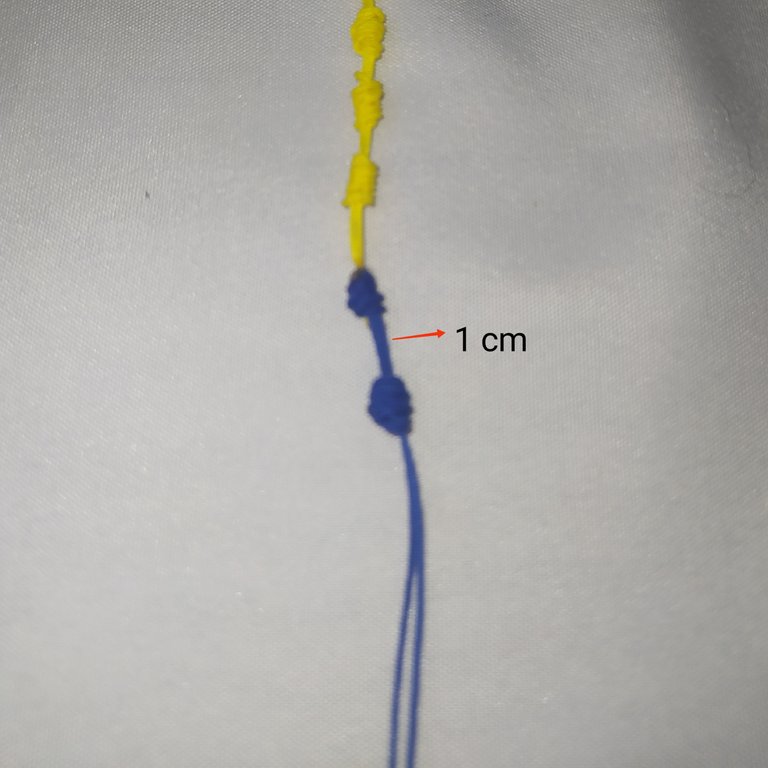
- We repeat the same procedure to tie the second knot but this time we must leave a separation of 0.5 cm.
- Repetimos el mismo procedimiento para realizar el segundo nudo pero está vez debemos dejar una separación de 0.5 cm
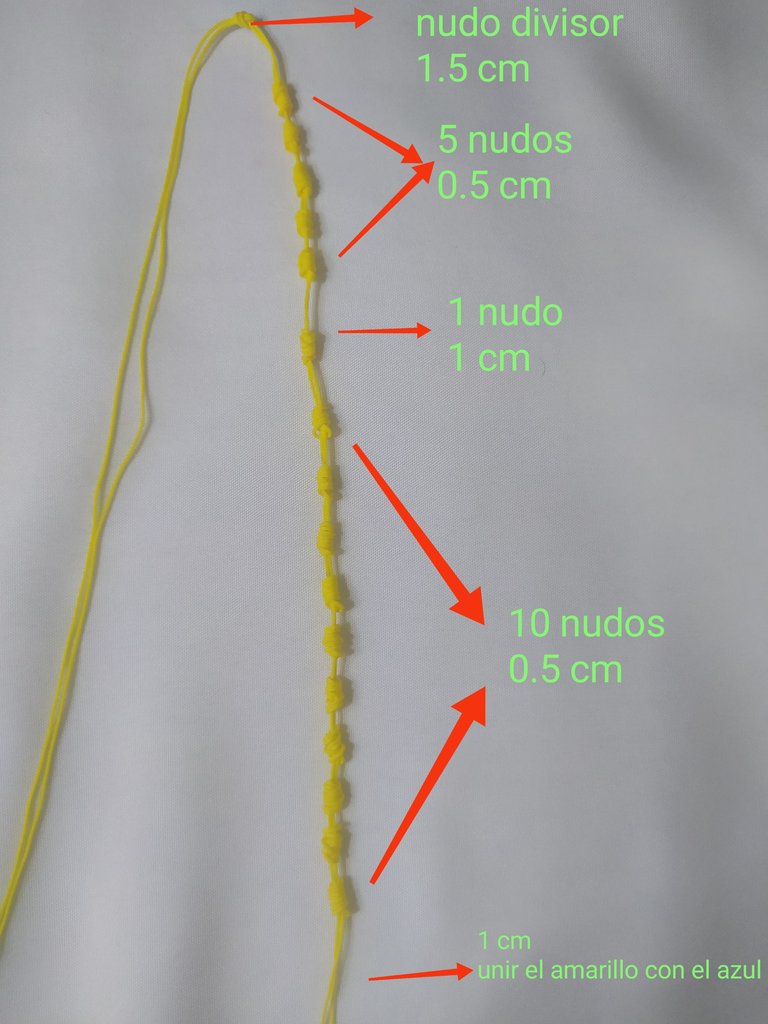
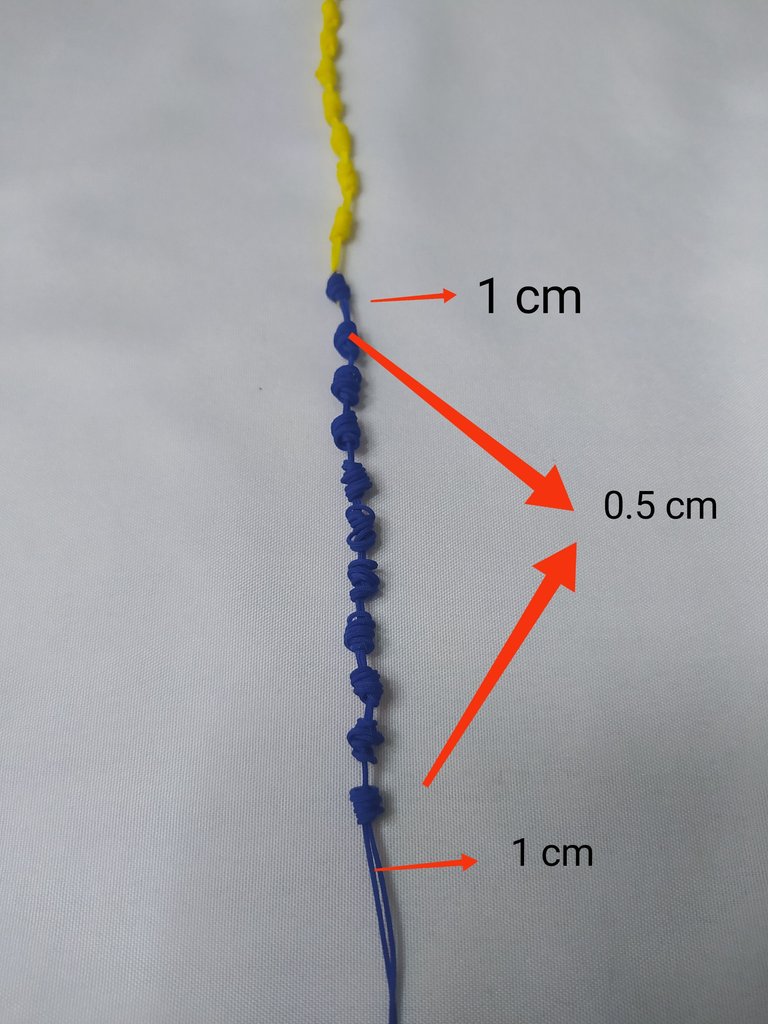
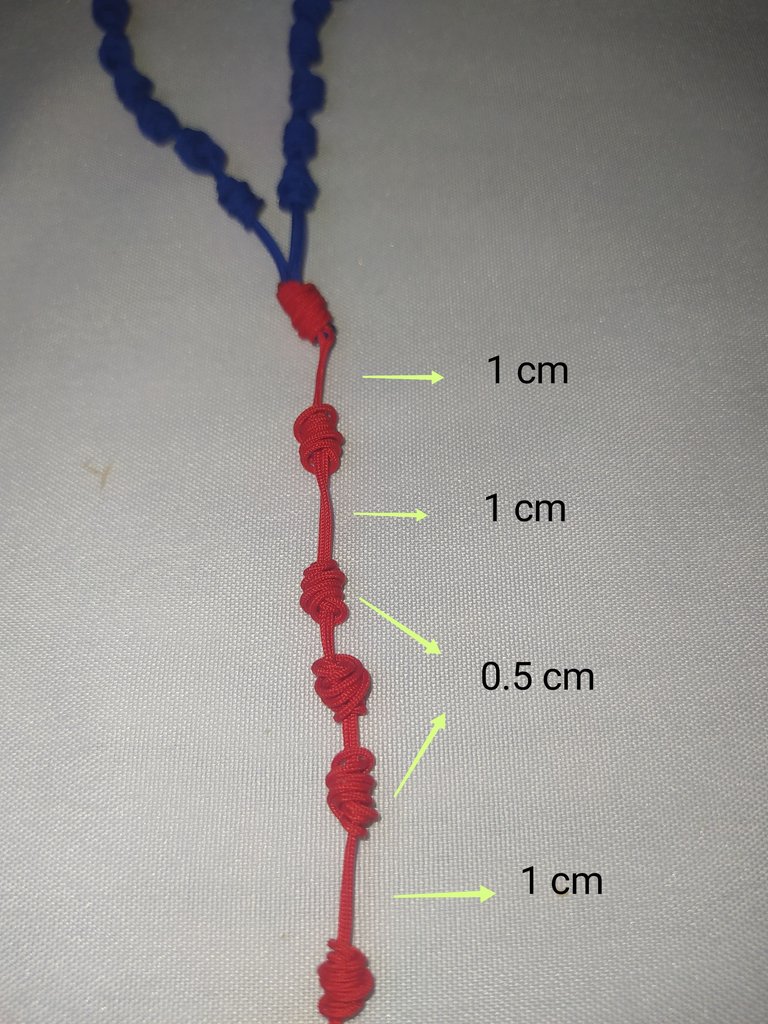
- With the yellow thread we are going to make 16 Franciscan knots like the one in the photo.
- From the guide or divider knot to the first knot we are going to leave 1 cm to make our first knot of four turns.
- We make 5 knots of 4 turns of 0.5 cm of separation between them.
- From the fifth knot we leave 1 cm of separation and we make a knot of 4 turns and we leave again 1 cm of separation.
- Now we are going to make 10 knots of 4 turns with 0.5 cm of separation between each one.
- Con el hilo amarillo vamos a realizar 16 nudos franciscanos como nuestro aquí en la foto.
- Dede el nudo guía o divisor al primer nudo vamos a dejar 1 cm para realizar nuestro primer nudo de cuatro vueltas.
- Realizamos 5 nudo de 4 vueltas de 0.5 cm de separación entre ellos.
- Desde el quinto nudo dejamos 1 cm de separación y realizamos un nudo de 4 vueltas y dejamos nuevamente 1 cm de separación.
- Ahora vamos a realizar 10 nudos de 4 vueltas con 0.5 cm de separación entre cada uno.
 |  |
|---|
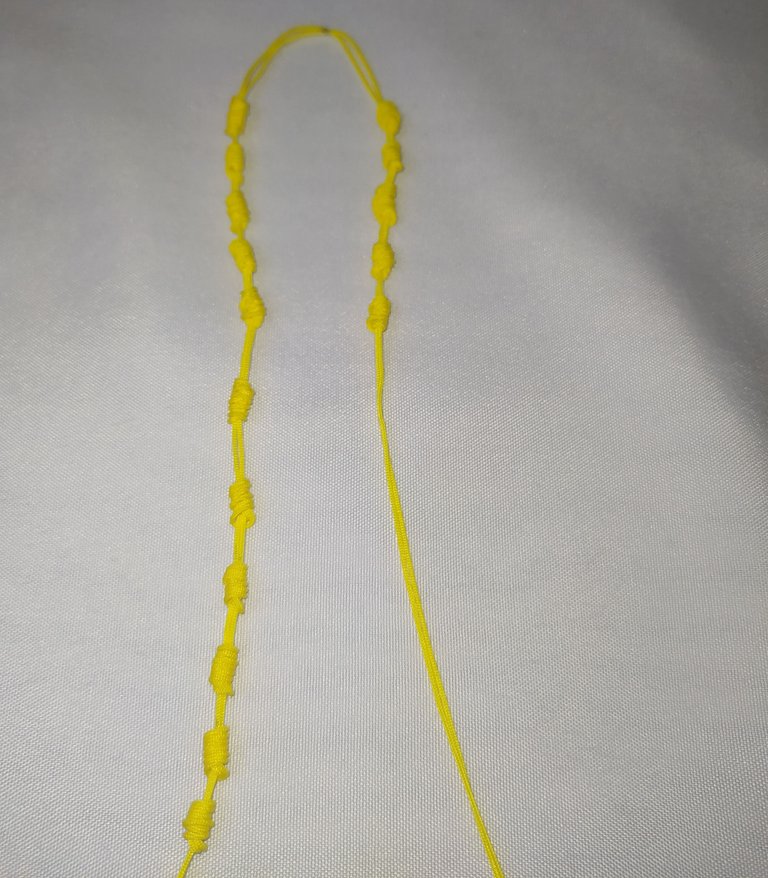
- Then we repeat the same step by step on the other part of the yellow thread.
- Luego repetimos el mismo paso a paso en la otra parte del hilo amarillo.
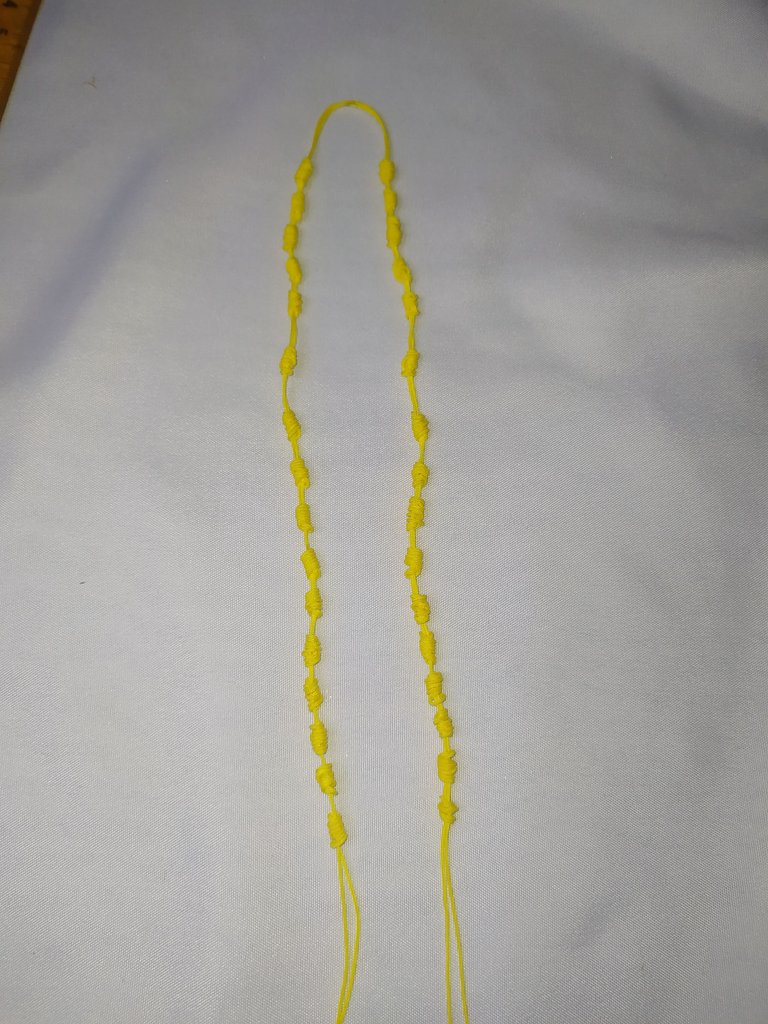
- We should look like this.
- Nos debe quedar así.
Let's join the yellow thread with the blue thread.
Pasemos a unir el hilo amarillo con el hilo azul.
💙 colors blue
💙 Color azul
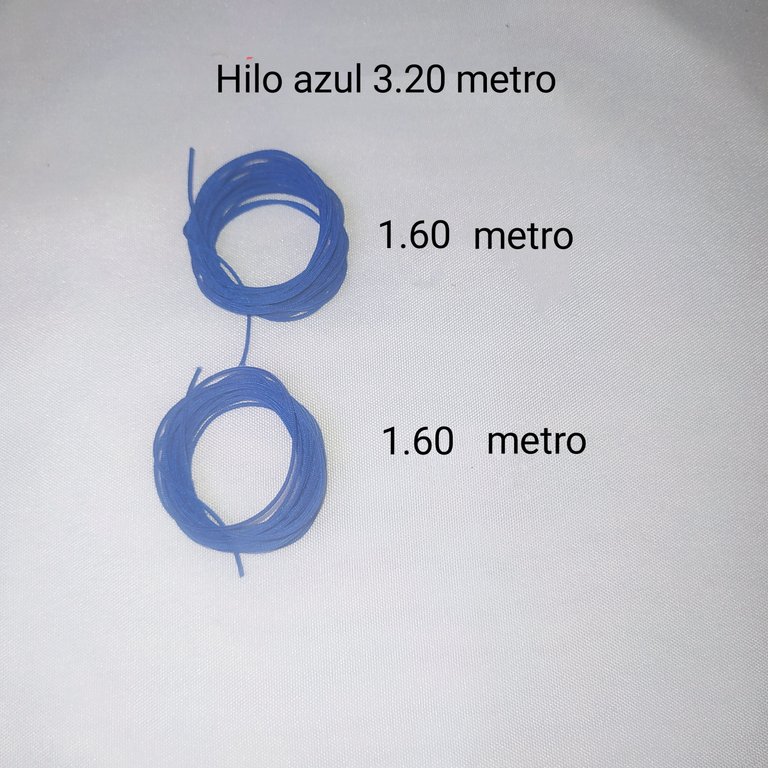
We are going to use 1.60 meters on each side.
Vamos a utilizar de cada lado 1.60 metros
 |  |  |
|---|
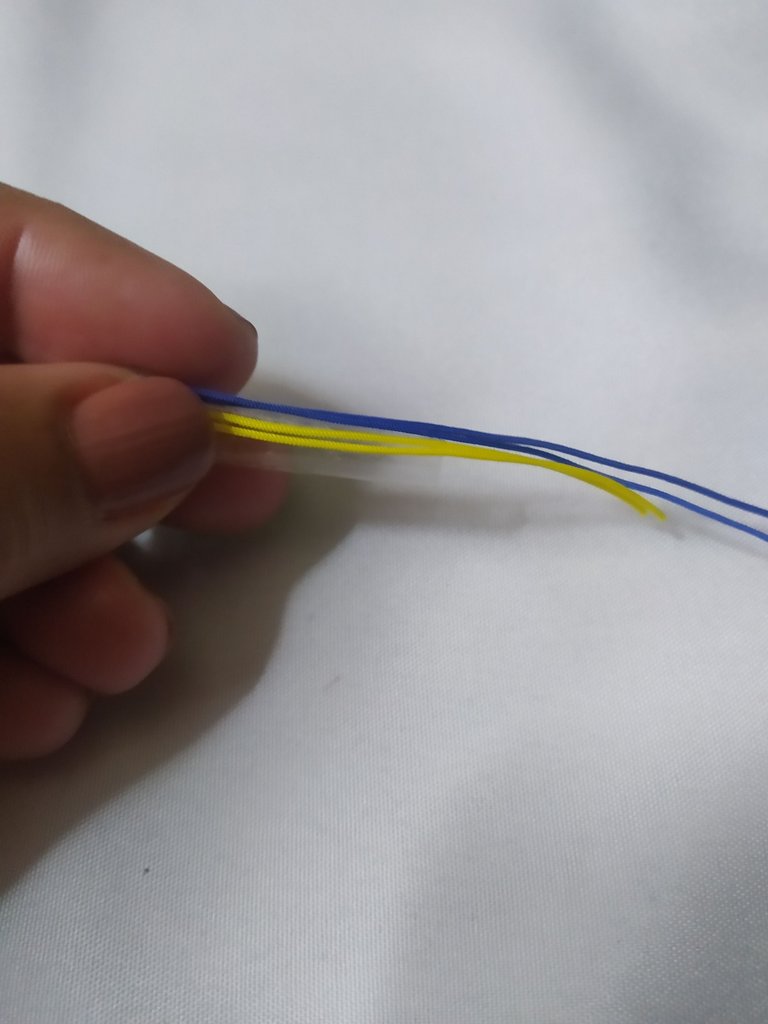
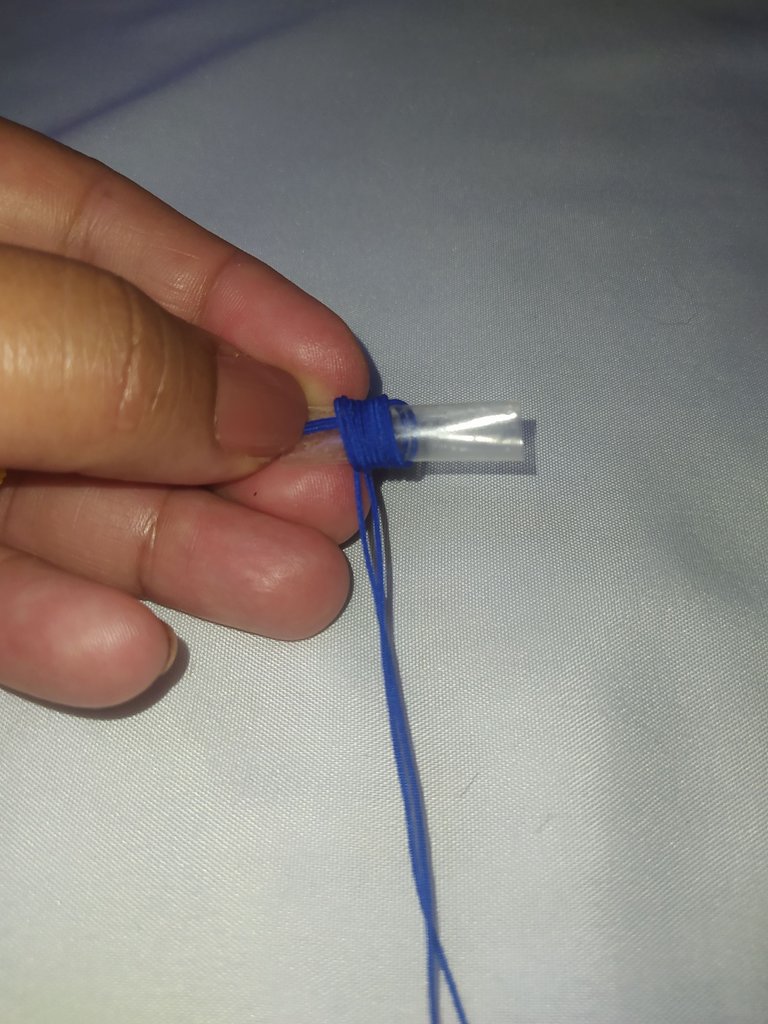
- We join the ends, fold in half and place the double thread.
- Then we place the yellow thread and the blue thread on top of the piece of straw.
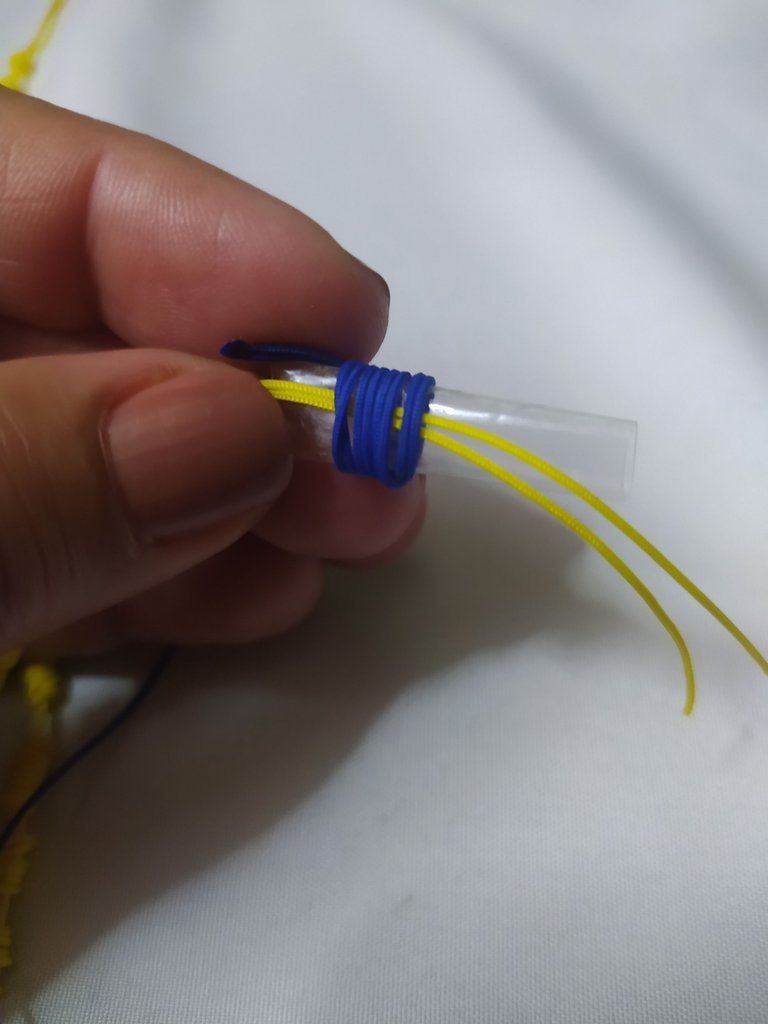
- We make four wrapping turns with the blue thread, making sure that the yellow thread is in the center.
- Insert the tip of the blue thread through the hole on the left side of the straw and pull it out through the hole on the right side of the straw.
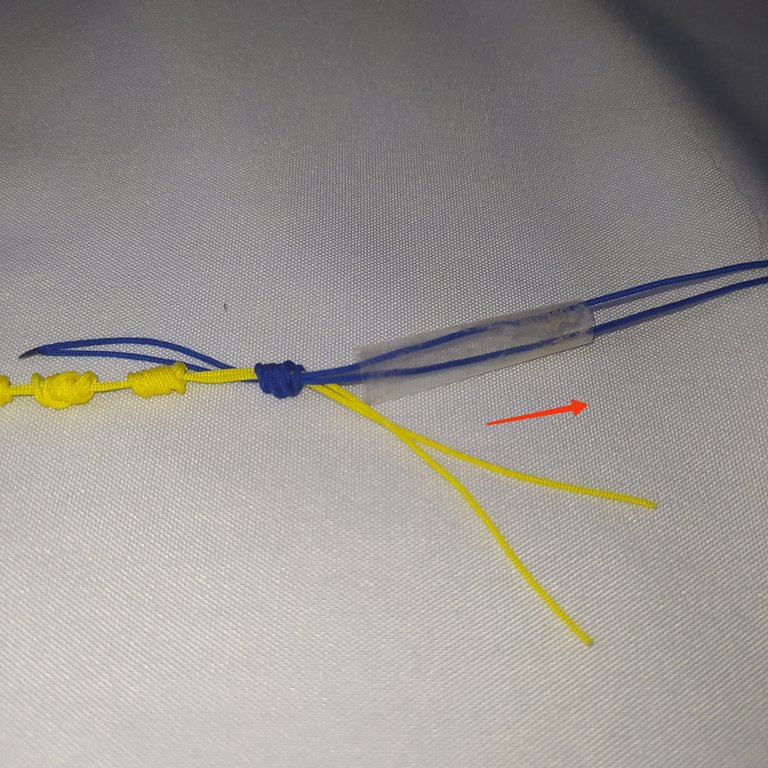
- We remove the straw little by little we pull the ends of the blue thread gently, we hold the knot and we give it its shape, then we measure that we are one centimeter away from the last yellow knot.
- Unimos las puntas doblamos a la mitad y colocamos el hilo doble.
- Luego colocamos el hilo amarillo y el hilo azul encima del trozo de pitillo.
- Damos cuatro vueltas de forma envolvente con el hilo azul, asegurándonos que el hilo amarillo quede en el centro.
- Introducimos la punta del hilo azul por el orificio del lado izquierdo del pitillo y sacamos por el orificio del lado derecho del mismo.
- Vamos retirando el pitillo poco a poco vamos tirando del las puntas del hilo azul con suavidad, sujetamos el nudo y vamos dándole su forma, luego medimos que nos quede a un centimetro del último nudo amarillo.
 |  |
|---|
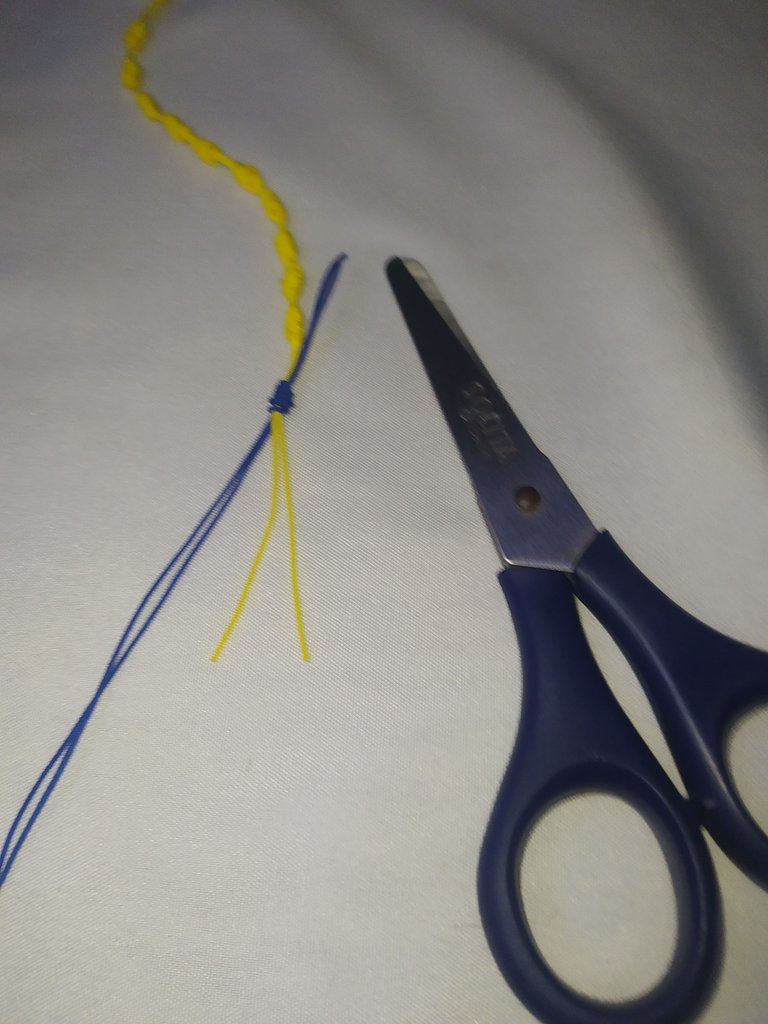
- Cut the excess threads (from the upper part the blue thread and from the lower part the yellow thread).
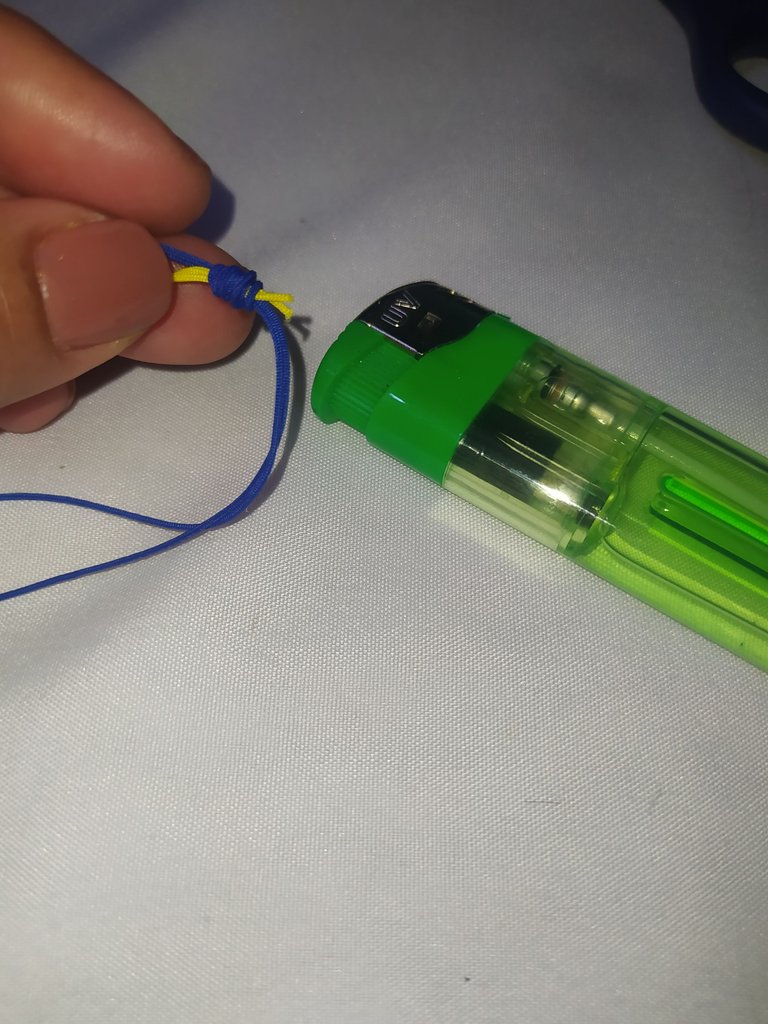
- We burn the ends to seal taking care to do it with the blue part of the flame.
- Cortamos los hilos excedentes.( de la parte de arriba el hilo azul y de la parte de abajo el hilo amarillo)
- Quemamos las puntas para sellar cuidando de hacerlo con la parte azul de la llama.
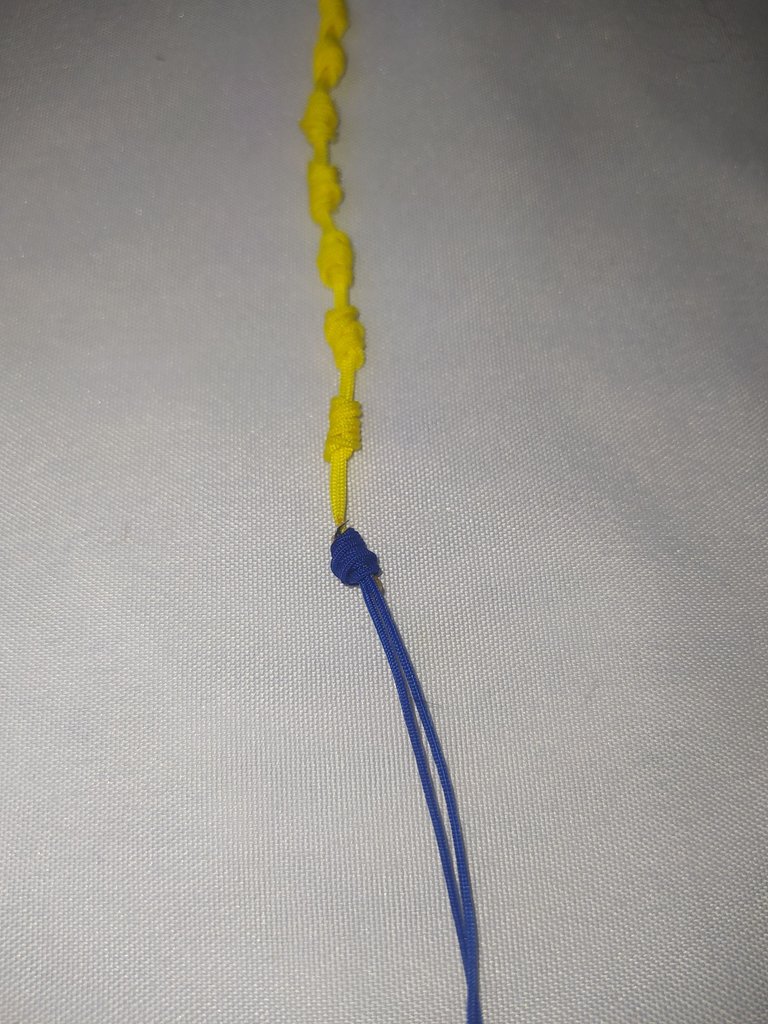
- This is how it should look.
- Así nos debe quedar.
 |  |
|---|
- We tie a second knot using the same technique as the Franciscan knot.
- Realizamos un segundo nudo aplicando la misma tecnica del nudo franciscano
 |  |
|---|
- We leave 1 cm of separation.
- We are going to make 11 knots with the blue thread.
- In the first two knots the distance of separation is 1 cm and in the remaining 9 knots we must leave 0.5 cm between them.
- Dejamos 1 cm de separación.
- Vamos a realizar con el hilo azul 11 nudos.
- En los dos primeros la distancia de separación es de 1 cm y en los 9 nudos restantes debemos dejar de separación entre ellos 0.5 cm.
 |  |
|---|
- We perform the same technique on the other side of the blue thread.
- Realizamos la misma técnica en el otro lado del hilo azul
❤️ Colors red
❤️ Color rojo
 |  |
|---|
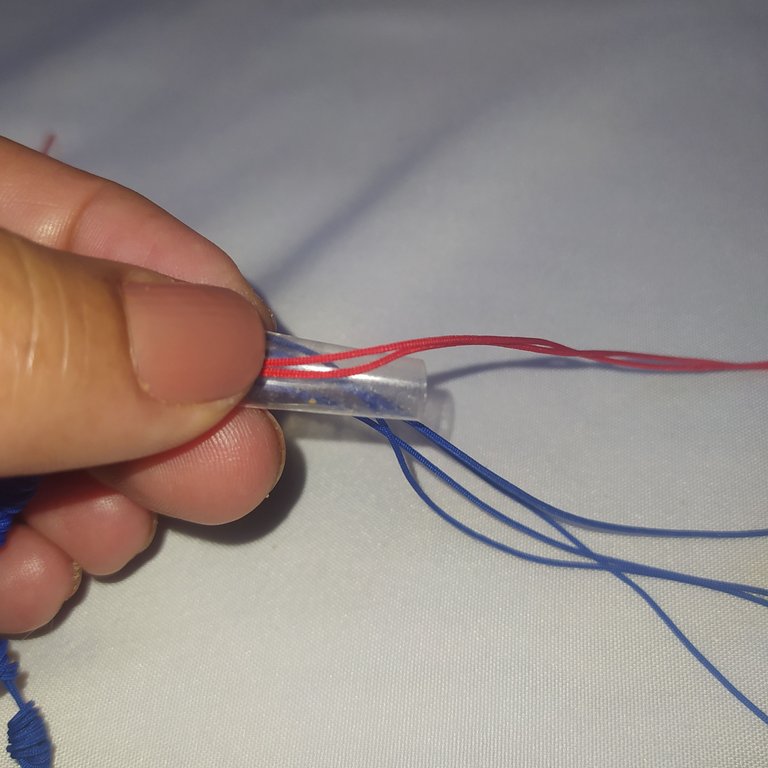
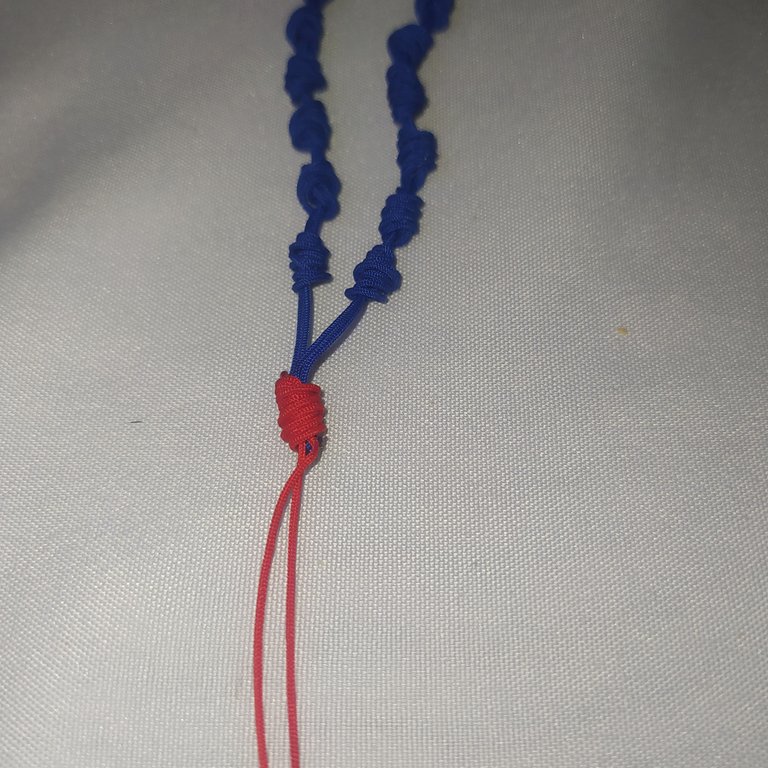
- Join the ends of the blue threads.
- We place the double red thread.
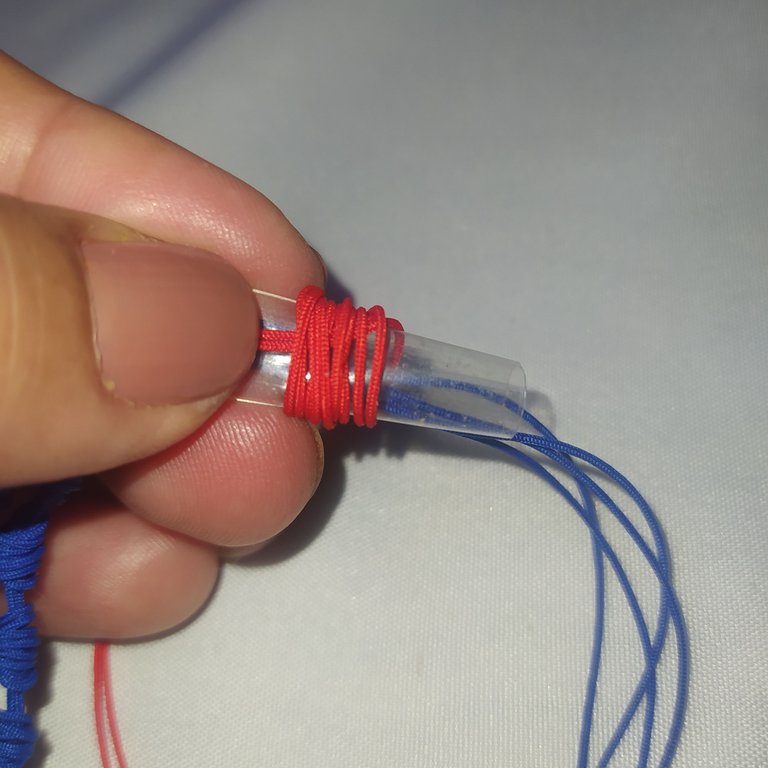
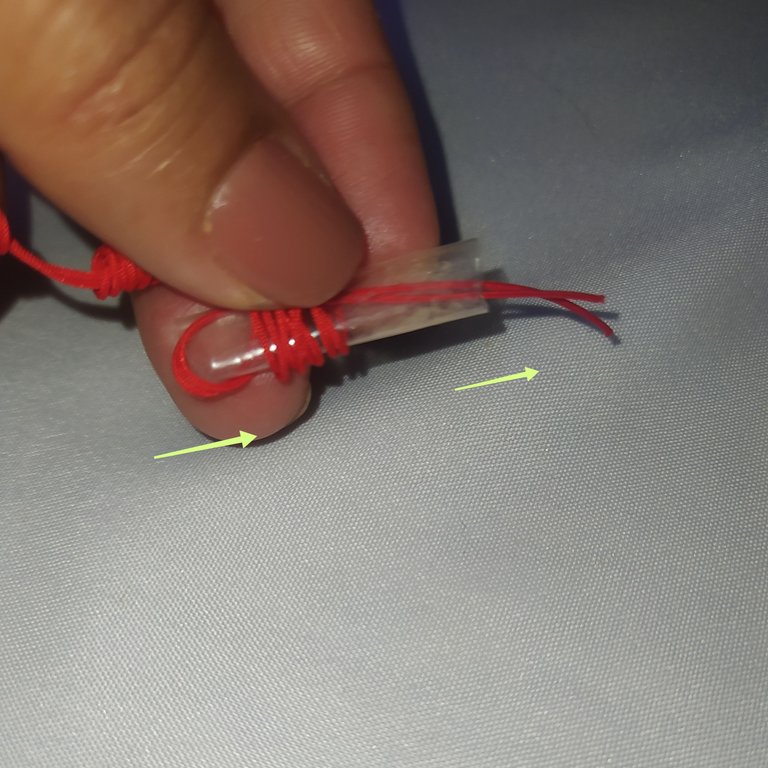
- Place the blue and red yarns on top of the straw, we turn it 5 times.
- Insert the tip of the red thread through the hole on the left side of the straw and pull it out through the right side of the straw.
- Unimos las puntas de los hilos azules
- Colocamos el hilo rojo doble.
- Colocamos los hilos azules y los hilos rojos encima del pitillo, le damos 5 vueltas.
- Introducimos la punta del hilo rojo por el orificio del lado izquierdo del pitillo y sacamos por el lado derecho del pitillo.
 |  |
|---|
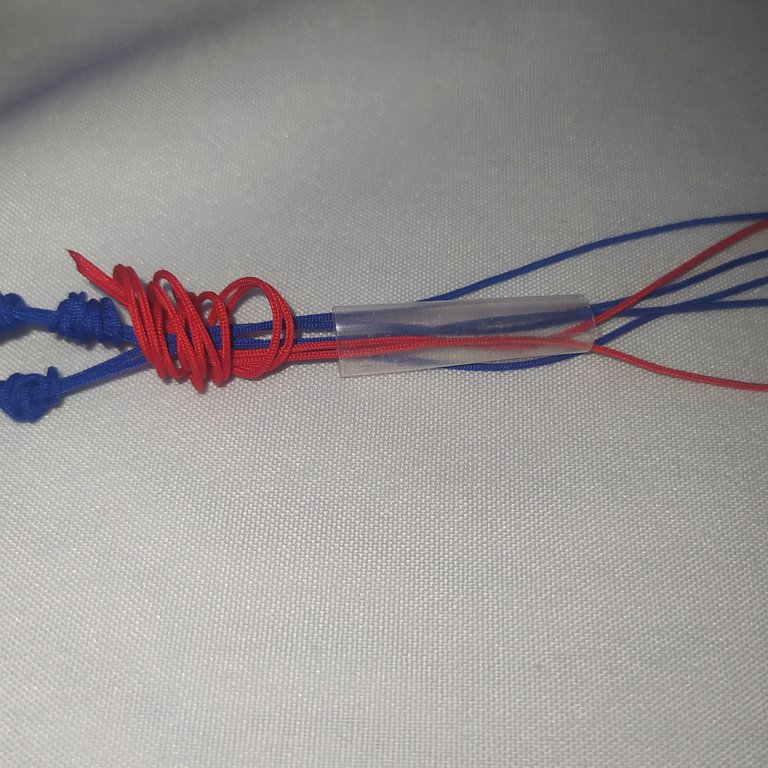
- Remove the straw
- Hold the knot and pull the ends of the red threads to secure the knot leaving a separation of 1 cm from the blue knots.
- Retiramos el pitillo
- Sujetamos el nudo y vamos jalando las puntas de los hilos rojos para asegurar el nudo dejando una separación de 1 cm desde los nudos azules.
 |  |
|---|
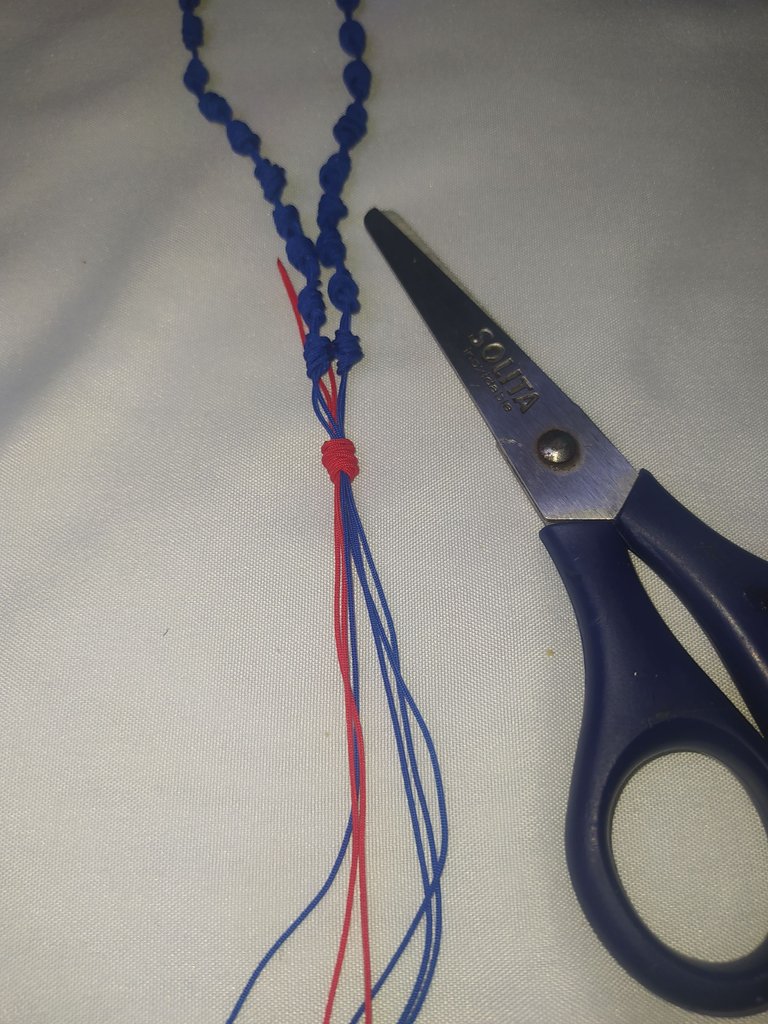
- We cut the excess thread at the top the red thread and at the bottom the blue thread.
- Cortamos el hilo sobrante en la parte de arriba el hilo rojo y en la parte el hilo azul.
- Then we burn the tips to seal them.
- Luego quemamos las puntas para sellar.
 |  |
|---|
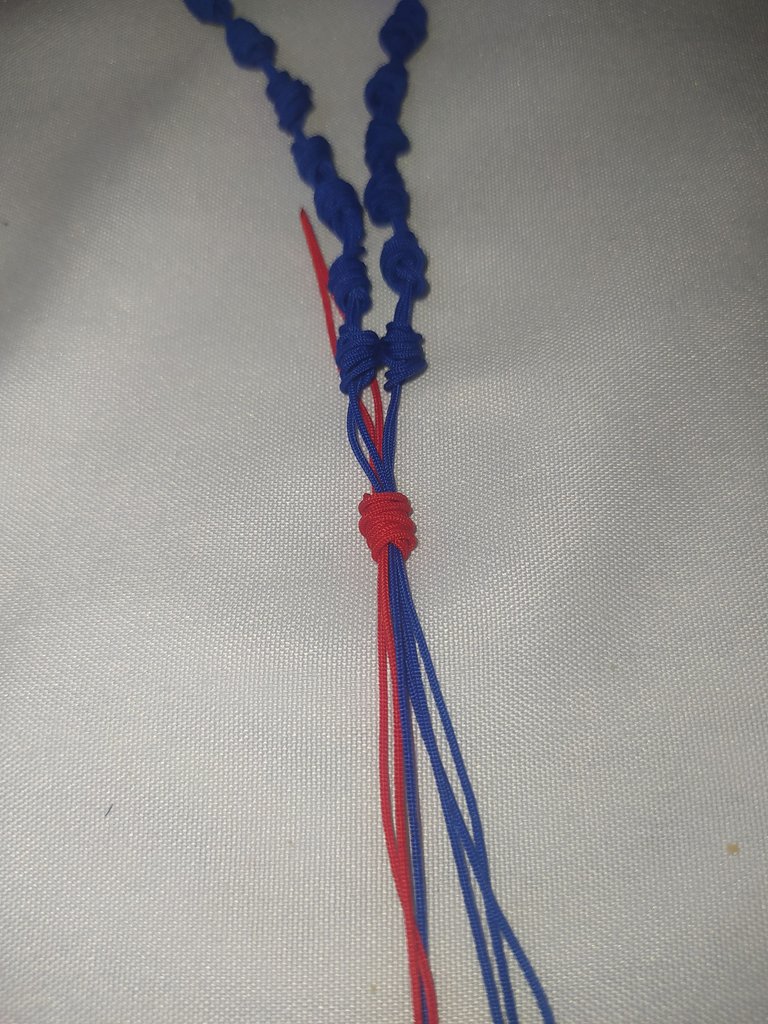
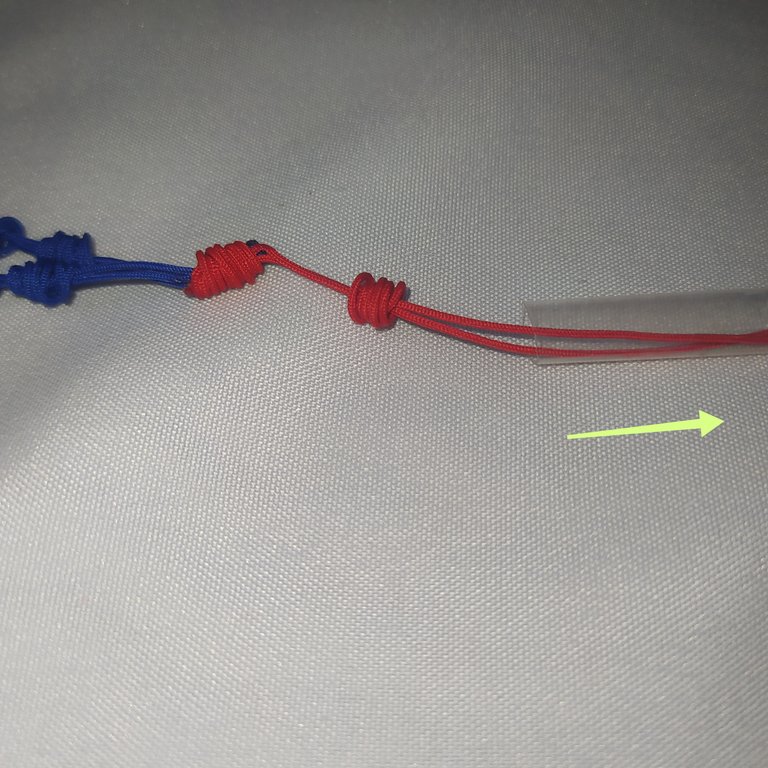
- We make a second one using the same method and leave 1 cm of separation between knots.
- Realizamos un segundo utilizando el mismo método y dejamos 1 cm de separación entre nudos.
- We are going to make a total of 6 knots which we will do in the following way, as shown in the photo.
Always repeating the Franciscan knot technique.
- Vamos a realizar en total 6 nudos los cuales haremos de la siguiente forma, como muestro en la foto.
Siempre repitiendo la técnica del nudo franciscano.
Cruz del rosario
Cruz del rosario.

- From the last knot we leave 1 cm of separation.
- To make the top of the cross we make a Franciscan knot of 5 turns.
- We leave 0.5 cm of separation.
- To make the bottom part of the cross, we make a knot of 6 turns.
- Dede el último nudo dejamos 1 cm de separación.
- Para realizar la parte de arriba de la cruz hacemos un nudo franciscano de 5 vueltas.
- Dejamos de separación 0.5 cm.
- Realizamos la parte de abajo de la cruz haciendo un nudo de 6 vueltas.
 |  |
|---|
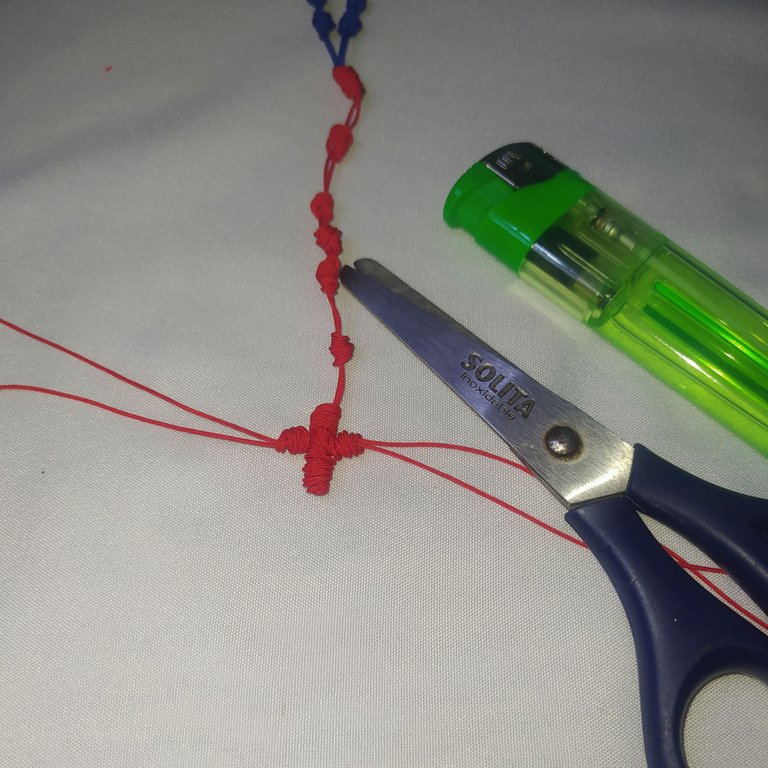
- We cut the excess thread and burn to seal.
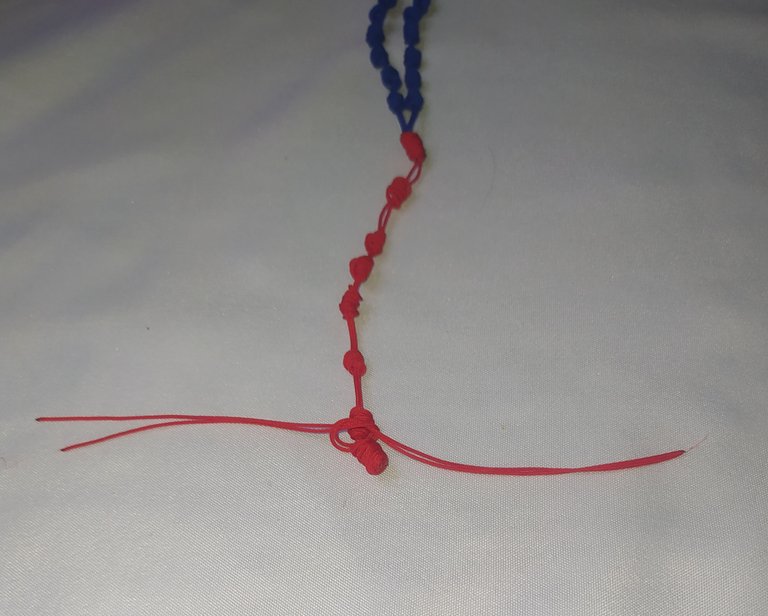
- With the remaining thread we are going to make the middle part of the cross.
- We tie it in the separation of the two knots, making a simple knot.
- Recortamos el hilo sobrante y quemamos para sellar.
- Con el hilo sobrante vamos a realizar la parte del medio de la cruz.
- Lo amarramos en la separación de los dos nudos, haciendo un nudo sencillo.
 |  |
|---|
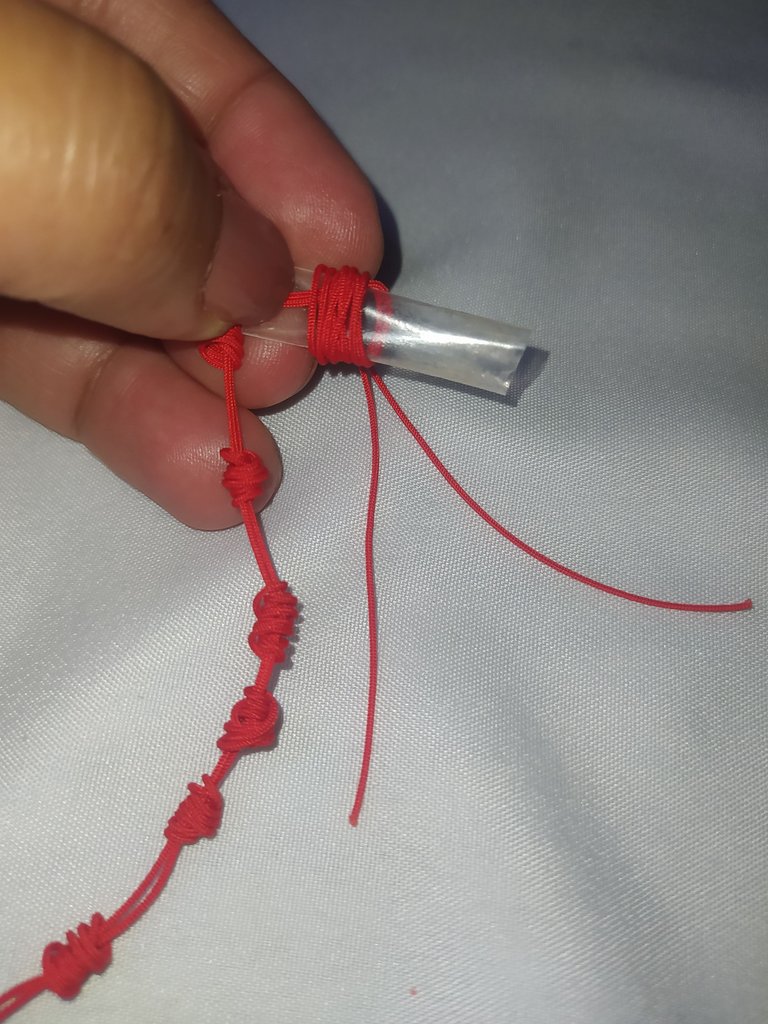
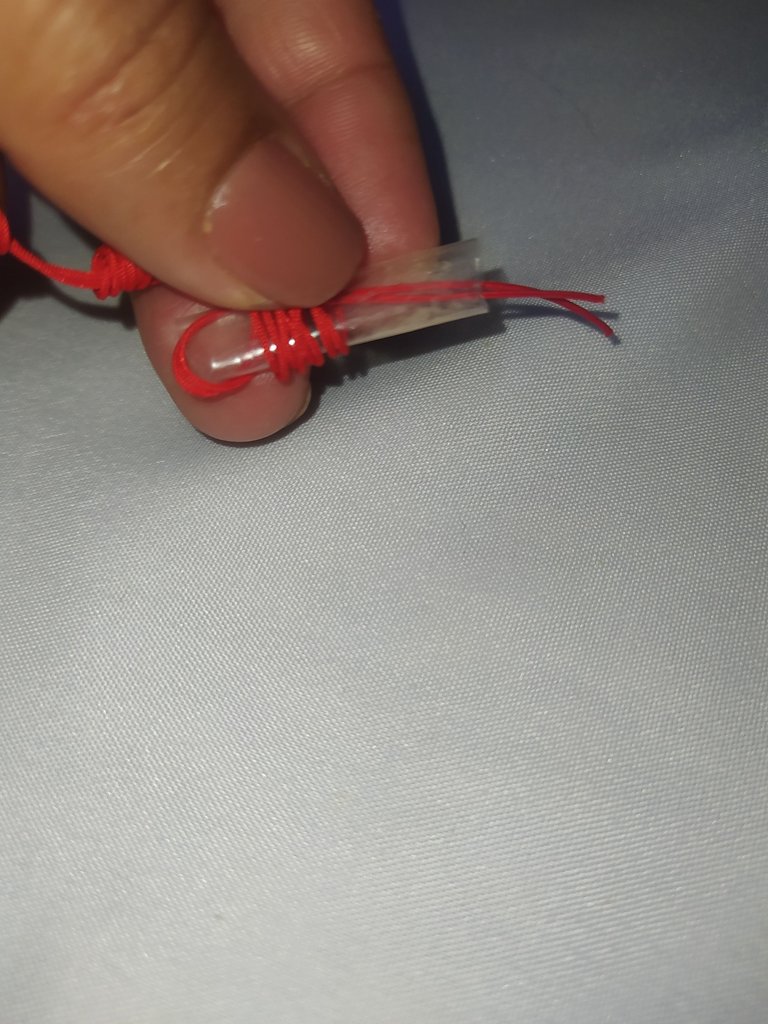
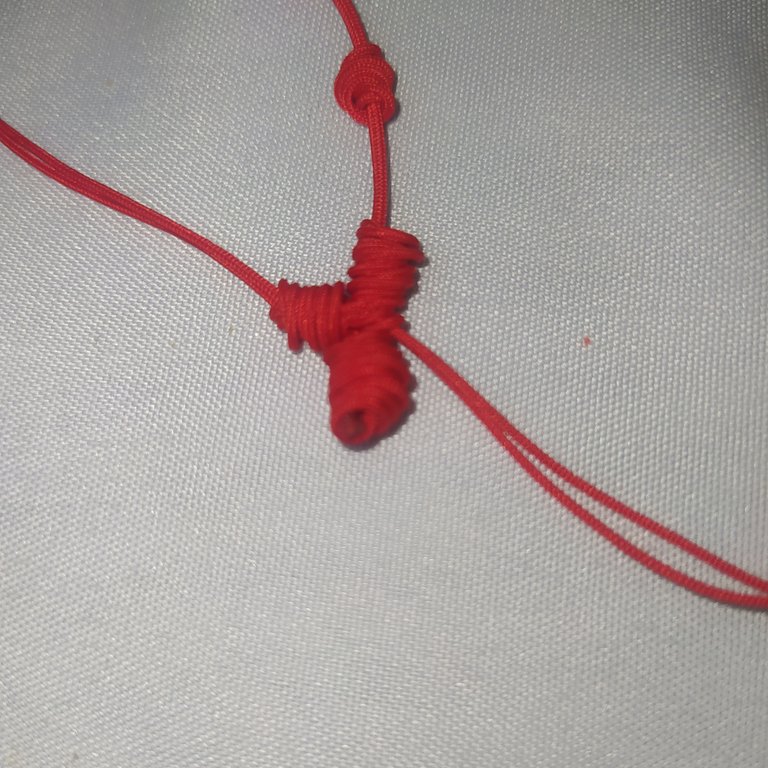
- Then we place the end of one of the threads and we place it over the straw and we give it four turns.
- We introduce through the left side of the straw, take out the right side, remove the straw and form one of the parts of the center of the cross.
- Luego colocamos el extremo de uno de los hilo y colocamos por encima del pitillo y le damos cuatro vueltas.
- Introducimos por el lado izquierdo del pitillo, sacamos por el lado derecho, retiramos el pitillo y formamos uno de las partes del centro de la cruz
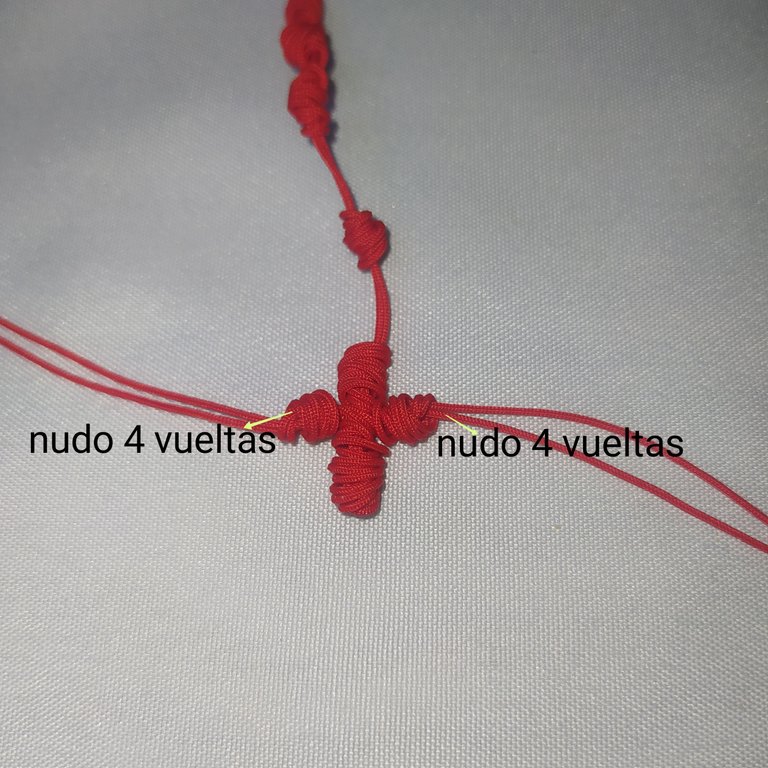
- We repeat the same procedure with the other part of the threads, in this way we make the cross.
- Then we cut the excess threads and burn the ends to seal.
- Repetimos el mismo procedimiento con la otra parte de los hilos,de esta forma realizamos la cruz.
- Luego recortamos los excedentes de los hilos y quemamos las puntas para sellar.
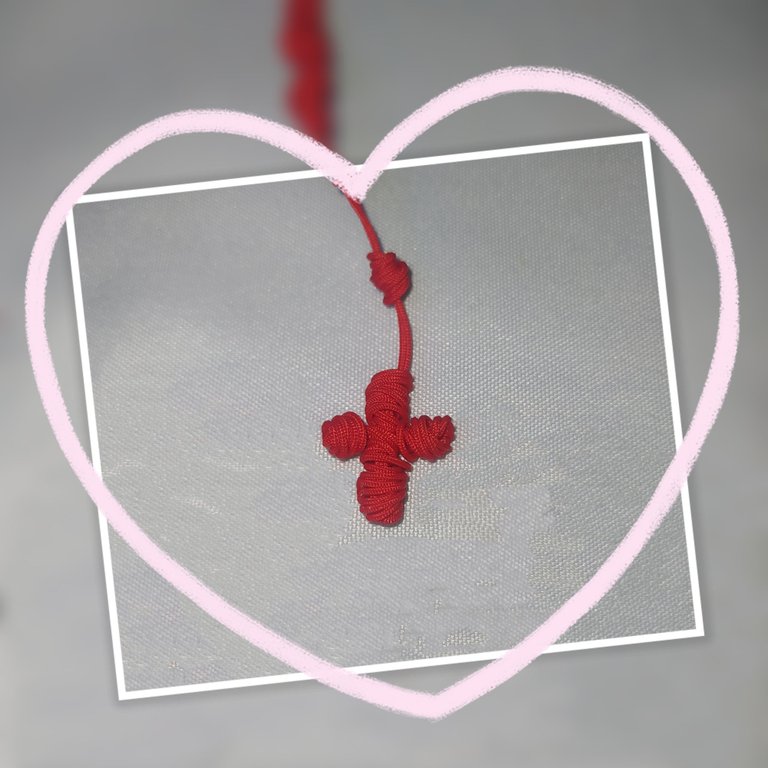
- In this beautiful way, we are left with the cross.
- De esta forma tan hermosa nos queda la cruz.

Thank you for joining me in making this rosary with the beautiful colors of the flag of my beautiful country Venezuela.
Gracias por haberme acompañado a realizar este rosario con los hermosos colores de la bandera de mi bello país Venezuela.
I would like to invite my friends @dlizara @yagelybr @maytom to participate in this initiative.
Quieto invitar a participar en esta iniciativa a mis amigas @dlizara @yagelybr @maytom
Never forget to love and forgive and above all smile and always have your heart full of faith, hugs I read them in the comments to see if you liked it.
Nunca olvides amar y perdonar y sobre todo sonreír y siempre ten tu corazón lleno de mucha fé, abrazos los leo en los comentarios para saber si te ha gustado

Banner realizado en Meitu
Traductor Deepl.
Photos of my property taken with Xiaomi redmi note 8 phone.
Banner made in Meitu
Translator Deepl.
8 phone.
Banner made in Meitu
Translator Deepl.

