Hello, hello happy and blessed day my beautiful people that we connect from anywhere in the world, for this little side of the world with a lot of heat but very happy to be able to bring a new accessory to this beautiful community @jewelry.
Hola, hola feliz y bendecido día mi gente hermosa que nos conectamos desde cualquier parte del mundo, por este ladito del mundo con mucho calor pero muy feliz de poder traer un nuevo accesorio a esta bella comunidad @jewelry.
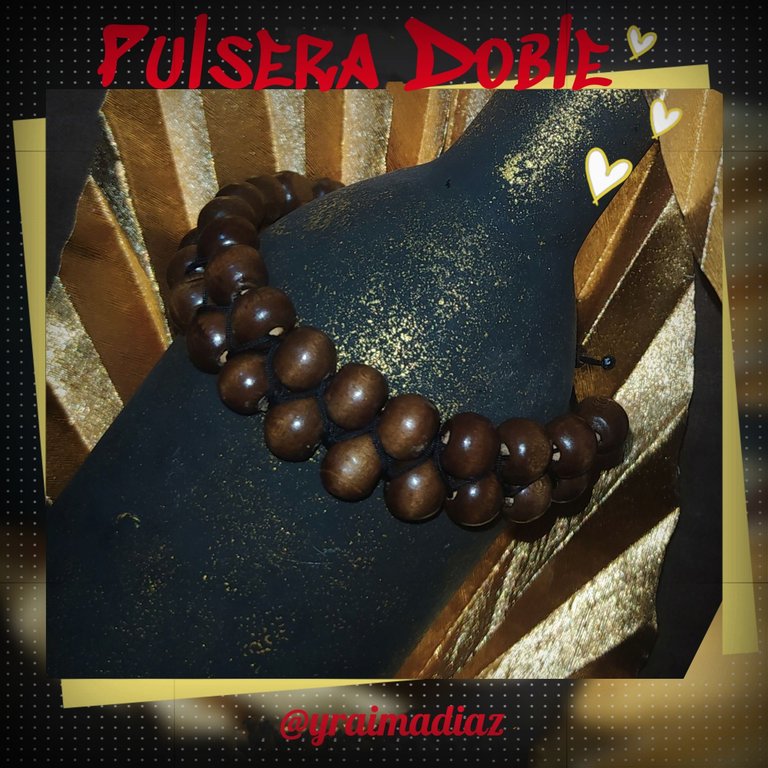
Today I bring you a tutorial on how to make a beautiful double bracelet or braided bracelet, which I love because it is unisex and is ideal to highlight our outfit, we can also make several and give to those important people in our life.
Hoy les traigo un tutorial de como realizar una Hermosa Pulsera Doble o Trenzada, la cual me encanta porque es unisex y es ideal para resaltar nuestro outfit, también podemos realizar varias y obsequiar a esas personita importante en nuestra vida.
In this beautiful bracelet I am using the flat knot technique and also a zig-zag weave, it is very easy to weave and the final result is very nice.
En esta bella pulsera estoy realizando la técnica del nudo plano y también un tejido en forma de zig-zag, es un tejido muy facil de realizar y su resultado final es muy lindo.
I invite you to join me once again to make it.
Te invito me acompañes una vez más a realizarla.
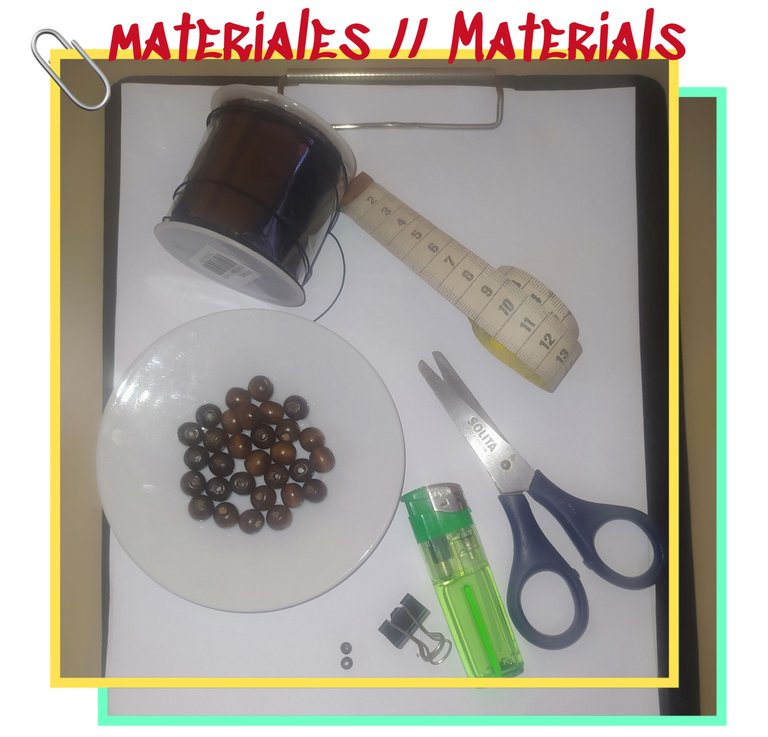
Materiales.
- Hilo chino color negro.
- 30 cuentas de madera.
- 2 cuenta pequeñas de madera
- Cinta métrica.
- Tijeras.
- Encendedor.
- Pinza
- Tabla con gancho.
Materials.
- Chinese thread black color.
- 30 wooden beads.
- 2 small wooden beads.
- Tape measure.
- Scissors.
- Lighter.
- Tweezers
- Board with hook.
let's move on to its elaboration.
pasemos a su elaboración.
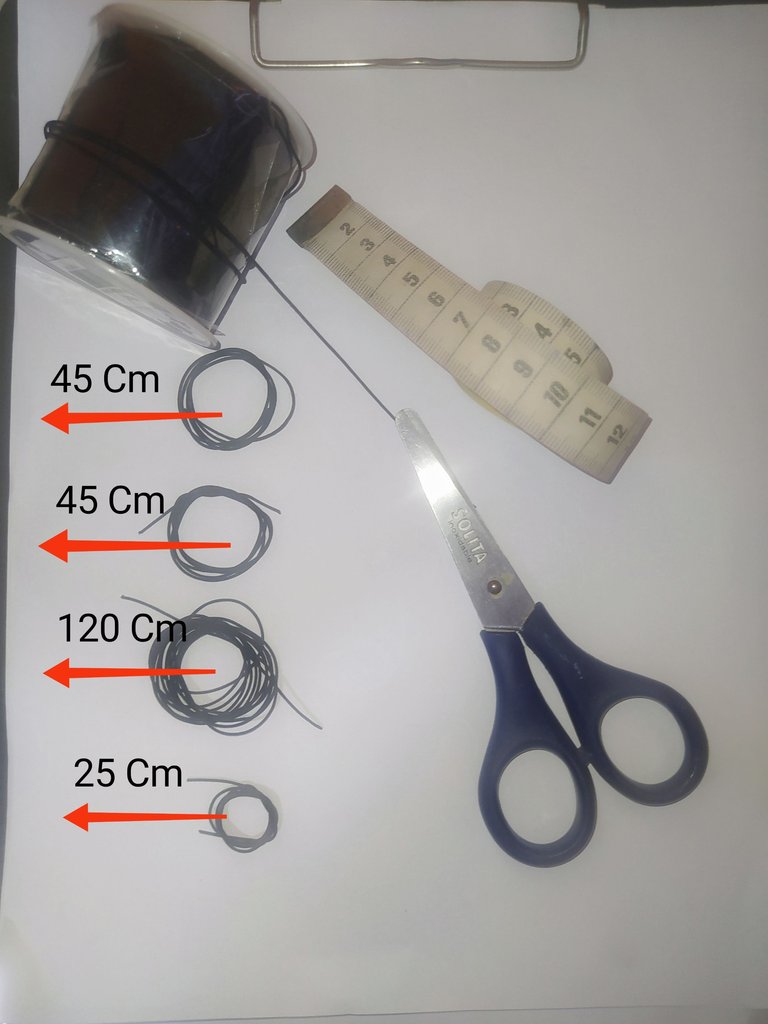
We measure the Chinese thread with the help of the measuring tape in the following measurements and cut
- 2 Chinese thread of 45 cm each one.
- 120 cm of Chinese thread.
- 25 cm of Chinese thread
Medimos el hilo chino con la ayuda de la cinta métrica en las siguientes medidas y cortamos
- 2 hilos chino de 45 cm c/u.
- 120 cm de hilo chino.
- 25 cm de hilo chino
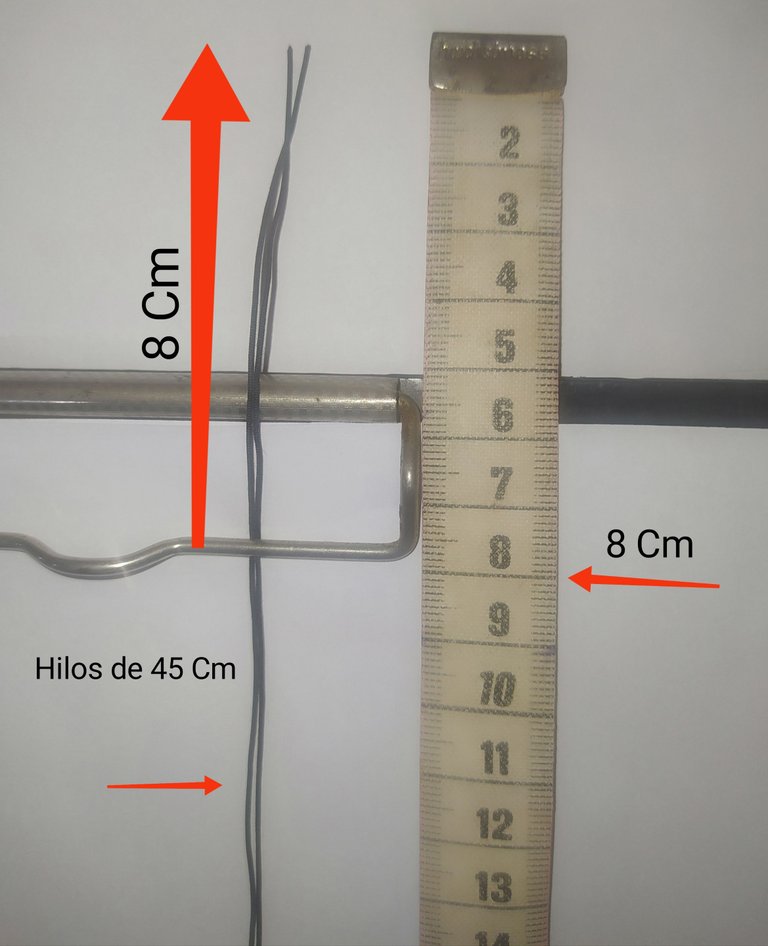
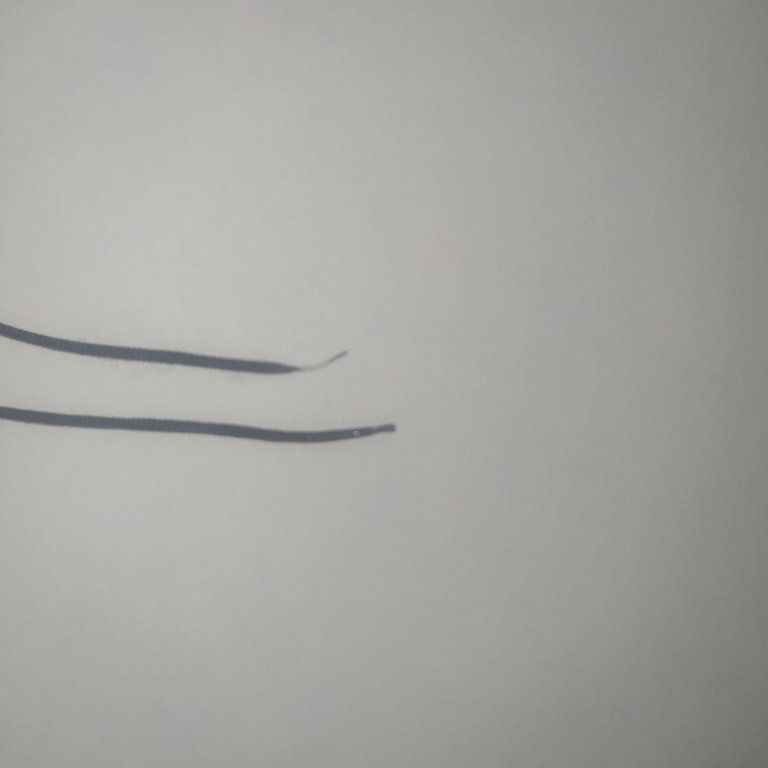
- Then the first thing we will do is to take the two threads of 45 centimeters, these are the central threads.
- We measure 8 centimeters that will be free where we will make the closure of the bracelet and hold with the clamp on the table.
- Luego lo primero que haremos es tomar los dos hilos de 45 centímetros, estos son los hilos centrales.
- Medimos 8 centímetros que van a quedar libres donde vamos a realizar el cierre de la pulsera y sujetamos con la pinza en la tabla.
 |  |
|---|
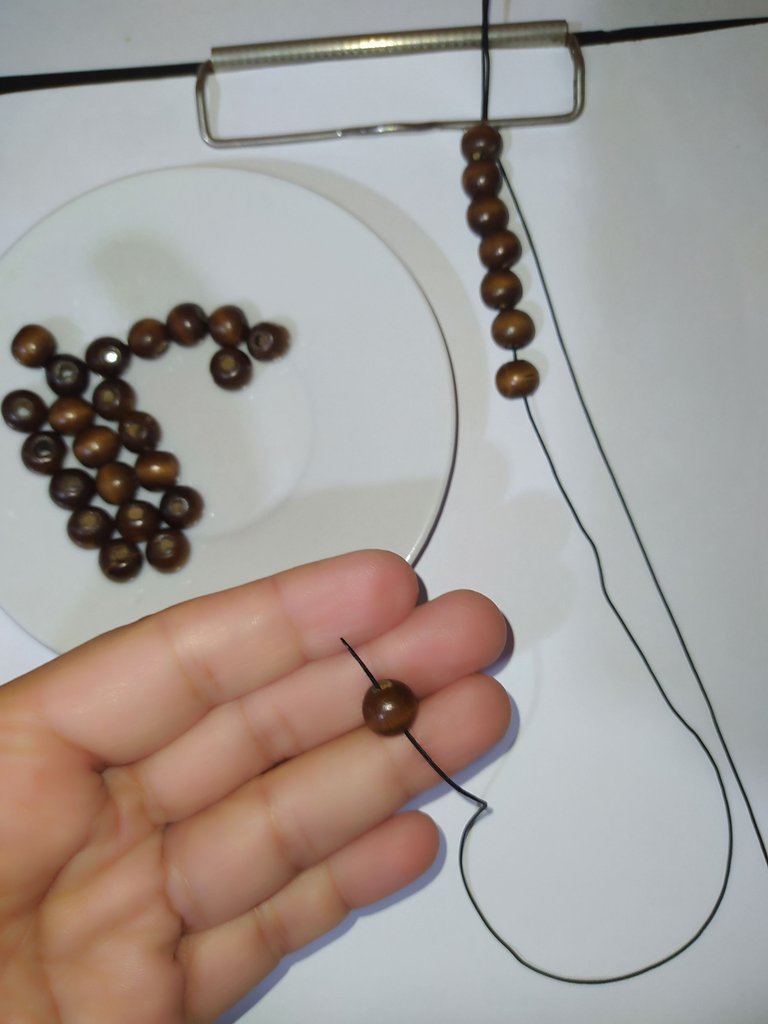
- We burn the ends of the threads with the lighter to prevent them from fraying.
- Then we introduce the beads.
- Quemamos las puntas de los hilos con el encendedor para evitar que se deshilachen
- Luego vamos introduciendo las cuentas.
 |  |
|---|
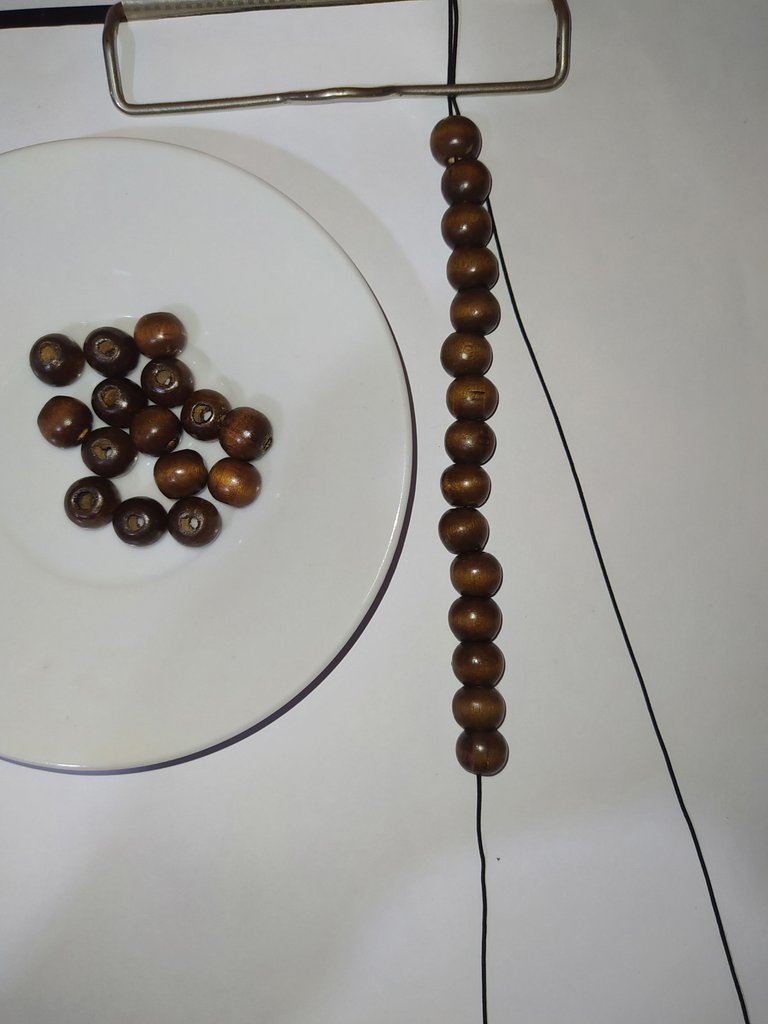
- Once we have inserted the 15 beads on both strands, we secure the bottom with a clamp.
- Una vez que hemos introducidos las 15 cuentas por ambos hilos aseguramos en la parte de abajo con una pinza.
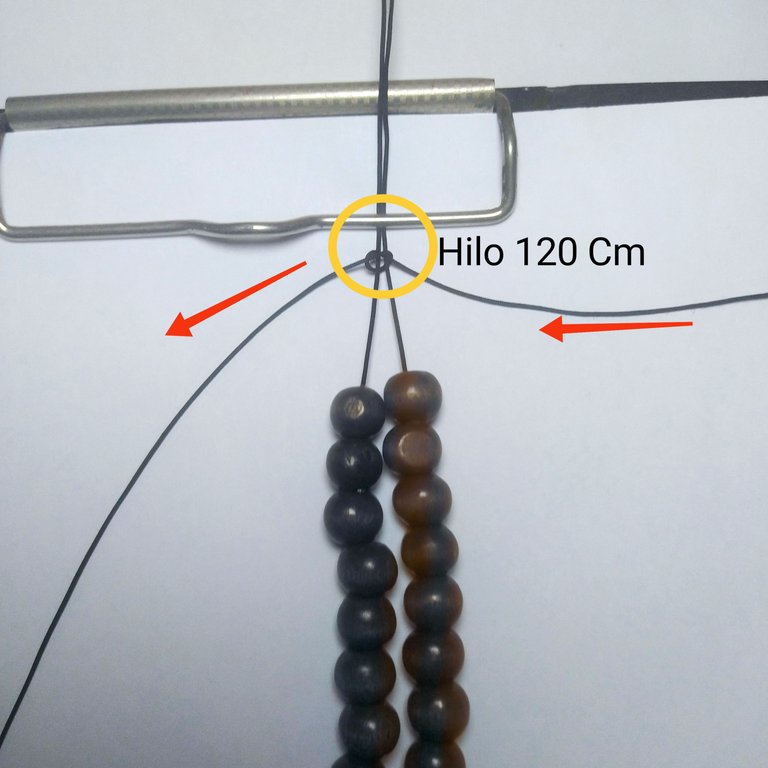
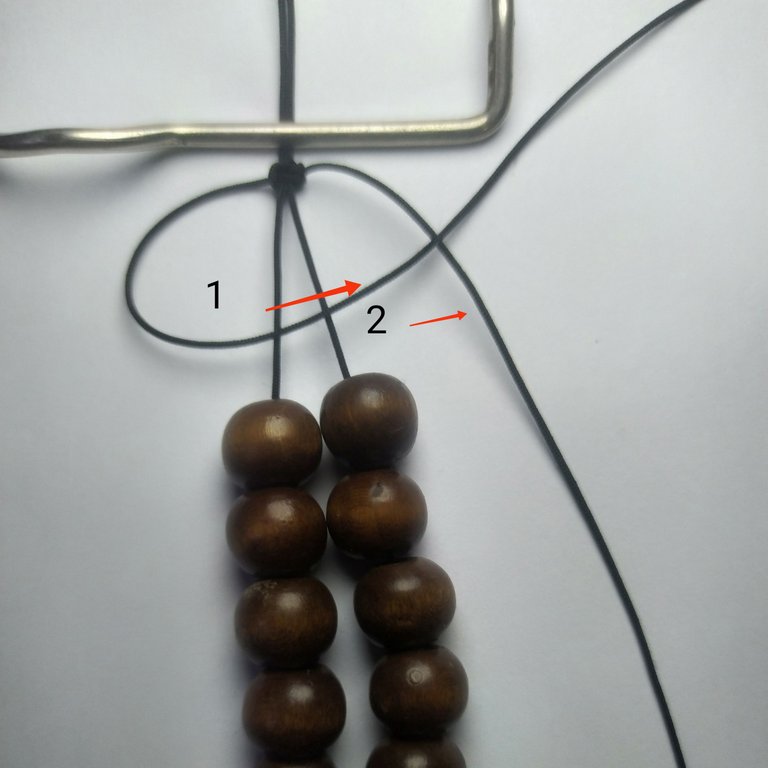
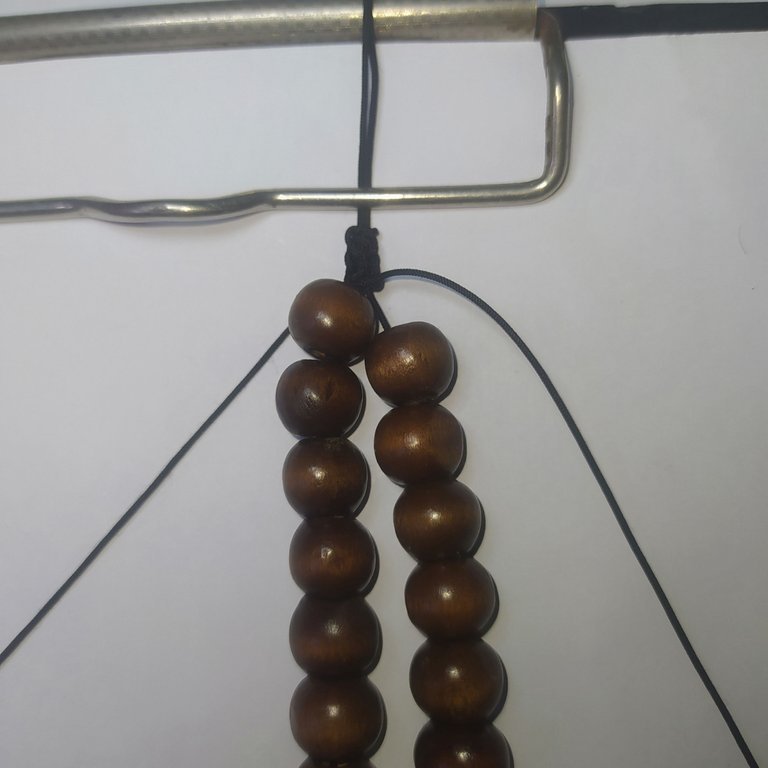
- We take the 1.20 cm thread and make a simple knot on top of the beads.
- Taking into account that we should have 60 cm of thread on both sides.
- Tomamos el hilo de 1.20 cm y hacemos un nudo sencillo arriba de las cuentas.
- Tomando en cuenta que nos deben quedar 60 cm de hilo de ambos lados.
Flat knot fabric
Tejido de nudo plano
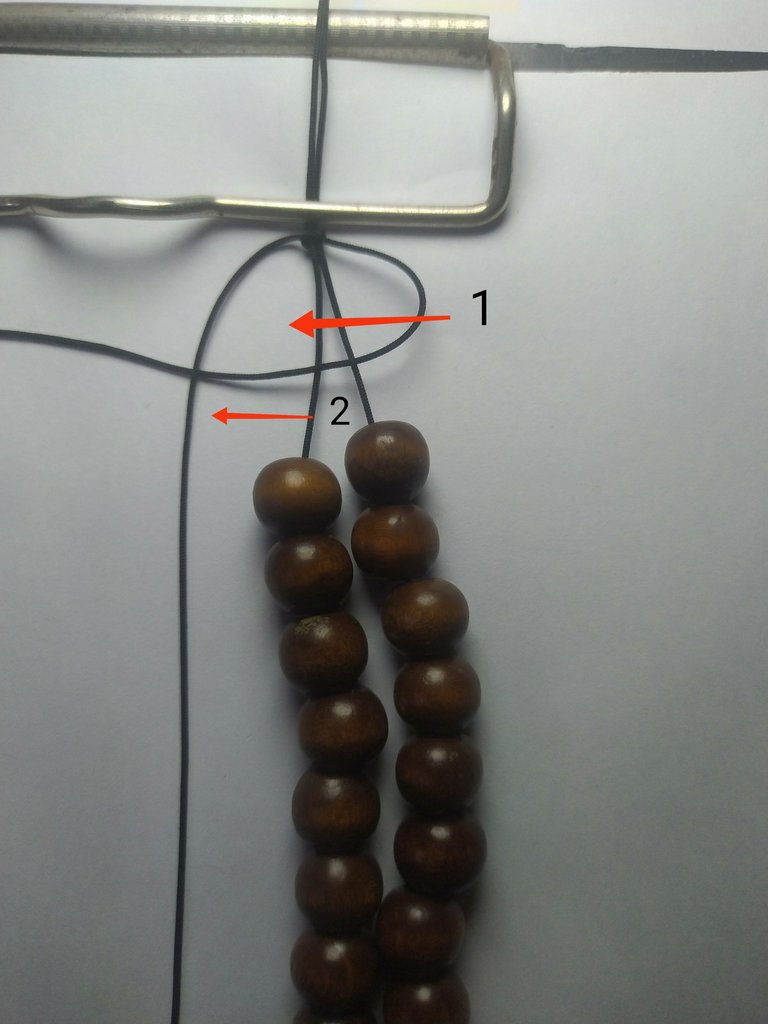
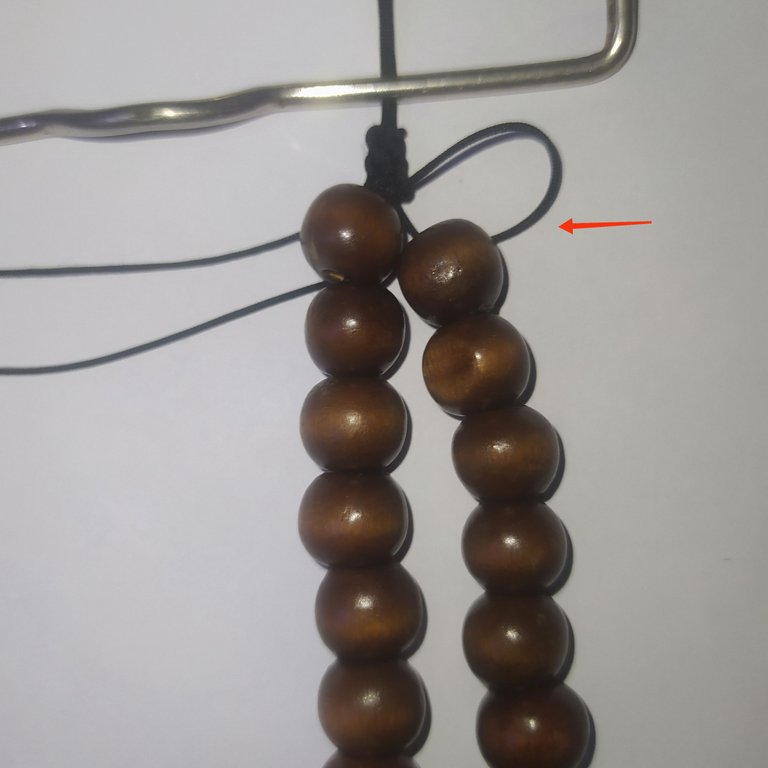
Right side flat knot
Nudo plano del lado de la derecha.
- We take the thread on the right and pass it over the central threads and under the thread on the left.
- Tomamos el hilo de la derecha y lo pasamos por encima de los hilos centrales y por debajo del hilo de la izquierda.
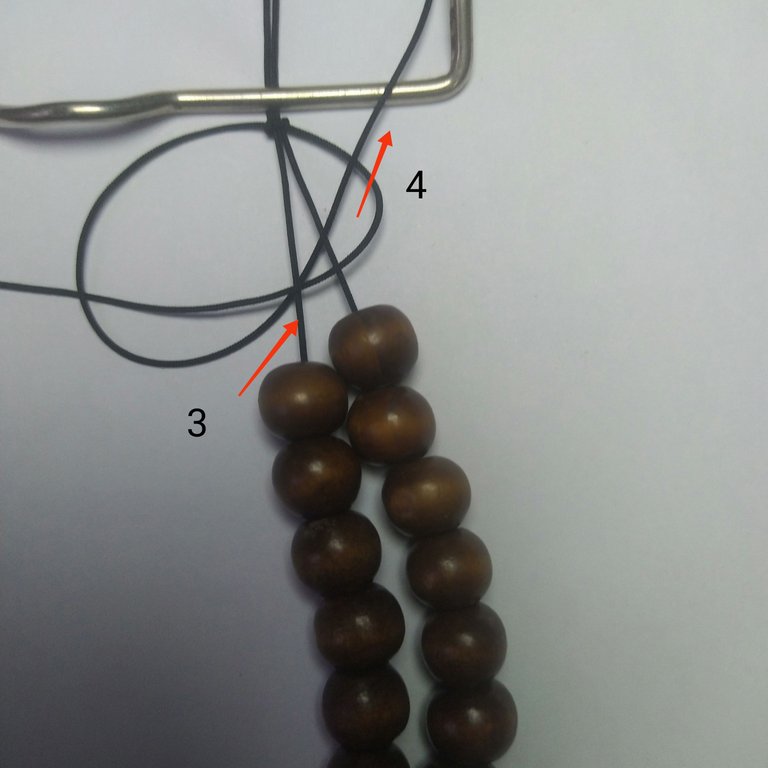
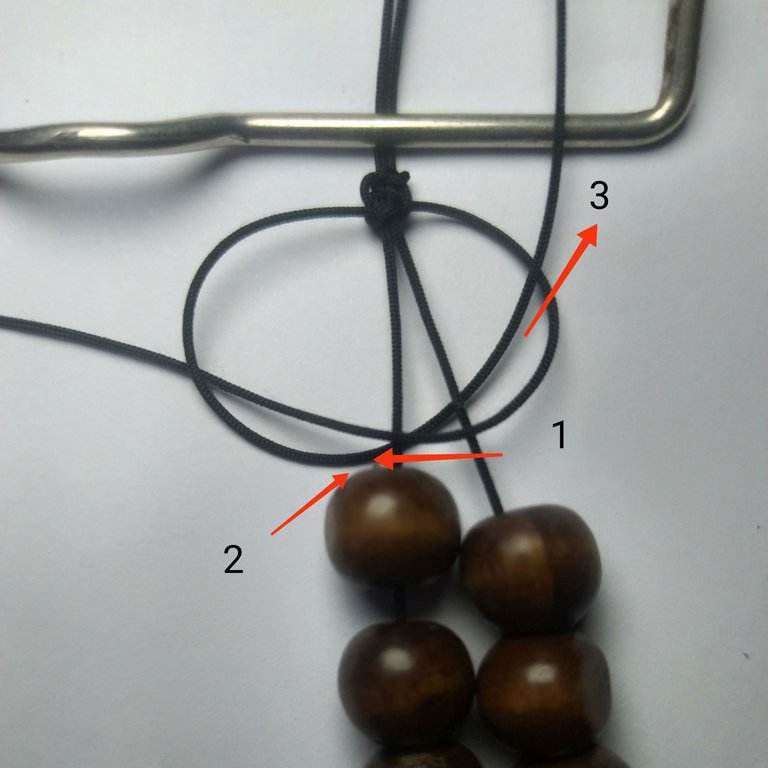
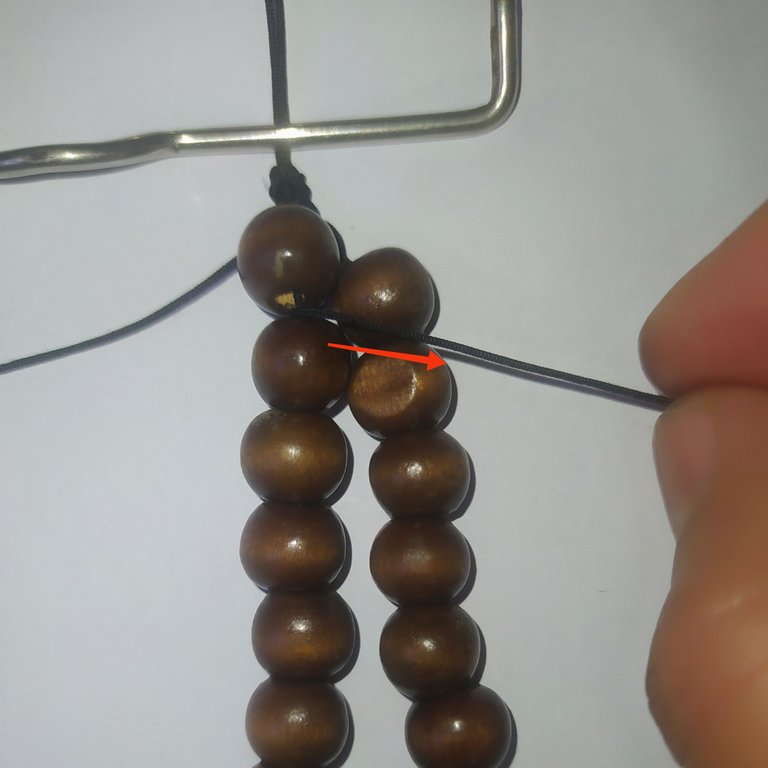
- The left yarn is passed under the central yarns.
- We pull it over the thread on the right.
- El hilo de la izquierda lo pasamos por debajo de los hilos centrales.
- Lo sacamos por encima del hilo de la derecha.
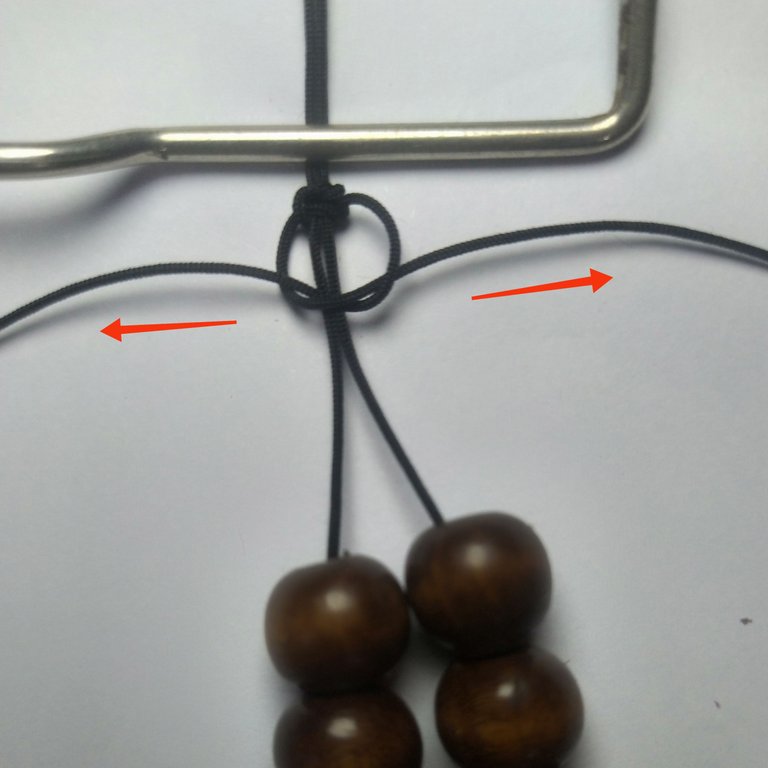
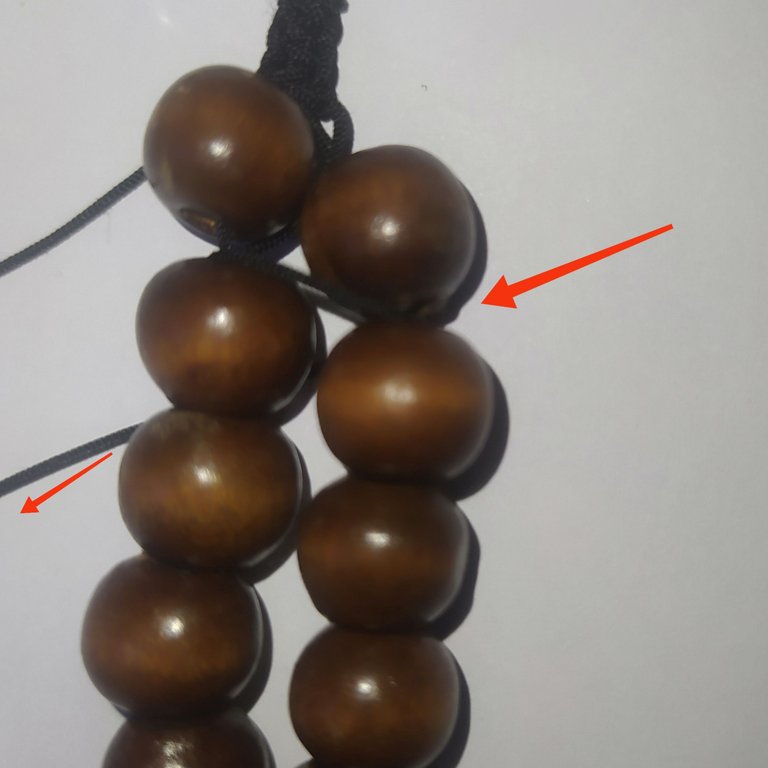
- We take the two ends, pull and tie the flat knot on the right side.
- Tomamos las dos puntas halamos y realizamos el nudo plano del lado de la derecha
Left side flat knot.
Nudo plano del lado izquierdo.
- Repeat the same process but now on the left side.
- Take the yarn on the left side and pass it over the central yarns and then under the yarn on the right side.
- Repetimos el mismo proceso pero ahora del lado izquierdo.
- Tomamos el hilo de la izquierda pasamos por encima de los hilos centrales y luego por debajo de hilo de la derecha.
- We take the thread on the right and pass over the central threads and under the thread on the left.
- Tomamos el hilo de la derecha y pasamos por encima de los hilos centrales y por debajo del hilo de la izquierda.
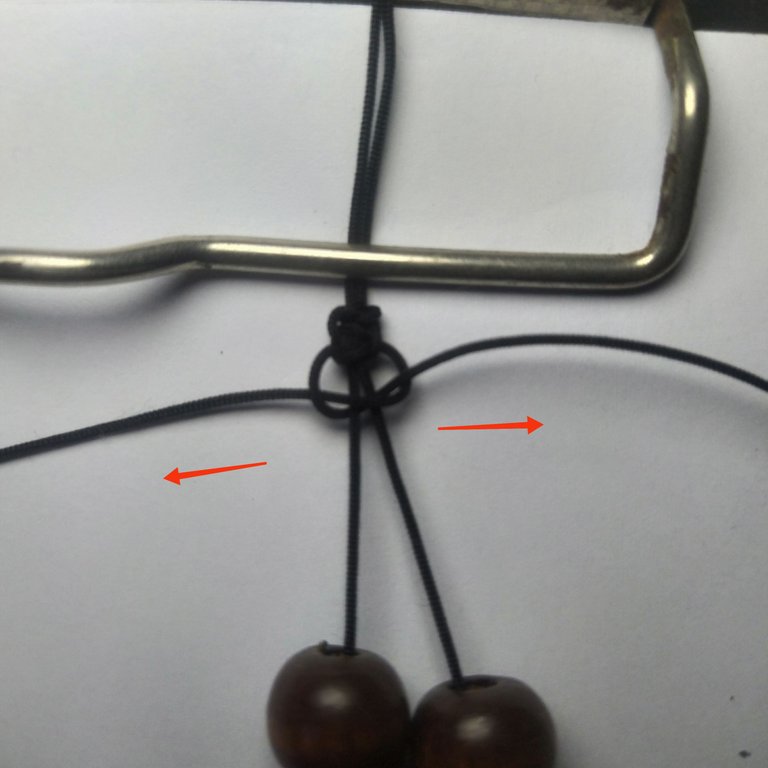
- Now we pull the two threads and we have ready the flat knot on the left side.
- Ahora tiramos de los dos hilos y tenemos listo el nudo plano del lado izquierdo
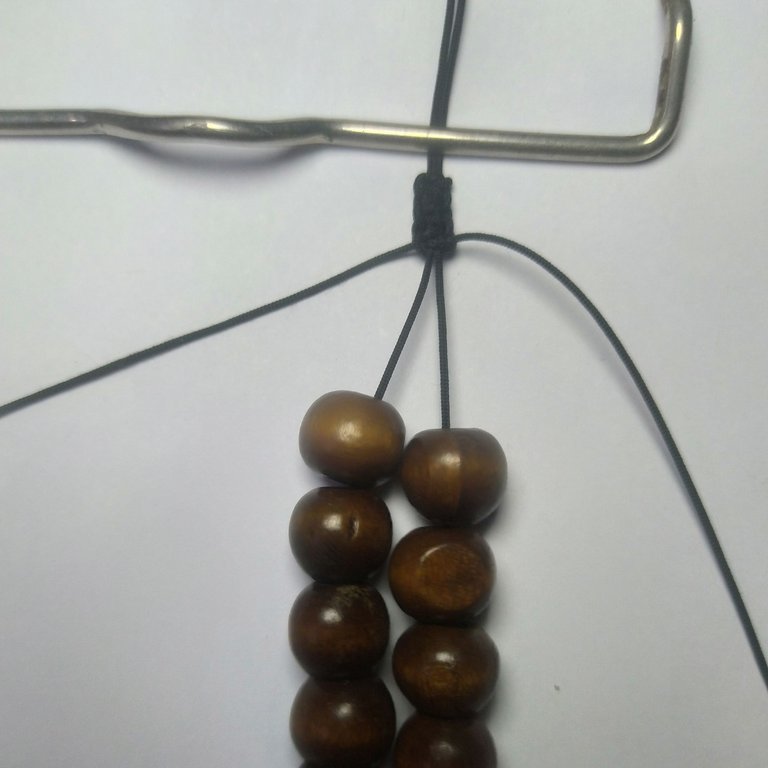
- We repeat this same technique until we have approximately 1 cm.
- When the desired size is reached, we place the threads on both sides.
- Repetimos está misma técnica hasta realizar 1 cm aproximadamente.
- Al terminar el tamaño deseado olocamos los hilos en ambos lados.
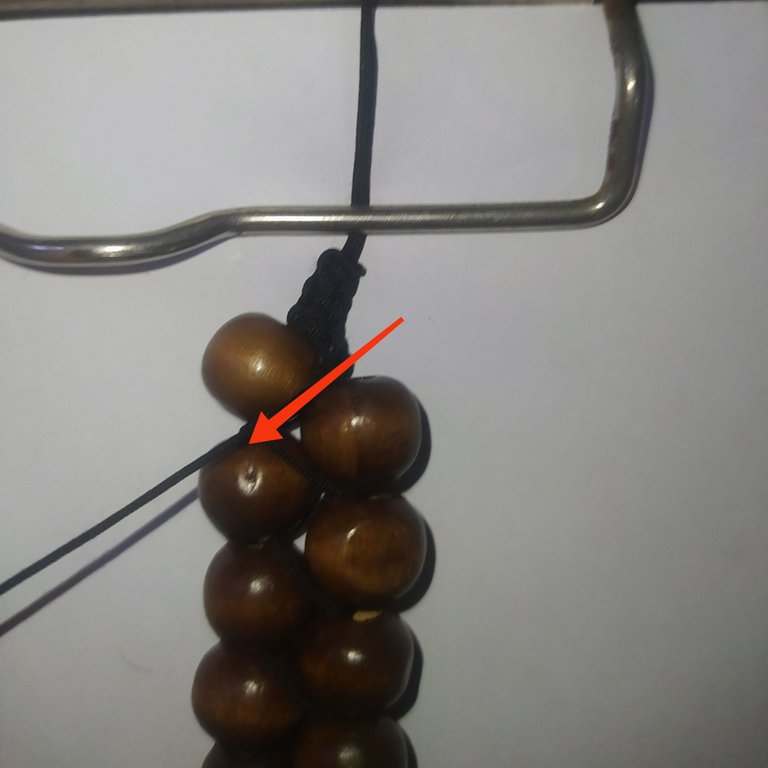
- We move up one of the beads on the left a little more.
- Subimos un poco más hacia arriba una de las cuentas de la izquierda.
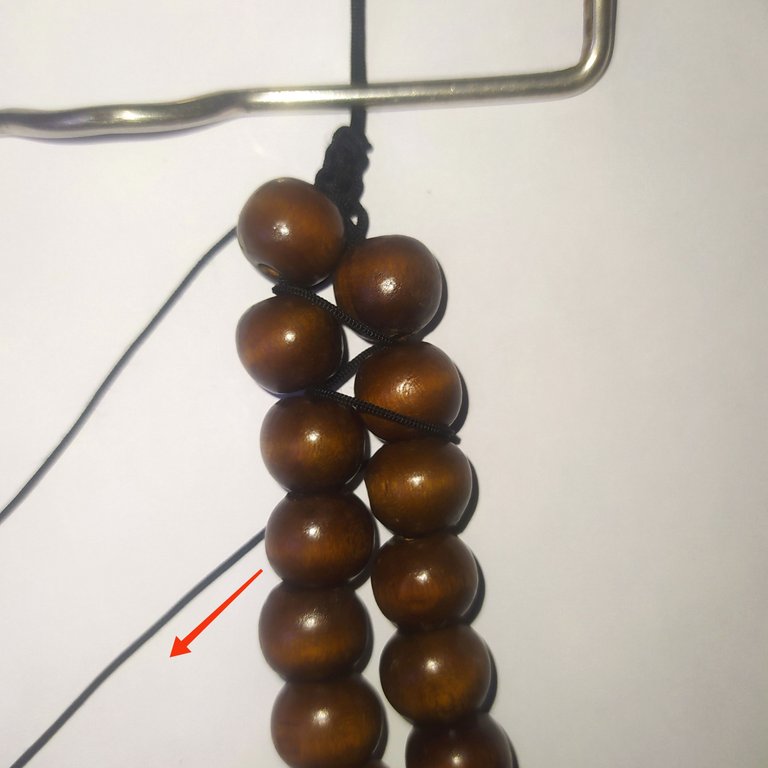
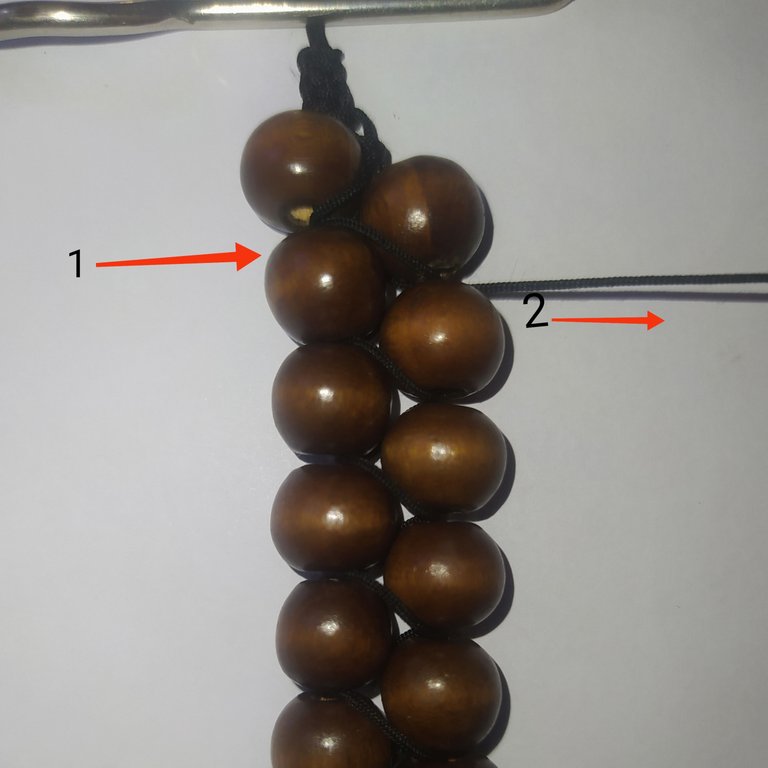
This weaving we are going to do with the beads is like a zig zag.
- We take the thread on the right and pass it under the beads.
- Then we pull it out over the beads on the left.
Este tejido que vamos a realizar con las cuentas es como un zig zag.
- Tomamos el hilo de la derecha y lo pasamos por debajo de las cuenta.
- Luego lo sacamos por encima de las cuentas de la izquierda
- We pull the thread and bring it to the bead on the right side.
- Tiramos del hilo y lo llevamos hacia la cuenta del lado derecho.
- We pass the thread over the bead on the right side.
- Then we pass it underneath and pull out the thread on the left side.
- Pasamos el hilo por encima de la cuenta del lado derecho.
- Luego lo pasamos por debajo y sacamos el hilo por el lado izquierdo
- We pass the thread over the beads on the left side and over the bead on the right side.
*We must always make sure that we take two beads, one on the left side and the other on the right side, pass the thread underneath and repeat.
- Pasamos el hilo por encima de las cuentas del lado izquierdo y por encima de la cuenta del lado derecho.
- Siempre nos debemos asegurar que tomamos dos cuentas una del lado izquierdo y la otra del lado derecho pasamos el hilo por debajo y repetimos
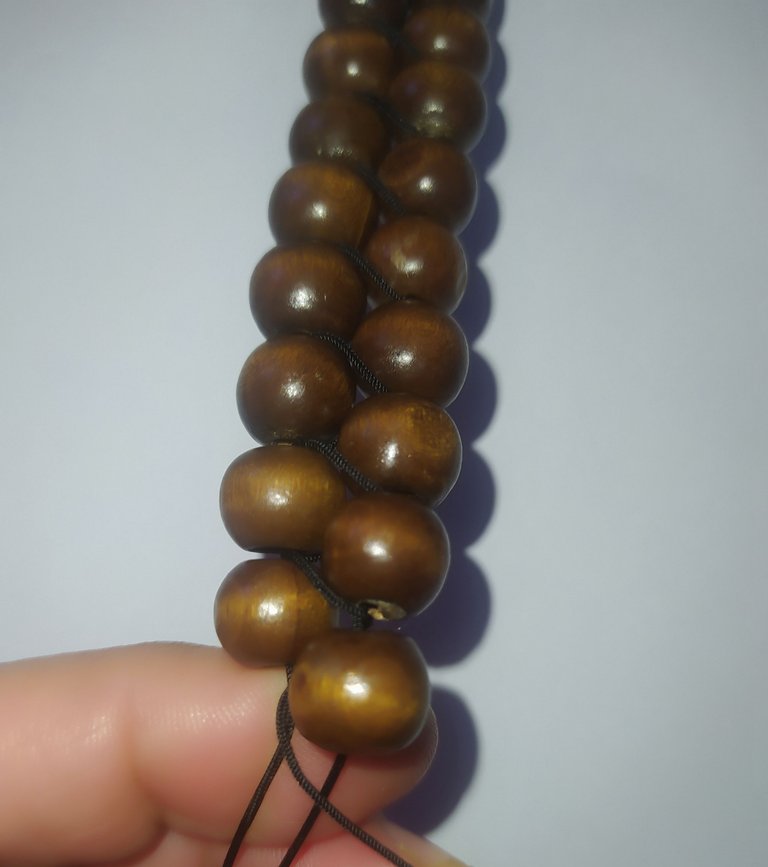
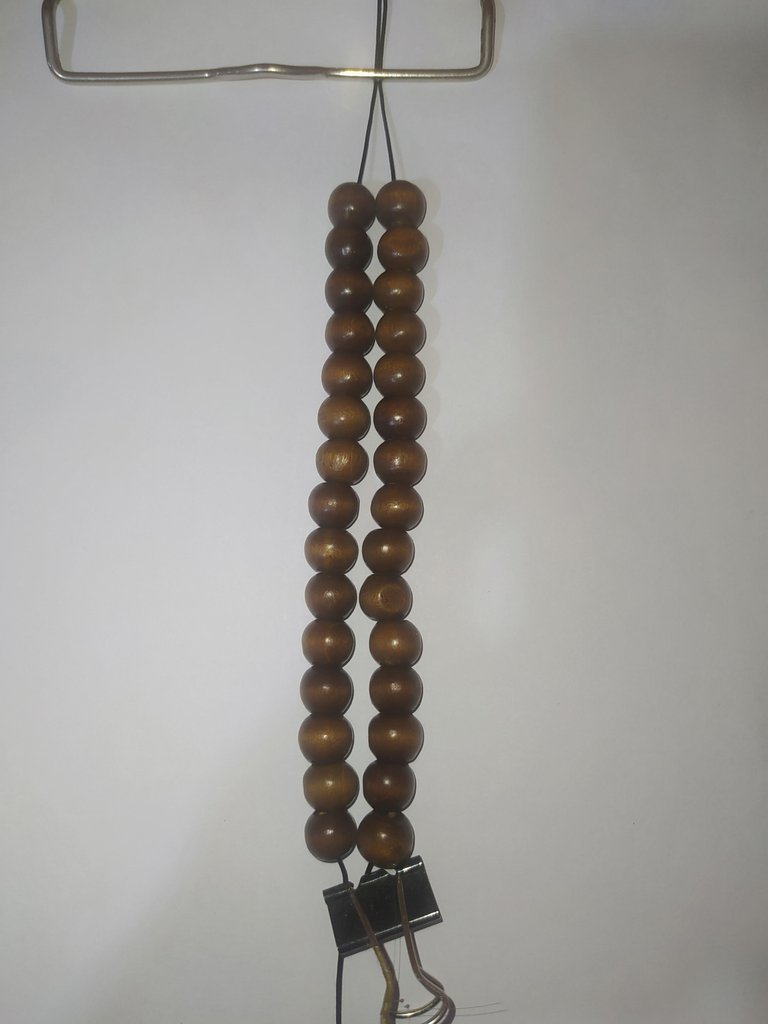
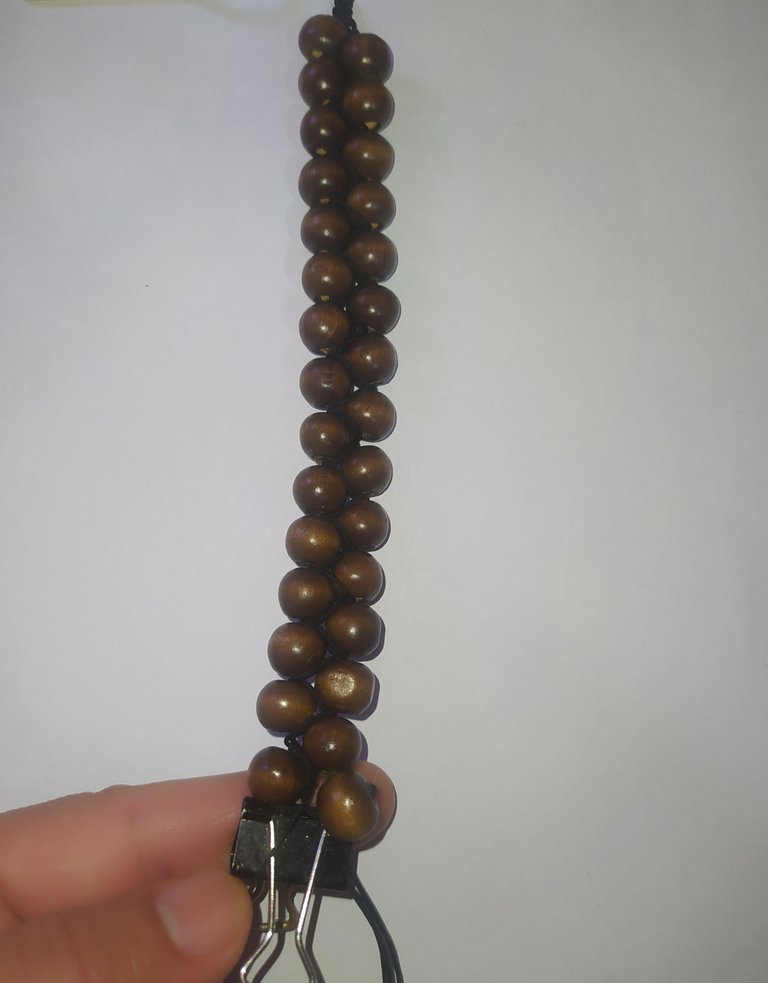
- We must repeat the same technique until we reach the last beads.
- Debemos repetir la misma técnica hasta hasta llegar a las últimas cuentas.
- Secure with a clamp.
- Aseguramos con una pinza.
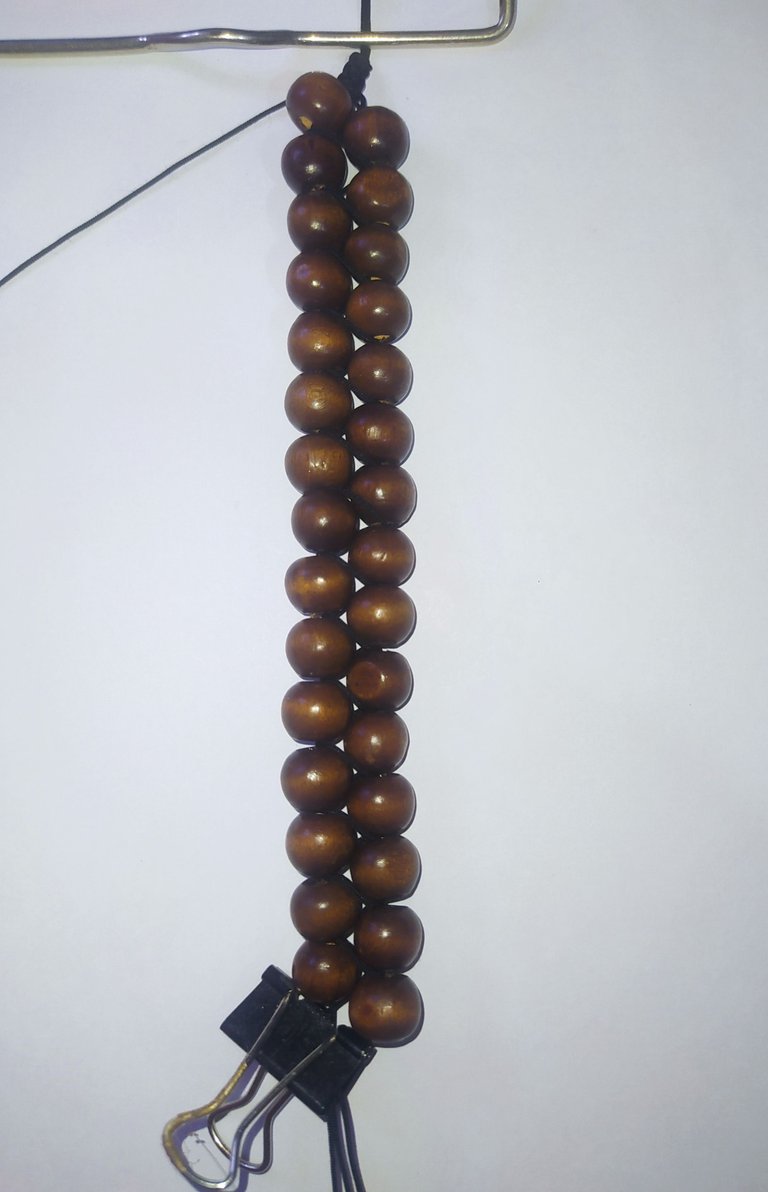
We proceed to weave the fabric with the thread on the left side.
Pasemos a realizar el tejido con el hilo que está al lado izquierdo
- We take the thread on the left side
- We pass it over the bead on the left side.
- Tomamos el hilo de la izquierda
- Lo pasamos por encima de la cuenta del lado izquierdo.
- Then we pass the thread under the bead on the left side.
- Luego pasamos el hilo por debajo de la cuenta del lado izquierdo.

- We pass the thread over the bead on the right and left side.
- Pass the yarn back underneath and repeat until you reach the bottom.
- Pasamos el hilo por encima de la cuenta del lado derecho y del lado izquierdo.
- Pasamos nuevamente el hilo por debajo y repetimos hasta llegar hasta abajo.
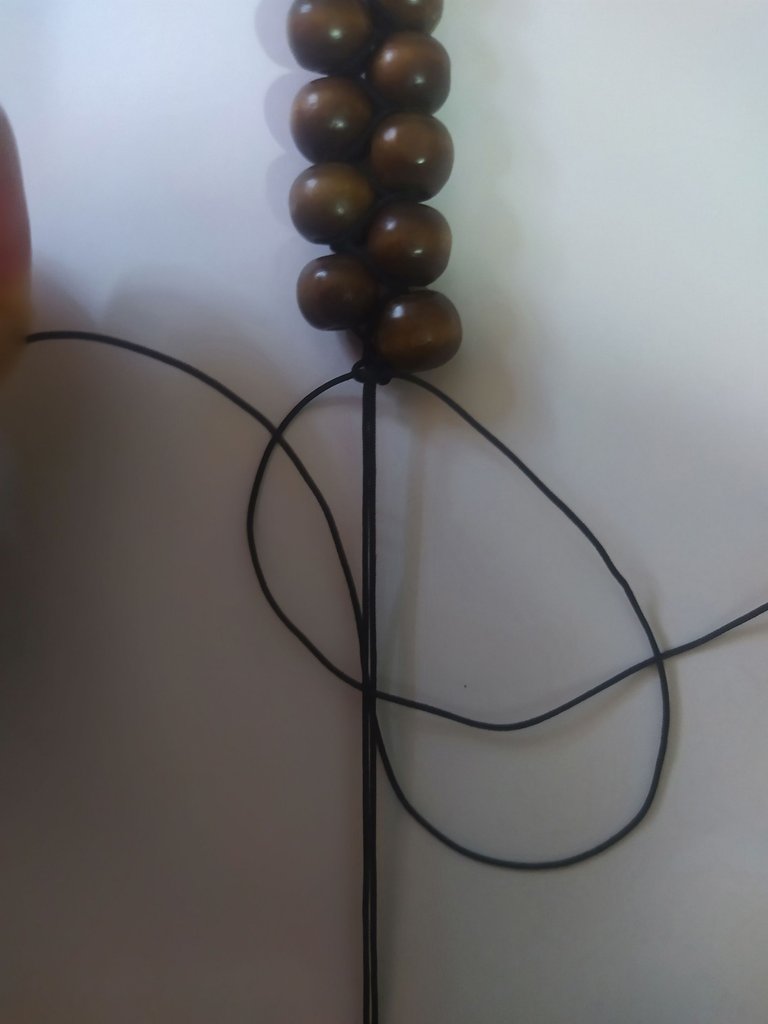
- Once we reach the end of the last beads we secure the threads with the plier.
- We make a simple knot.
- Una vez lleguemos al final de las últimas cuentas aseguramos los hilos con la pinza.
- Hacemos un nudo simple.
We repeat the flat knot technique that we did at the beginning.
- Here are the images of the process.
Repetimos la técnica del nudo plano que realizamos al principio.
- Aquí les dejo las imágenes de su proceso.
 |  |  |
|---|
 |  |
|---|
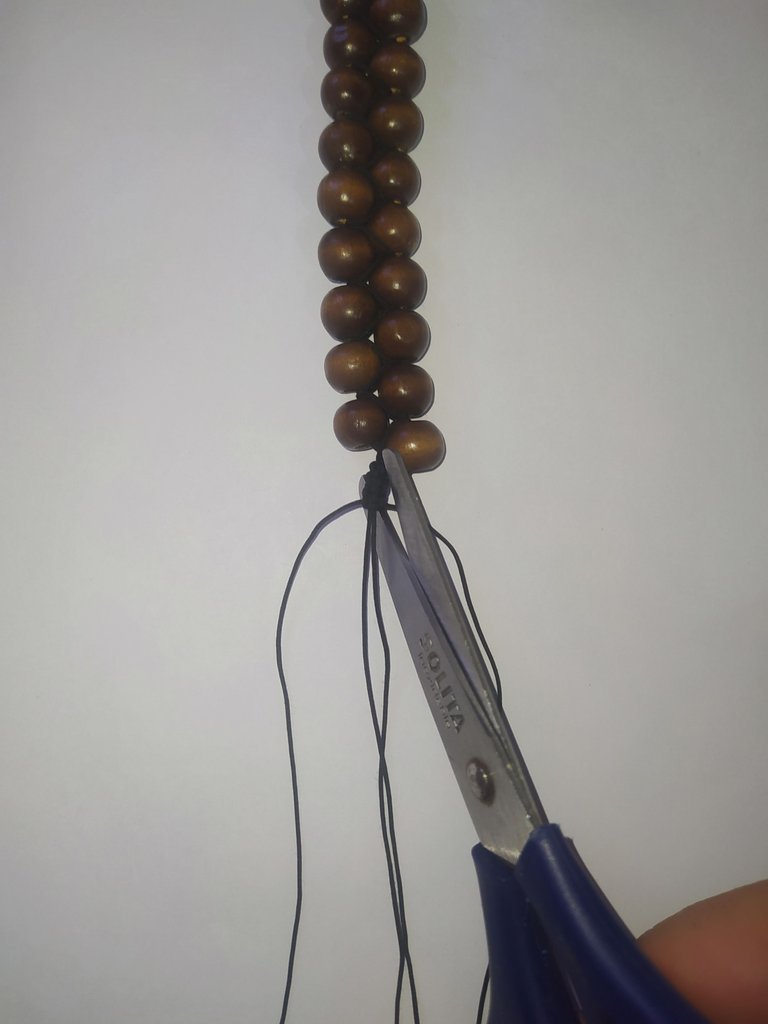
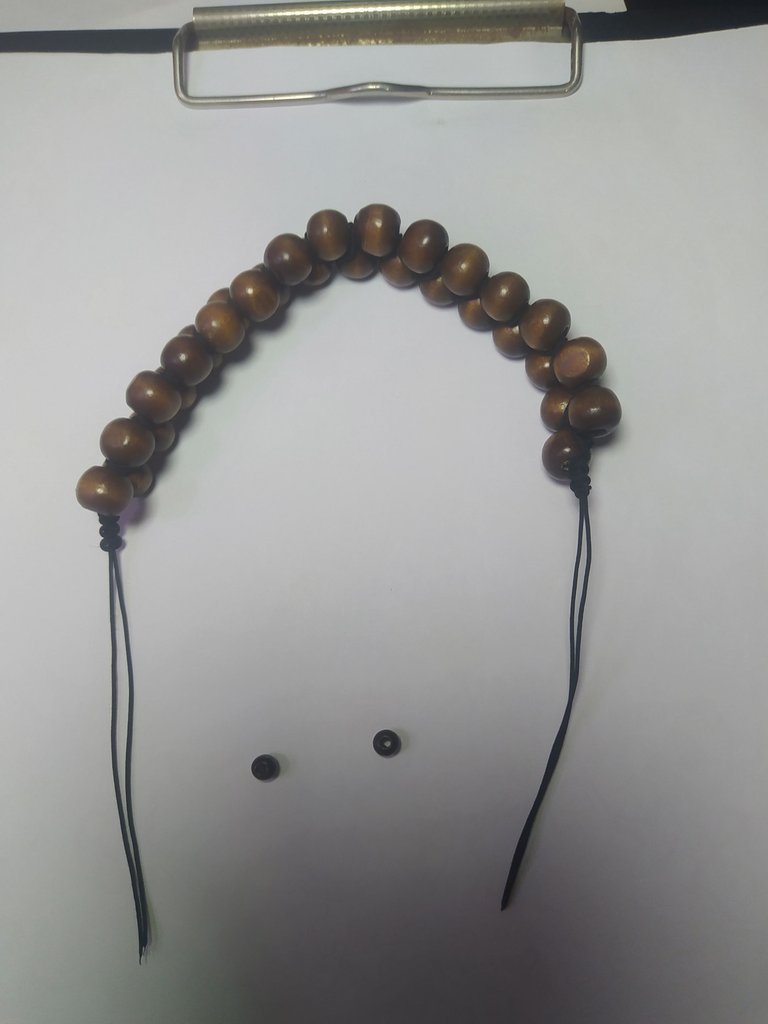
End part of the bracelet.
Parte final de la pulsera.
 |  |  |
|---|
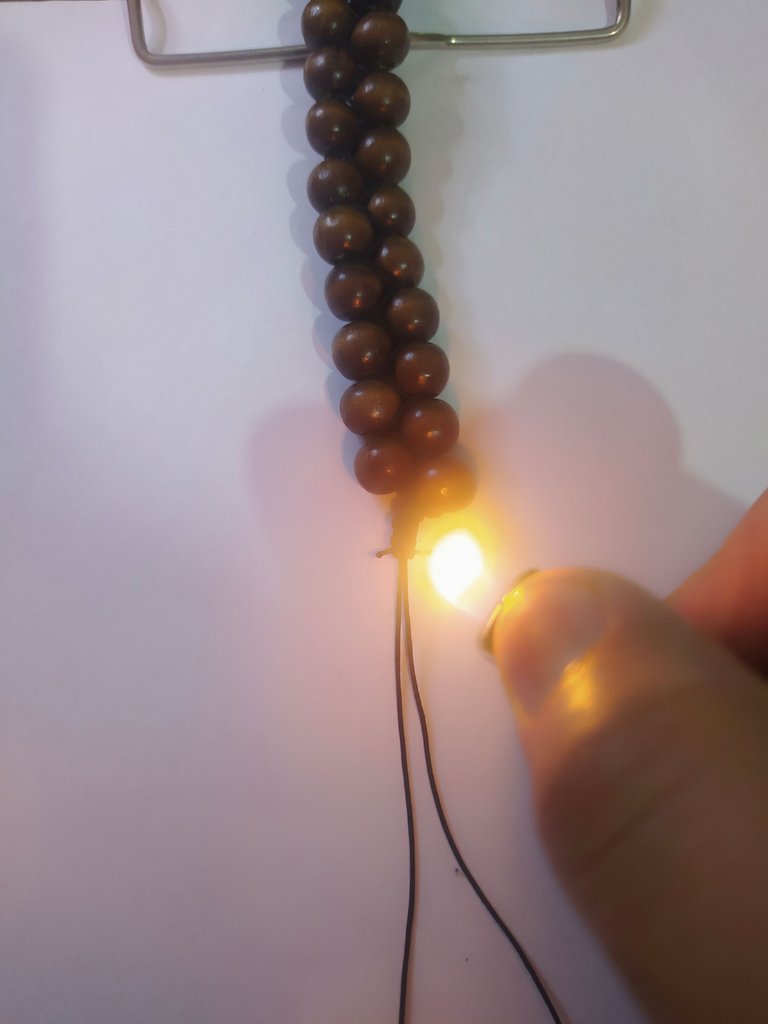
- We burn the tip of the threads
- We introduce the small wooden beads.
- Quemamos la punta de los hilos
- Introducimos las cuentas pequeñas de madera.
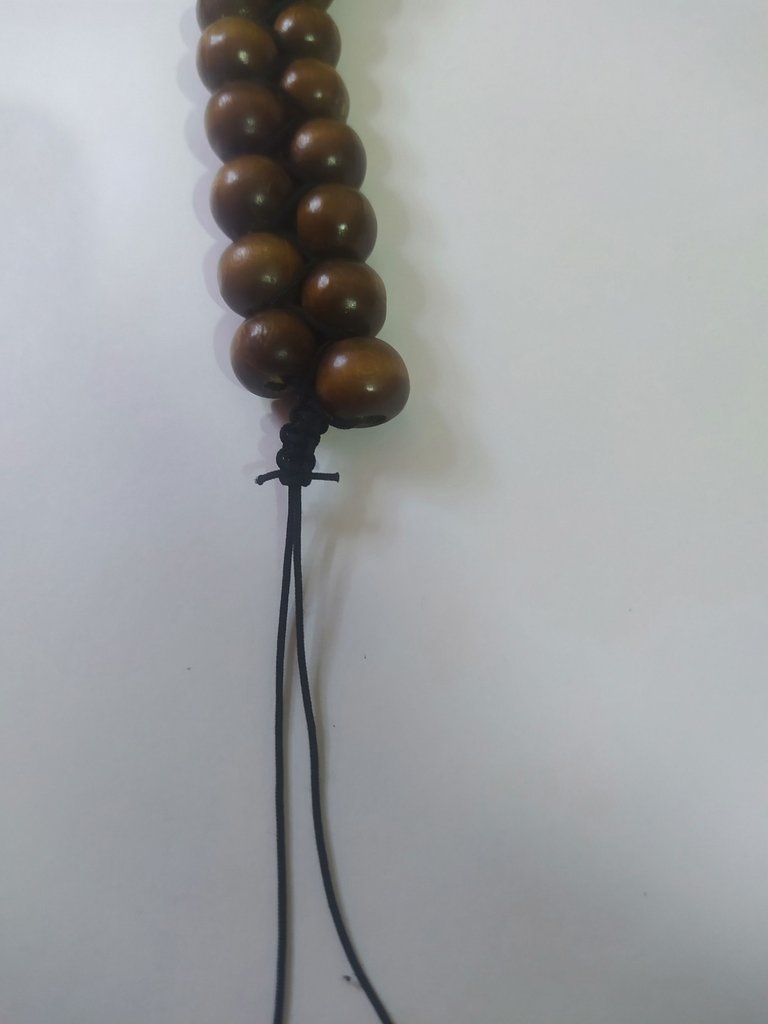
- We tie a simple knot.
- Realizamos un nudo simple.
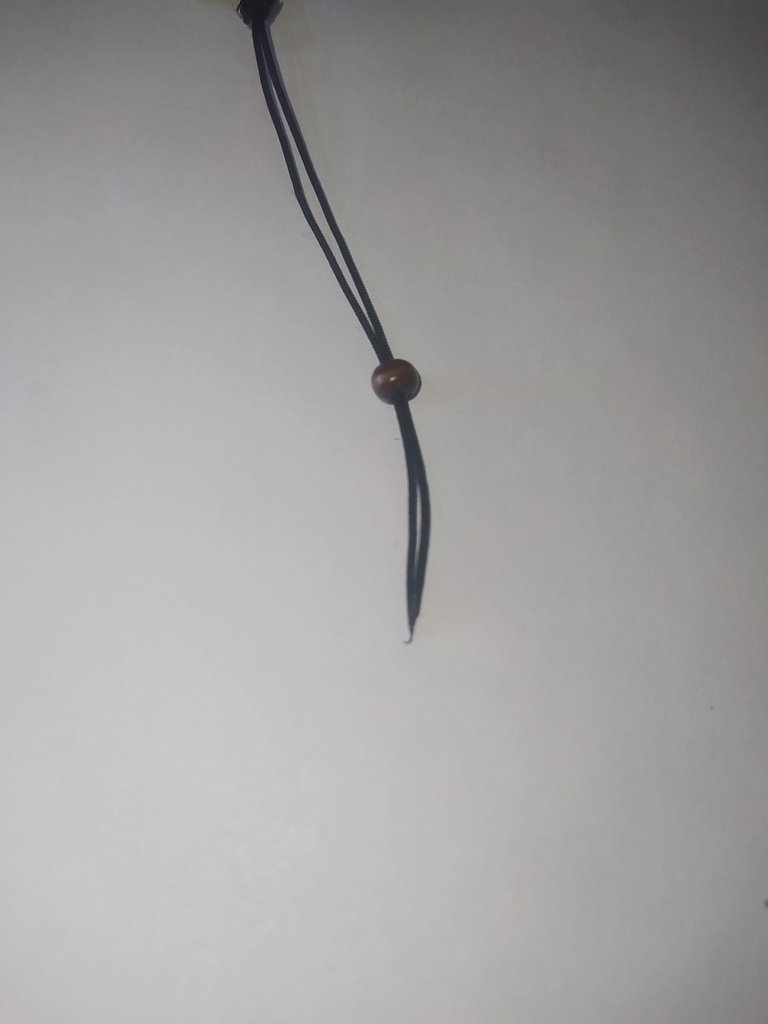
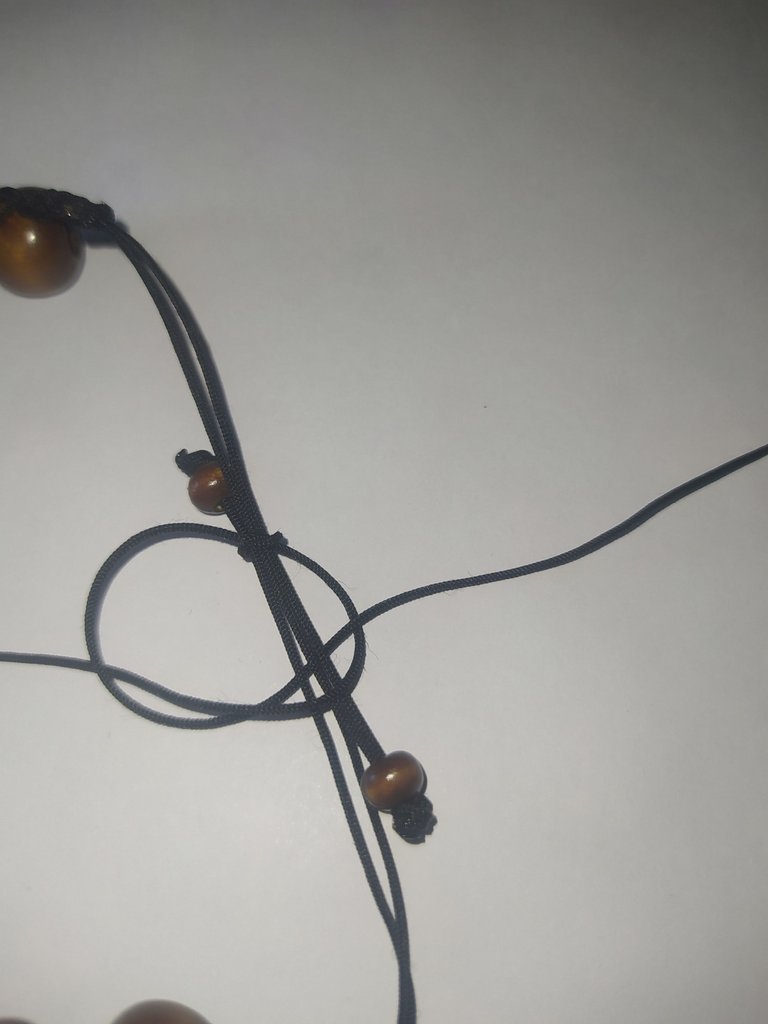
Closing the bracelet with a slip knot, using the flat knot technique.
Cierre de la pulsera con nudo corredizo, utilizando la técnica del nudo plano.
 |  |
|---|
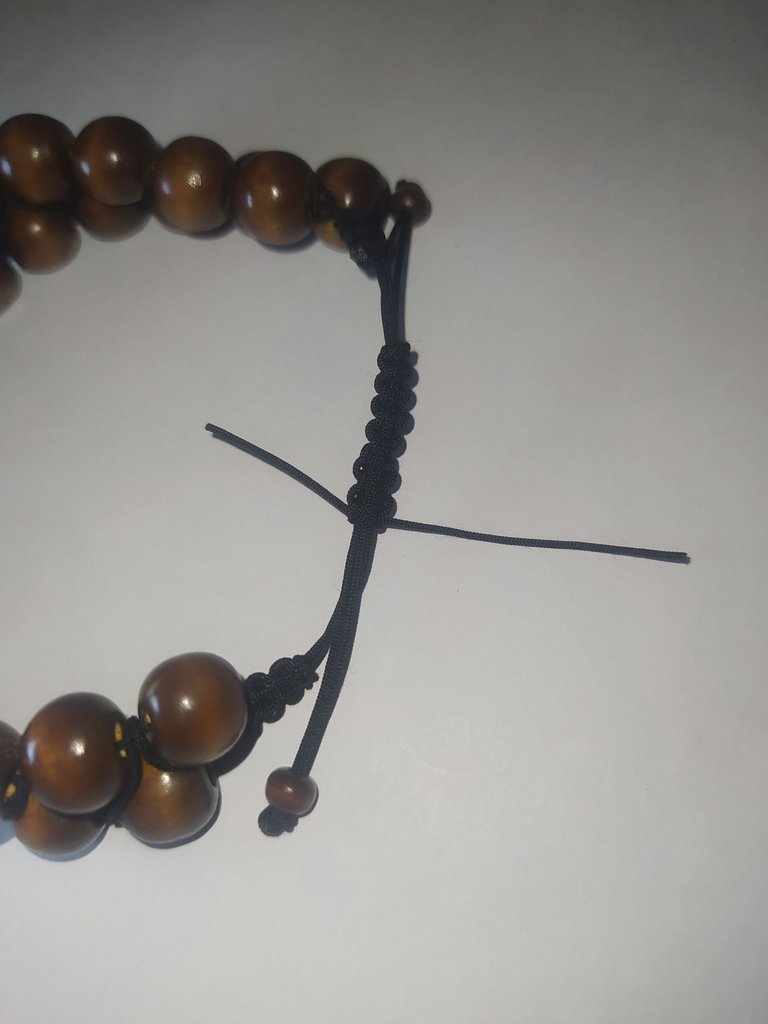
- We take the two strands of the bracelet and place them side by side, as shown in the photo.
- Tomamos los dos hilos de la pulsera y colocamos uno al lado del otro, como muestro en la foto.
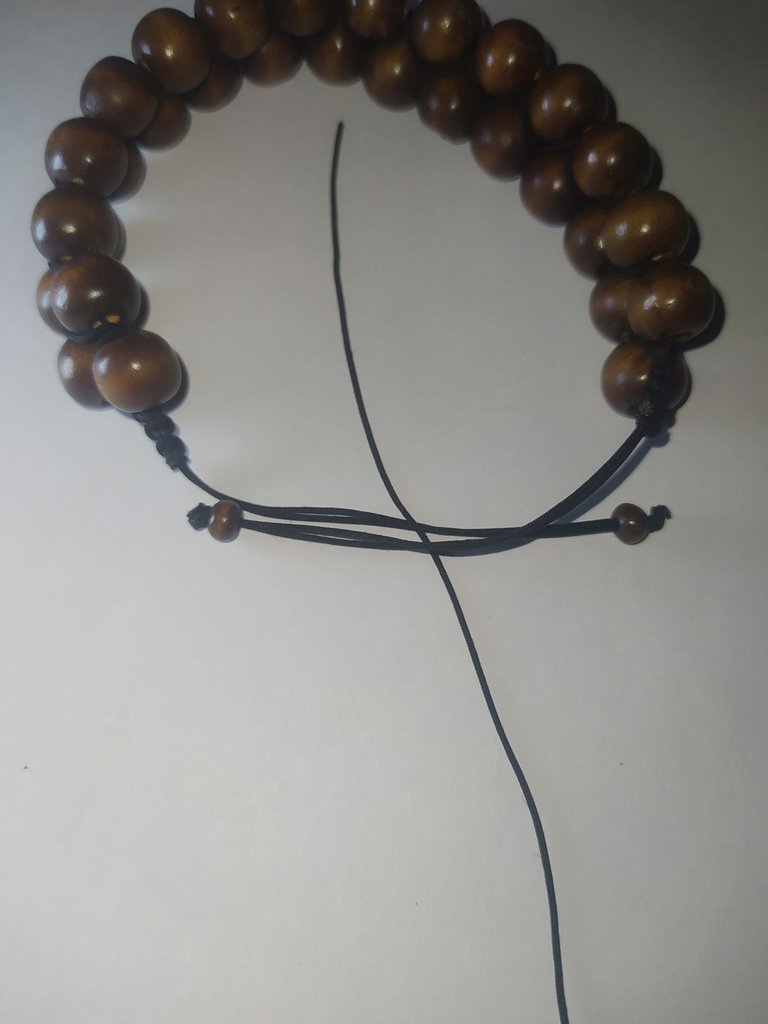
- I place the 25 cm thread underneath and we proceed to make the flat knot technique as I explained at the beginning, here I show you the images.
- Coloco el hilo de 25 cm por debajo y procedemos a realizar la técnica del nudo plano como les expliqué al principio aquí les muestro las imágenes
 |  |
|---|
 |  |
|---|
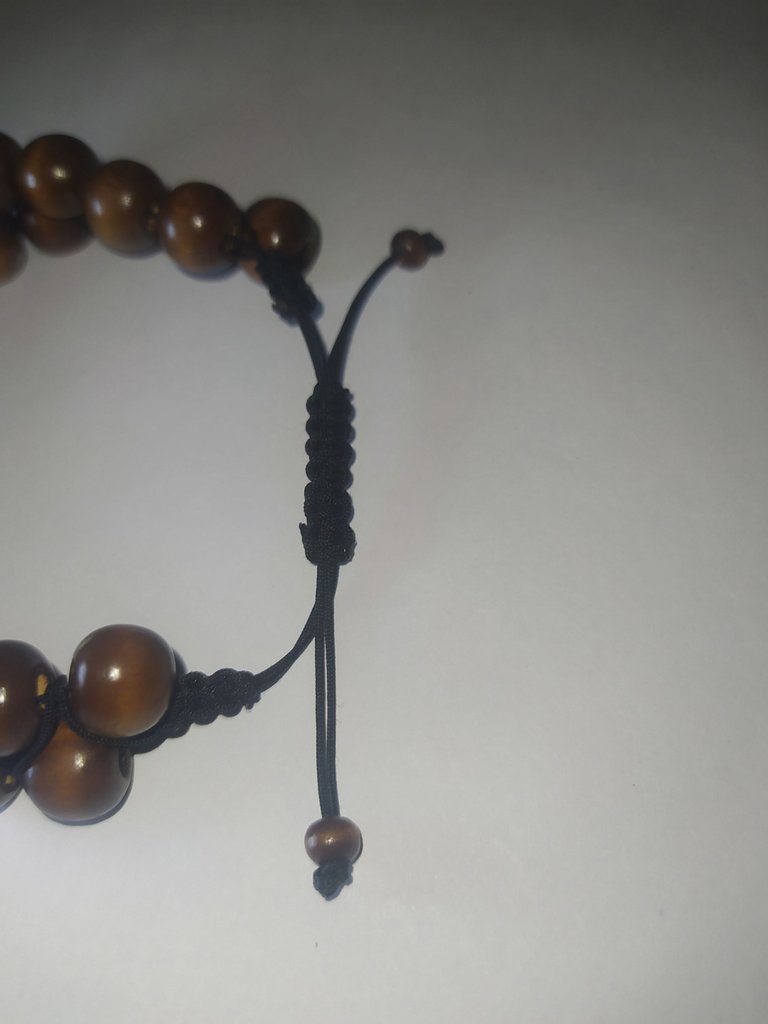
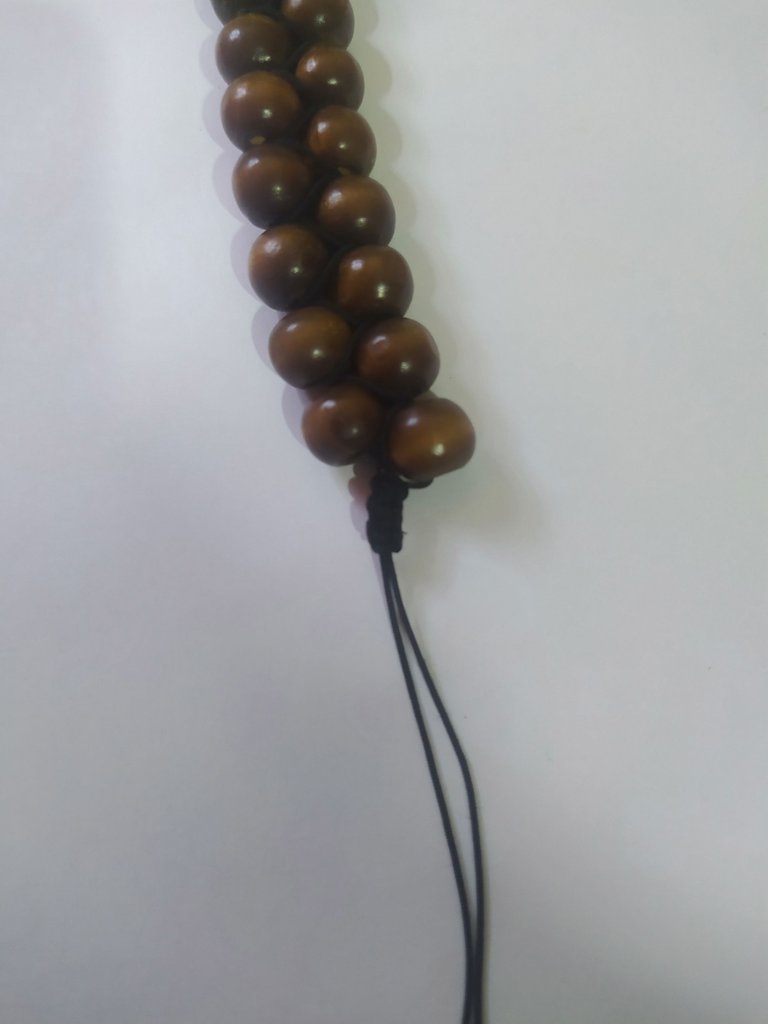
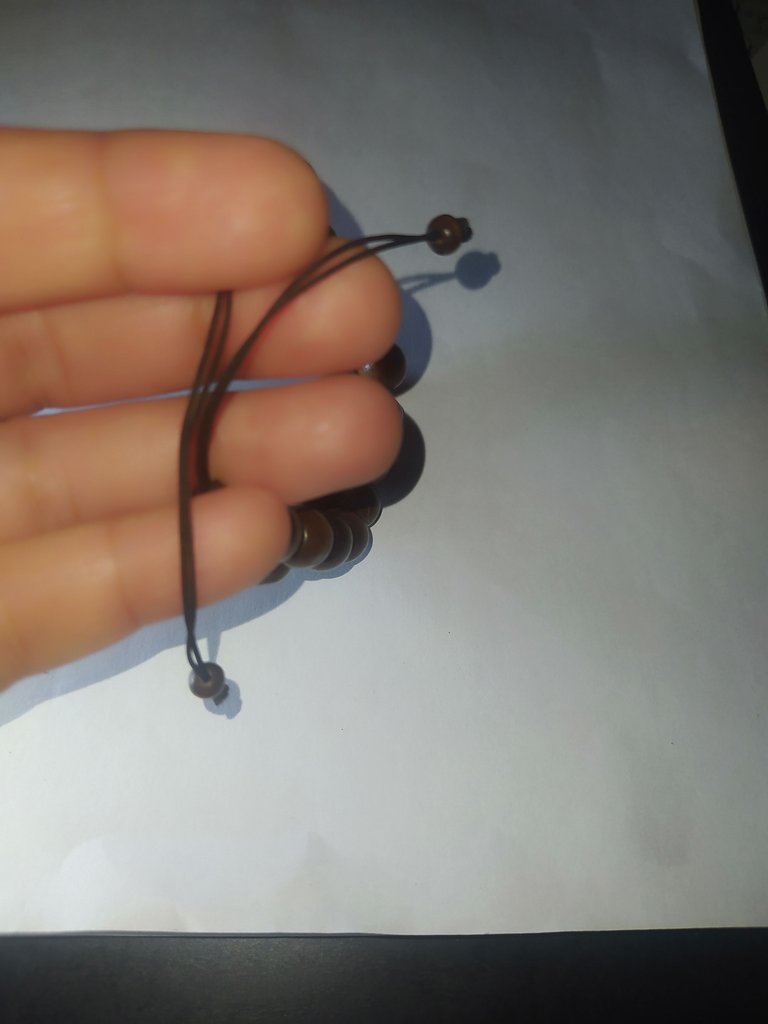
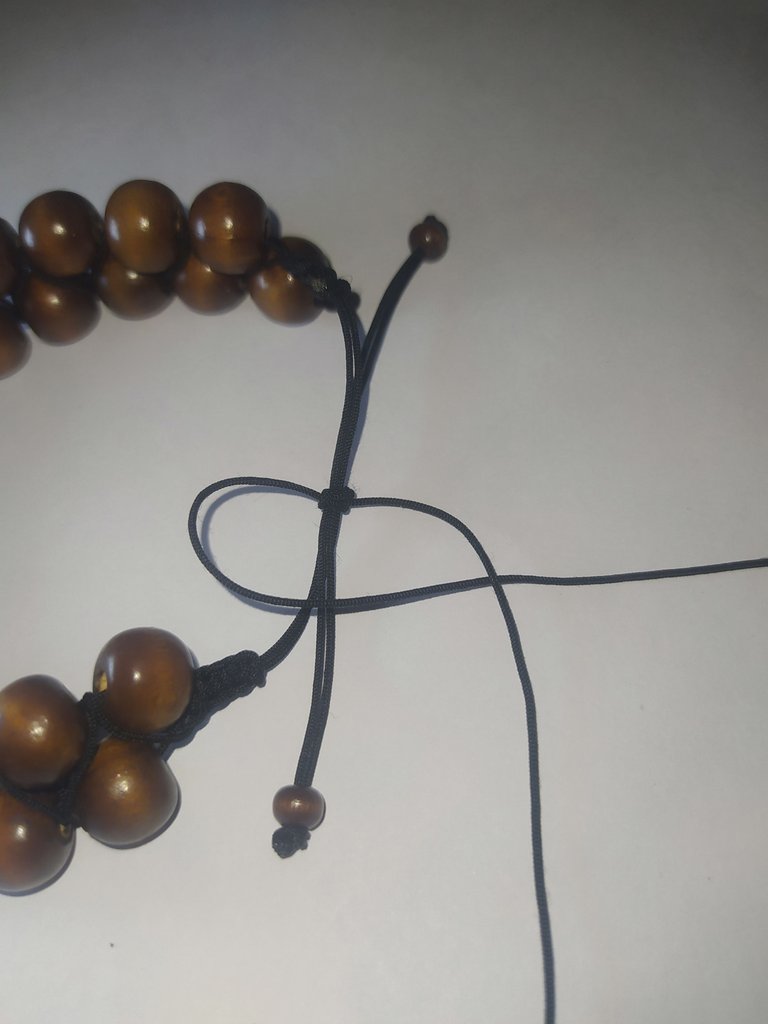
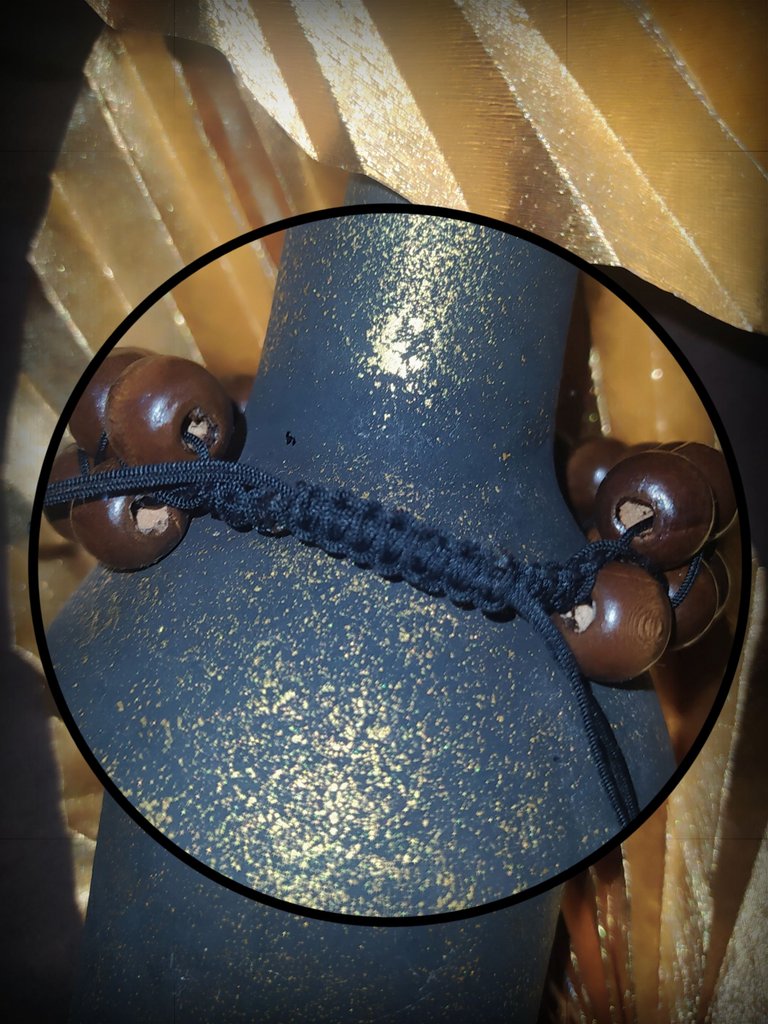
- This is how our flat knot sliding clasp looks like.
- Así queda nuestro cierre corredizo de nudo plano.
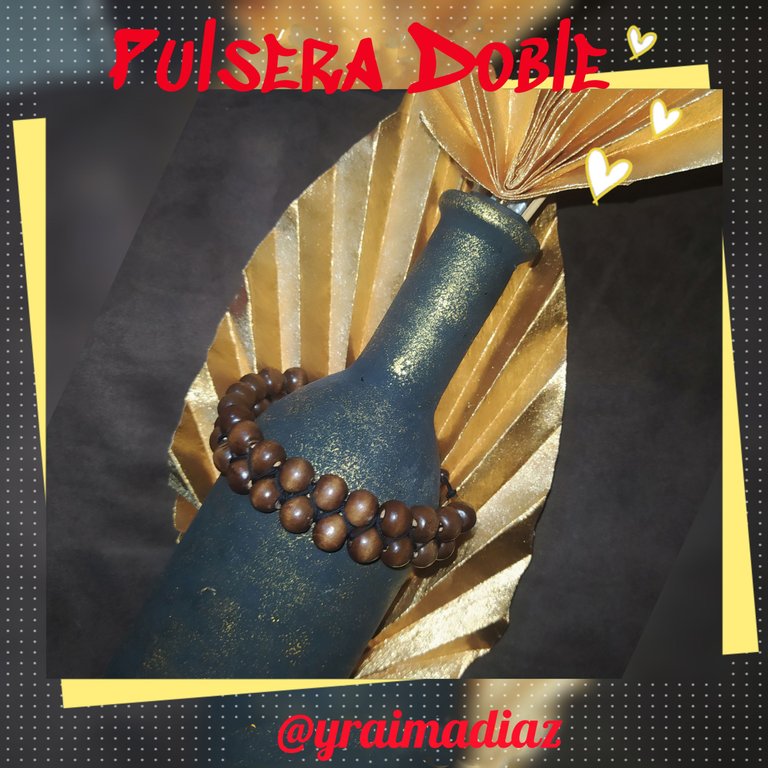
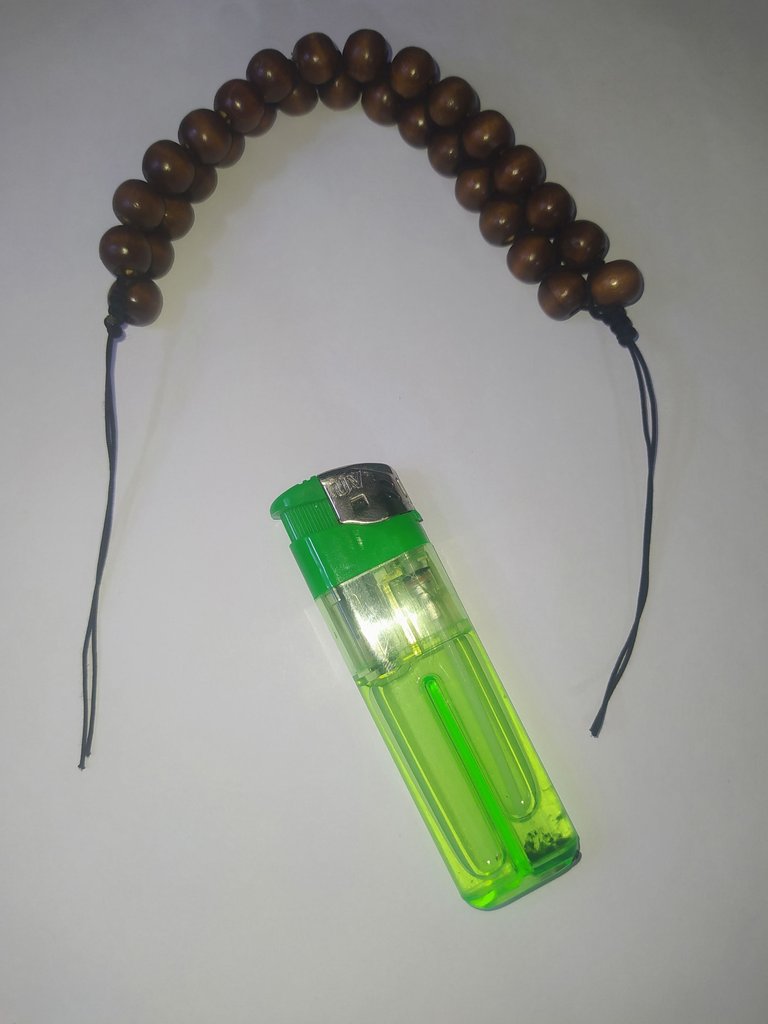
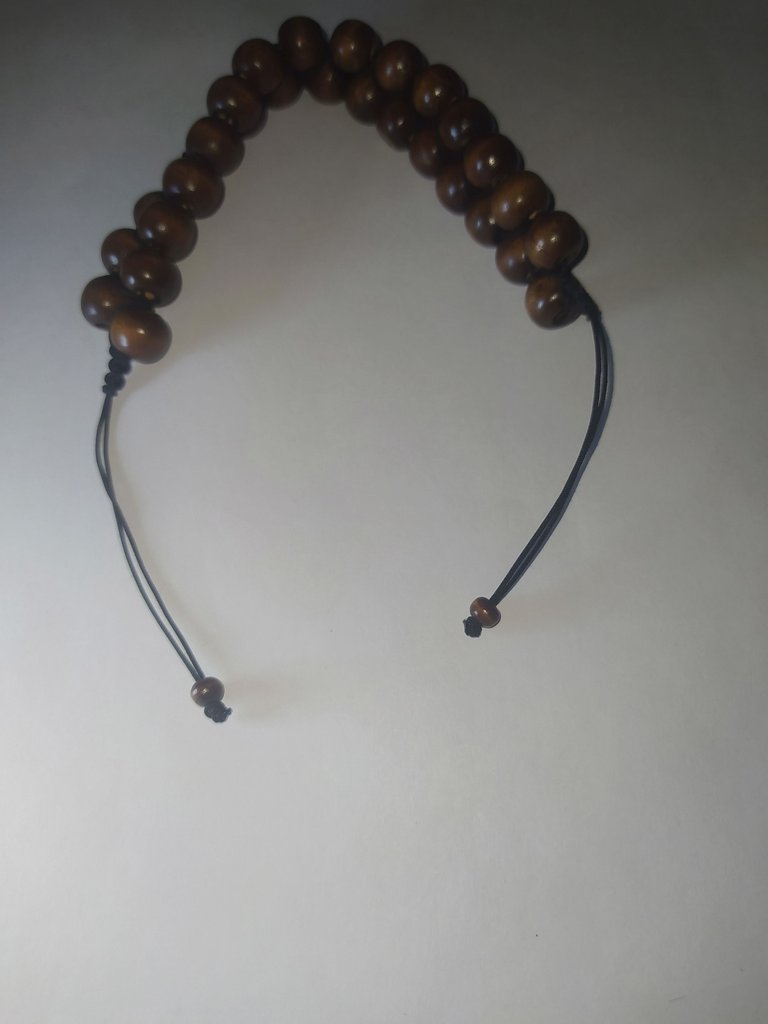
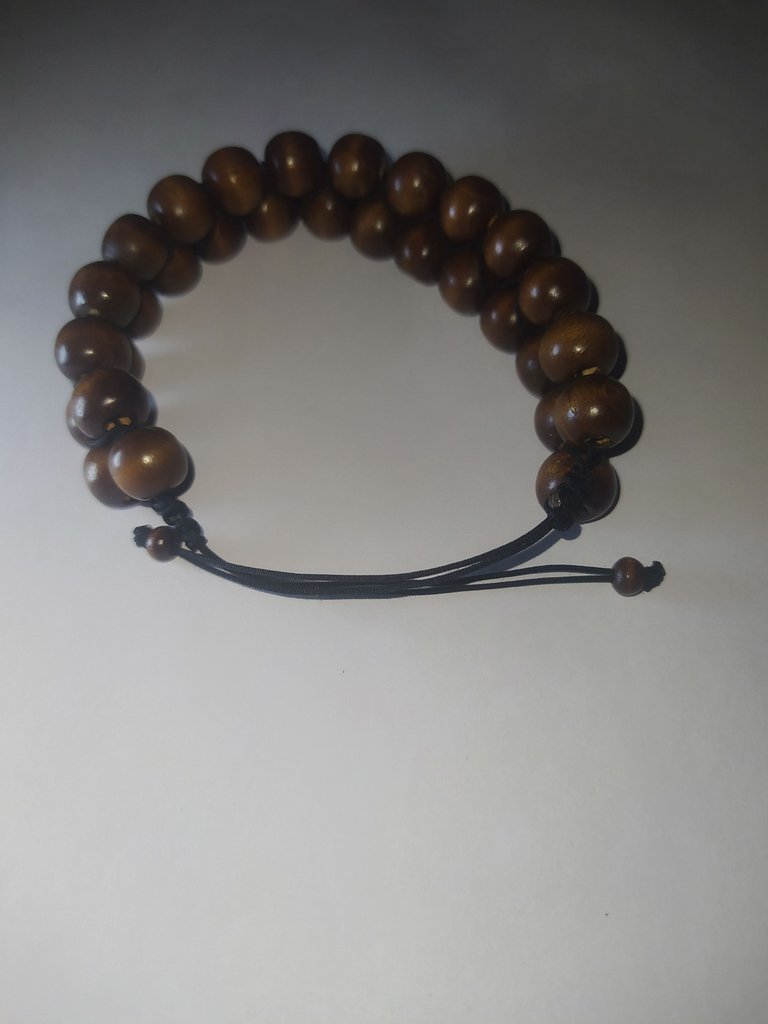
Look at the beautiful result of this double bracelet with wooden beads, thanks for joining me to make it, remember to leave your mark with your comment, let's build memories.
Miren el hermoso resultado de esta pulsera doble con cuentas de madera, gracias por haberme acompañado a realizarla, recuerda dejar tu huella con tu comentario, construyamos recuerdos
Remember to forgive now, love with all your heart and smile at life.
Recuerda perdona ahora, ama con todo tu corazón y sonríele a la vida.

Banner realizado en Meitu
Traductor Deepl.
Photos of my property taken with Xiaomi redmi note 8 phone.
Banner made in Meitu
Translator Deepl.
8 phone.
Banner made in Meitu
Translator Deepl.
