Hello, hello greetings my dear creative friends I hope you had a beautiful day.
Hola, hola saludos mis queridos amigos creativos espero hayan tenido un hermoso día.
Today I join this wonderful initiative to celebrate World Bee Day brought to us by my dear community @diyhub, following an invitation from my beautiful friend @yagelybr.
Hoy me uno a esta maravillosa iniciativa para celebrar el Día Mundial de las abejas que nos trae mi querida comunidad @diyhub atendiendo una invitación que me hizo mi bella amiga @yagelybr
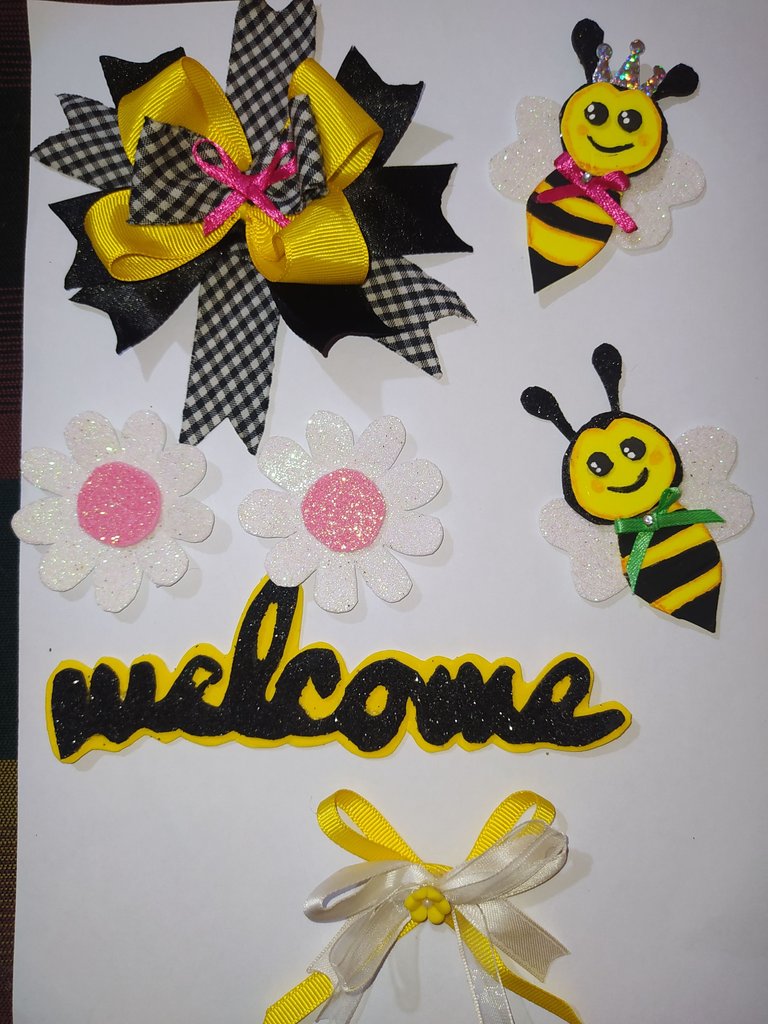
I have brought you a nice Welcome sign to hang in the entrance of the house or in that special place you enjoy the most in your home.
Les he traído un lindo letrero de Bienvenida para colgar en la entrada de la casa o en ese sitio especial en el que más disfrutes en tu hogar.
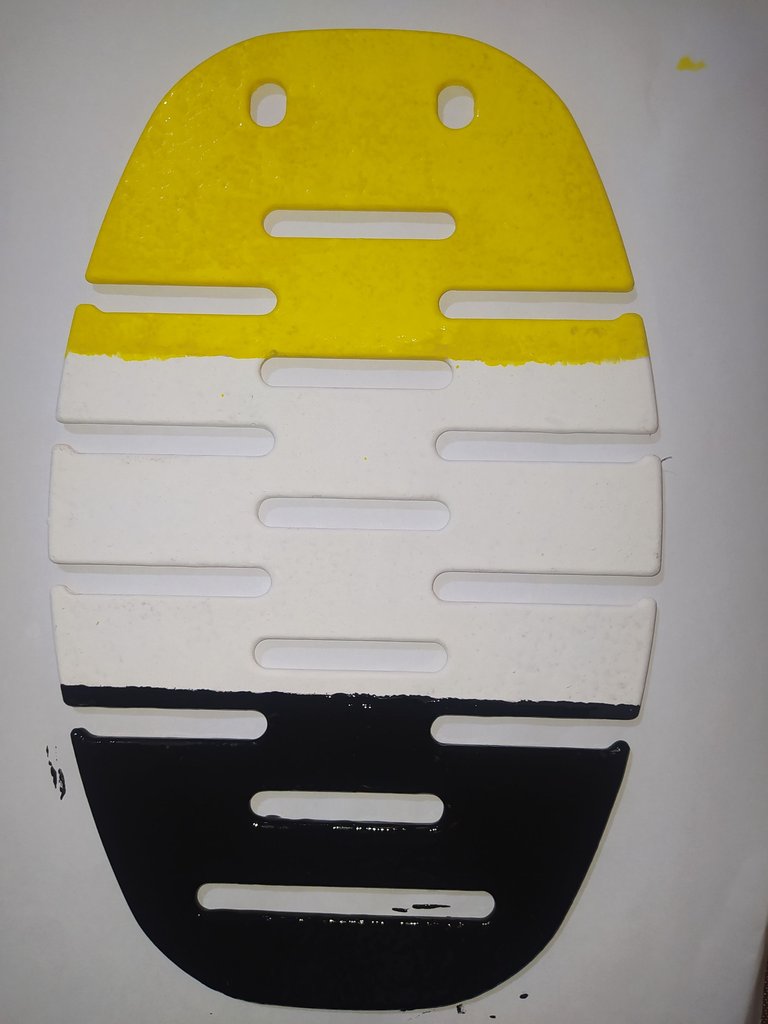
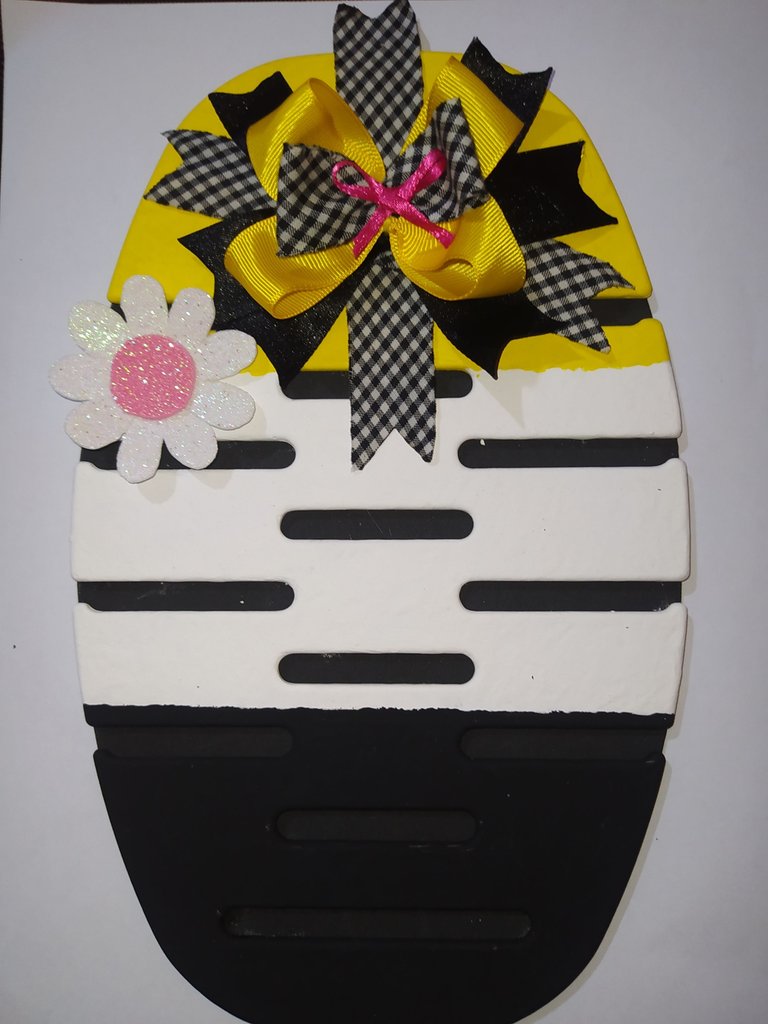
This sign its main piece is for recycling as I found it on one of my morning walks, I have no idea what it is but when I saw it I knew what I was going to use it for, now I say it is very true the saying that some people's trash is a treasure for others.
Este letrero su pieza principal es de reciclaje ya que la encontré en un día de mis caminatas matutinas, no tengo idea de que es pero al verlo supe en qué lo iba a utilizar, ahora digo que es muy cierto el dicho que dice que la basura de unos es un tesoro para otros.
This tutorial is a bit long so I decided to do it in eight steps so that you don't miss anything and can understand it.
Este tutorial es un poco largo por eso decidí realizarlo en ocho pasos para que no se pierdan nada y lo puedan entender.
I invite you to join me once again and be my accomplice in this process.
Te invito me acompañes una vez más y seas mi cómplice en todo este proceso.
I share with you the list of materials and the step-by-step procedure
Te comparto la lista de los materiales y su paso a paso
Materiales.
- Base de plástico.
- Pintura acrílica blanca.
- Pintura acrílica amarilla.
- Pintura acrilica negra.
- Rodillo.
- Pincel.
- Plato pequeño.
- Foami amarillo.
" Foami negro. - Foami negro escarchado.
- Foami blanco escarchado.
- Foami rosado escarchado.
- Chenil dorado
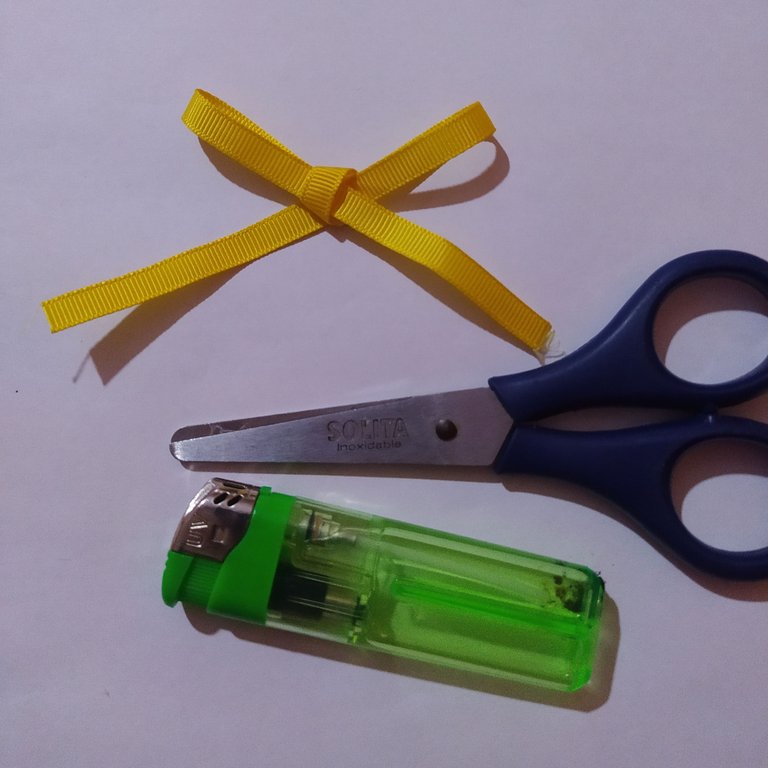
- Exacto.
- Tijera.
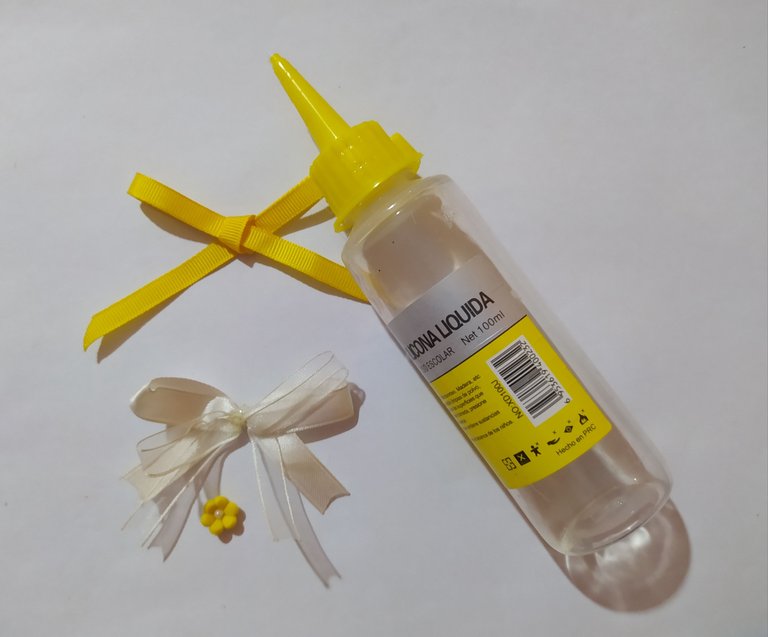
- Silicón liquido al frio.
- Molde de abejita.
- Molde de flor.
- Molde de welcome.
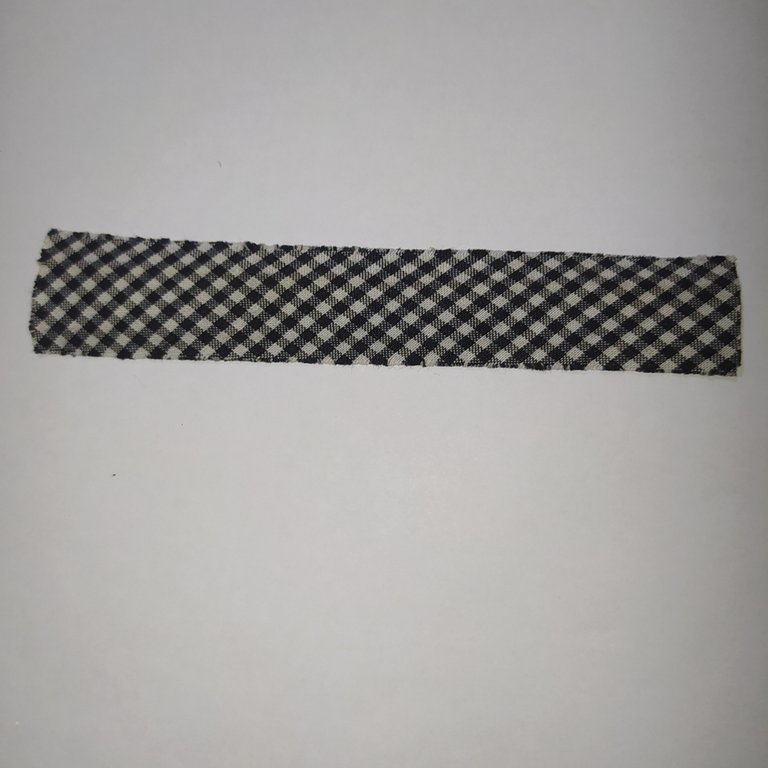
- Cinta negra de 2.5 cm de ancho.
- Cinta amarilla de 2.5cm de ancho.
- Cinta de cuadritos de 2.5 cm de ancho.
- Cinta amarilla de 0.5 cm de ancho.
- Cinta verde de 0.3 mm de ancho.
- Cinta fucsia de 0.3 mm.
- Lazo blanco.
- Florecita amarilla.
- Coronita plateada.
- Hilo negro.
- Hilo amarillo.
- Agujas.
- Encendedor.
- Palito de altura.
- Regla.
- Lápiz.
Materials.
- Plastic base.
- White acrylic paint.
- Yellow acrylic paint.
- Black acrylic paint.
- Roller.
- Brush.
- Small plate.
- Yellow Foami.
"Black foami. - Black frosted Foami.
- White frosted Foami.
- Pink frosted foami.
- Golden chenille
- Exact.
- Scissors.
- Cold liquid silicone.
- Bee mold.
- Mold of flower.
- Mold of welcome.
- Black ribbon 2.5 cm wide.
- Yellow ribbon 2.5 cm wide.
- 2.5 cm wide checkered ribbon.
- Yellow ribbon 0.5 cm wide.
- Green ribbon 0.3 mm wide.
- Fuchsia ribbon of 0.3 mm.9
- White ribbon.
- Yellow flower.
- Silver crown.
- Black thread.
- Yellow thread.
- Needles.
- Lighter.
- Height stick.
- Ruler.
- Pencil.
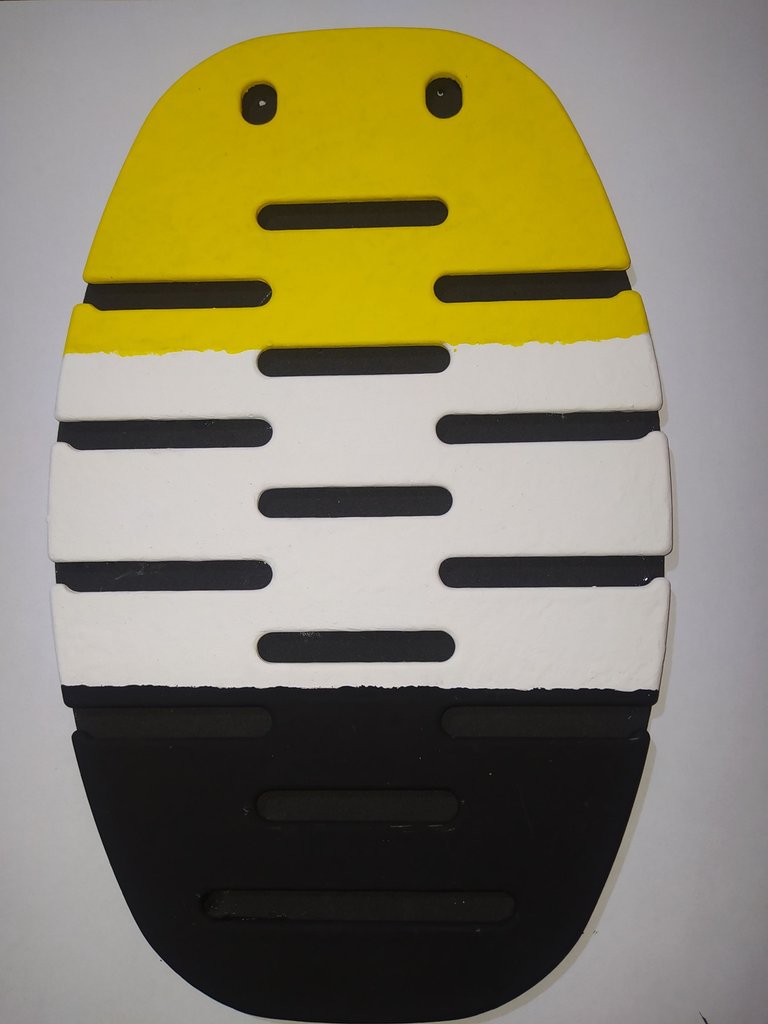
Let's move on to its preparation.
Step one
Paint the plastic base.
Pasemos a su elaboración.
Paso uno
Pintar la base plástica.
 |  |  |
|---|
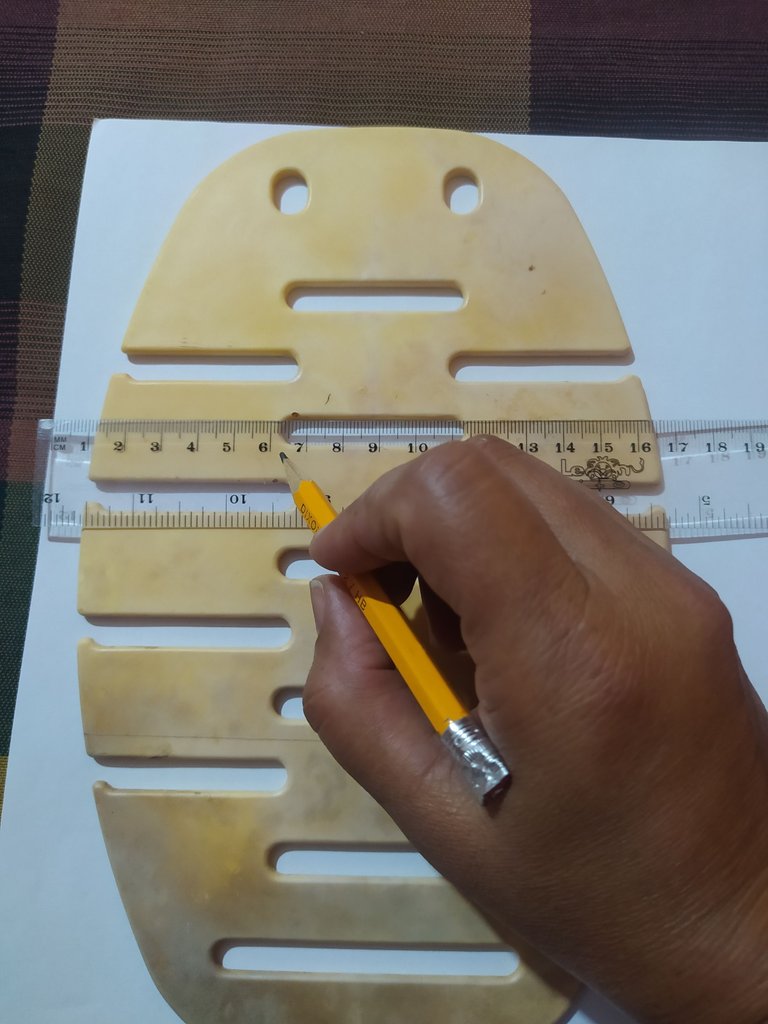
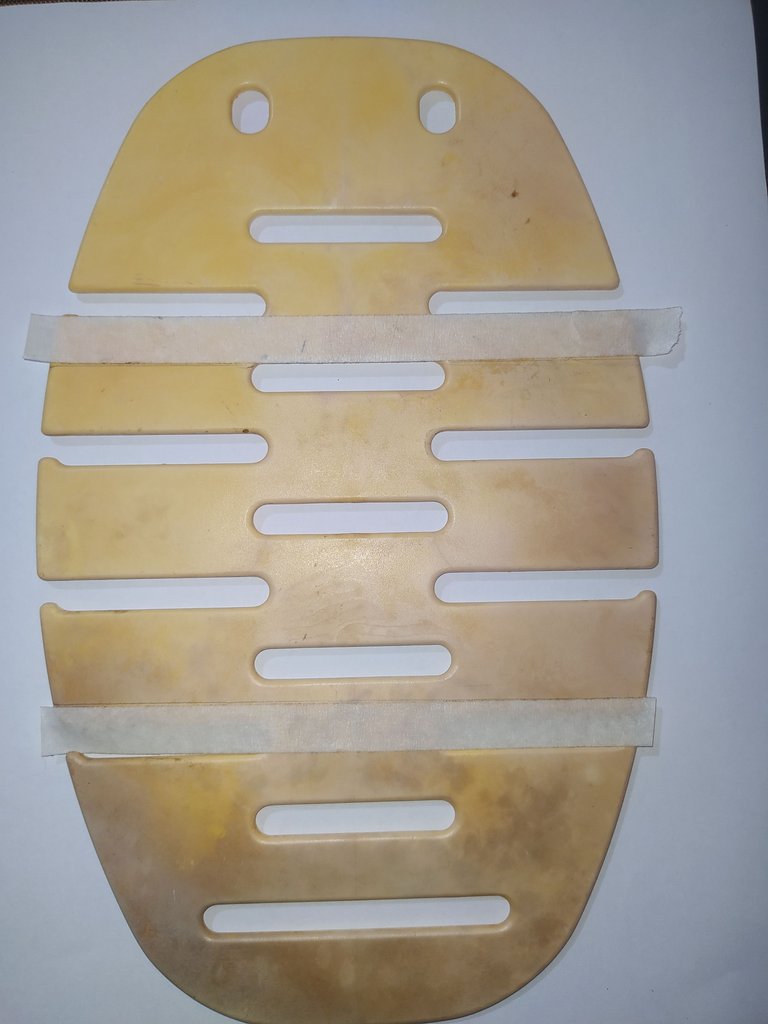
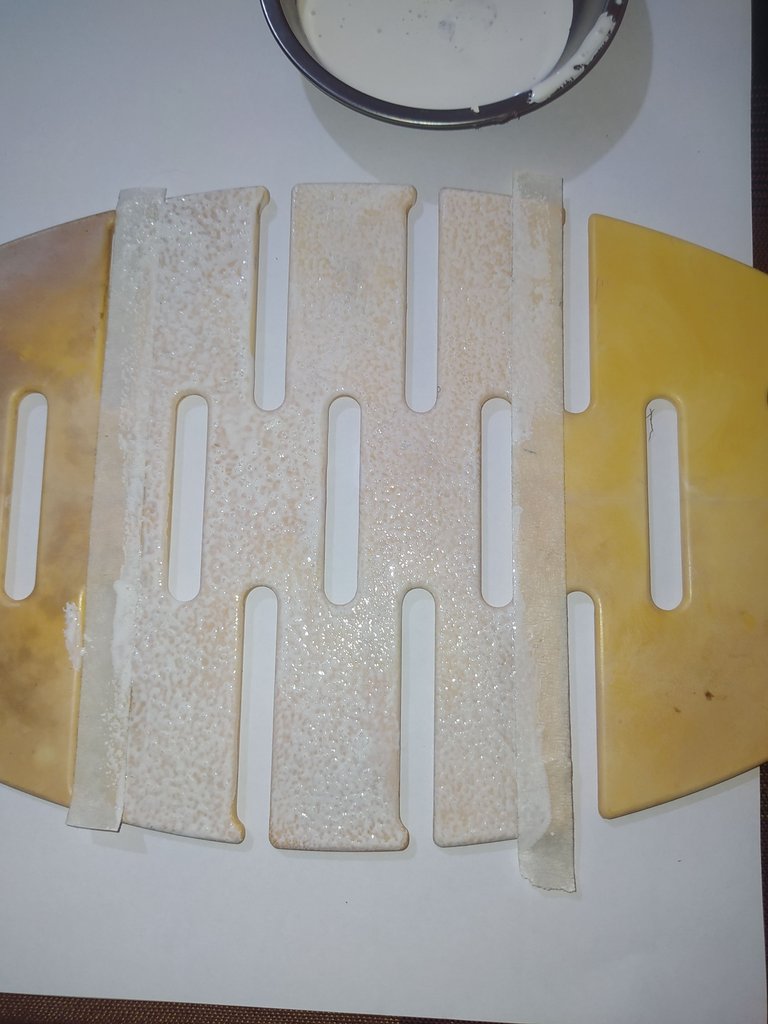
- We take the plastic piece, measure it and make three separations.
- We divide with tape, and then paint.
- Tomamos la pieza de plástico medimos y hacemos tres separaciones.
- Dividimos con cinta, para luego pintar.
 |  |  |
|---|
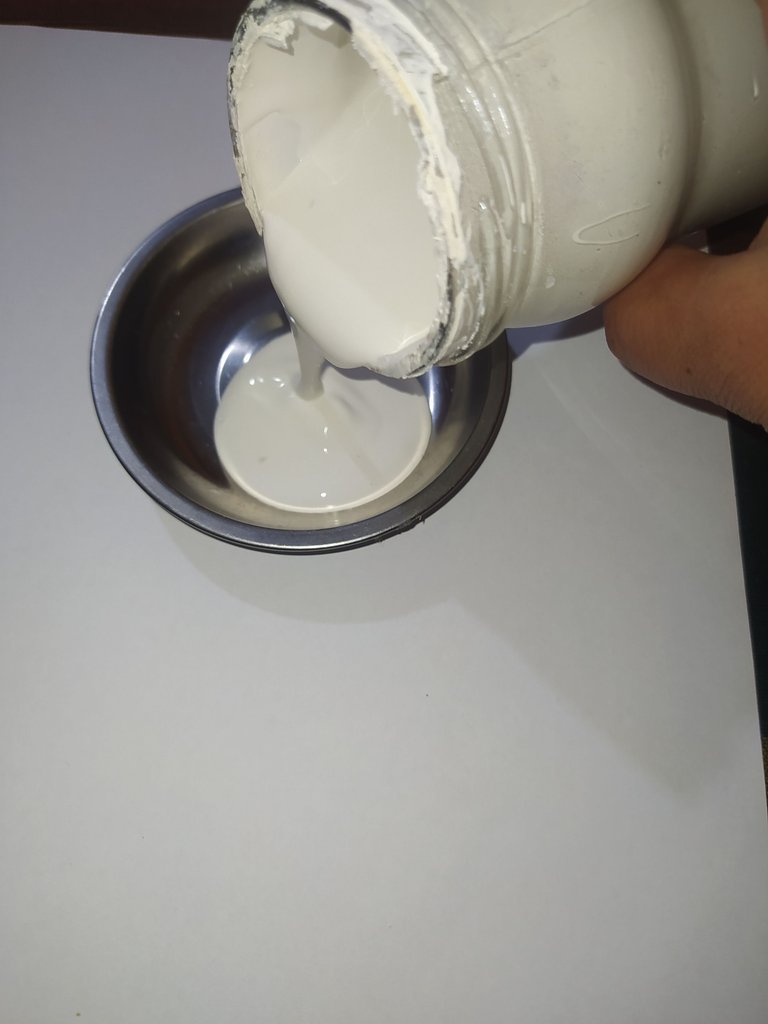
- We pour the white paint on the metal plate.
- Then we start painting the center part with the help of the roller.
- Vertemos la pintura blanca en el plato de metal.
- Luego empezamos a pintar la parte del centro con la ayuda del rodillo.
 |  |
|---|
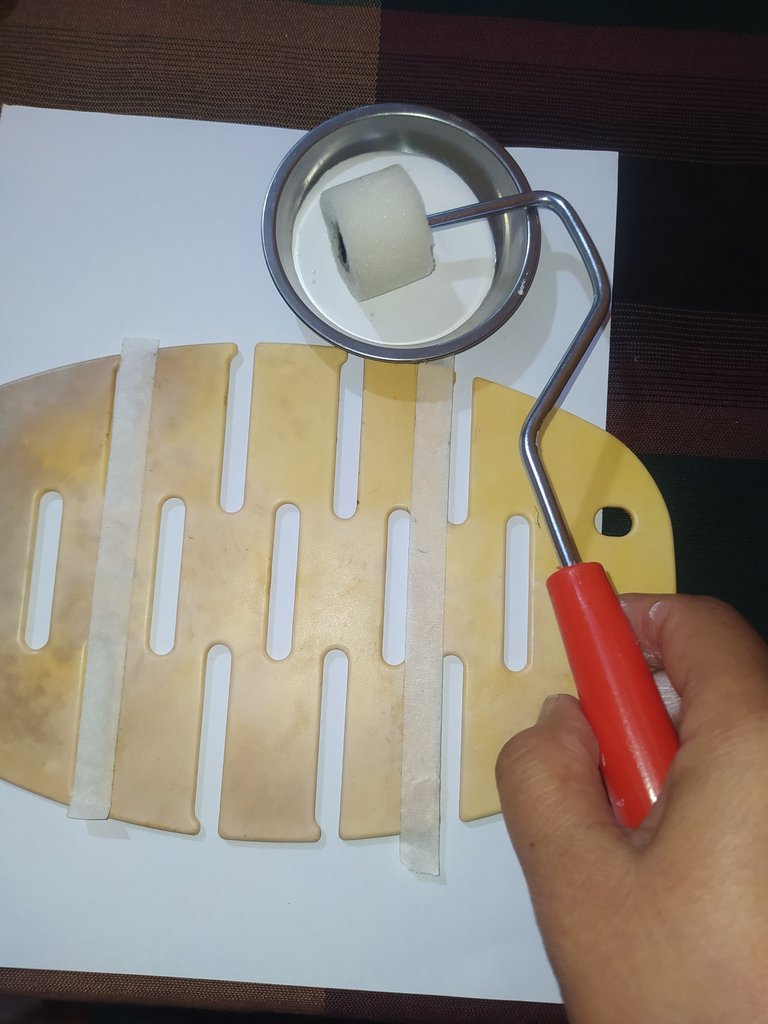
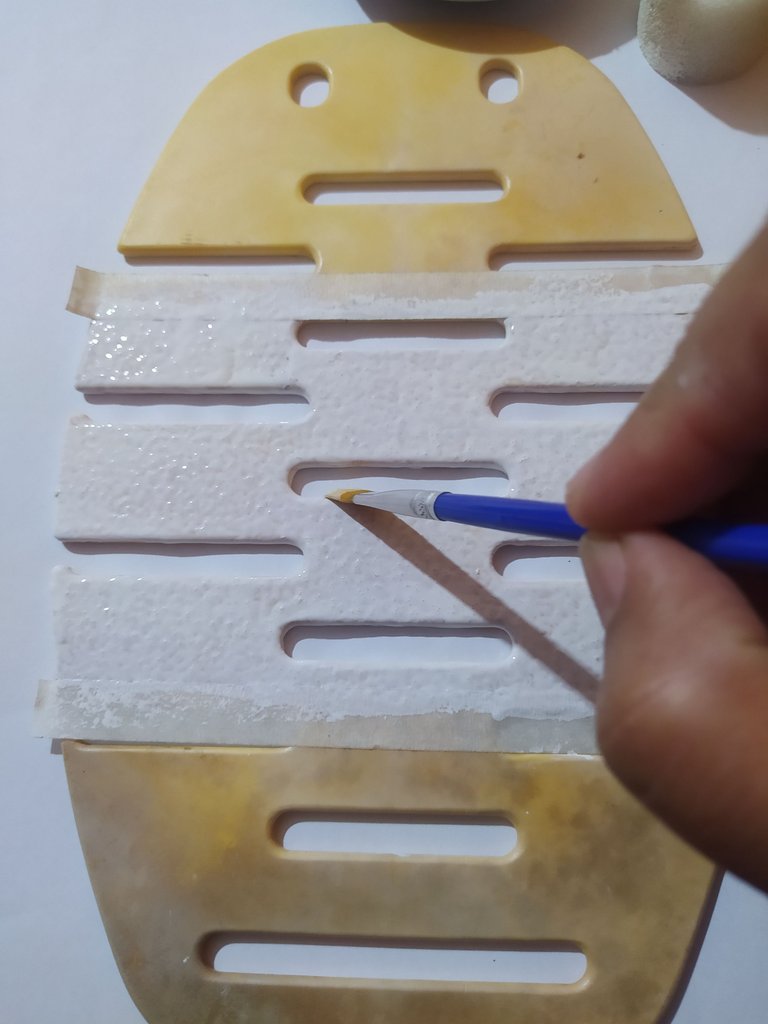
- With the brush we paint the parts where the roller does not reach.
- We paint all the white part several times until it covers its totality leaving to dry between each layer.
- Con el pincel pintamos la partes donde no llega el rodillo.
- Pintamos toda la parte blanca varias veces hasta que cubra su totalidad dejando secar entre cada capa.
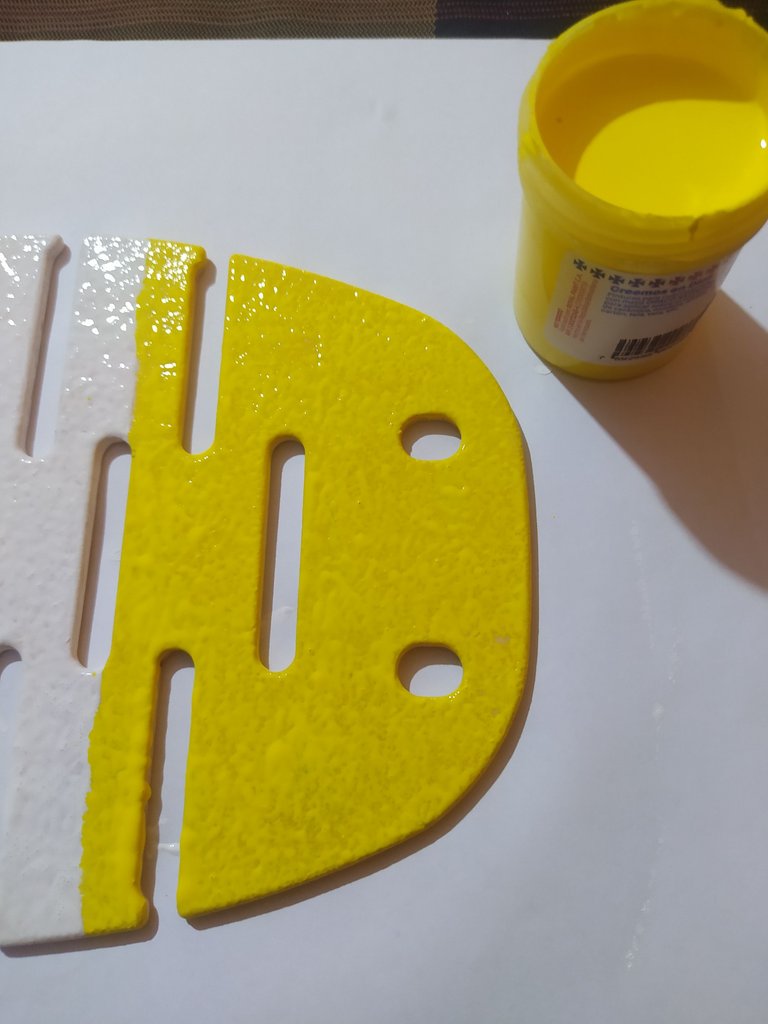
Now we paint the second division in yellow.
Ahora pintamos la segunda división de color amarillo.
 |  |  |
|---|
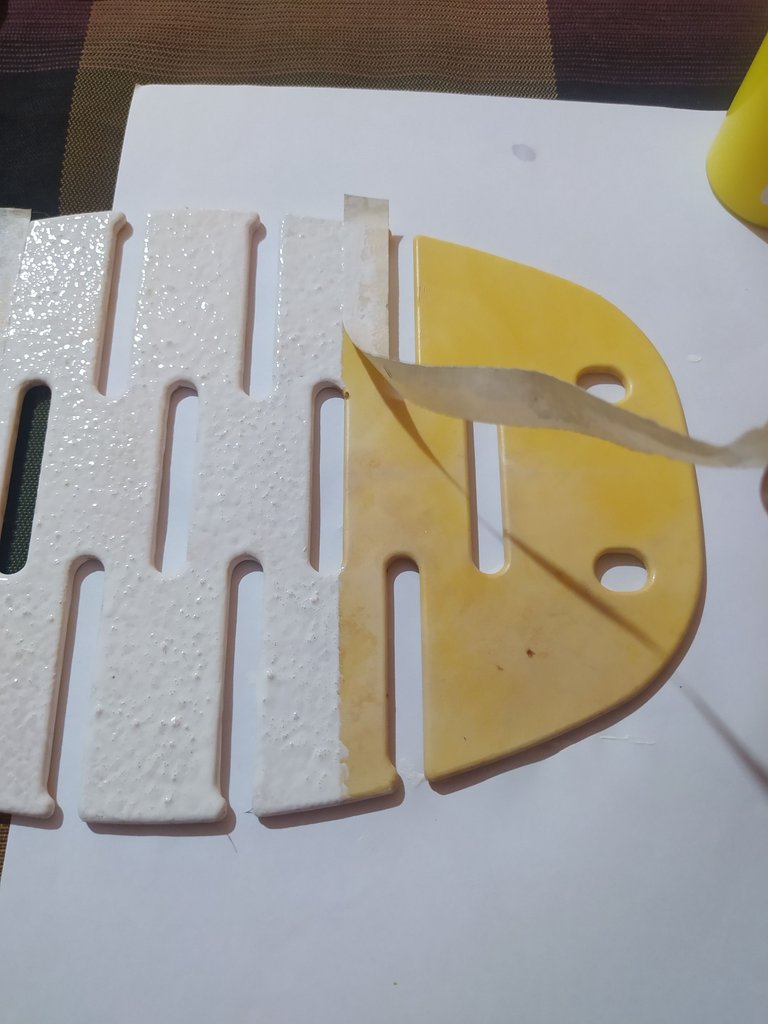
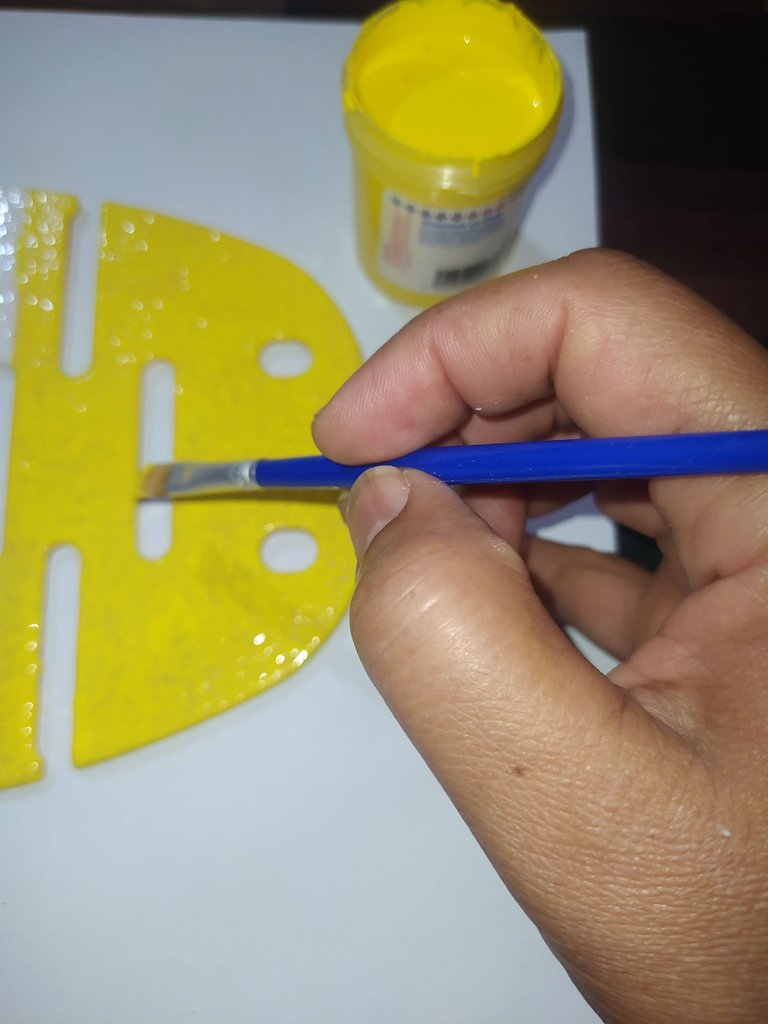
- We apply the yellow paint on the top of the base with the roller and with the help of the brush we apply color in the narrowest parts.
- Repeat until well covered.
- Aplicamos la pintura de color amarilla en la parte de arriba de la base con el rodillo y con la ayuda del pincel aplicamos color en las partes más angostas.
- Repetimos hasta cubrir bien
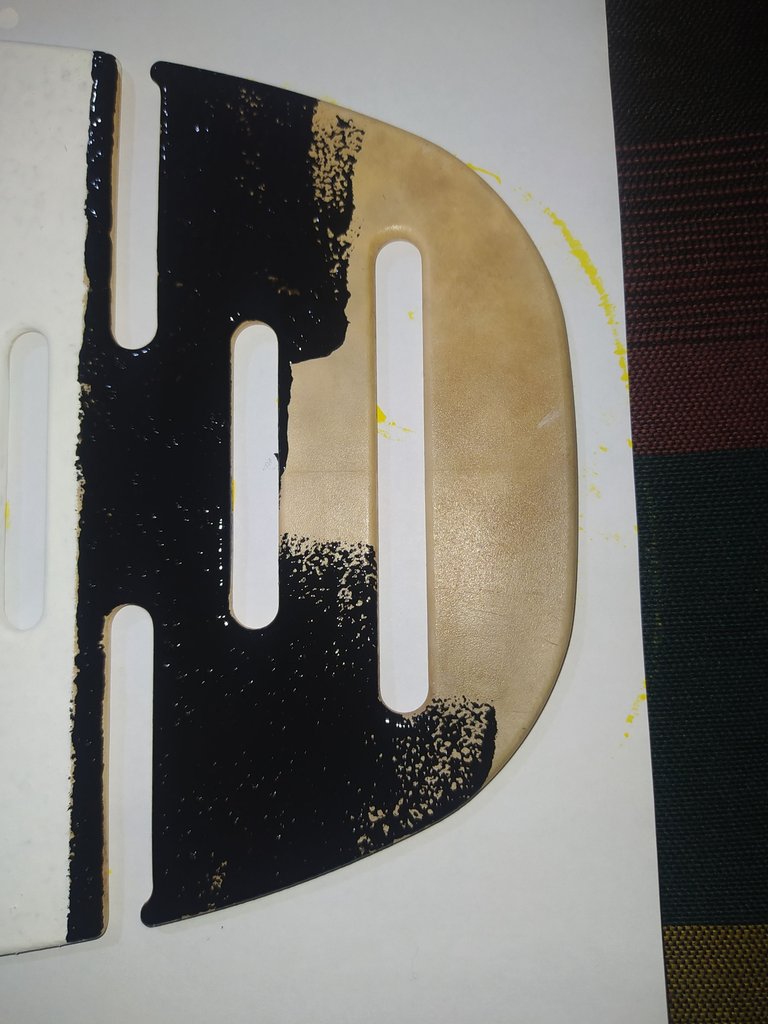
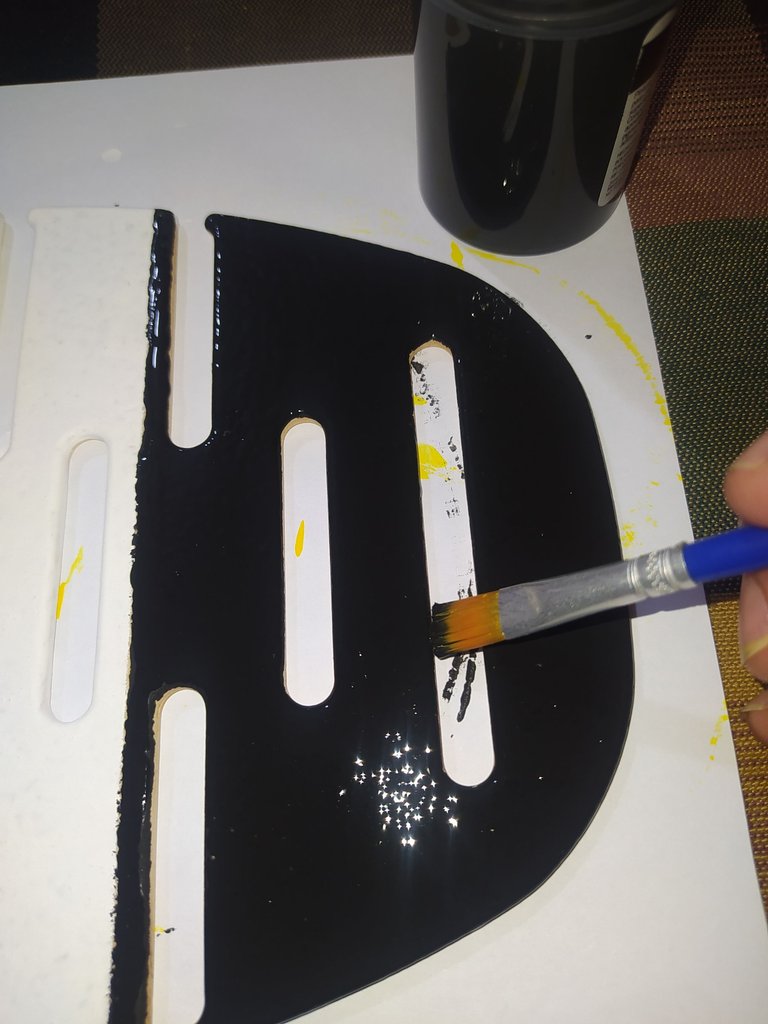
We apply the black color at the bottom of the base.
Aplicamos el color negro en la parte de abajo de la base.
 |  |  |
|---|
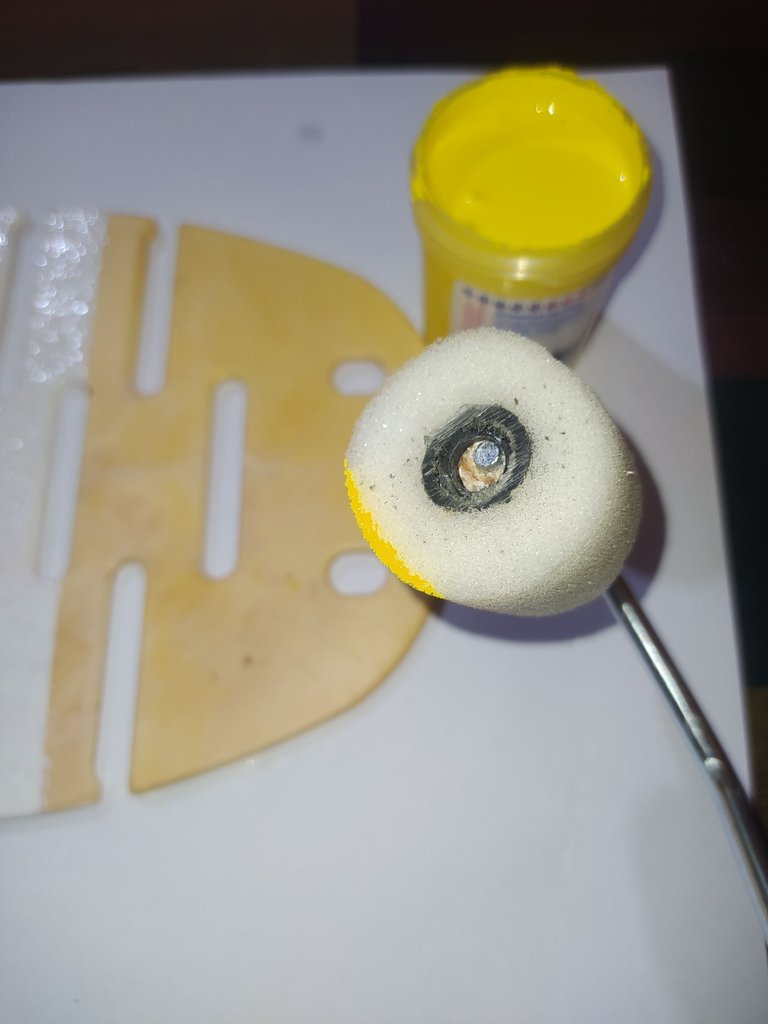
- We repeat the same procedure with the black color.
- We must take into account to give as many coats of paint as necessary to cover.
- Let dry and reserve.
- Repetimos el mismo procedimiento con el color negro.
- Debemos tener en cuenta de dar tantas capas de pintura como sea necesario hasta cubrir.
- Dejamos secar y reservamos.
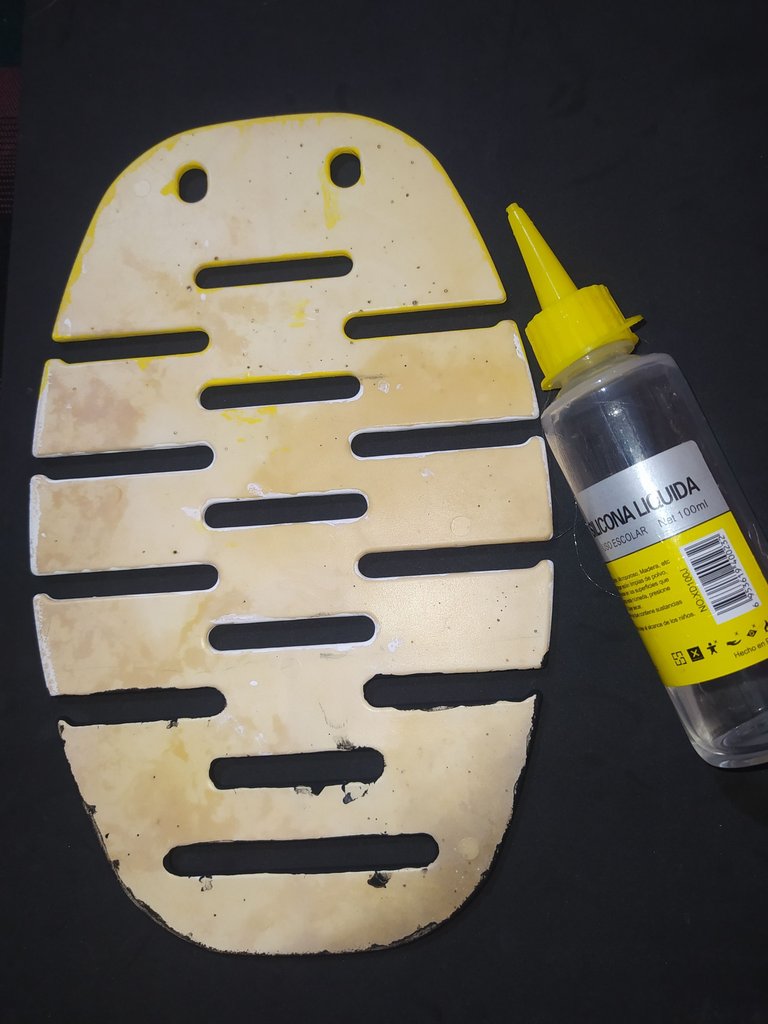
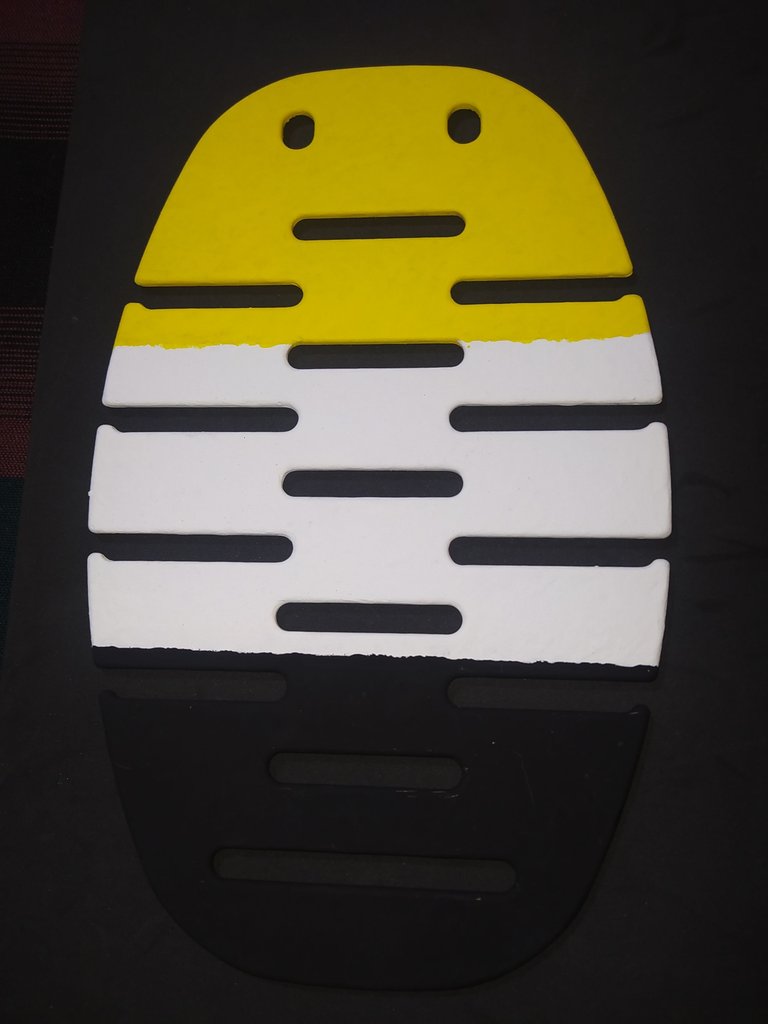
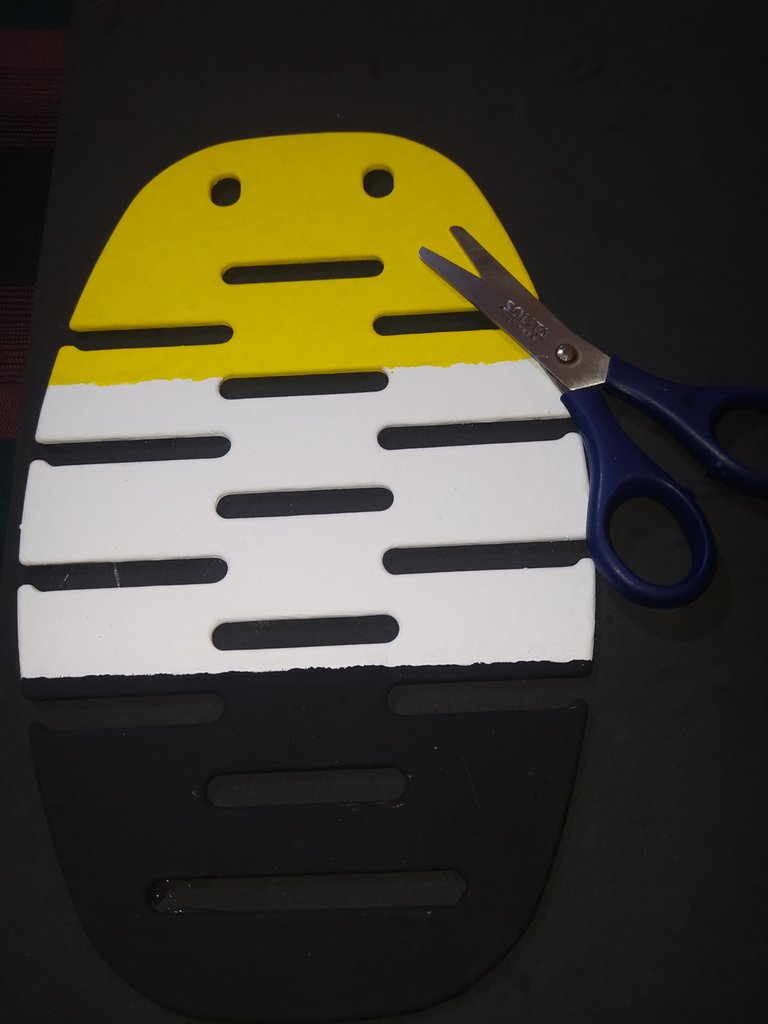
Step two
Cover the back of the base.
Paso dos
Cubrir la parte de atrás de la base.
 |  |  |
|---|
- Apply silicone to the back of the plastic base.
- Place the base on top of the black foami.
- Then we cut all around the edge.
- Le aplicamos silicón a la parte de atrás de la base plástica.
- Colocamos la base encima de el foami negro.
- Luego recortamos por todo el borde.
 |  |
|---|
- With the help of the height stick we make two holes at the top.
- Con la ayuda del palito de altura realizamos dos orificios en la parte de arriba.
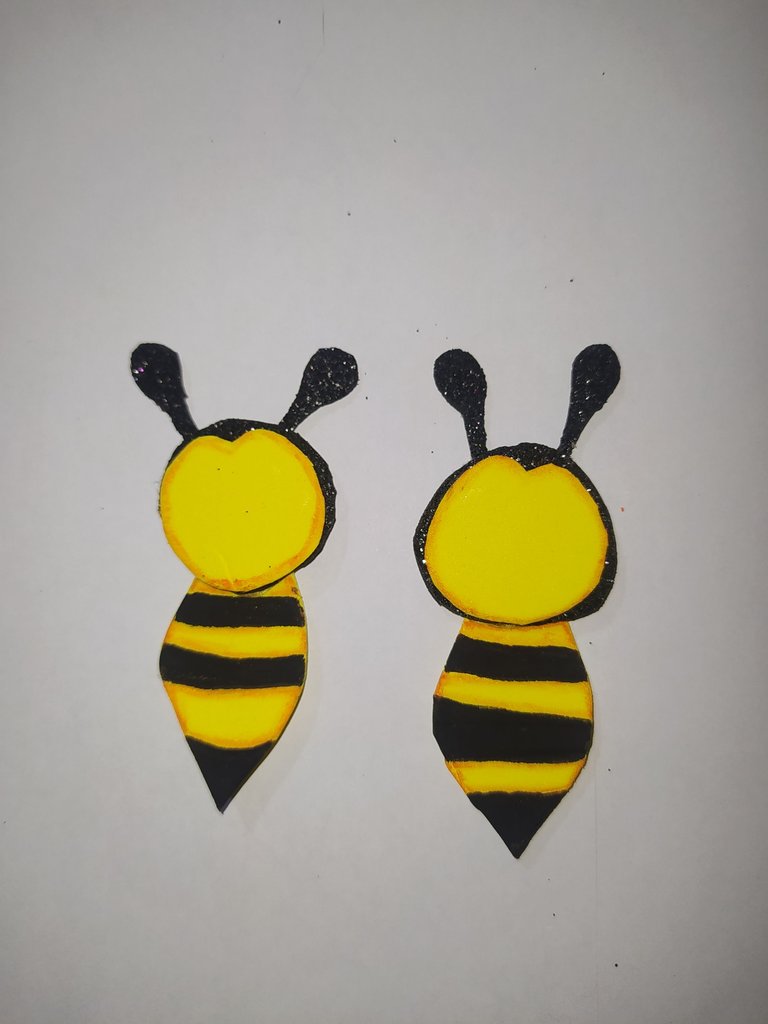
Step three
Make the bees.
Paso tres
Elaborar las abejas.
 |  |
|---|
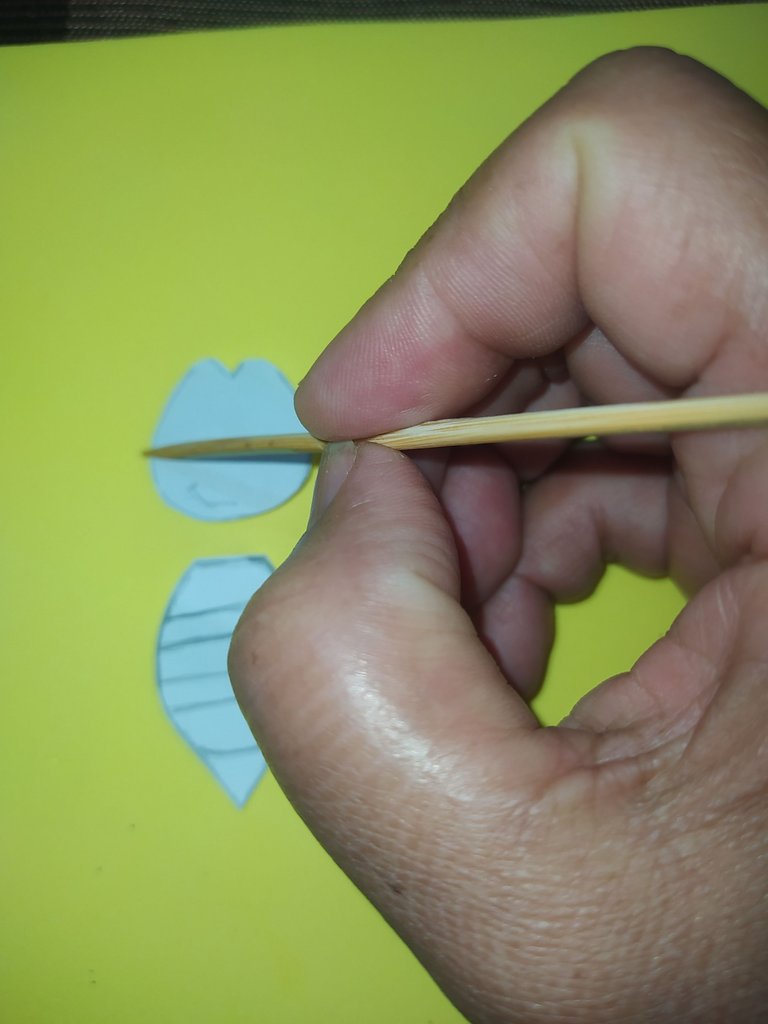
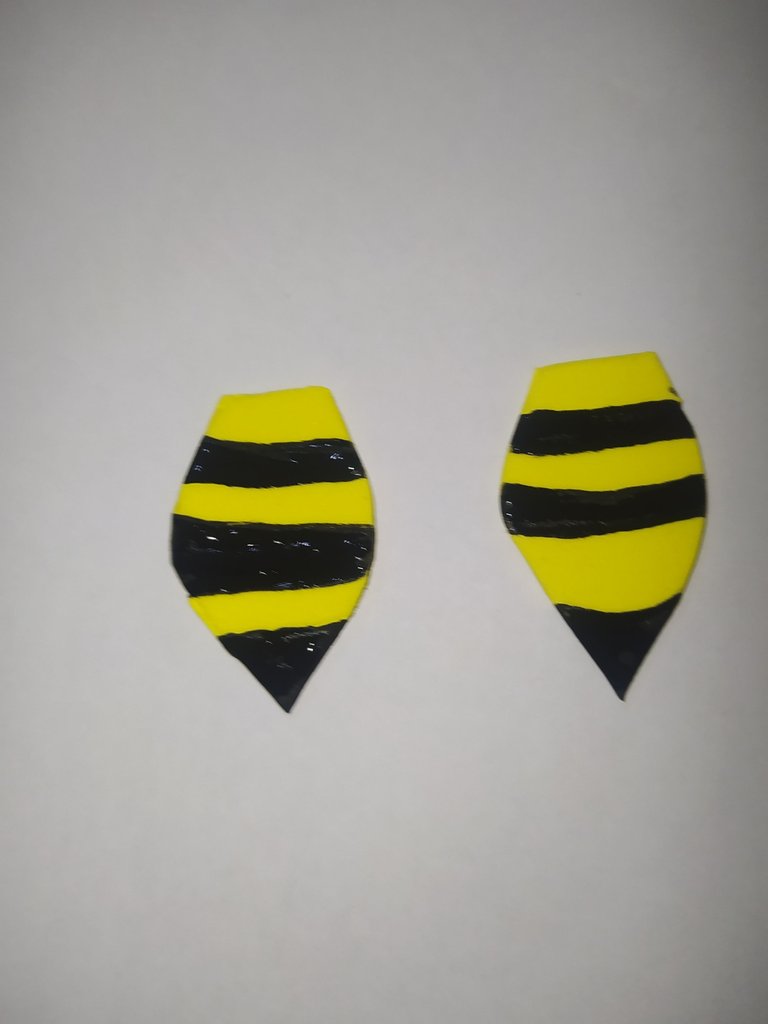
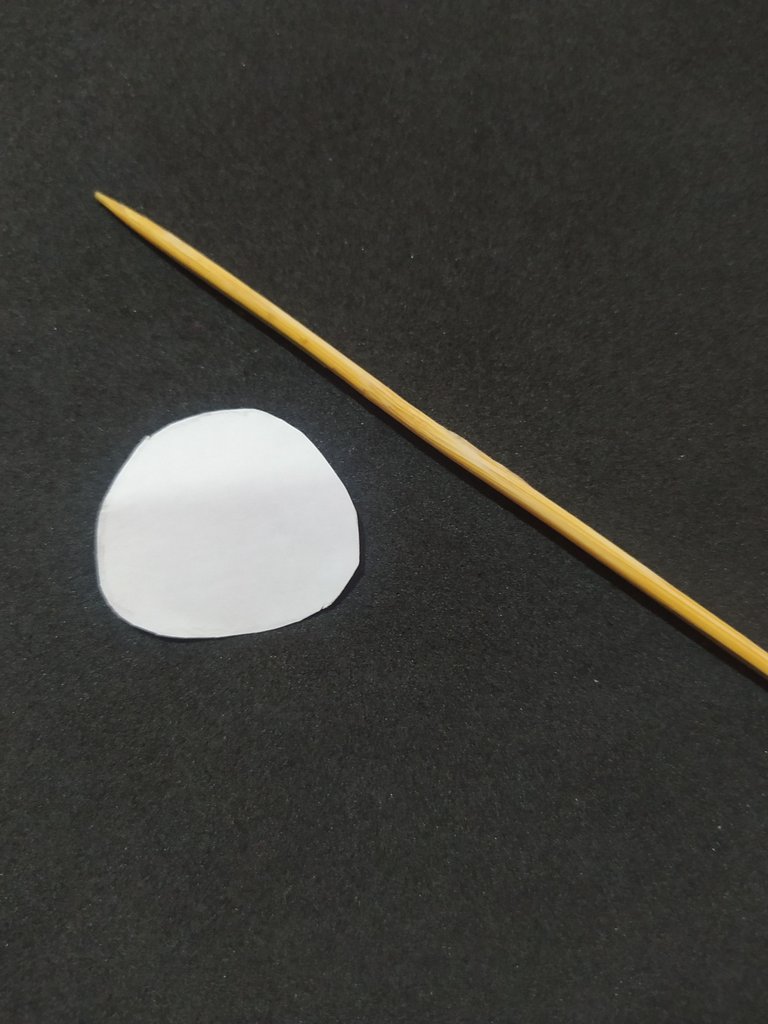
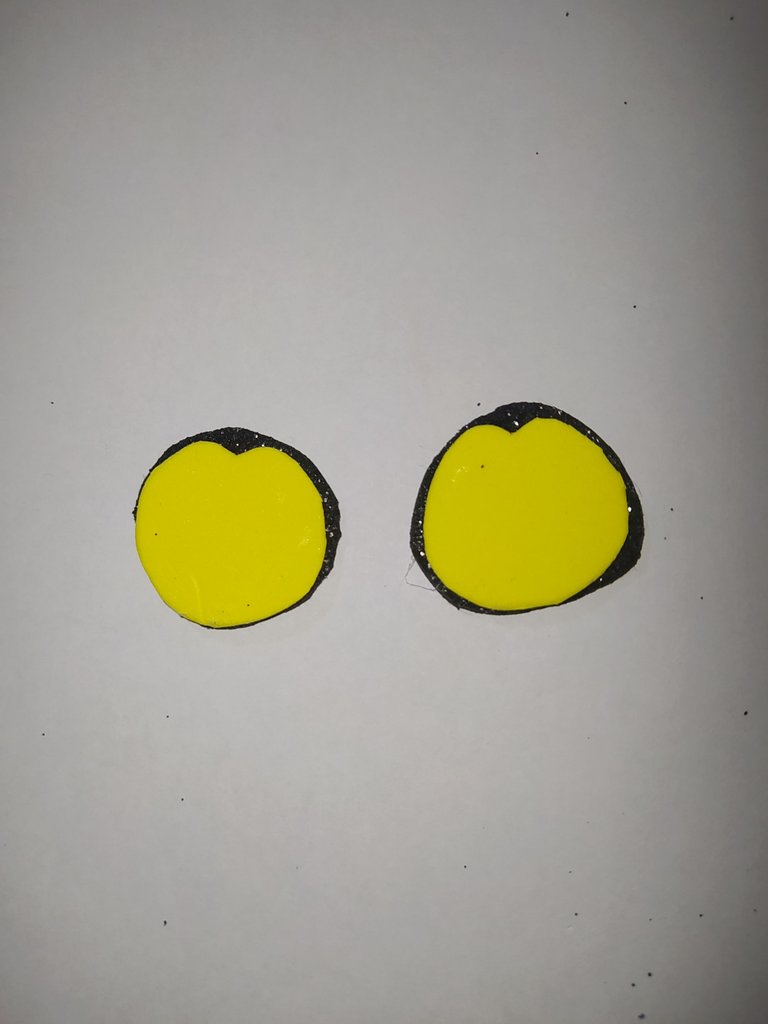
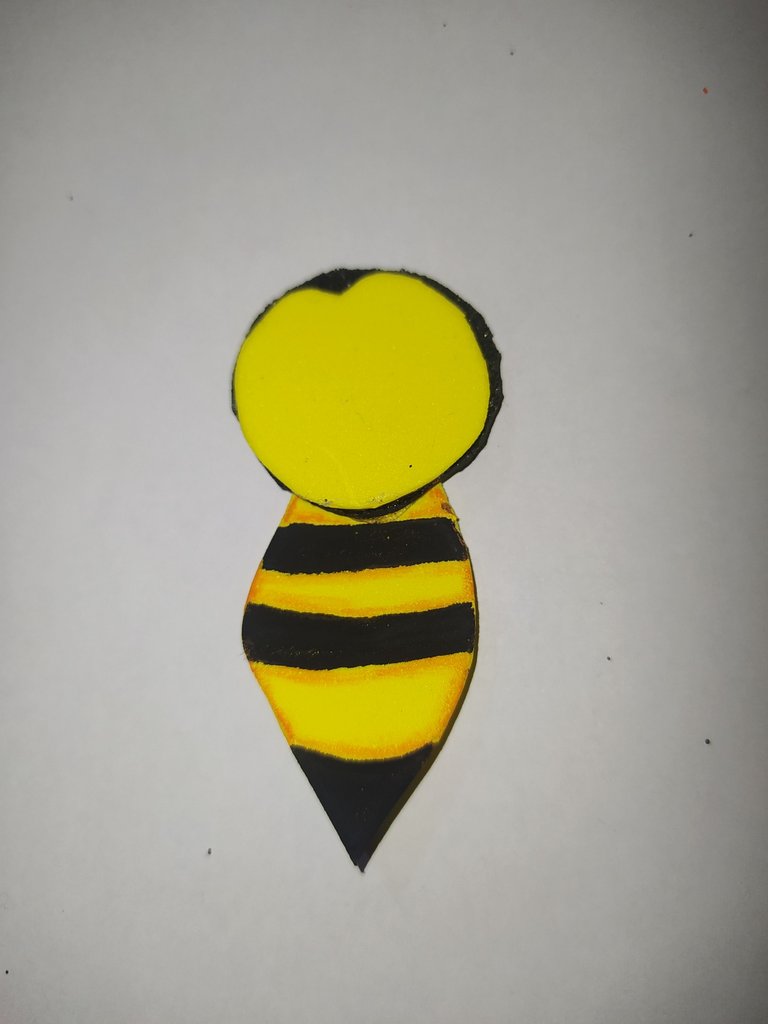
- Place the mold of the bee's body and head on the yellow foami and mark with the height stick.
- We do it twice each.
- Colocamos el molde del cuerpo y de la cabeza de la abeja sobre el foami amarillo y marcamos con el palito de altura.
- Lo realizamos dos veces c/u.
 |  |
|---|
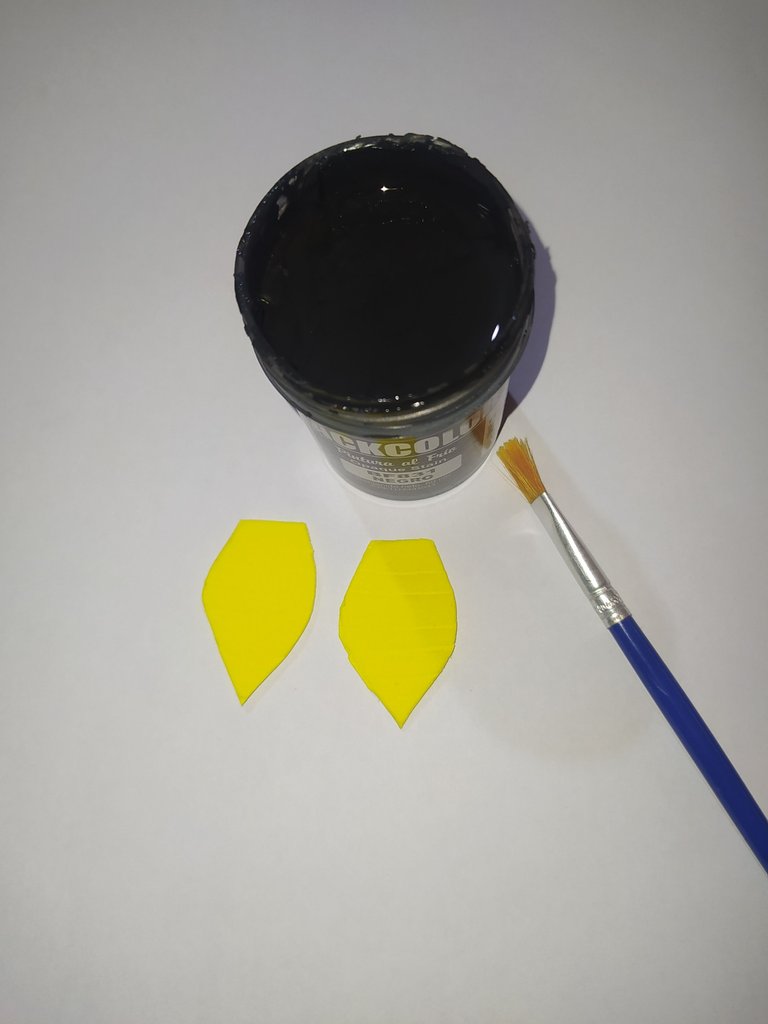
- We painted some stripes with black color on the body and on the sting.
- Le pintamos unas rayas con el color negro en el cuerpo y en el aguijón.
 |  |
|---|
- Place the mold for the head on the back side of the frosted black foami.
- Mark with the height stick.
- We make two
- Then cut out.
- Colocamos el molde para la cabeza por la parte de atrás del foami negro escarchado.
- Marcamos con el palito de altura.
- Realizamos dos
- Luego recortamos.
 |  |  |
|---|
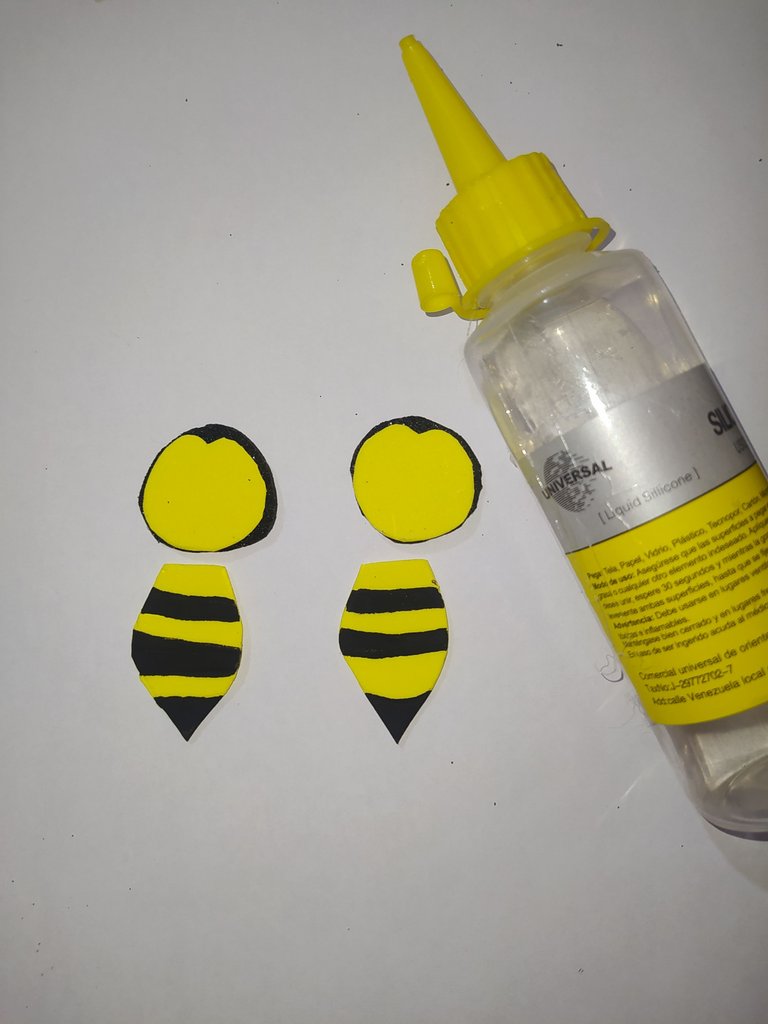
- We take the piece of the yellow head and with the help of the silicone we glue it on top of the black frosted foami.
- Then we glue it to the body of the bee.
- Tomamos la pieza de la cabeza amarilla y con la ayuda del silicón pegamos encima del foami negro escarchado.
- Luego la pegamos a el cuerpo de la abeja.
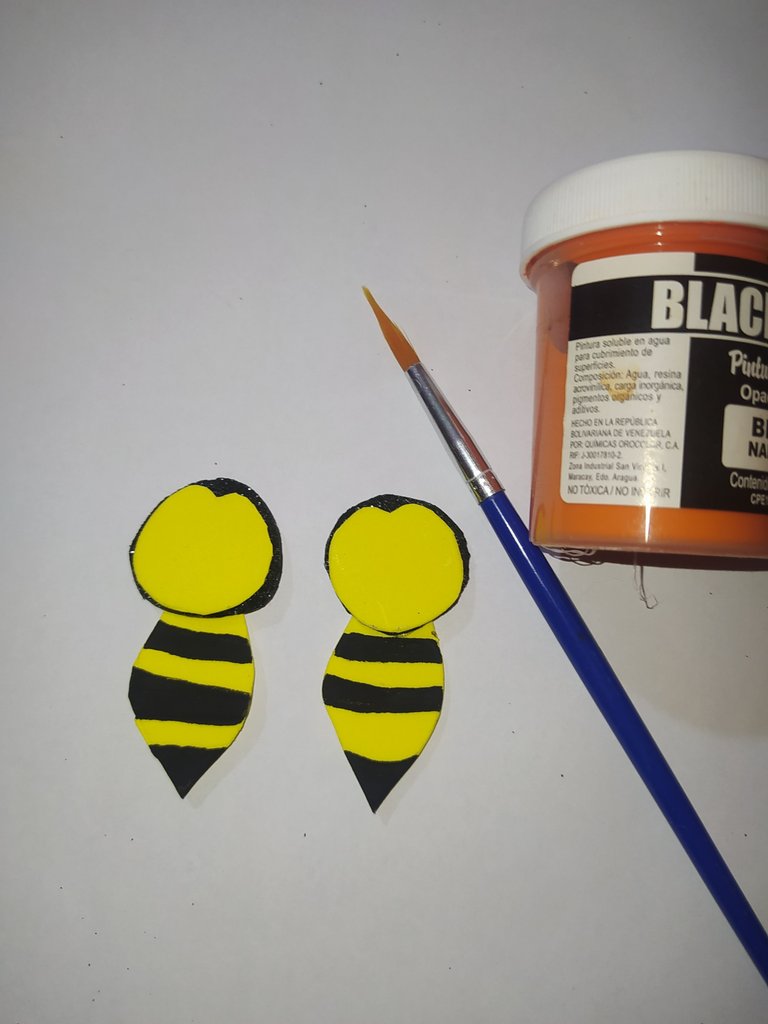
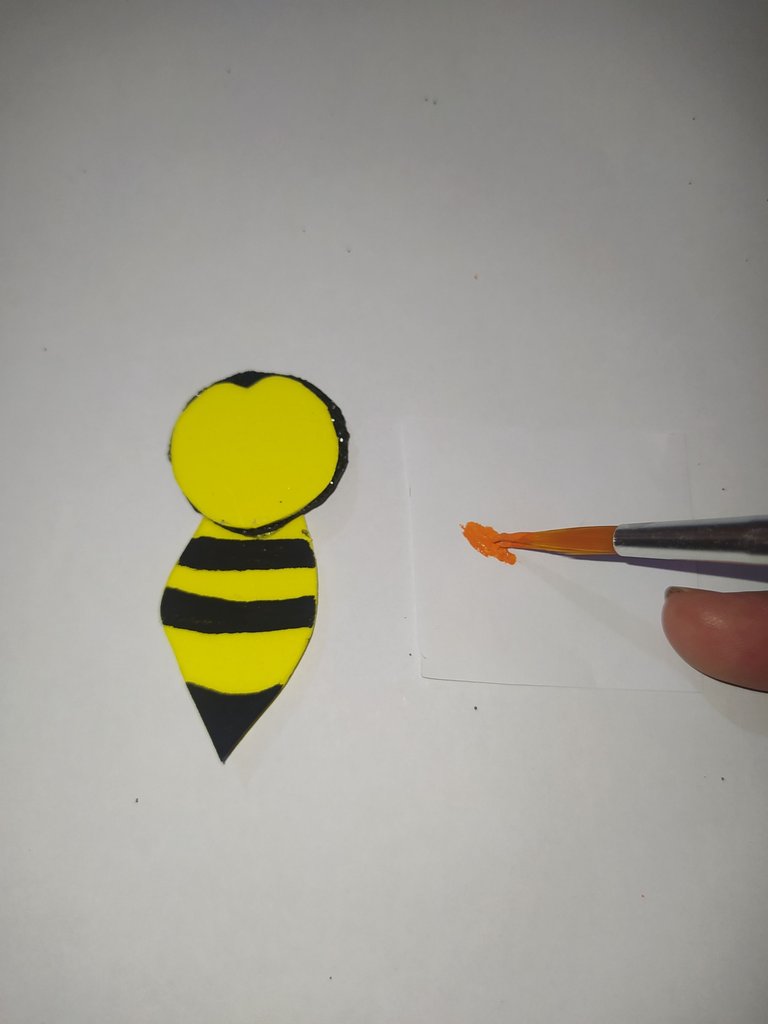
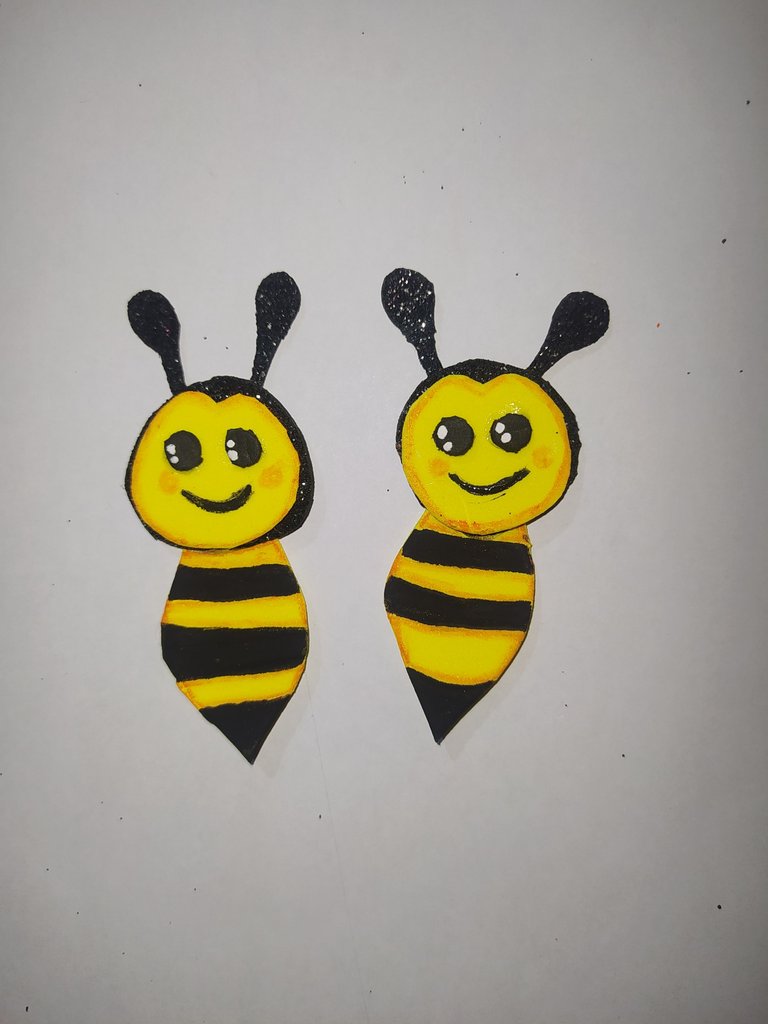
Bee shading.
Sombreado de las abejas.
 |  |
|---|
- We take orange paint with the brush, we discharge on the paper.
- Tomamos pintura naranja con el pincel, descargamos en el papel.
 |  |
|---|
- We go first along the edges of the body and then along the edges of the face.
- Pasamos primero por los bordes del cuerpo y luego por los bordes de la cara.
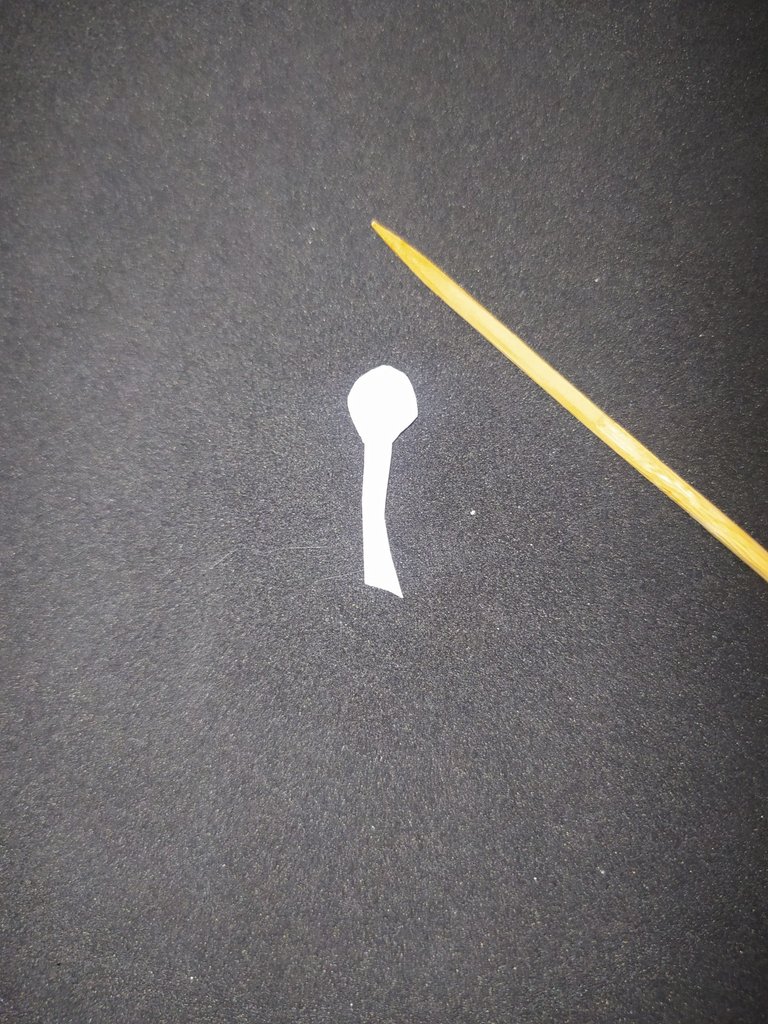
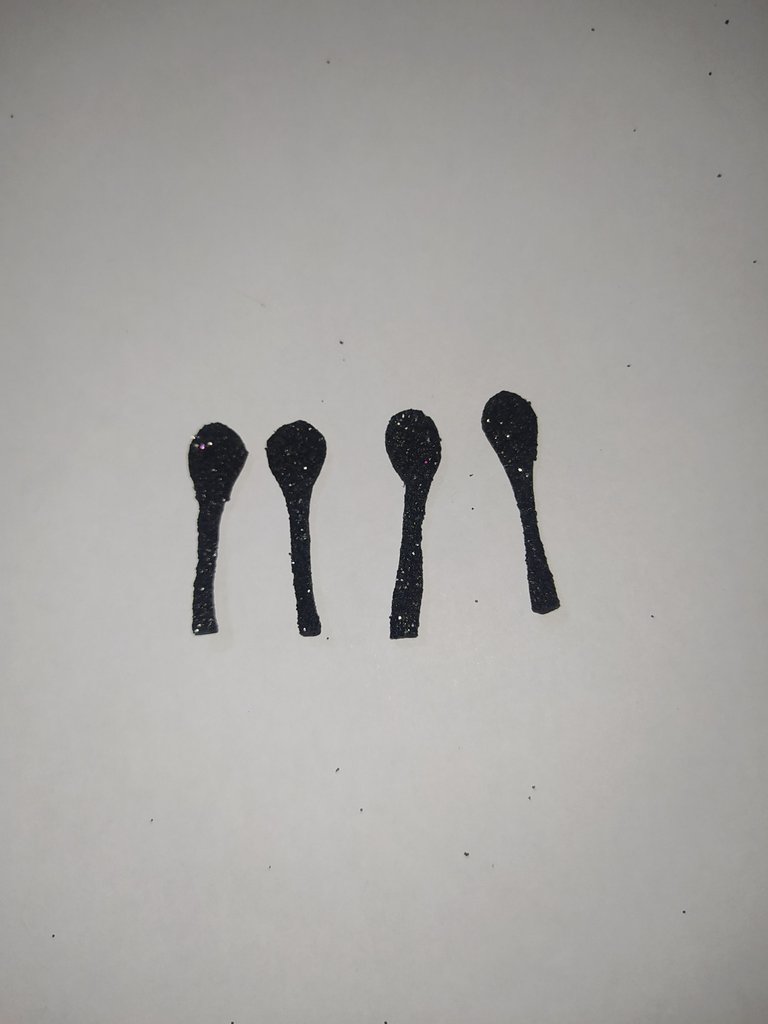
Bee antennae.
Antenas de las abejas.
 |  |
|---|
- Place the mold on the frosted black foami and mark four times.
- Then we cut all around the edge.
- Colocamos el molde en el foami negro escarchado y marcamos cuatro veces.
- Luego recortamos por todo el borde.
 |  |
|---|
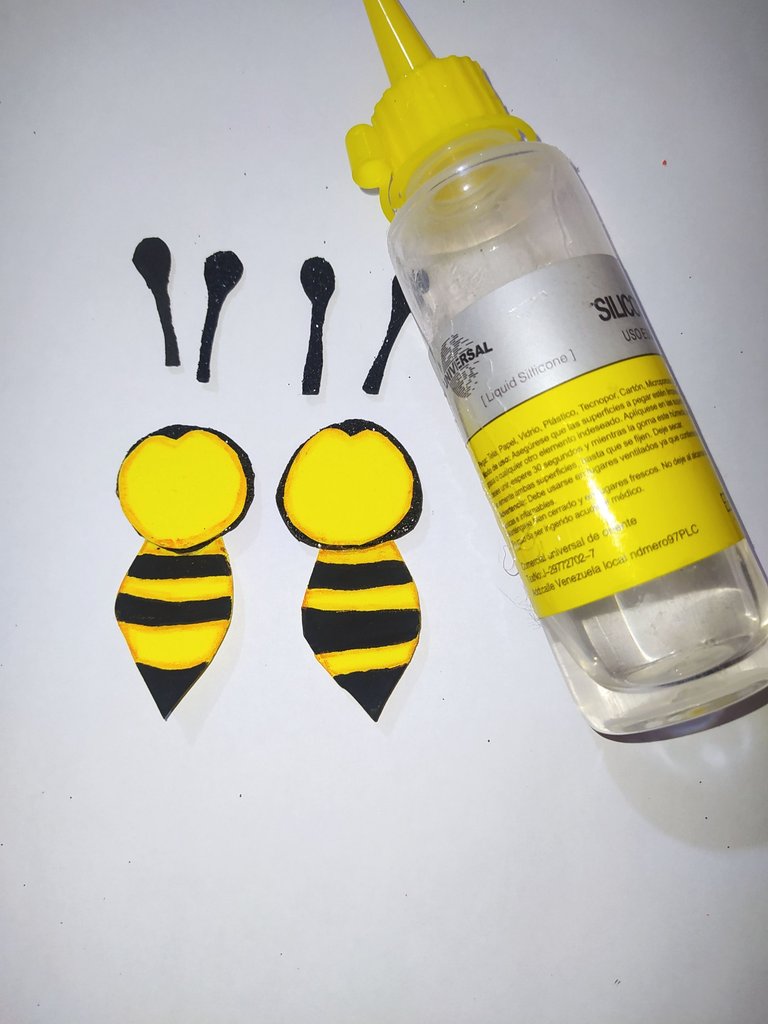
- We apply silicone and glue on the back of the head.
- Le aplicamos silicón y pegamos en la parte de atrás de la cabeza.
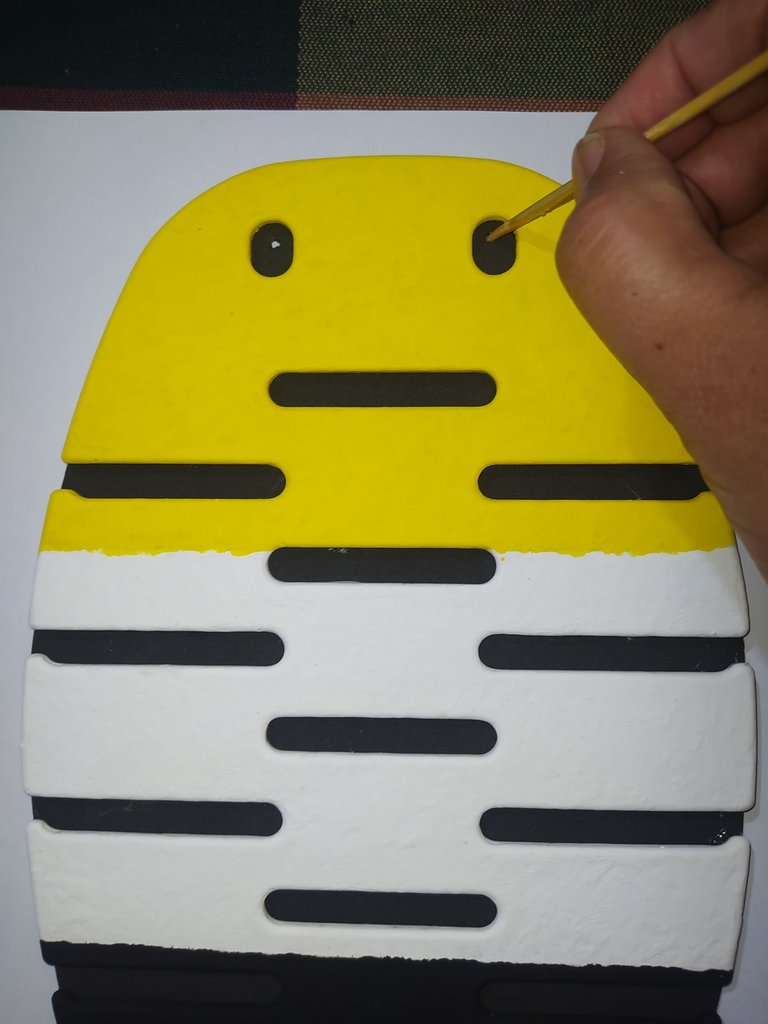
We made the eyes.
Realizamos los ojos.
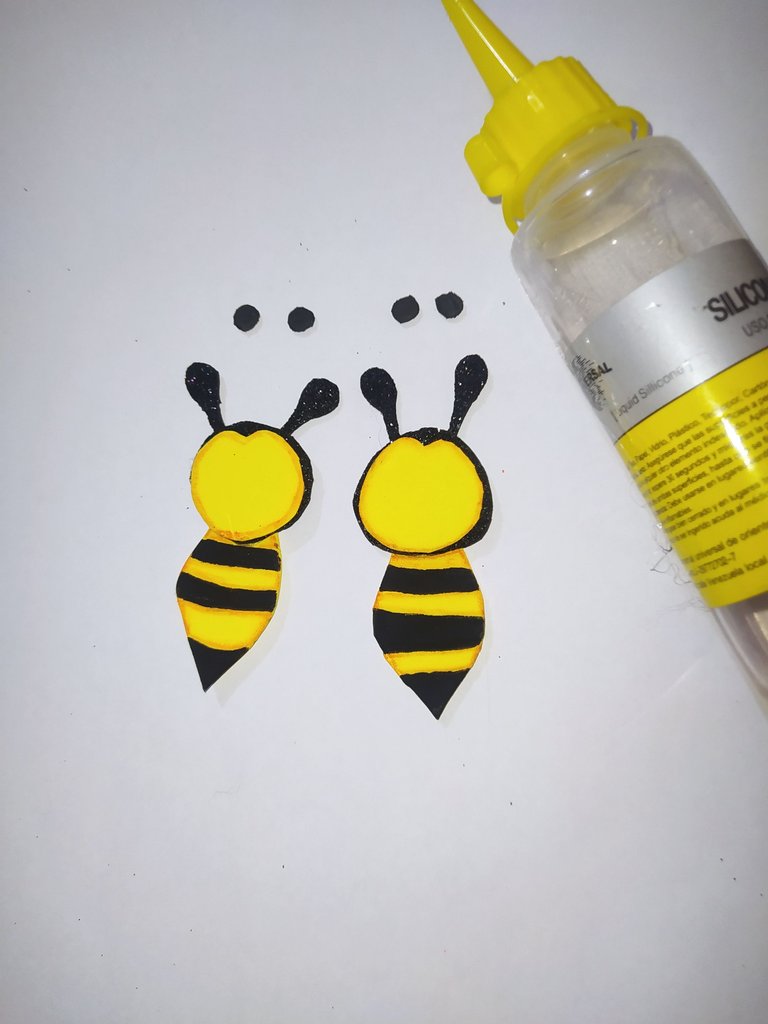 |  |
|---|
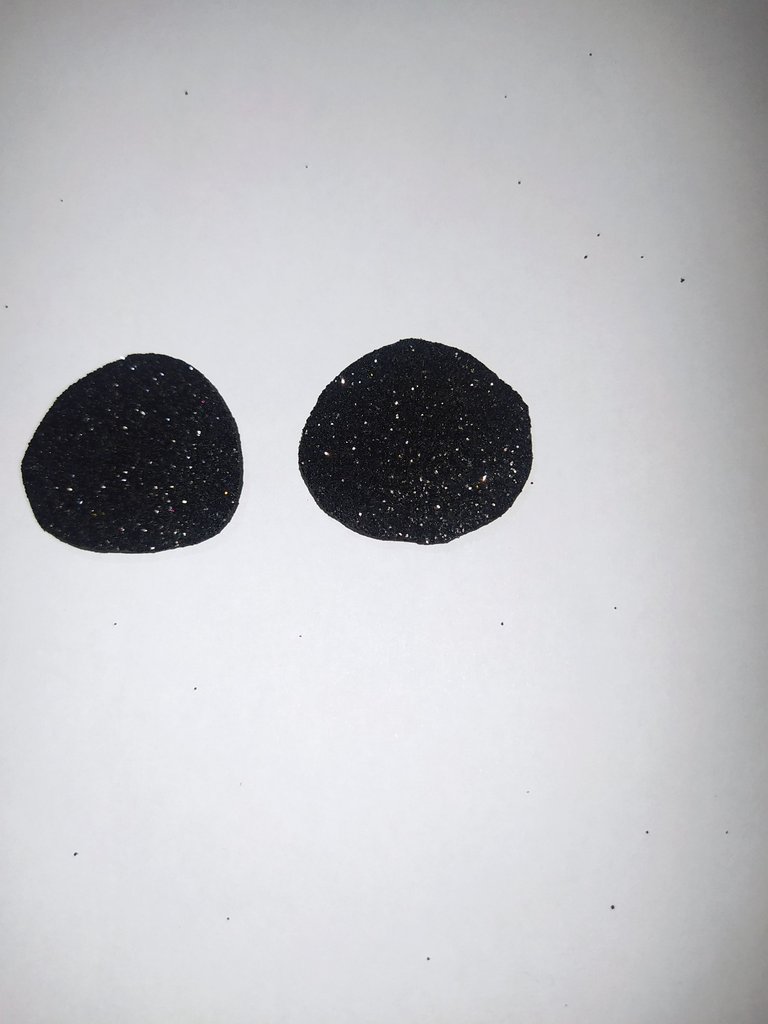
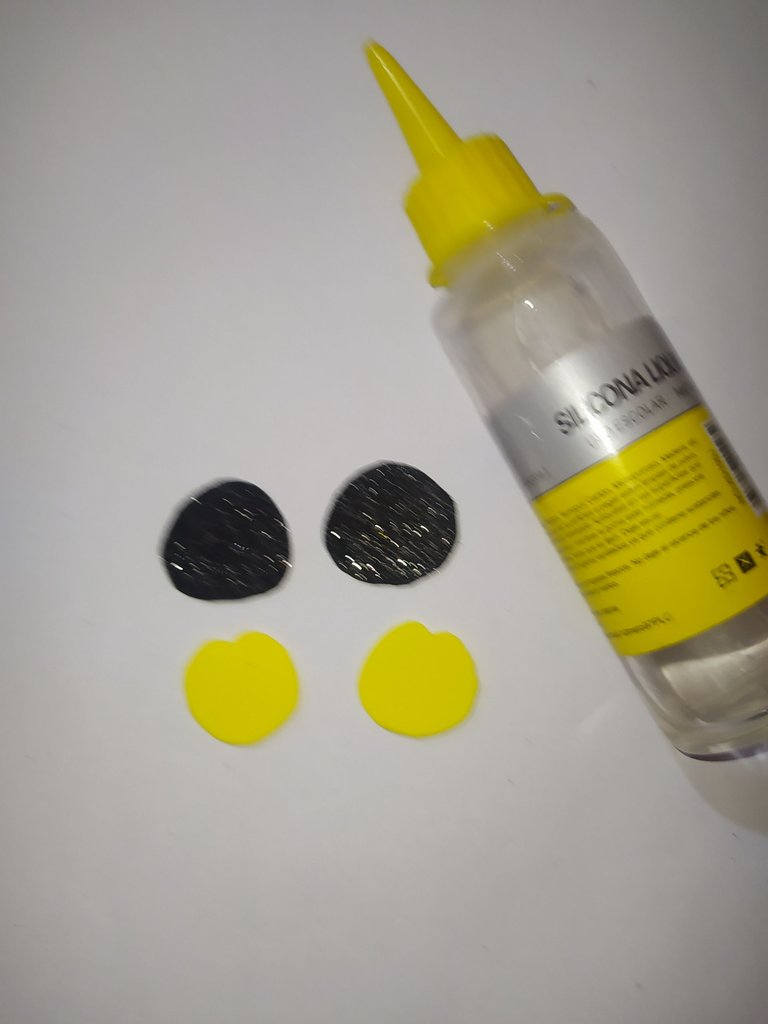
- Cut four small circles in black foami.
- Glue with silicone.
- Cortamos cuatro círculos pequeños en foami negro.
- Pegamos con silicón.
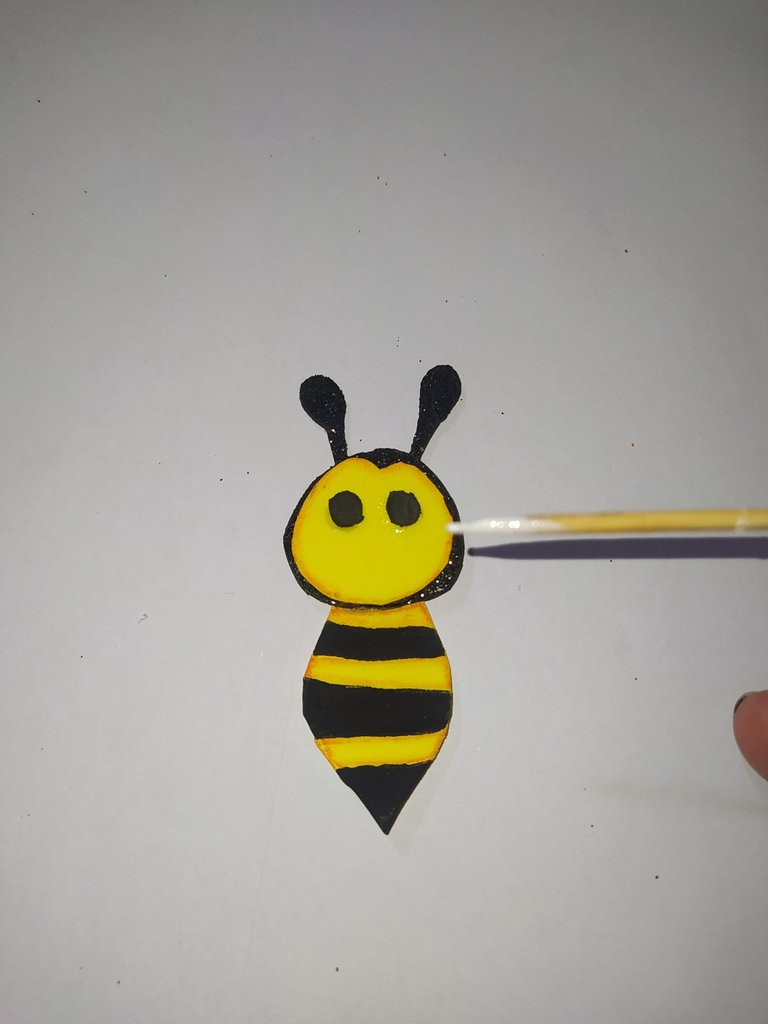 | 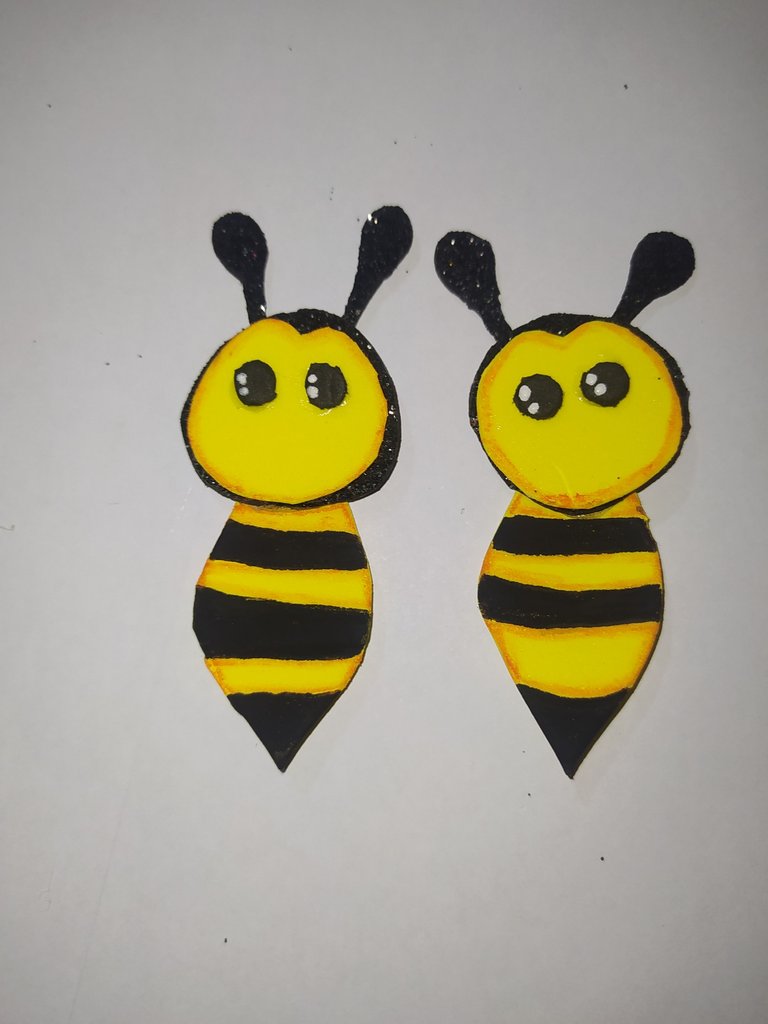 |
|---|
- To give light to the eyes we paint two dots in each eye with white paint and for this you use the thinnest tip of the height stick.
- Para darle luz a los ojos le pintamos dos puntitos en cada ojo con pintura blanca y para ello utilizas la punta más delgada del palito de altura.
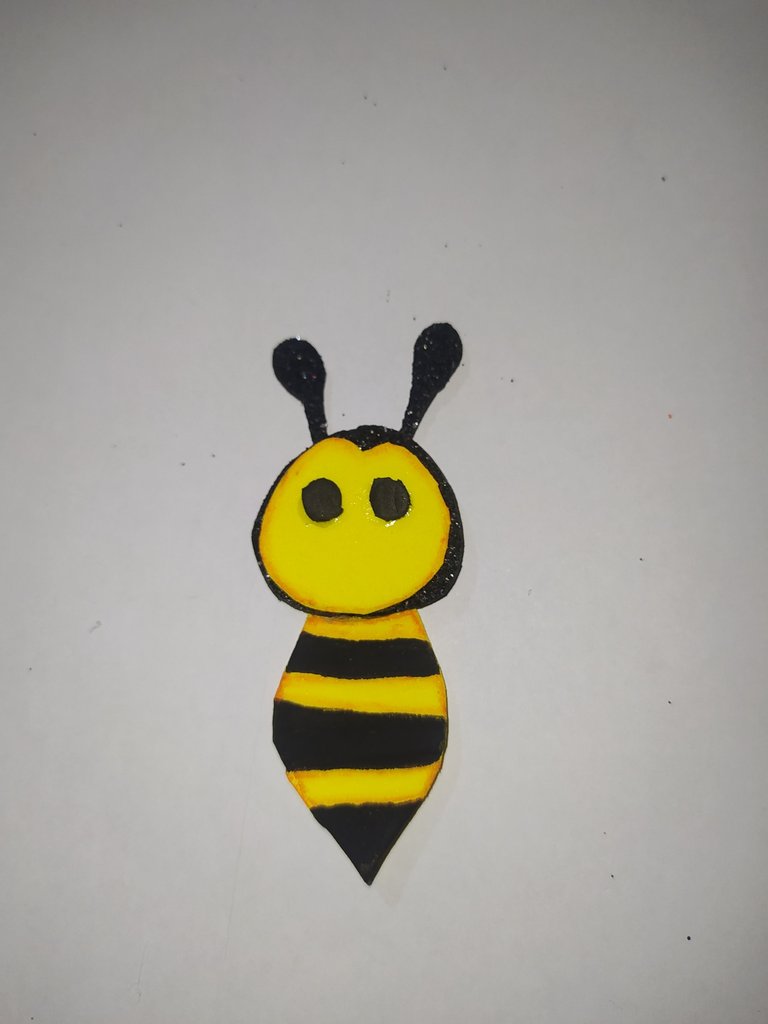
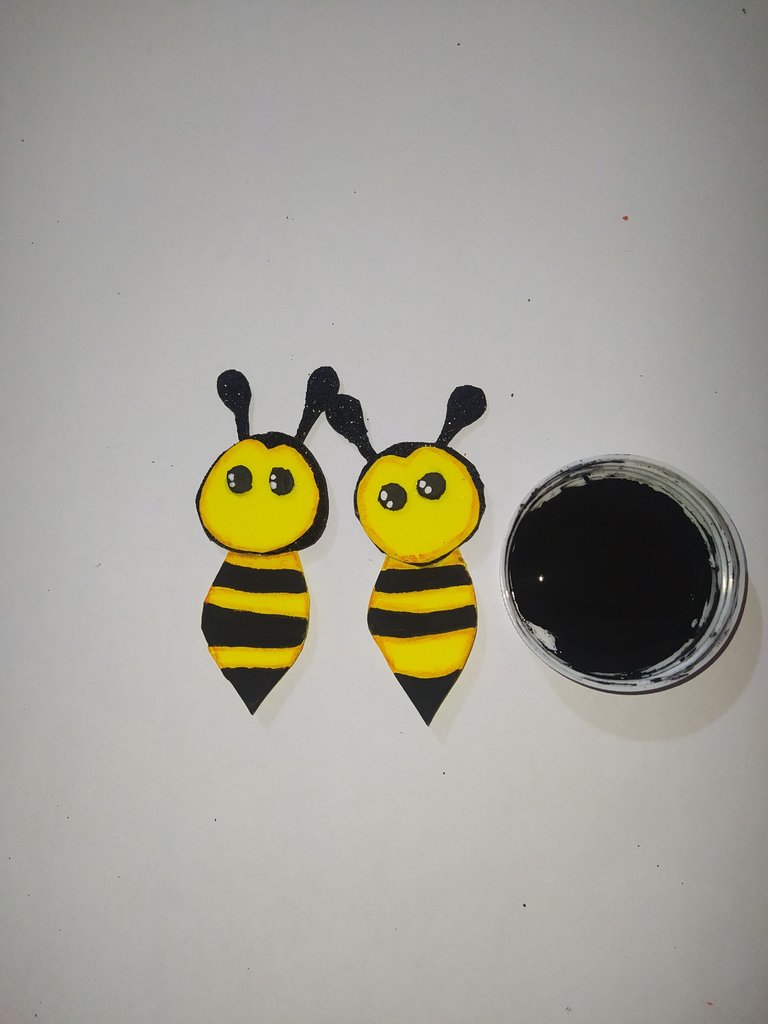
We make the mouth.
Realizamos la boca.
 |  |
|---|
- We paint a nice smile with black paint.
- We apply a little orange color on the cheeks.
- Pintamos una linda sonrisa con pintura negra.
- Le aplicamos un poco de color naranja en las mejillas.
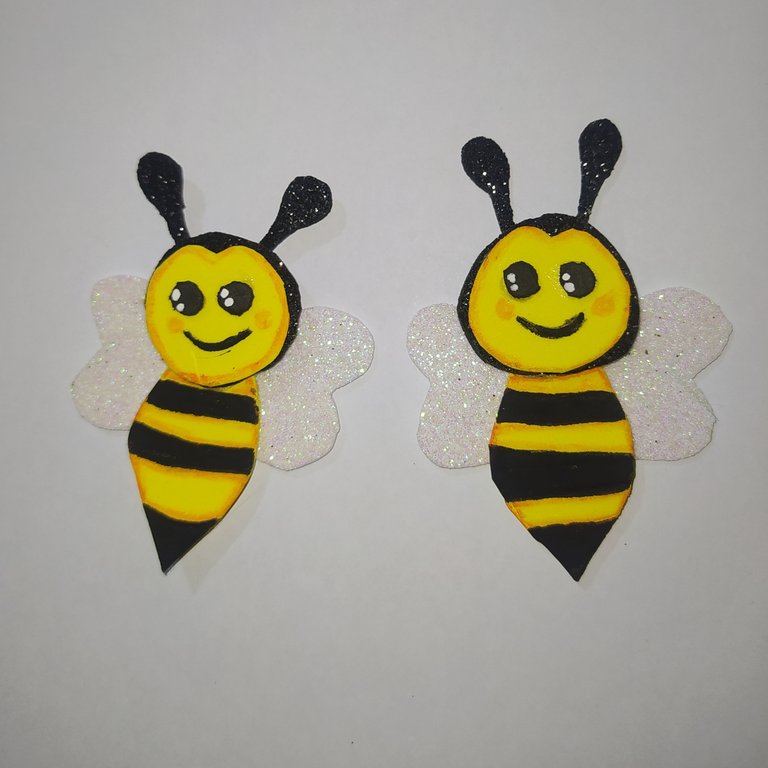
We made the wings.
Realizamos las alas.
 | 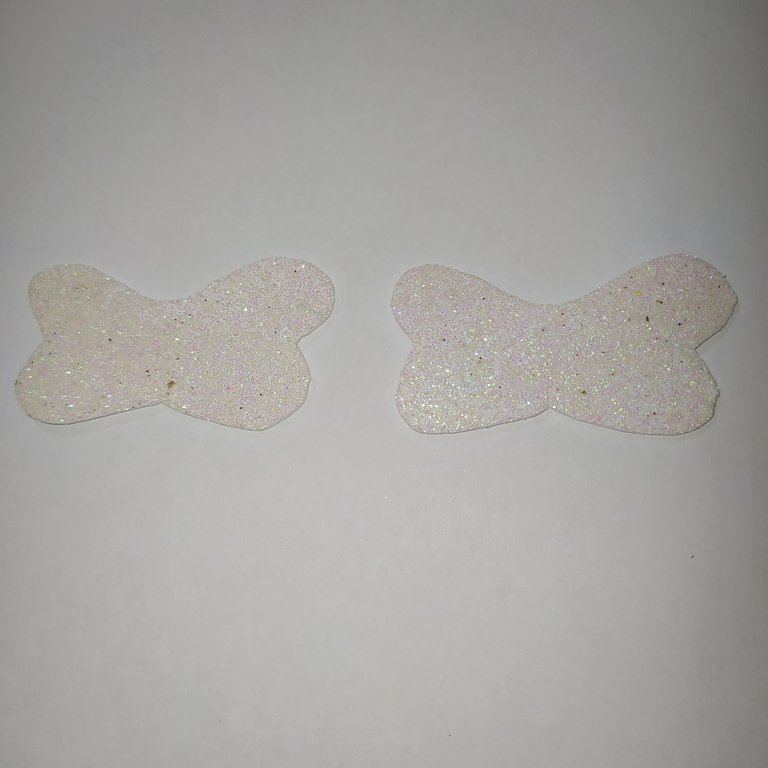 |
|---|
- Place the mold on the frosted white foami.
- Mark two wings.
- Then cut out.
- Colocas el molde en el foami blanco escarchado.
- Marcamos dos alas.
- Luego recortamos.
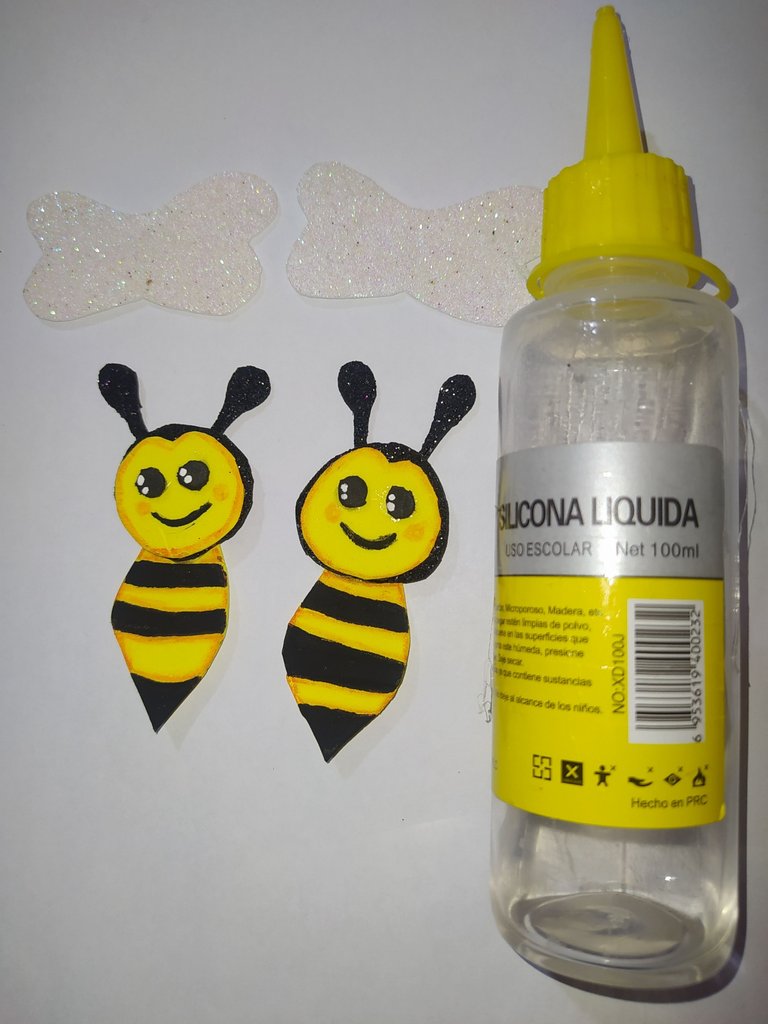 |  |
|---|
- Glue with silicone on the back of the bees.
- Pegamos con el silicón en la parte de atrás de las abejas.
 |  |
|---|
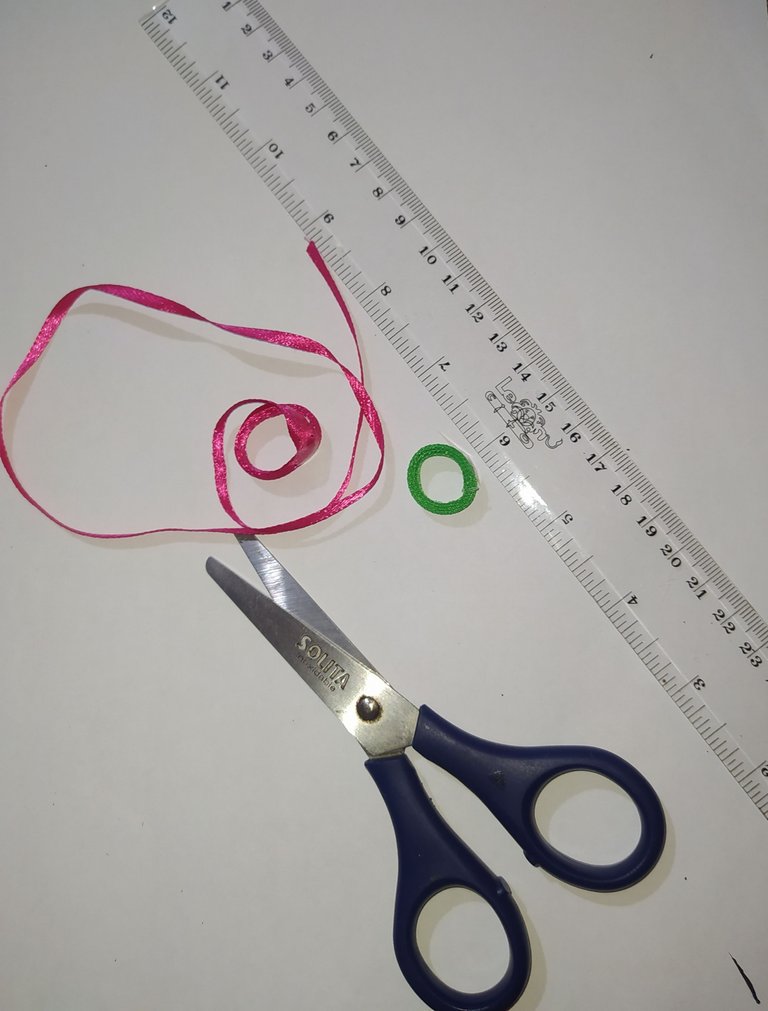
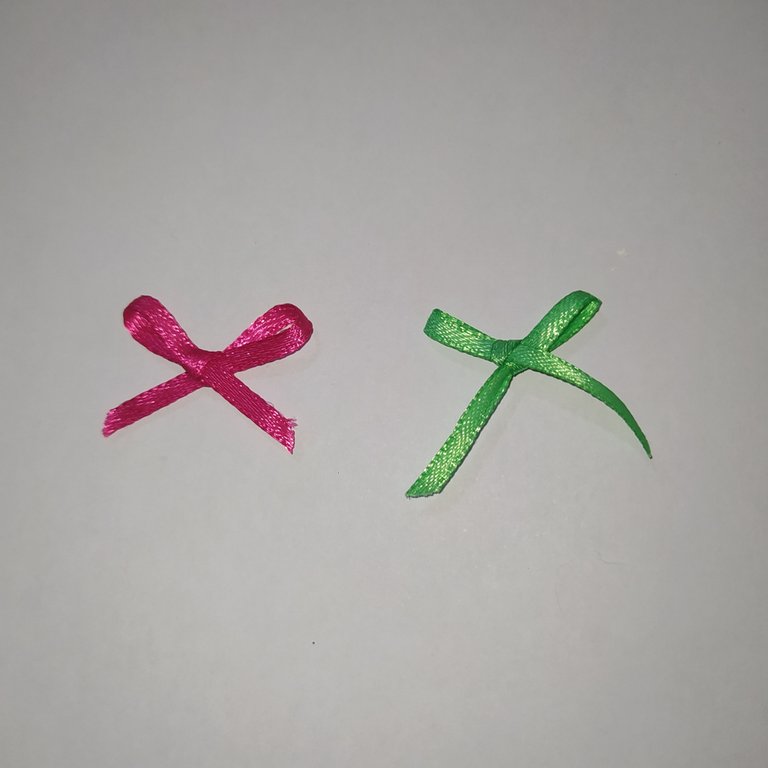
- We take 15 cm of ribbon of Fuchsia and green color and we make two simple and small bows.
- Tomamos 15 cm de cinta de color Fucsia y color verde y realizamos dos lacitos sencillos y pequeños.
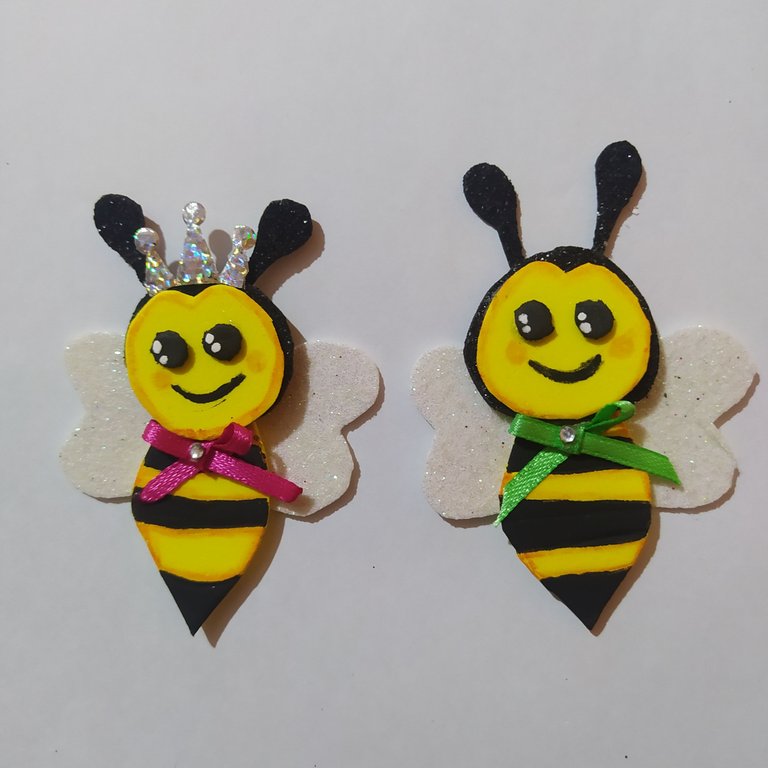
- We put a bow on each bee and a pretty little crown.
- Le colocamos un lacito a cada abejita y una linda coronita.
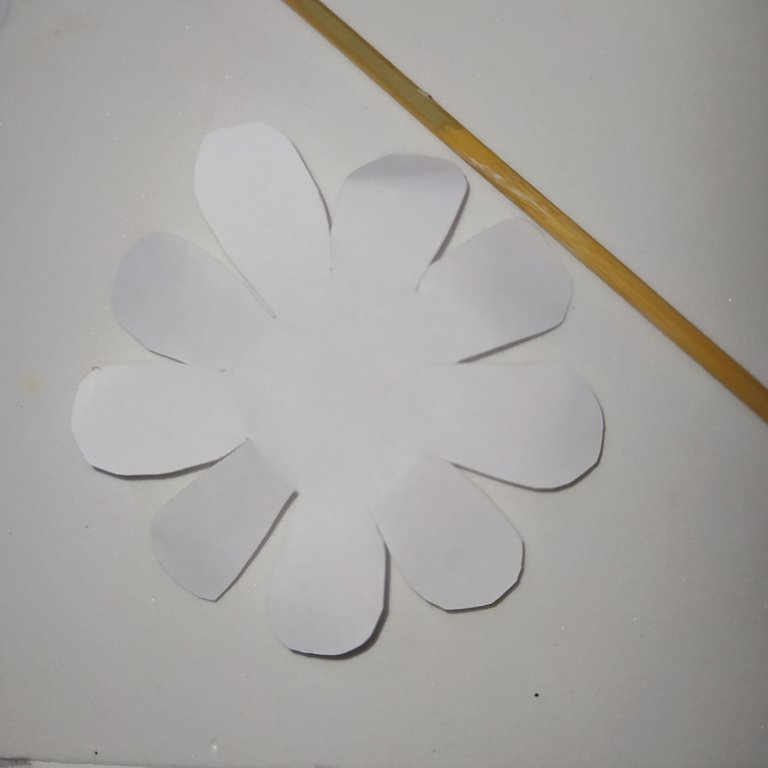
Step four.
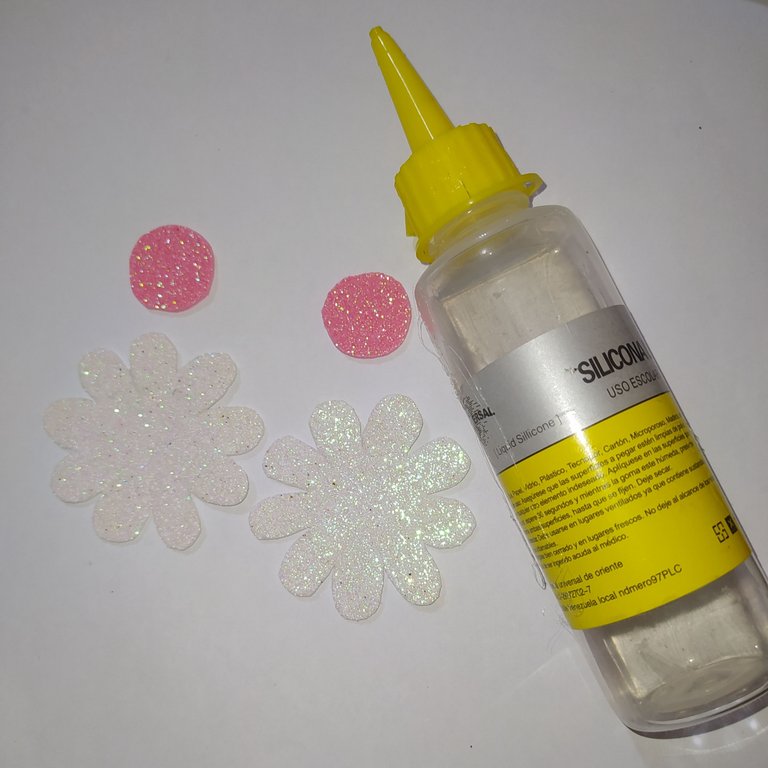
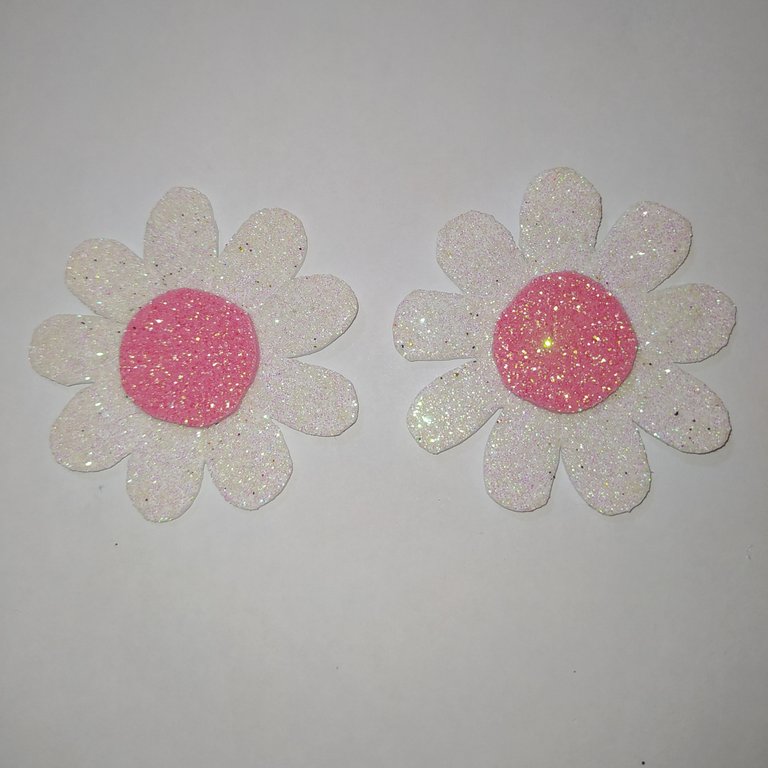
Making the flowers.
Paso cuatro.
Elaboración de las flores.
 |
| 
-|-|-
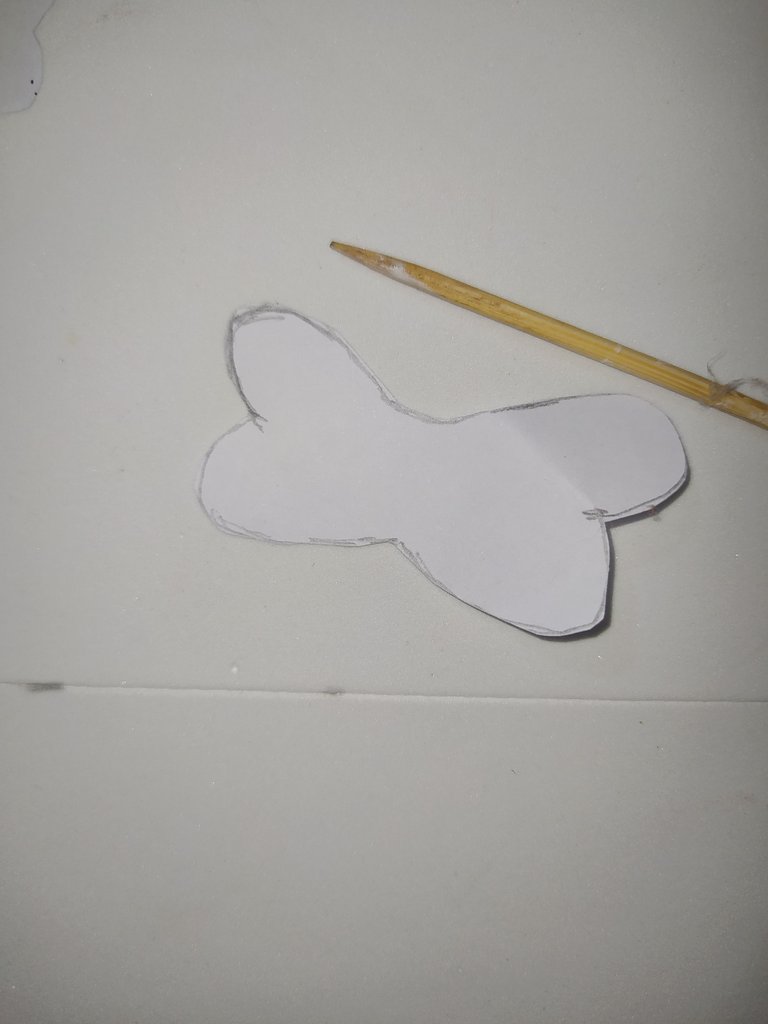
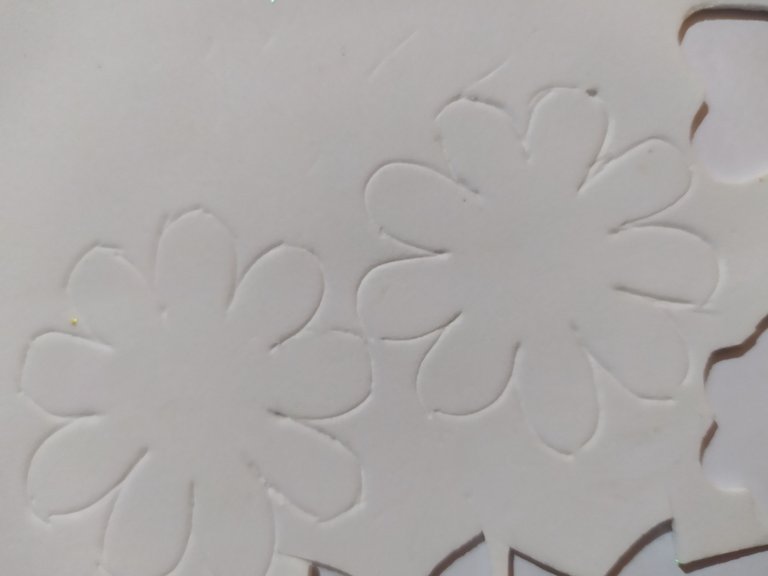
- Place the flower mold on the back of the foami.
- Mark with the height stick.
- Cut out.
- Colocamos el molde de la flor en la parte de atrás del foami.
- Marcamos con el palito de altura.
- Recortamos.
 |  |  |
|---|
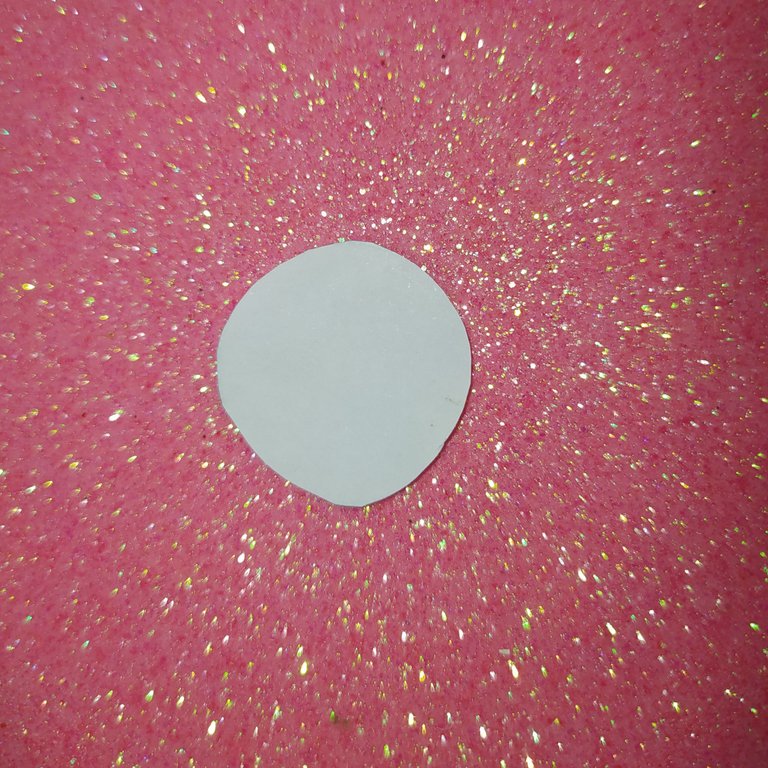
- To make the center of the flower we place the round mold on the pink foami.
- Mark it twice.
- Cut out.
- Apply silicone and glue in the center of the flower.
- Para hacer el centro de la flor colocamos el molde redondo en el foami rosado.
- Marcamos dos veces .
- Recortamos.
- Aplicamos silicón y pegamos en el centro de la flor.
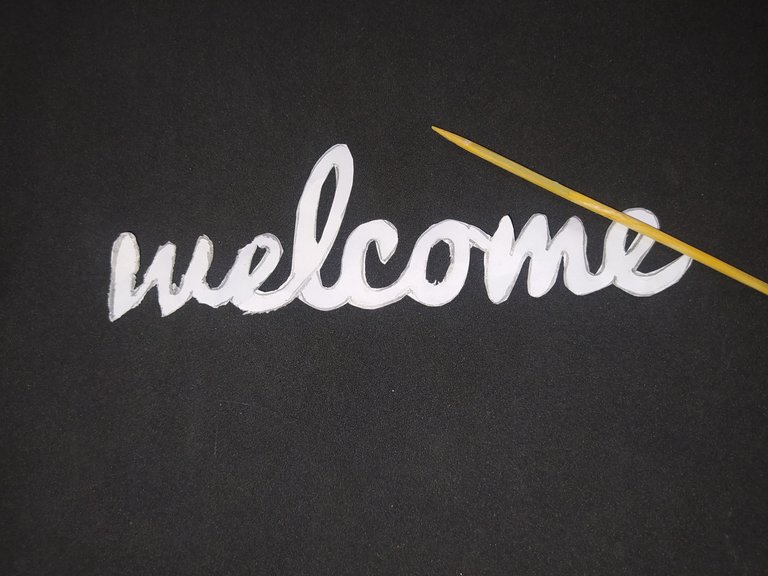
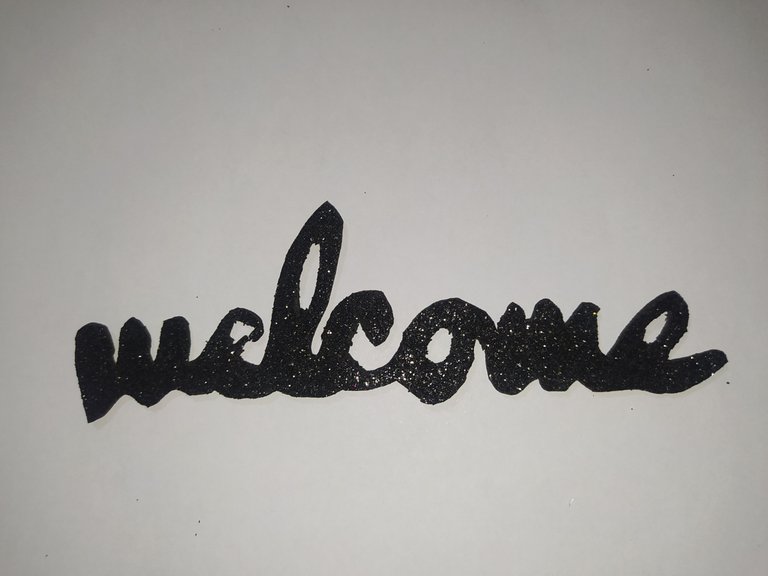
Step five.
Welcome lyrics
Paso cinco.
letras de Welcome.
 |  |
|---|
- Place the mold on the frosted black foami, mark with the height stick, then cut out with the exact one.
- Colocamos el molde en el foami negro escarchado, marcamos con el palito de altura, luego recortamos con el exacto.
 |  |
|---|
- Apply silicone on the back and glue on top of the yellow foami.
- Cut out.
- Aplicamos silicón en la parte de atrás y pegamos encima del foami amarillo.
- Recortamos.
Step six
Making the bows for the top.
Paso seis
Elaboración de los lazos
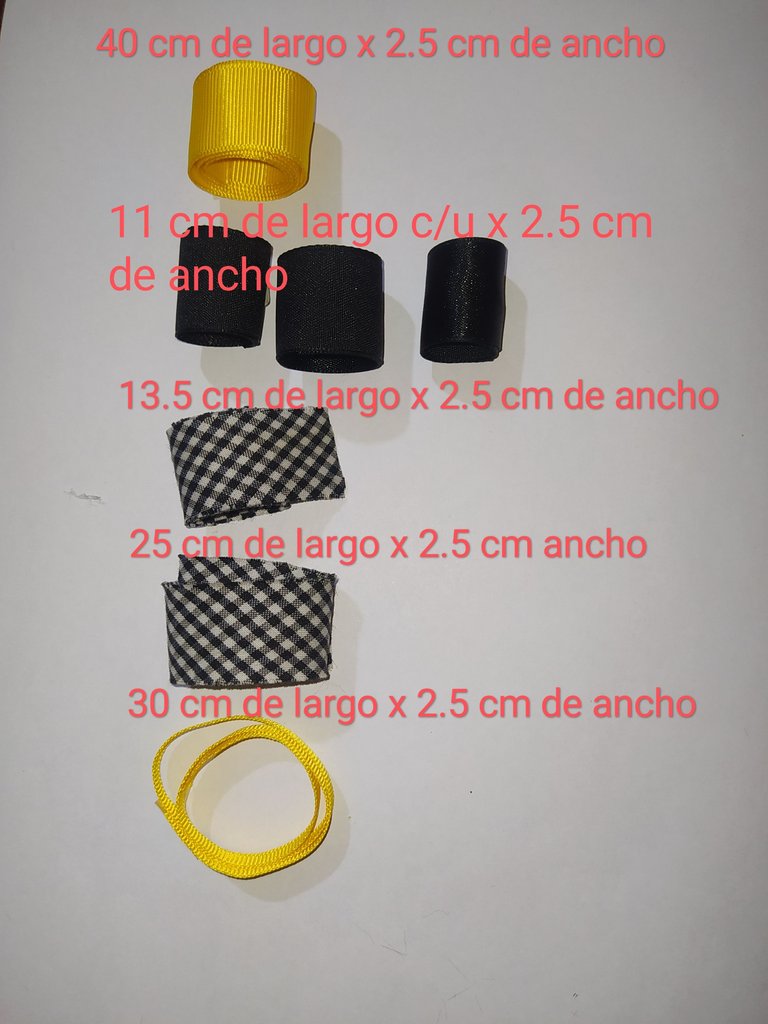
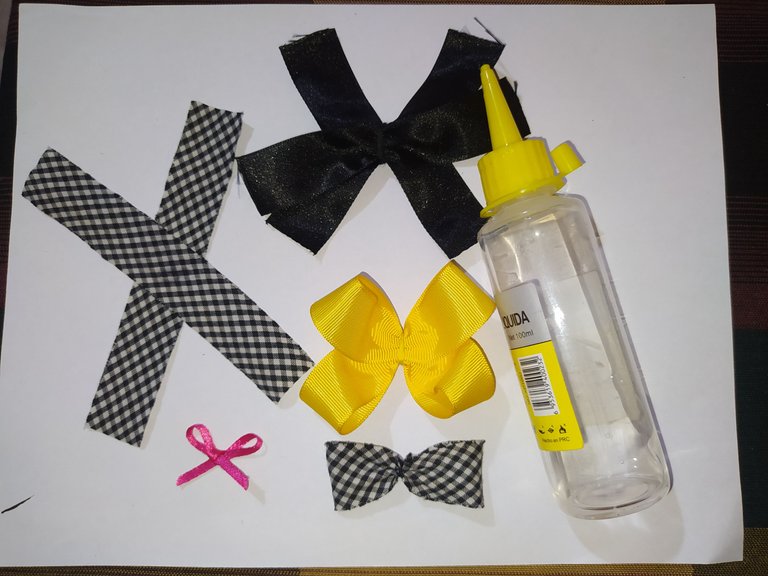
Materials
- 40 cm of yellow ribbon.
- 3 black ribbons of 11 cm each.
- 13.5 cm of checkered ribbon.
- 25 cm of checkered ribbon.
- 30 cm of thin yellow ribbon.
Materiales
- 40 cm de cinta amarilla.
- 3 cintas negras de 11 cm c/u.
- 13.5 cm de cinta de cuadritos.
- 25 cm cinta de cuadritos.
- 30 cm de cinta amarilla delgada.
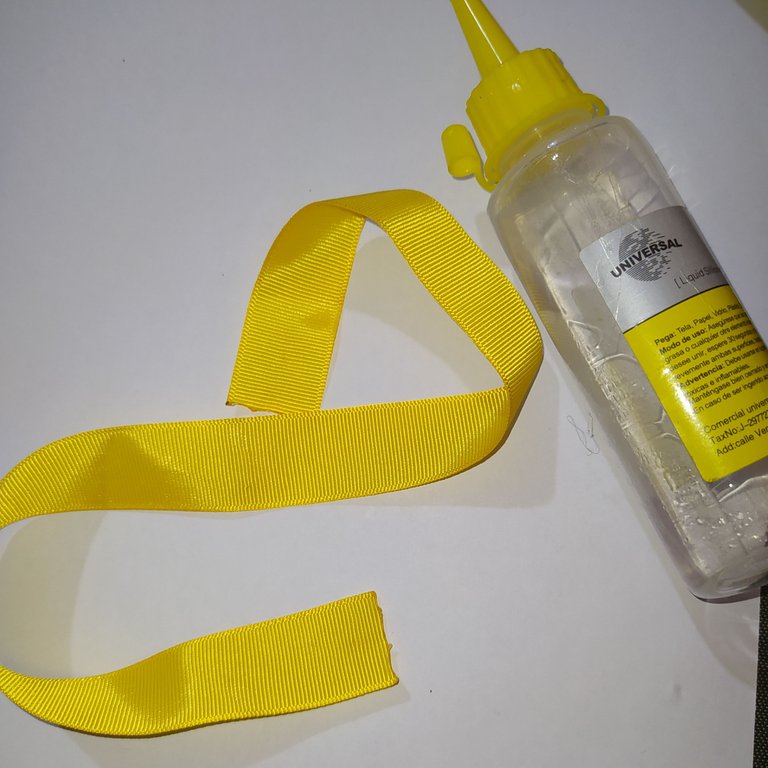
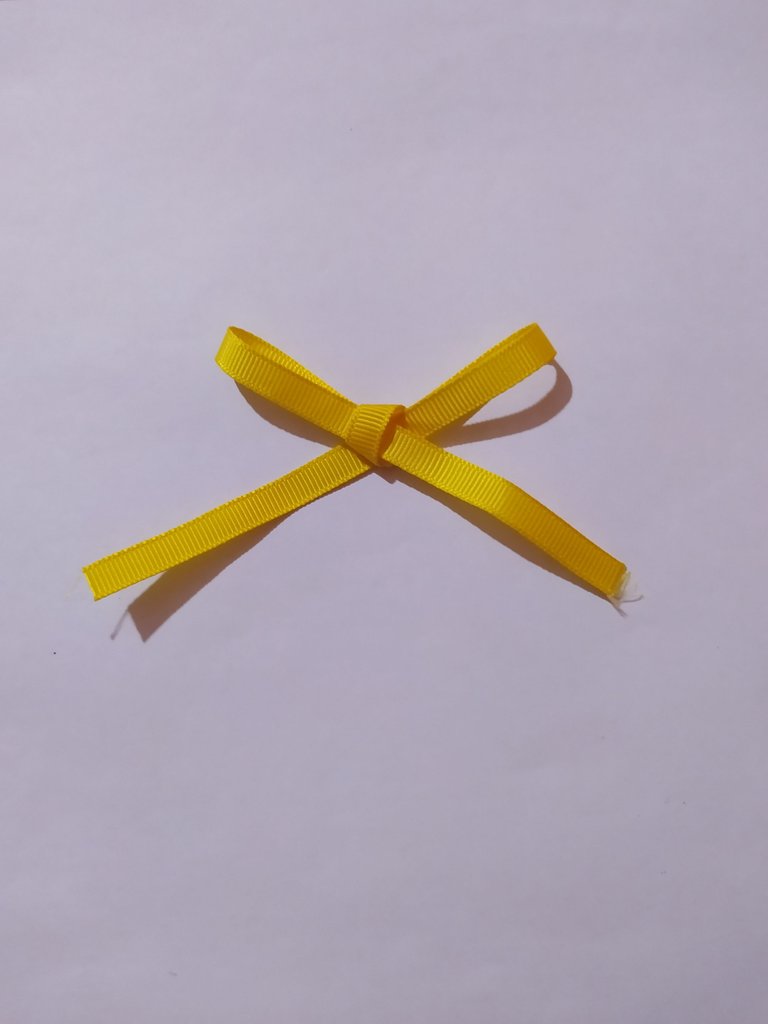
Elaboration of the yellow ribbon.
Elaboración del lazo amarillo.
 |  |  |
|---|
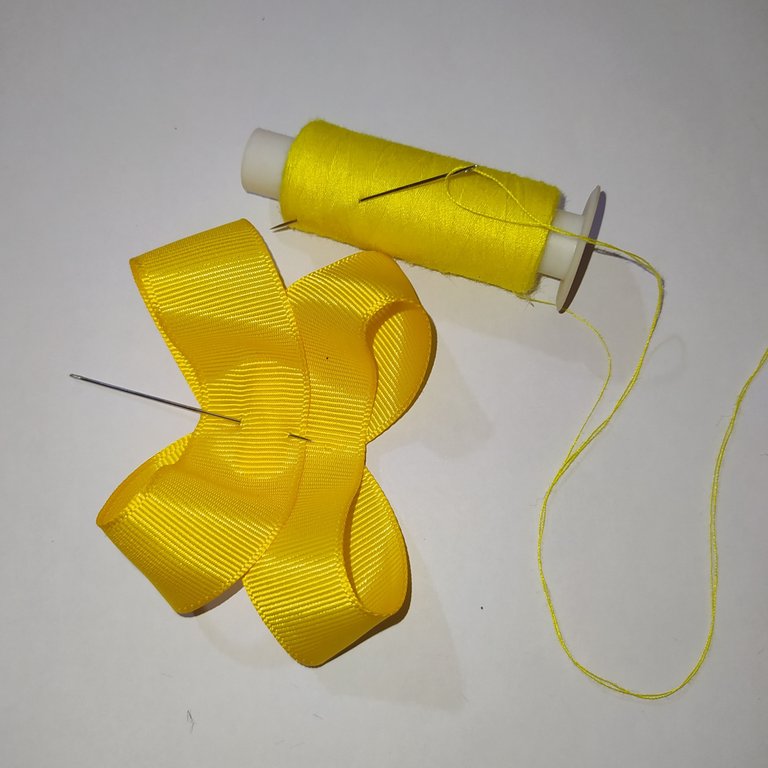
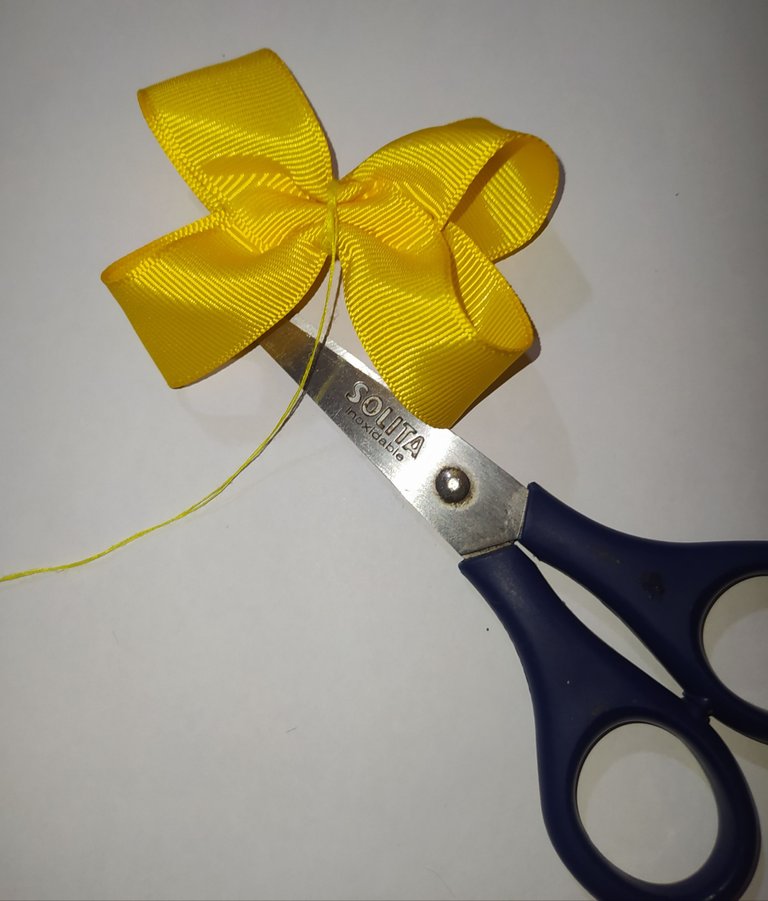
- Fold the ribbon in half to get the center.
- Take one end of the ribbon, apply a little silicone and glue it in the center.
- Then we take the other end, apply some glue and glue the other side in the center of the ribbon.
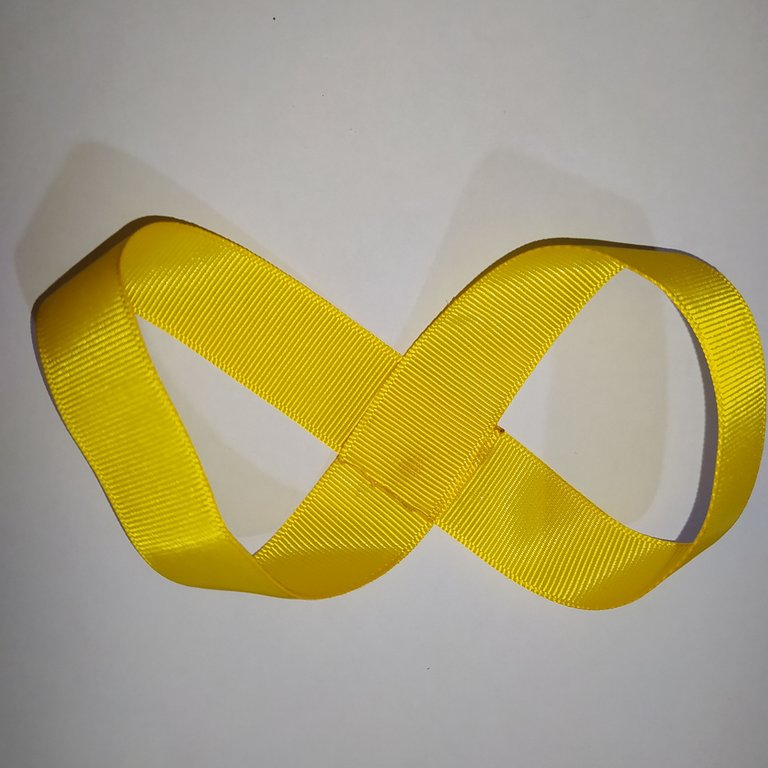
- We will have a shape like a figure eight as shown in the picture.
- Doblamos la cinta a la mitad para conseguir el centro.
- Tomamos una punta de la cinta le colocamos un poco de silicón y pegamos en el centro.
- Luego tomamos la otra punta le aplicamos pega y pegamos del otro lado en el centro de la cinta.
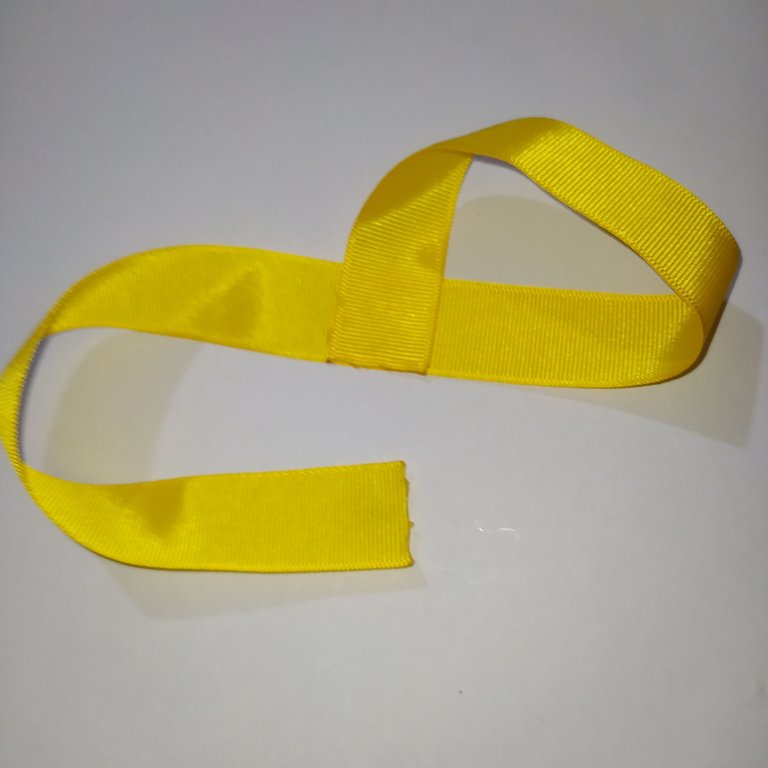
- Nos va a quedar una forma como un ocho como les muestro en la foto.
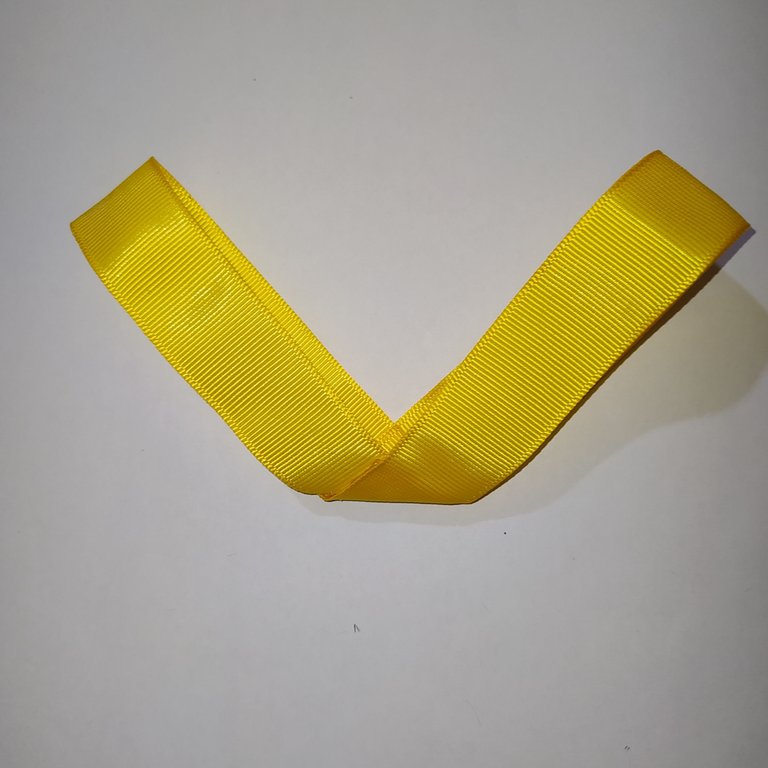
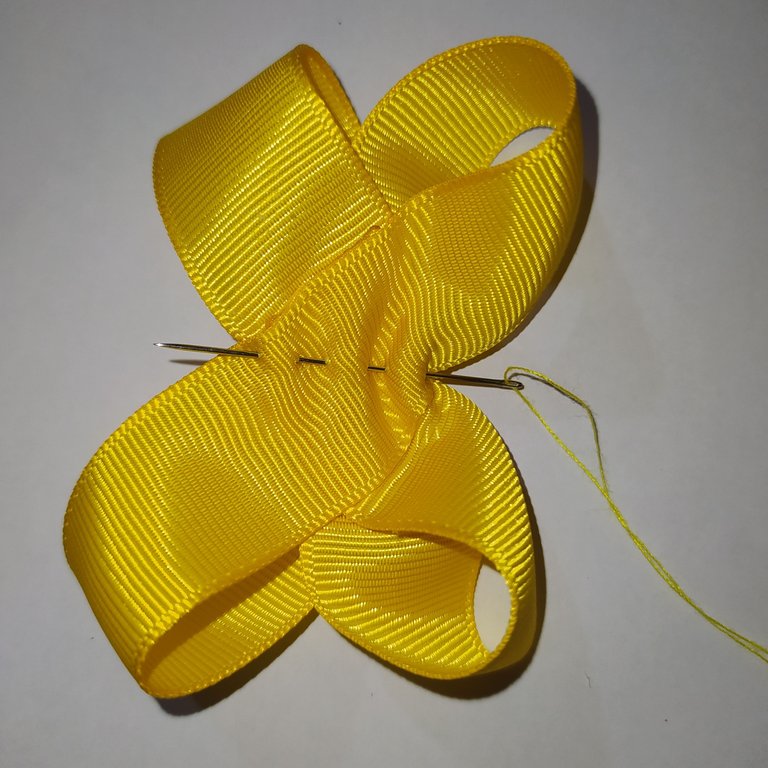
- Then we fold in a V-shape and mark the folds.
- Luego doblamos en forma de V y marcamos los dobleces.
 |  |
|---|
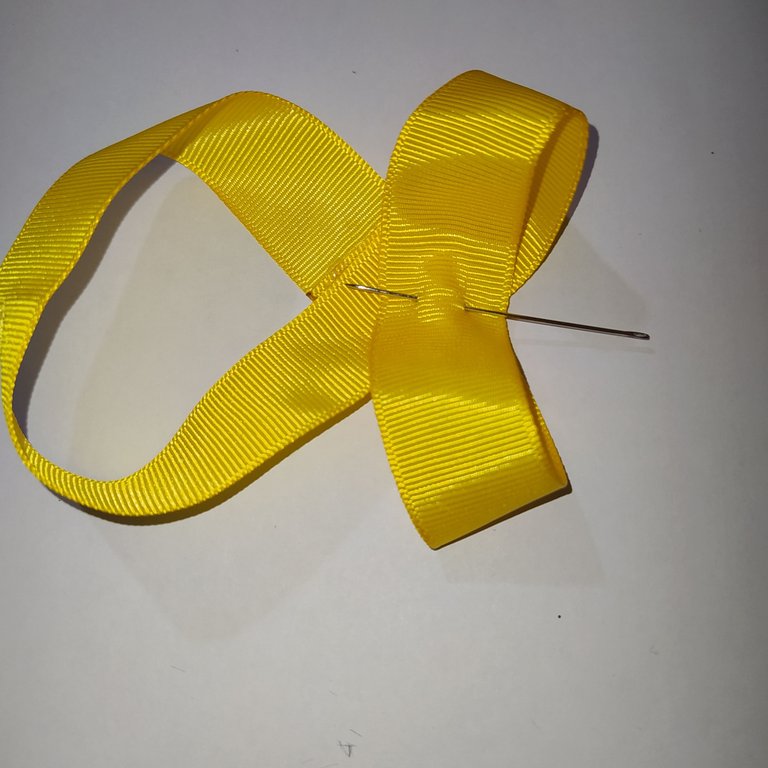
- We open the ribbon and place the right side in the center and fasten with a pin.
- Then take the left side and place on top of the right side and pin.
- Abrimos la cinta y colocamos el lado derecho en el centro y sujetamos con un alfiler.
- Luego tomamos el lado izquierdo y colocamos encima del lado derecho y sujetamos.
 |  |  |
|---|
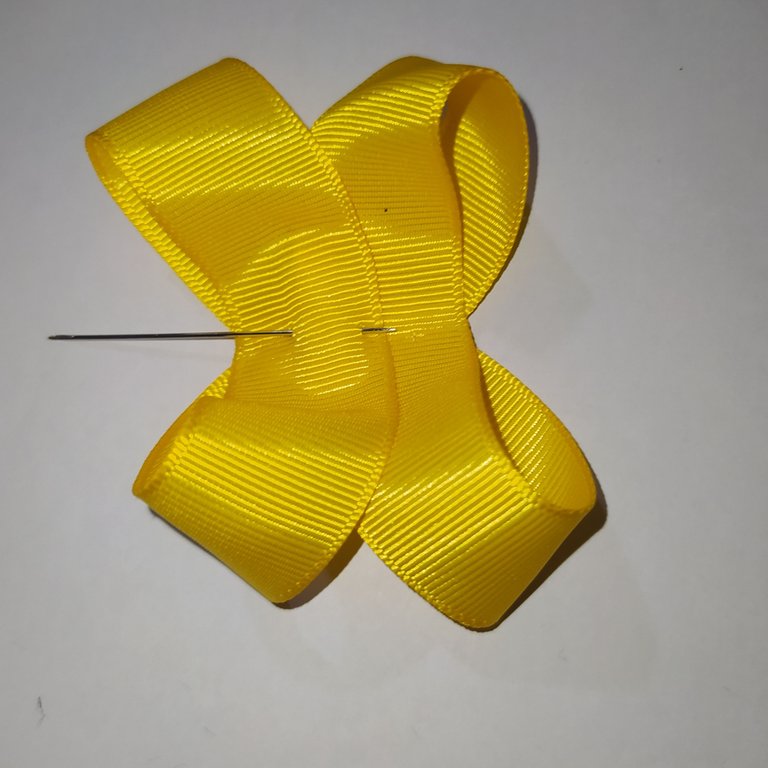
- We take the needle with the yellow thread and pass a few stitches through the center.
- Then we gently ruffle it to gather.
- Tomamos la aguja con el hilo amarillo y pasamos unas puntadas por el centro.
- Luego lo hablamos con suavidad para fruncir.
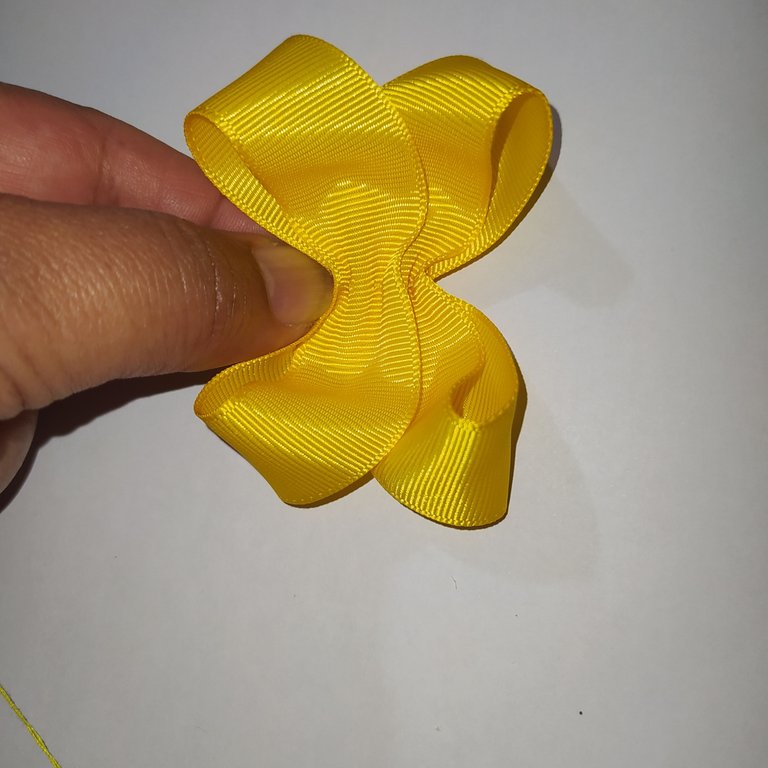
 |  |
|---|
- We make several turns with the thread, then we secure the back part with loops.
- Trim the excess yarn.
- Damos varias vueltas con el hilo, luego aseguramos en la parte de atrás con unas lazadas.
- Recortamos el excedente de hilo.
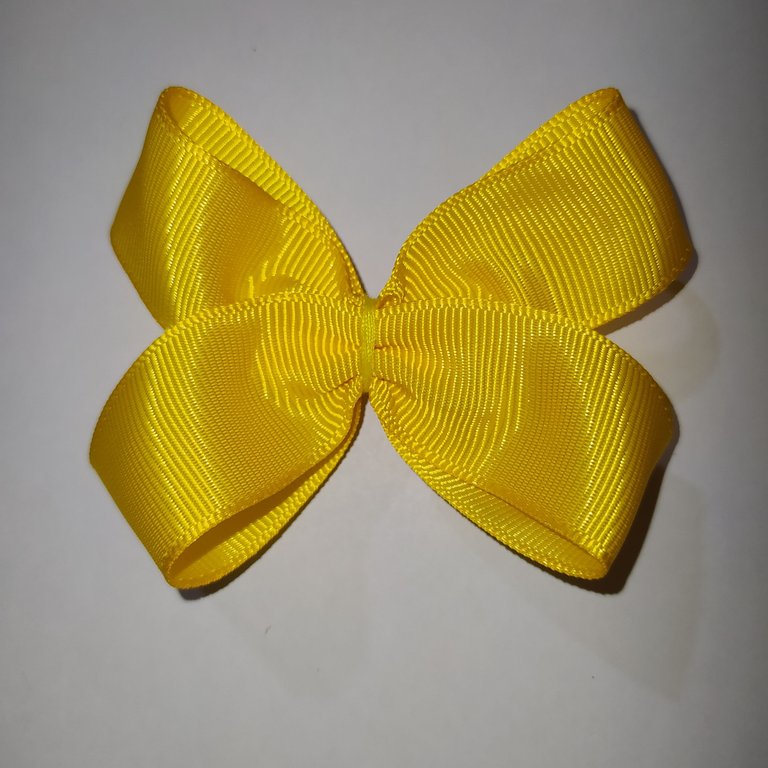
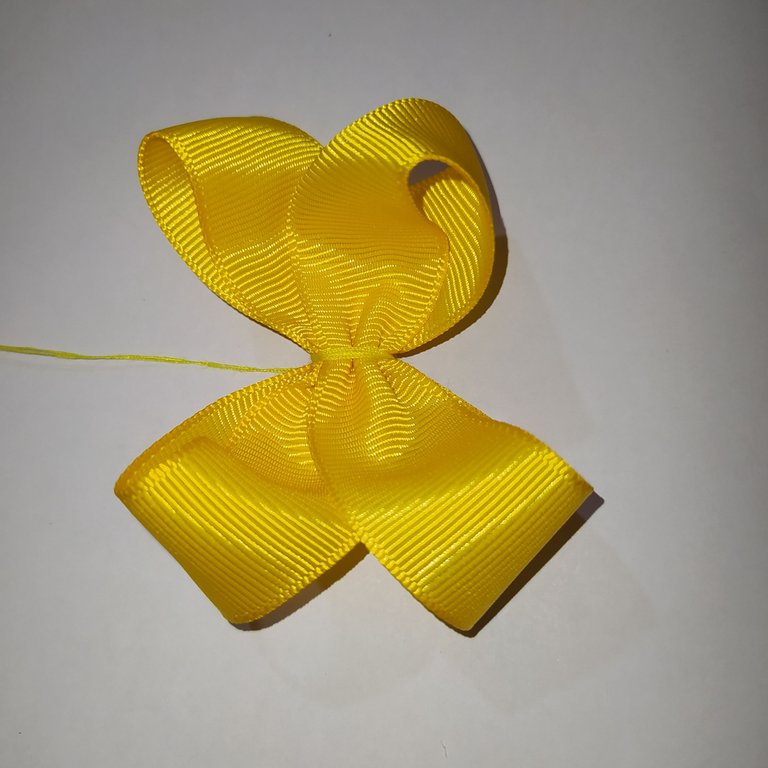
- Result.
- Resultado.
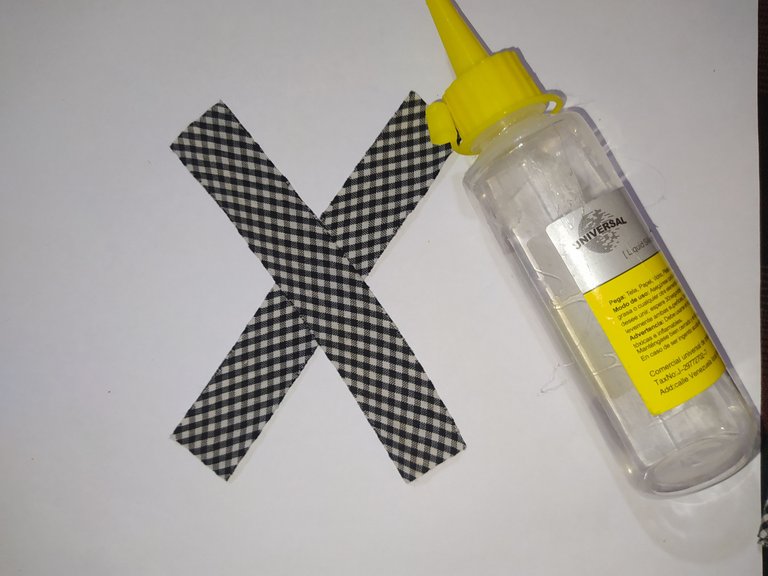
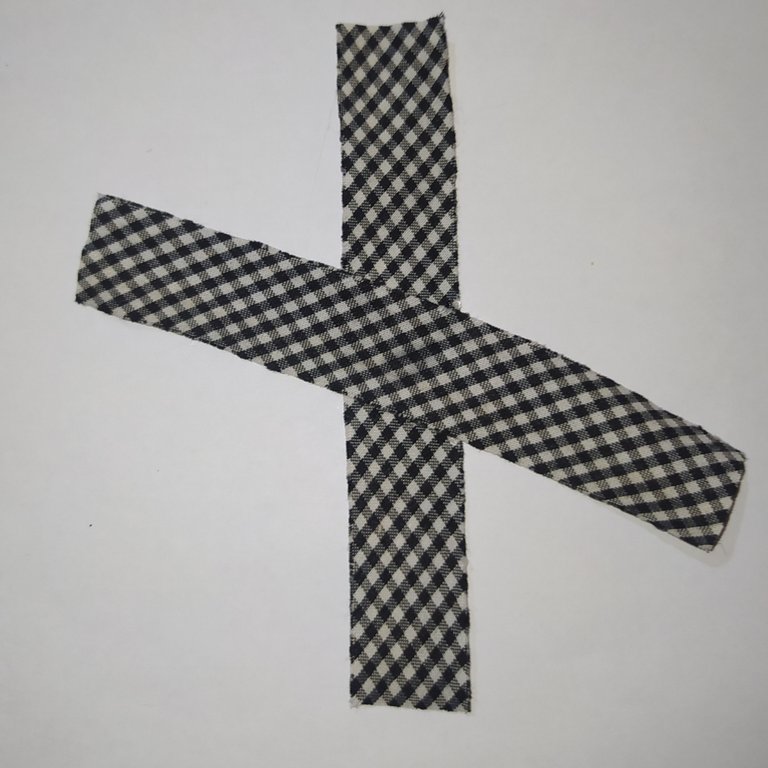
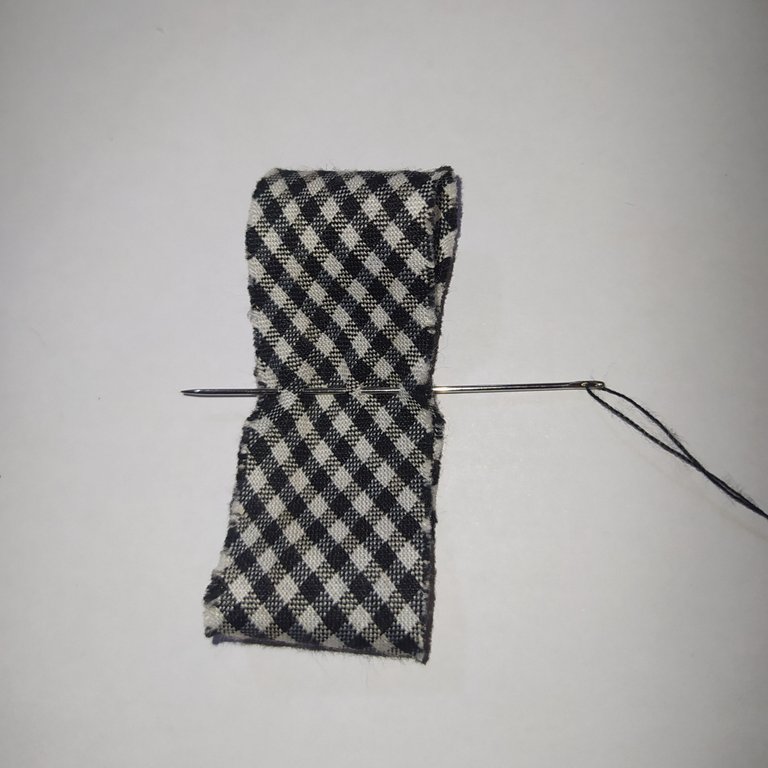
Checkered ribbon.
Lazo de cuadrito.
 |  |
|---|
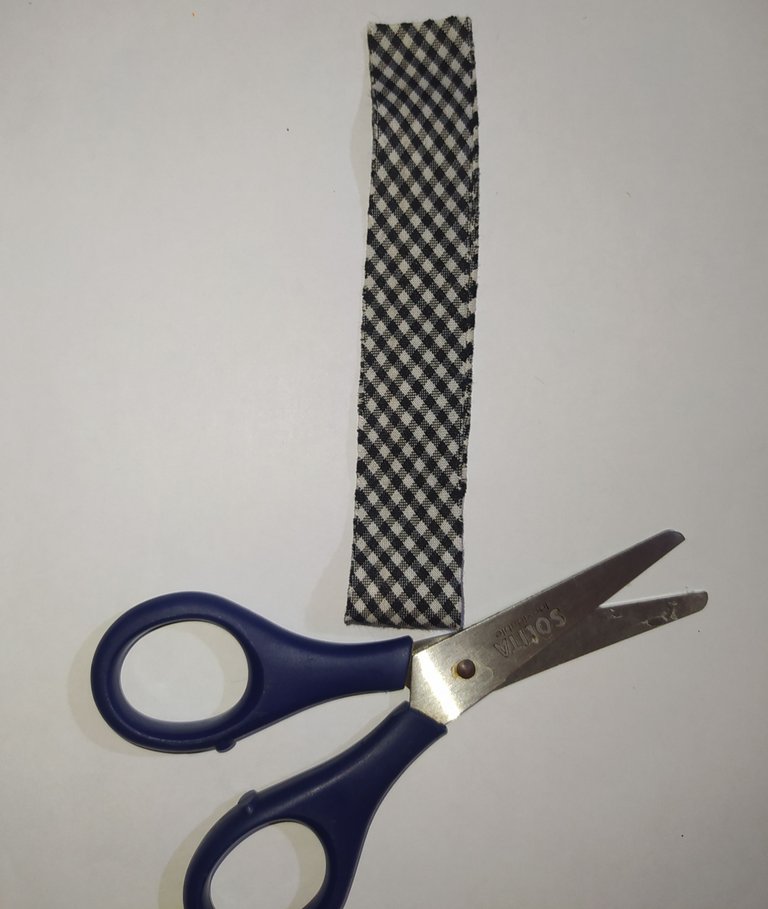
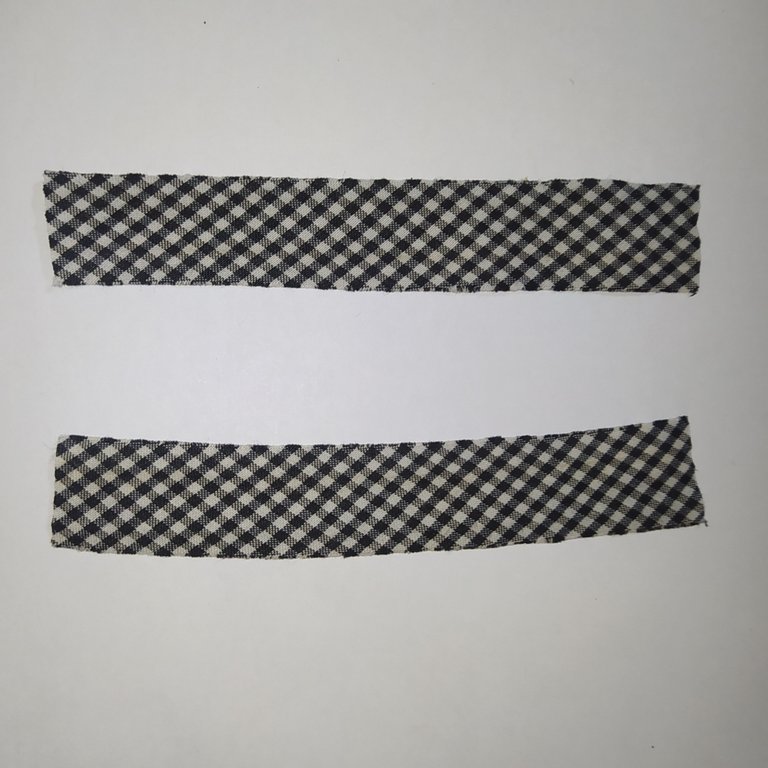
- We take the squared ribbon and cut it in half.
- Tomamos la cinta de cuadritos la cortamos a la mitad.
 |  |
|---|
- We make an x and put some glue in the center.
- Realizamos una x le colocamos un poco de pega en el centro.
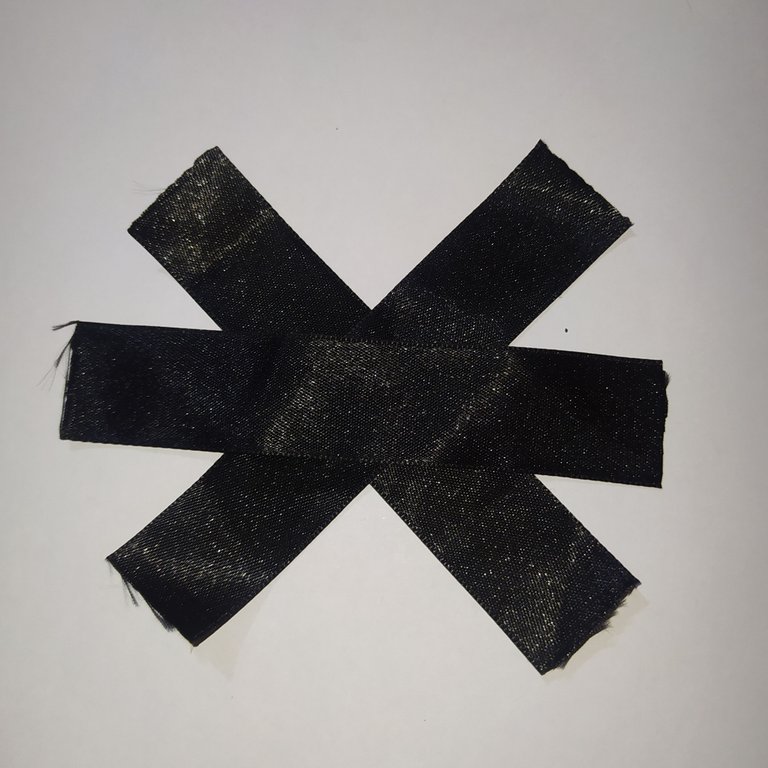
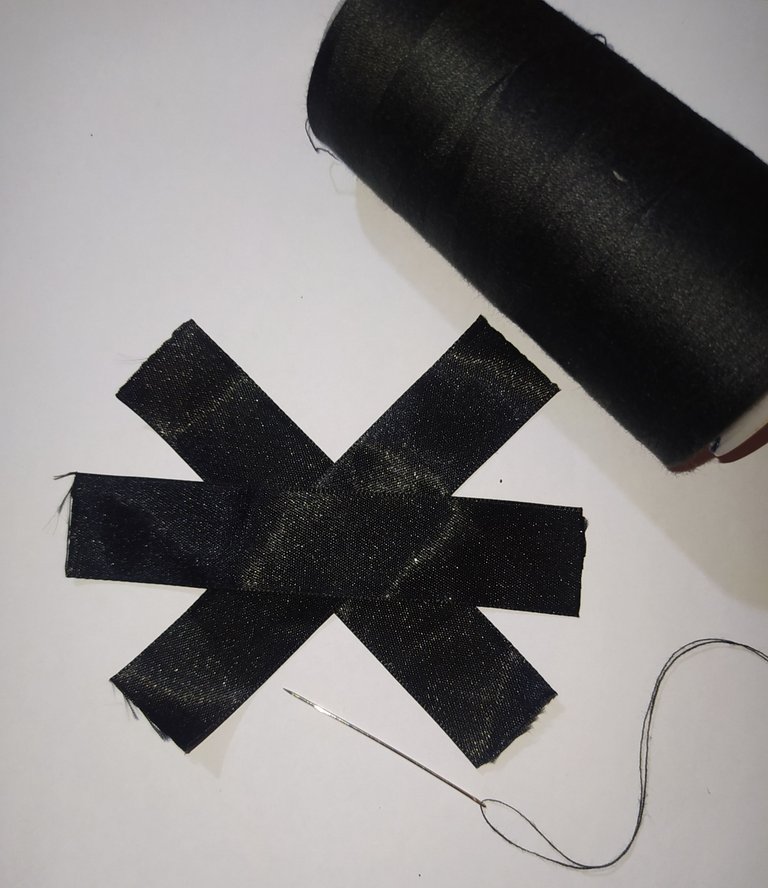
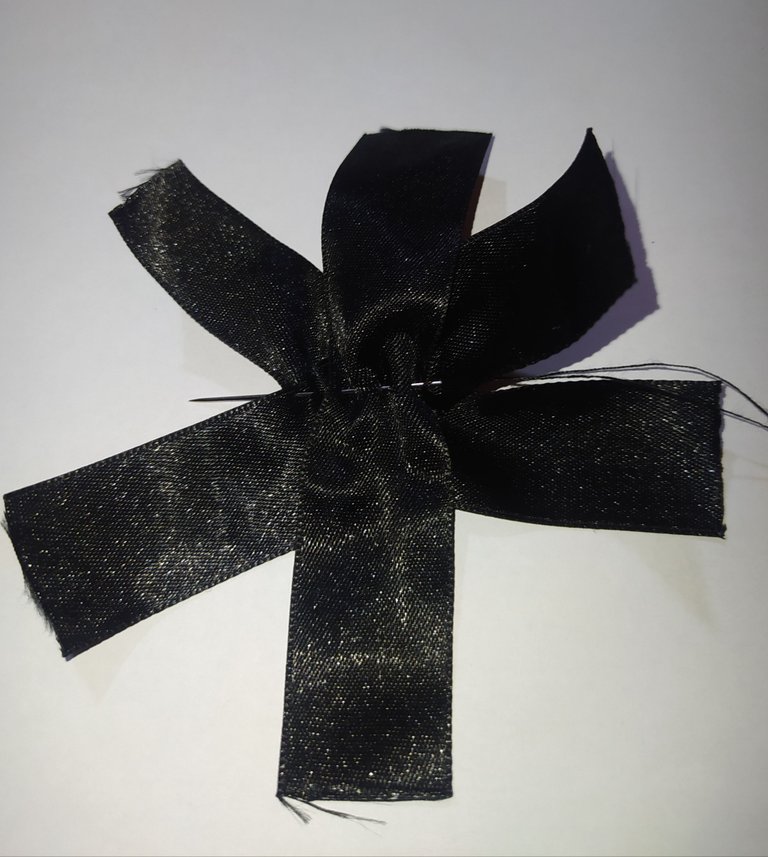
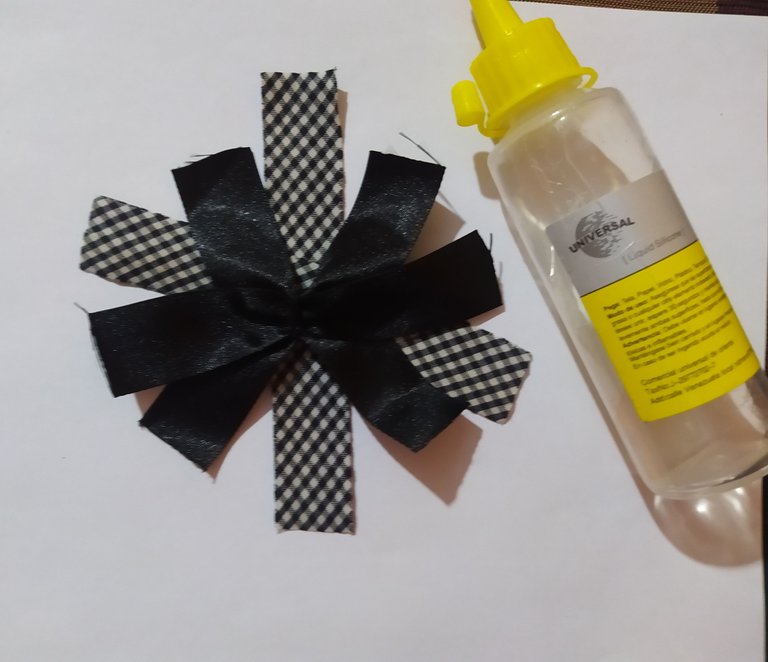
Black ribbon.
Lazo negro.
 |  |
|---|
- We place two black ribbons in the shape of an x and then the third ribbon diagonally in the center.
- We place the black thread on the needle.
- Colocamos dos cintas negras en forma de x y luego la tercera cinta en forma diagonal en el centro.
- Le colocamos el hilo negro a la aguja
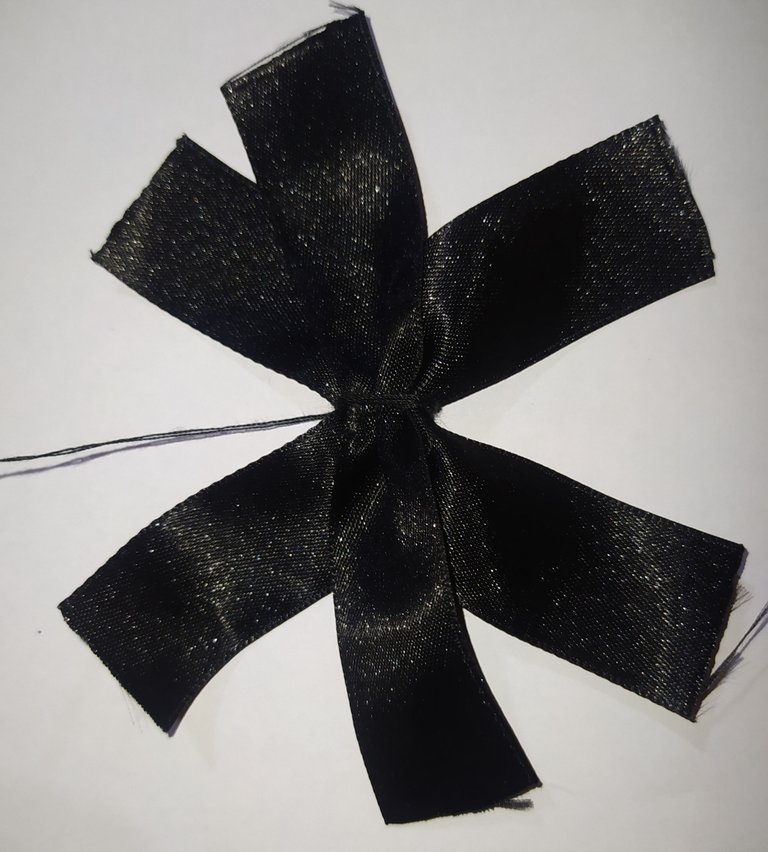
 |  |
|---|
- We make several stitches.
- We pull the thread to gather
- Damos varias puntadas.
- Halamos el hilo para fruncir.
 | 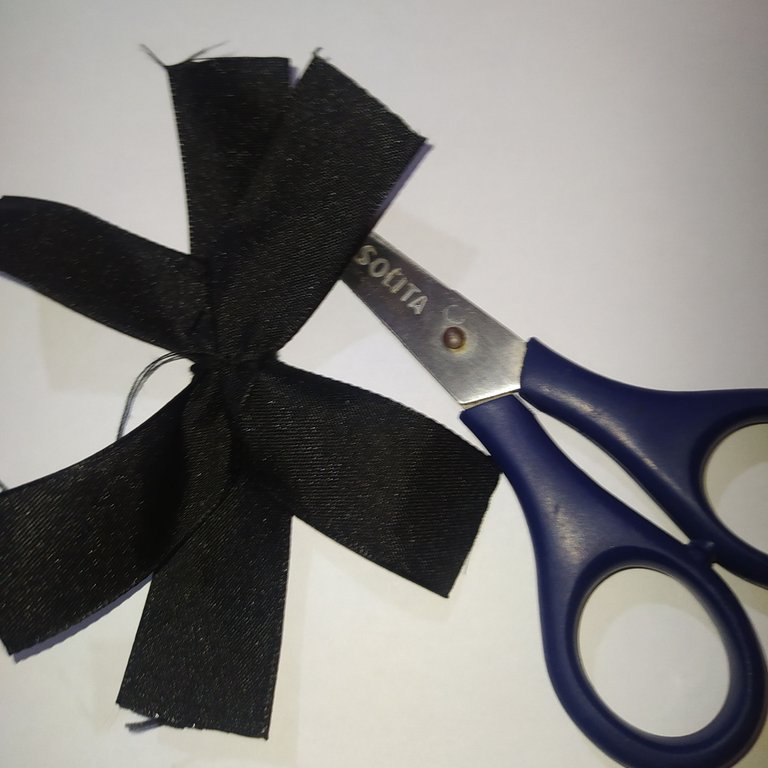 |
|---|
- We make several turns to secure
- We make the knot with a few loops.
- Trim the excess.
- Damos varias vueltas para asegurar
- Hacemos el nudo con unas lazadas.
- Recortamos el excedente.
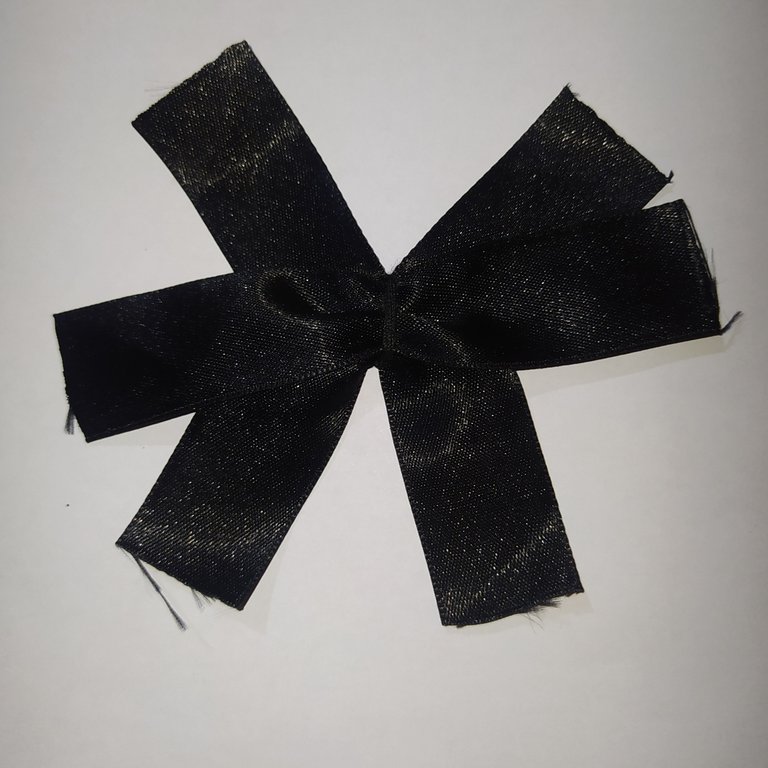
- Final result, we reserve.
- Resultado final, reservamos.
Elaboration of mini squares loop
Elaboración mini lazo de cuadritos.
 |  |
|---|
- We take a ribbon, fold it and place the tip one centimeter above the other tip.
- Tomamos una cinta la doblamos y colocamos en la punta un centímetro encima de la otra punta.
 |  |
|---|
- Then we pass some stitches with thread and needle.
- We gather, secure and trim the excess thread.
- Luego pasamos unas puntadas con hilo y aguja.
- Fruncimos, aseguramos y recortamos el excedente de hilo.
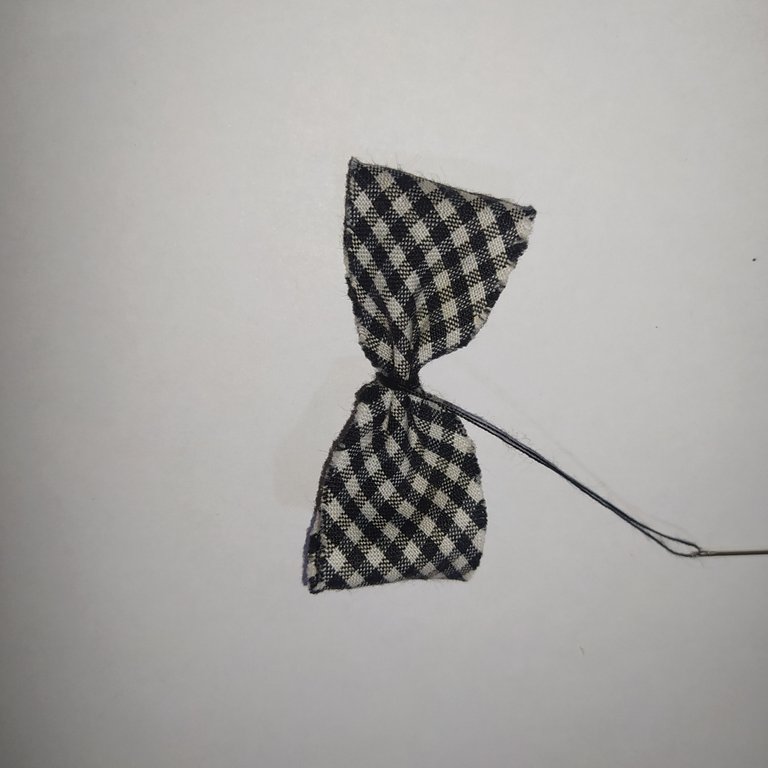
Pieces to make the bow or bow tie
Piezas para realizar el moño o lazo.
- Checkered ribbon.
- Black ribbon.
- Yellow ribbon.
- Mini checkered bow.
- Mini fuchsia bow.
- Cold silicone.
- Lazo de cuadritos.
- Lazo negro.
- Lazo amarillo.
- Mini lazo de cuadritos.
- Mini lacito fucsia.
- Silicón frio.
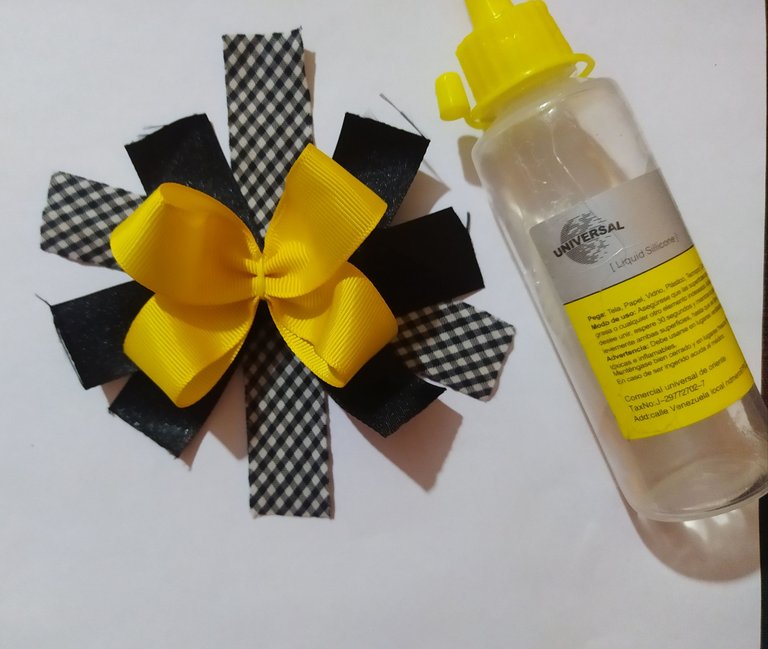
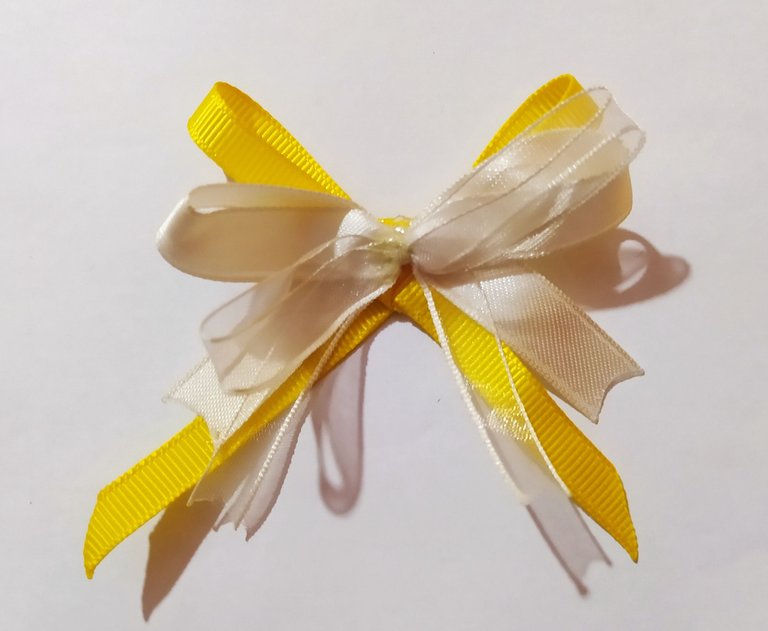
Elaboration of the bow or ribbon on the top.
Elaboración del moño o lazo de la parte de arriba.
 |  |
|---|
- First place the square ribbon, apply silicone in the center and glue the black ribbon to it.
- Then we apply silicone in the center of the black side and glue the yellow ribbon.
- Colocamos de primero el lazo de cuadro le aplicamos silicón en el centro y le pegamos el lazo negro.
- Luego le colocamos silicón en el centro a el lado negro y pegamos el lazo amarillo.
 | 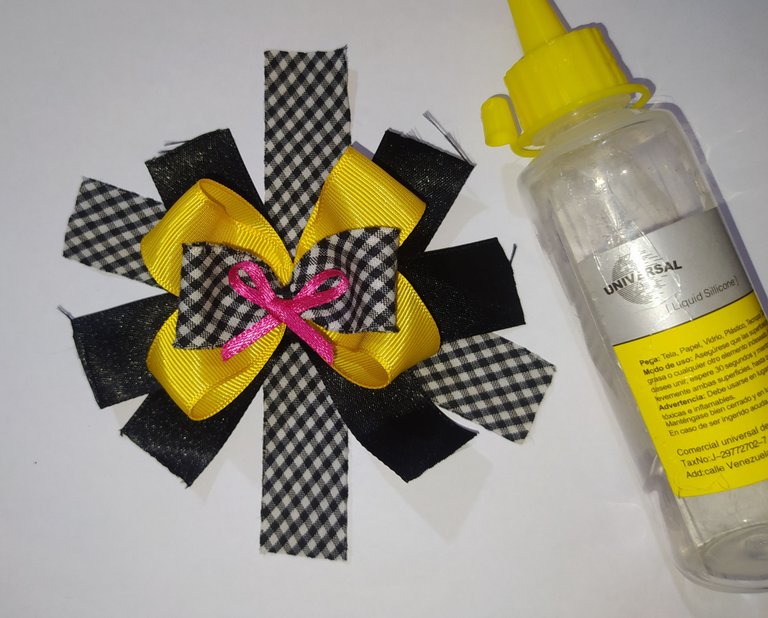 |
|---|
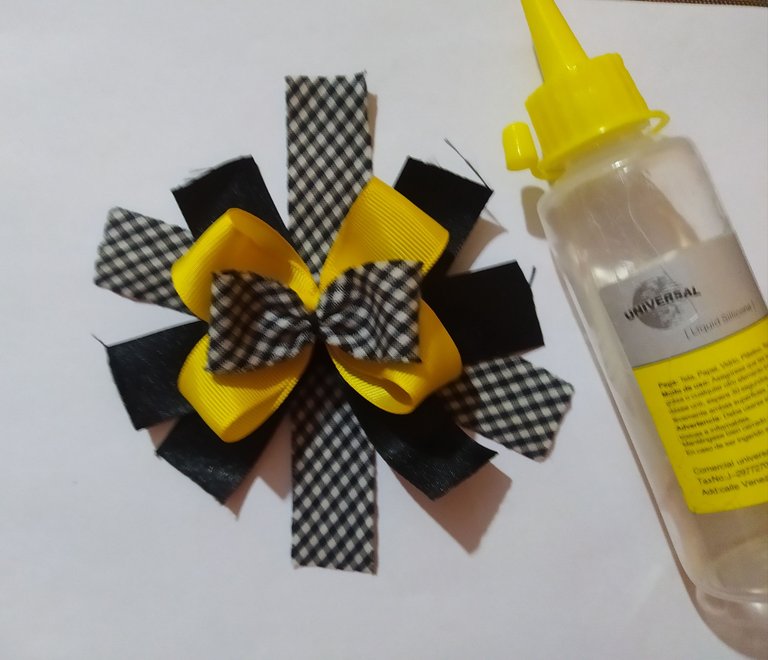
- Place silicone in the center of the yellow ribbon and glue the checkered ribbon.
- Then we put silicone in the center of the checkered ribbon and glue the fuchsia mini bow.
- Colocamos silicón en el centro de lazo amarillo y pegamos el lazo de cuadritos.
- Luego le colocamos silicón en el centro a el lazo de cuadros y pegamos el mini lacito fucsia.
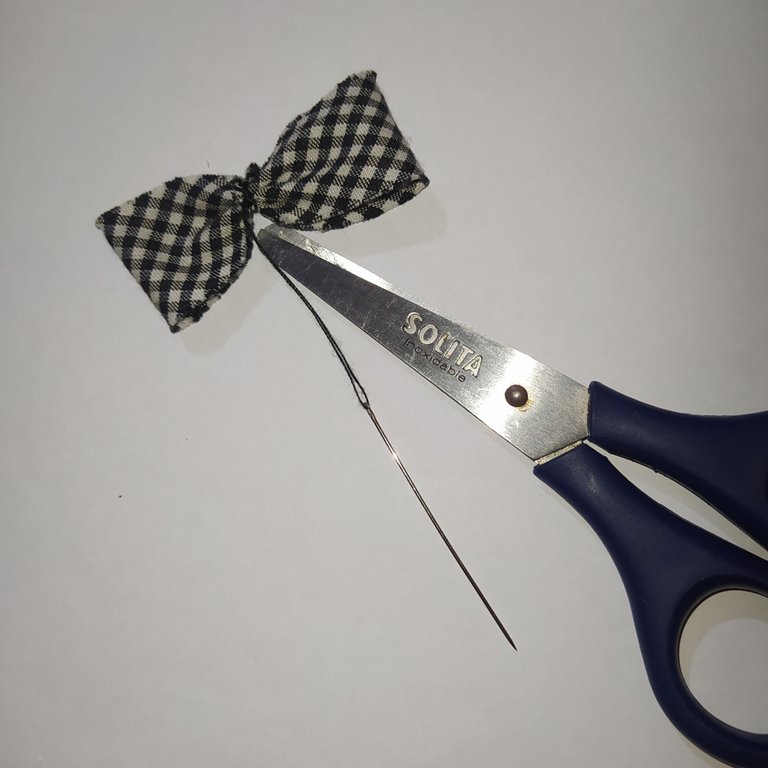
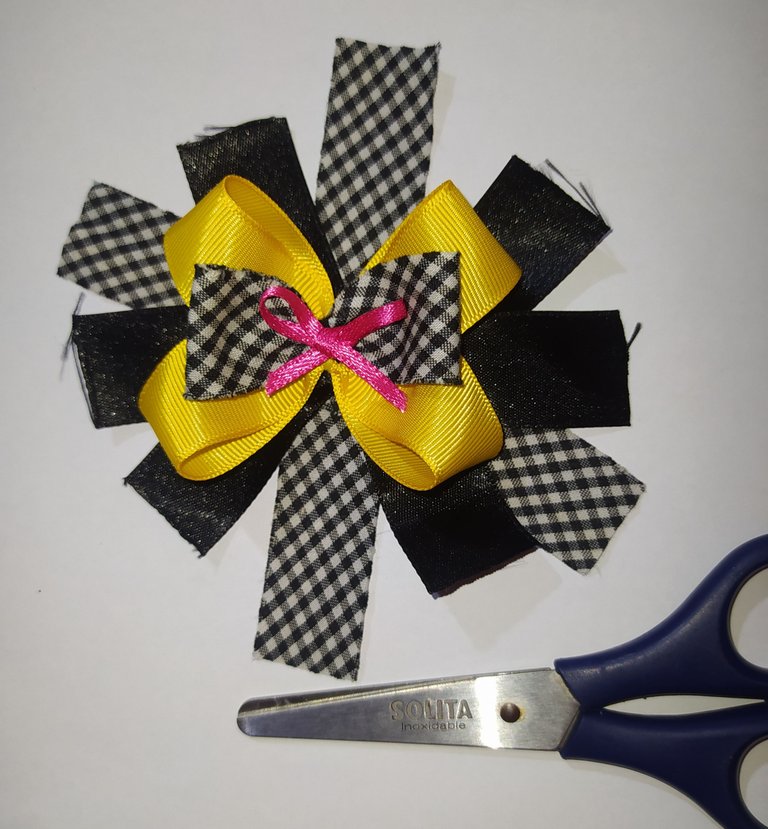 | 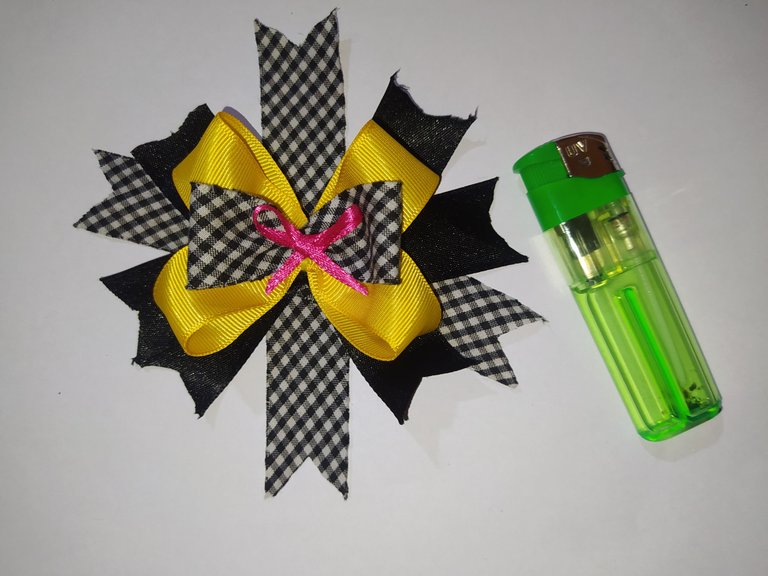 |
|---|
- Trim the ends to give it a nice shape.
- We burn the ends to prevent them from fraying.
- Recortamos las puntas dándole una bonita forma.
- Quemamos las puntas para evitar que se deshilachen.
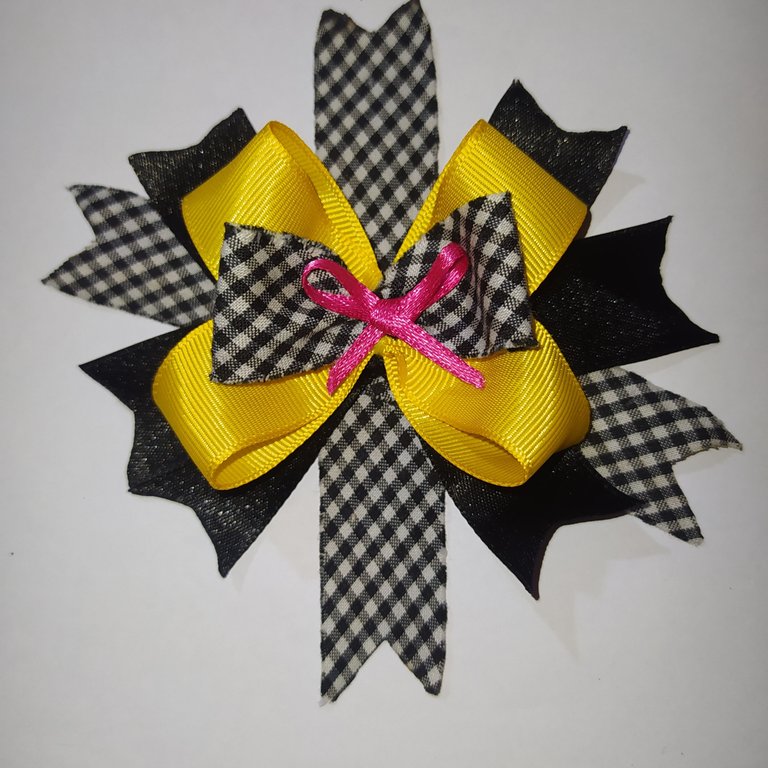
- Final result, we reserve.
- Resultado final, reservamos.
Step number six.
Elaborate loop from the bottom.
Paso número seis.
Elaboración lazo de la parte de abajo.
Yellow ribbon.
Lazo amarillo.
 |  |
|---|
- We make a simple ribbon, cut and burn the ends.
- Realizamos un lazo sencillo, recortamos y quemamos las puntas.
 |  |
|---|
- Then we put silicone in the center and glue the white ribbon.
- Luego le colocamos silicón en el centro y pegamos el lazo blanco.

- Glue the yellow flower to give it a nice finish, set aside.
- Pegamos la florecita amarilla para darle un lindo acabado, reservamos.
Step seven.
Once all the pieces of this beautiful handicraft are ready, let's move on to its assembly.
Paso siete.
una vez lista todas las piezas de esta hermosa manualidad pasemos a su armado.
 | |
|---|
- Here I show you all the pieces.
- Aquí les muestro todas las piezas.
- We take our piece of three colors and we glue on the top in the yellow color the bow around the center.
- Then on the left side in the white color we glue the first flower.
- Tomamos nuestra pieza de tres colores y le pegamos en la parte de arriba en el color amarillo el moño en todo el centro.
- Luego en el lado izquierdo en el color blanco pegamos la primera flor.
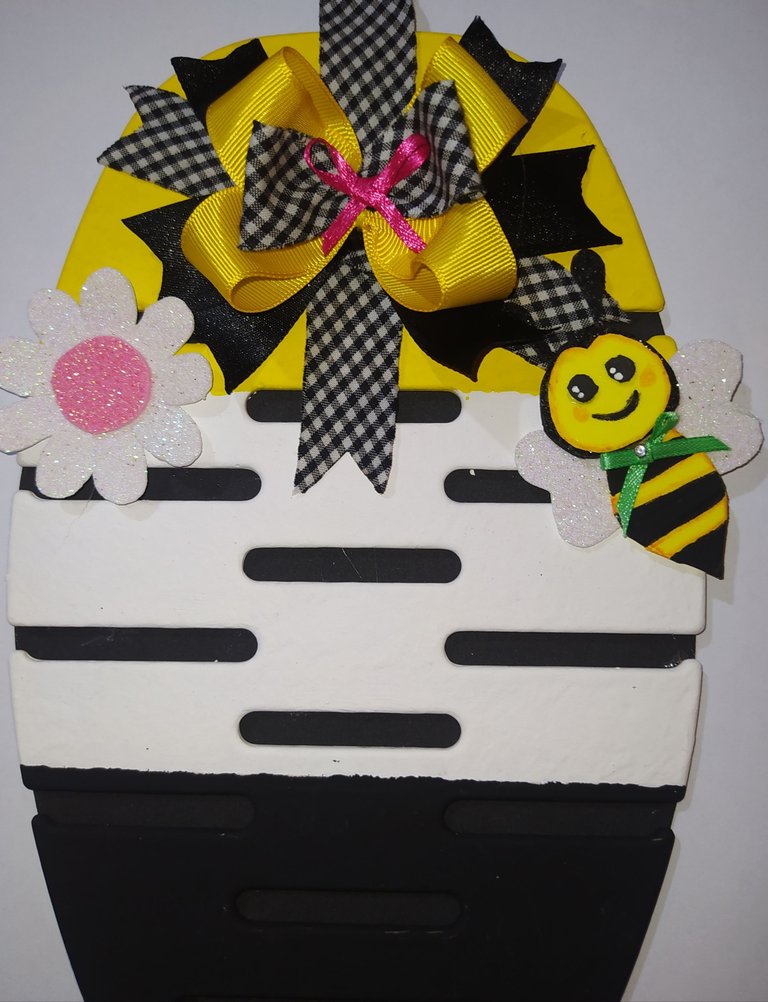
- On the right side we glue the first bee, which would be the ma.
- En el lado derecho pegamos la primera abejita que sería el varón.
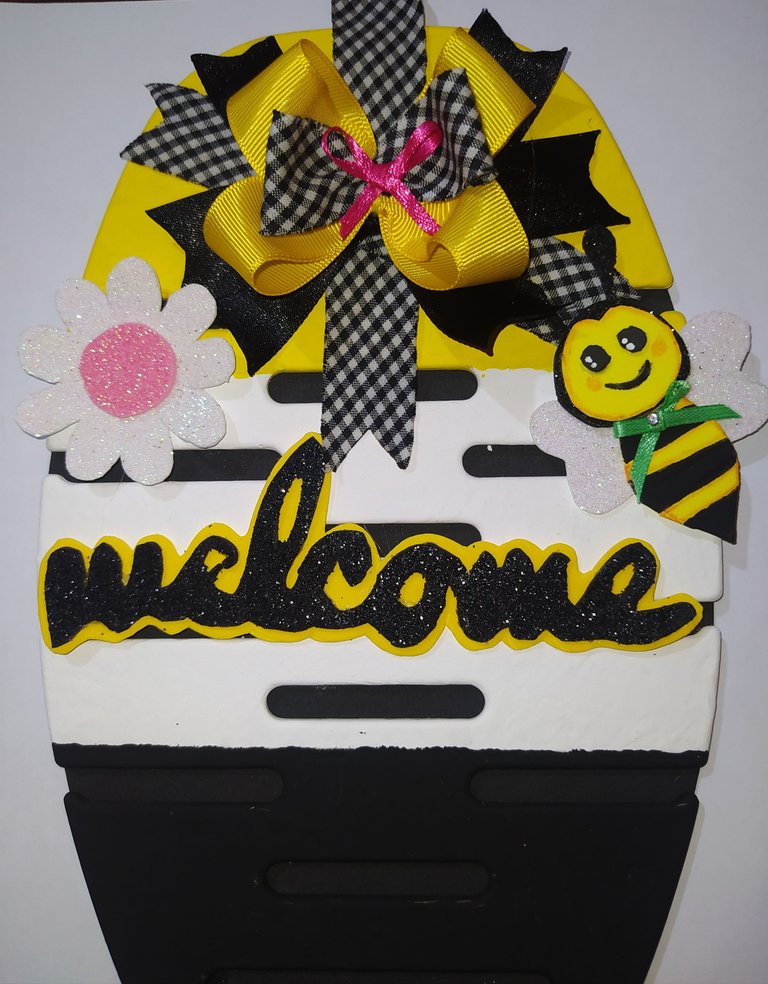
- We apply silicone and glue the Welcome sign.
- Aplicamos silicón y pegamos el letrero de Bienvenido.
- On the left side in the black color we glue the second little bee, which is the female.
- En el lado izquierdo en el color negro pegamos la segunda abejita, la cual es la hembra.
- Now we glue the flower on the left side and the second loop at the bottom in the center.
- Ahora pegamos la flor del lado izquierdo y el segundo lazo en la parte de abajo en todo el centro.
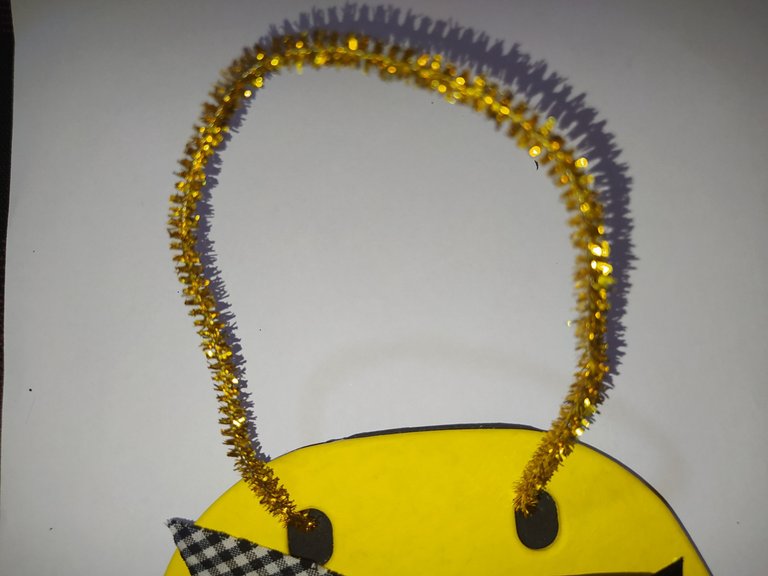
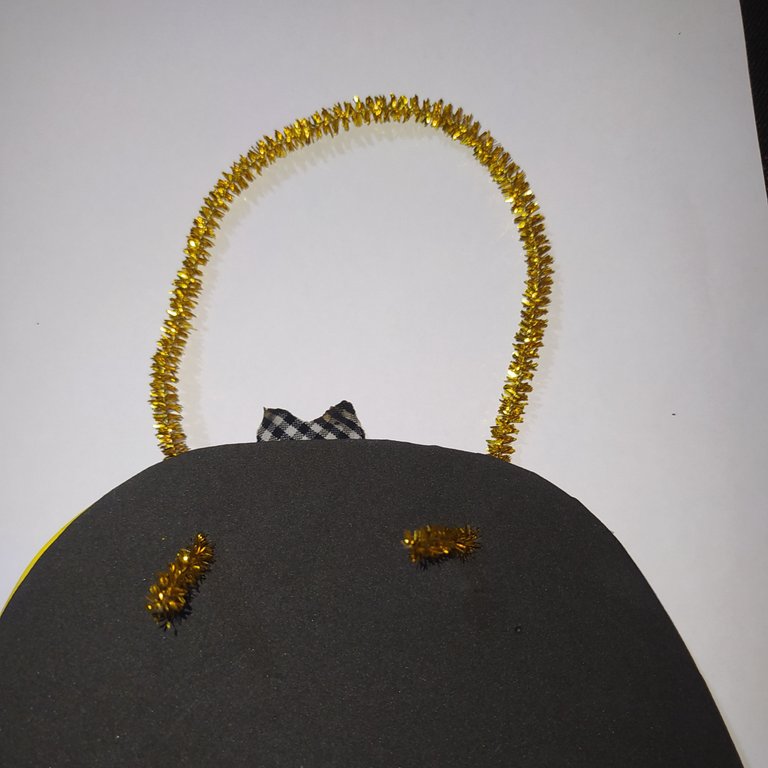
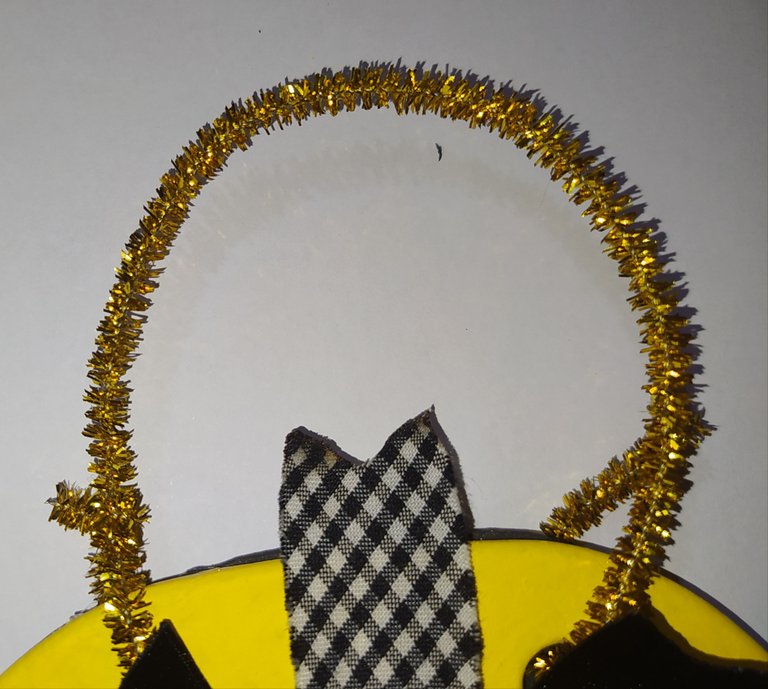
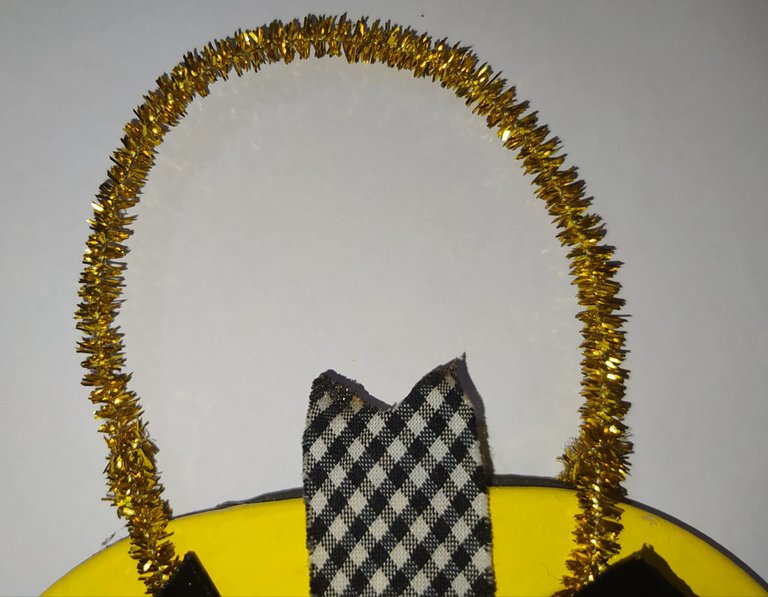
Step eight.
Place the chenil or pipe cleaner on top.
Paso ocho.
Colocamos el chenil o limpia pipas en la parte de arriba.
 |  |
|---|
- We introduce the chenille in the holes that we had left on the top of the base.
- We pass it from the front to the back.
- Introducimos el chenil en los orificios que habíamos dejado en la parte de arriba de la base.
- Lo pasamos desde el frente hacia atrás.
 |  |
|---|
- Then we screw on the top of both sides.
- Luego entorchamos en la parte de arriba de ambos lados
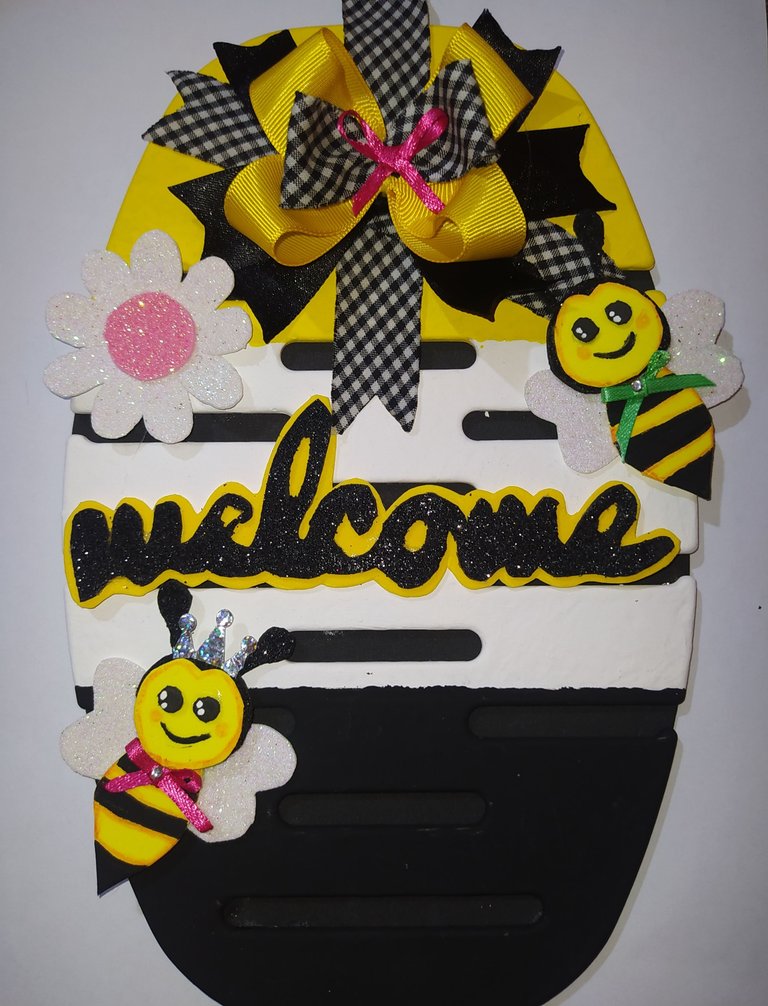
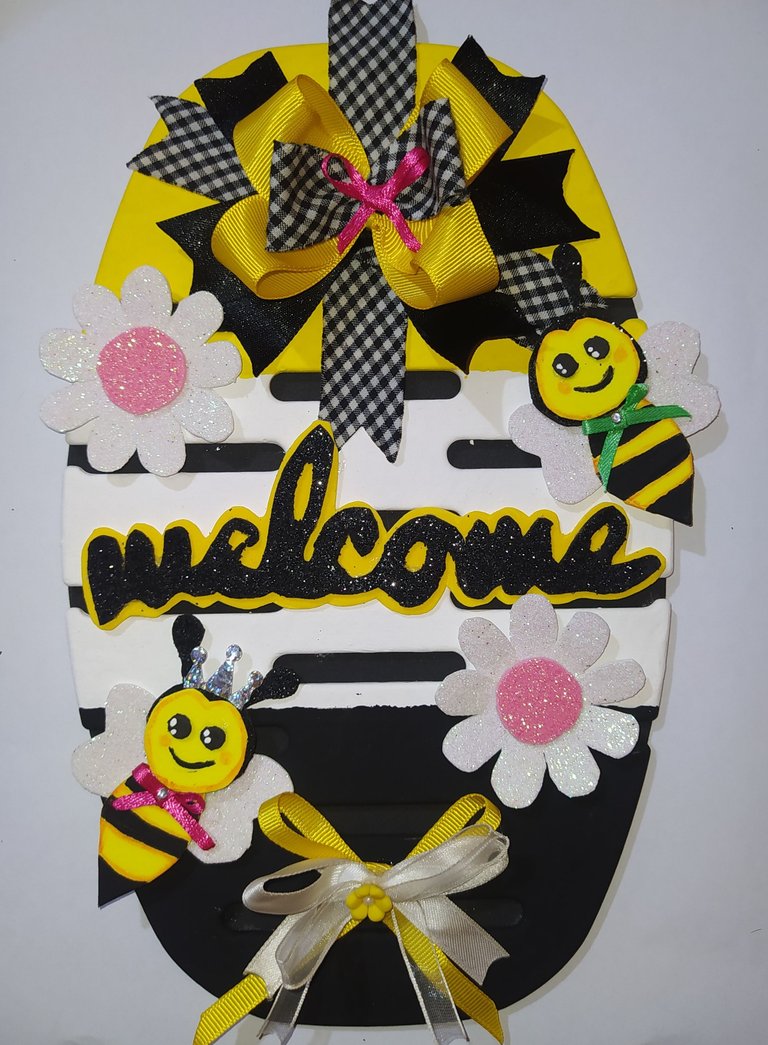
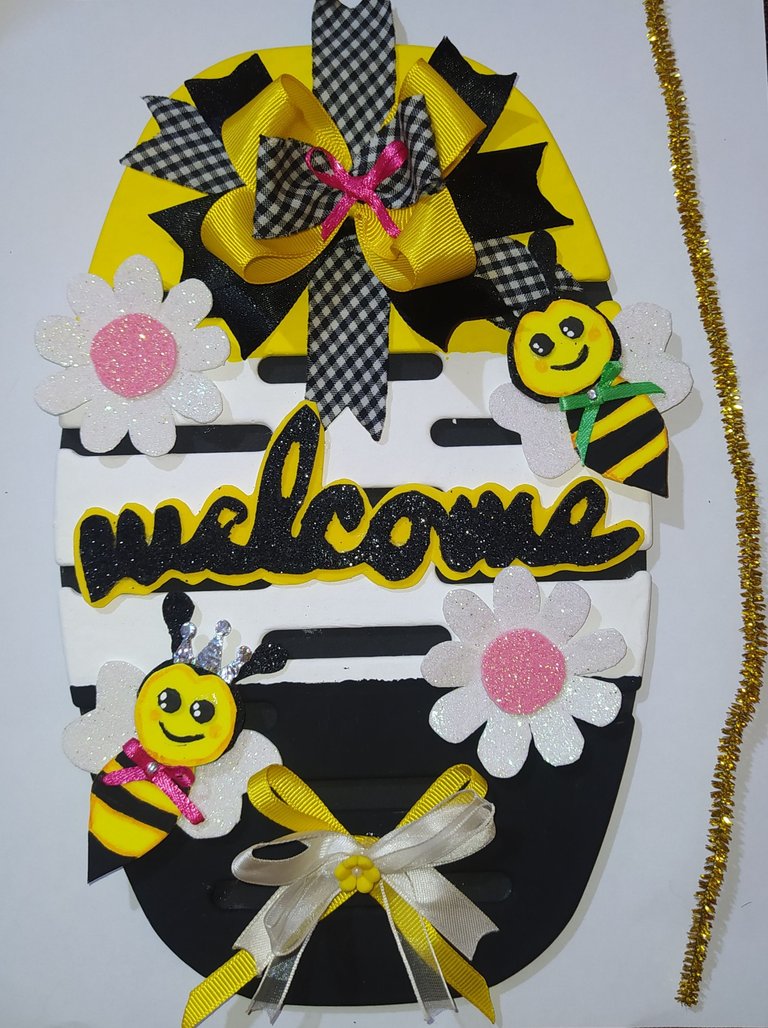
I confess that I was very pleased with the final result, it is one of those projects that you love when you finish it.
Miren lo hermoso y delicado que ha quedado, les confieso que quedé muy complacida con su resultado final, es uno de esos.proyectos que lo amas al terminarlo.
Thank you for staying until the end, I invite you to build a nice memory by leaving your comment.
Gracias por quedarte hasta el final, te invito a construir un lindo recuerdo dejando tu comentario.
Don't forget to forgive, love and smile, hugs and blessings ❤️
No olvides perdonar, amar y sonreír, abrazos y bendiciones ❤️

Banner realizado en Meitu
Traductor Deepl.
Photos of my property taken with Xiaomi redmi note 8 phone.
Banner made in Meitu
Translator Deepl.
8 phone.
Banner made in Meitu
Translator Deepl.