Captura de Pantalla

Saludos #Lunuxeros, miembros de la comunidad de #Linux&SoftwareLibre y toda la comunidad de #Linux en #Hive, bienvenidos a un nuevo post de #ViernesDeEscritorio.
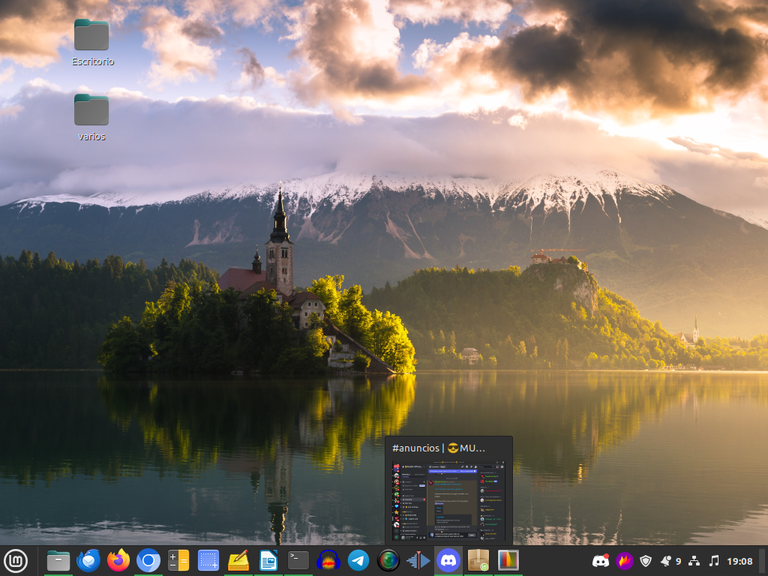
Hoy estoy presentando mi escritorio #Linux Mint 21.3 “Virginia’’ Cinnamon, hoy quiero hablarles de cómo cambiar los DNS de manera gráfica, ya que lo podemos hacer de dos formas a través de la #terminal, y a través del modo gráfico.
Una amiga me preguntó cómo cambiar los DNS de modo gráfico, ya que ella viene de Windows y no le gusta mucho, ingresar a la terminal.
Ella quiere ingresar los DNS de Google, que son 8.8.8.8 y el secundario es 8.8.4.4, pero yo en este ejemplo voy a instalar los de Cloudflare, ya que ellos en su DNS público ofrecen una forma rápida, segura y privada de navegar por la red. Y a diferencia de Google, no van a usar tus datos para enviarte propaganda, o para pasar información de tus visitas a empresas. Sus DNS son 1.1.1.1 y el secundario es: 1.0.0.1
Hagamos el proceso del cambio de los DNS:
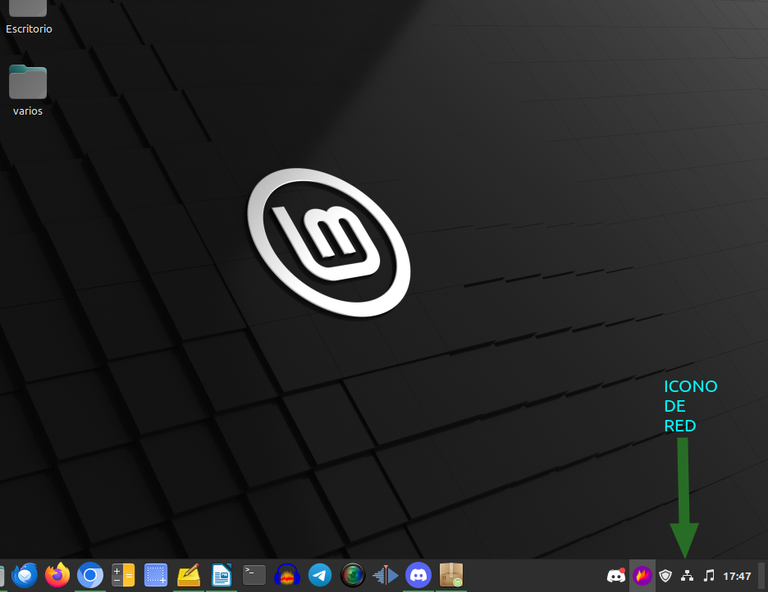
- Abrir el modo gráfico. En mi caso, en el escritorio Cinnamon, nos vamos a dirigir a la parte inferior derecha y le vamos a dar al icono de red. Ver imagen.
Fuente: Captura de pantalla.
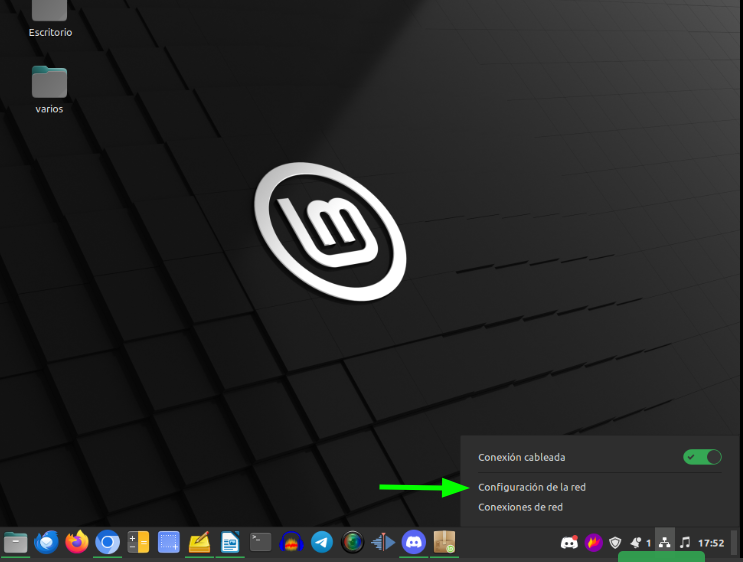
- Ahora vamos a la configuración de red.
Fuente: Captura de pantalla.
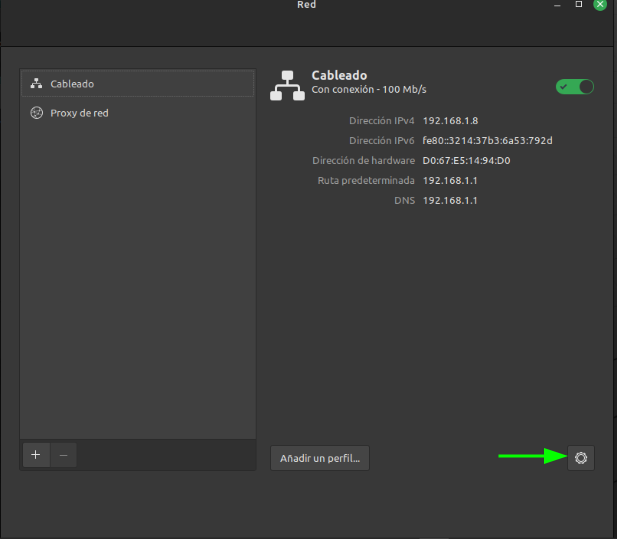
- Ahora pisamos sobre el icono de configuración.
Fuente: Captura de pantalla.
- Ahora al abrir la ventana, y de ahí, vamos a donde dice "IPv4"
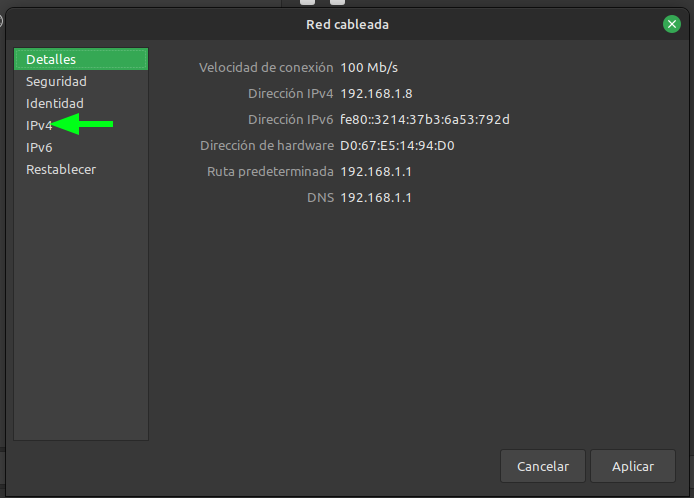
Fuente: Captura de pantalla.
- Dentro de la ventana de IPv4, cerramos o quitamos el modo automático.

Fuente: Captura de pantalla.
- Colocamos el servidor que deseemos para nuestro DNS, en mi caso yo voy a usar el de Cloudflare, que es 1.1.1.1, pero si quisiera el de Google pondría 8.8.8.8, y el de IBM sería 9.9.9.9. Todo depende de nuestra elección personal.
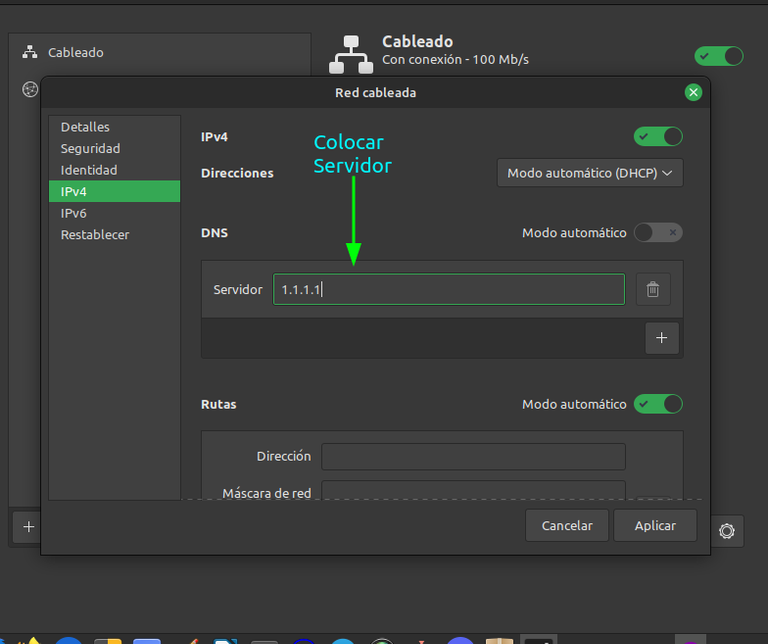
Fuente: Captura de pantalla.
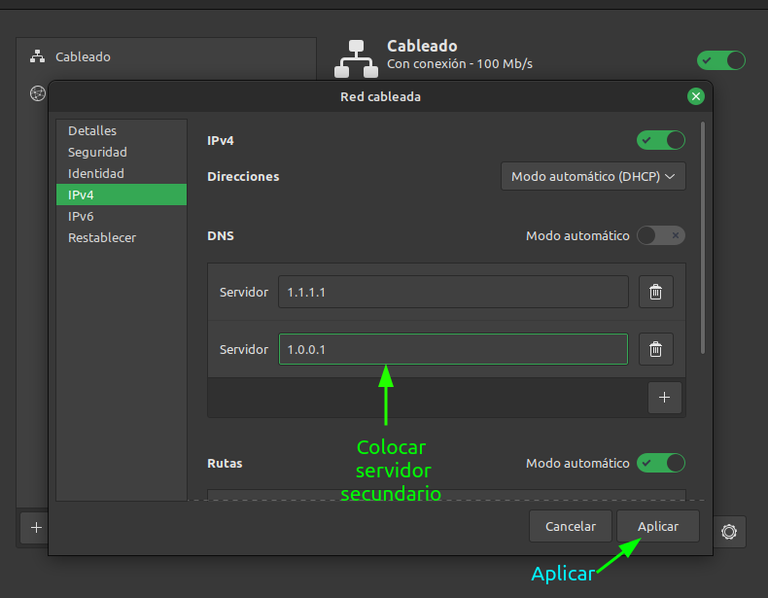
- Después de colocar el primer servidor de DNS, le damos al signo de, (+) y luego colocamos el segundo DNS, o el DNS de respaldo, si es que lo tiene el DNS público, o privado, que vayamos a colocar.
Cuando terminemos, le damos a la tecla "Aplicar" y se guardarán los cambios, y nos envía a la ventana principal de la red.
Fuente: Captura de pantalla.
- Apagamos la red.
Cuando lleguemos a la ventana principal de la red, veremos que no se han cambiado los DNS.
Eso se debe a que para que el cambio se ejecute, debemos apagar la red, dándole al icono de encendido, y después de unos 10 segundos, la prendemos de nuevo y ya el cambio del DNS, se hará efectivo.

Fuente: Captura de pantalla.
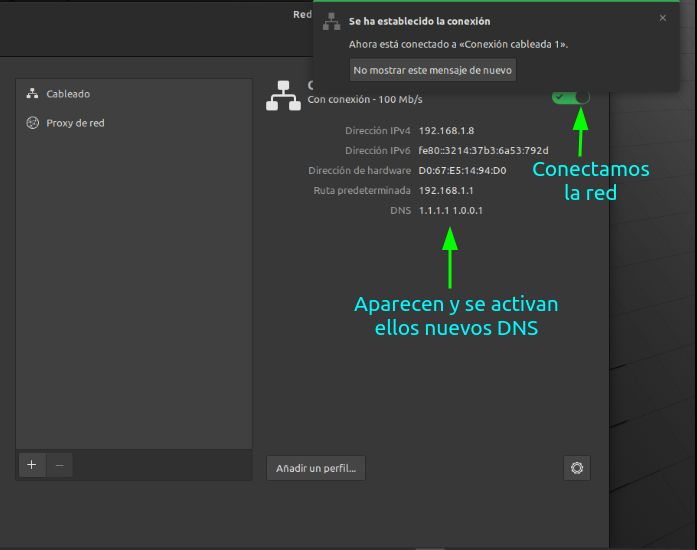
- Después de apagar l red unos segundos, la encendemos de nuevo, dándole al icono de encendido, y en ese momento, nos aparecen los nuevos DNS activados en nuestro equipo, de Linux Mint.
Fuente: Captura de pantalla.
Espero este tutorial, ayude a las personas que desconocen como cambiar los DNS en #Ubuntu y #LinuxMint en modo gráfico, debido aque el proceso es el mismo.
En mi caso, siempre recomiendo cambiar los DNS, debido a que eso muchas veces nos libra de los bloqueos que tienen los gobiernos y las empresas que prestan servicios de internet, a paginas y servicios que ofrece la red.
Y en el caso de los DNS como los de Cloudflare, nos garantizan seguridad, y que no hay un almacenamiento de nuestros datos, que posteriormente puedan ser vendidos a empresas u otros entes, ya sean estos públicos o privados.
Mis mejores deseos y feliz viernes #Linuxero para todos.
To read English
Screenshot
Greetings #Lunuxeros, members of the #Linux&Free Software community and the entire #Linux community in #Hive, welcome to a new post of #Fridaysdescritorio.
Today I'm presenting my #Linux Mint 21.3 “Virginia’ Cinnamon desktop, today I want to talk about how to change DNS in a graphical way, since we can do it in two ways through the #terminal, and through the graphical mode.
A friend asked me how to change the DNS in graphical mode, since she comes from Windows and she doesn't like it very much, enter the terminal.
She wants to enter the Google DNS, which are 8.8.8.8 and the secondary one is 8.8.4.4, but in this example I'm going to install the Cloudflare ones, since they in their public DNS offer a fast, secure and private way to surf the net. And unlike Google, they will not use your data to send you advertising, or to pass information about your visits to companies. Its DNS is 1.1.1.1 and the secondary is: 1.0.0.1
Let's do the DNS change process:
- Open the graphic mode. In my case, on the Cinnamon desktop, we are going to go to the bottom right and we are going to give the network icon. See image.
Source: Screenshot.
- Now let's go to the network settings.
Source: Screenshot.
- Now we step on the settings icon.
Source: Screenshot.
- Now to open the window, and from there, let's go to where it says "IPv4"
Source: Screenshot.
- Inside the IPv4 window, we close or remove the automatic mode.
Source: Screenshot.
- We place the server we want for our DNS, in my case I'm going to use the Cloudflare one, which is 1.1.1.1, but if I wanted the Google one I would put 8.8.8.8, and the IBM one would be 9.9.9.9. It all depends on our personal choice.
Source: Screenshot.
- After placing the first DNS server, we give the sign of, (+) and then we place the second DNS, or the backup DNS, if the public or private DNS that we are going to place has it.
When we finish, we hit the "Apply" key and the changes will be saved, and it sends us to the main window of the network.
Source: Screenshot.
- We turned off the network.
When we get to the main network window, we will see that the DNS has not been changed.
That's because for the change to be executed, we must turn off the network, giving it the power icon, and after about 10 seconds, we turn it on again and the DNS change will take effect.
Source: Screenshot.
- After turning off the network for a few seconds, we turn it on again, giving the power icon, and at that moment, the new DNS activated on our Linux Mint computer appears.
Source: Screenshot.
I hope this tutorial will help people who do not know how to change the DNS in #Ubuntu and #LinuxMint in graphical mode, because the process is the same.
In my case, I always recommend changing the DNS, because that often frees us from the blocks that governments and companies that provide internet services have, to pages and services offered by the network.
And in the case of DNS such as those of Cloudflare, they guarantee us security, and that there is no storage of our data, which can later be sold to companies or other entities, whether these are public or private.
Best wishes and happy #Linuxero Friday to everyone.