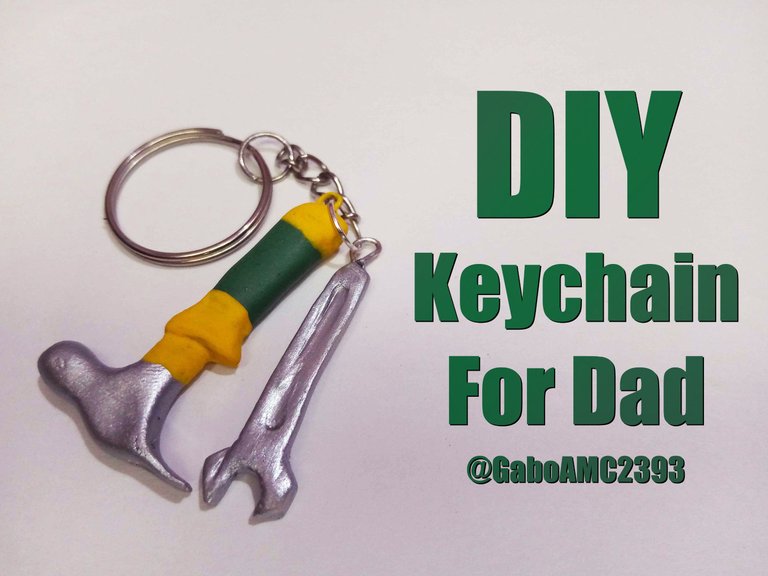
Greetings friends, I hope you had a great Father's Day this past Sunday. On this occasion, to join Jewelry's initiative I would like to show you this pair of tools that I have made as keychains or pendant for a purse.
They are quite representative for my dad, because he was someone who was always repairing things so seeing these tools reminds me a lot of him. Join me in the creative process of this piece.
Español
Saludos amigos, espero que este domingo que pasó hayan pasado un día del padre genial. En esta ocasión, para unirme a la iniciativa de Jewelry me gustaría mostrarles este par de herramientas que he hecho como llaveros o colgante para un bolso.
Son bastante representativas para mi papá, porque era alguien que siempre andaba reparando cosas así que ver estas herramientas me recuerda mucho a él. Acompáñenme en el proceso creativo de esta pieza.
First of all, I would like to invite @calisto24, @hayleysv and @edeyglezsosa to participate in the initiative if they are still on time or to subscribe to the community if they have not yet done so.
You can learn more about this initiative by following this link:
https://peakd.com/hive-189504/@hive-189504/a-gift-for-dad-oror-initiative
Step by step
Well, I'll tell you all about what I did to turn the materials I used into this cute keychain.
First of all I have here my base material, the flexible dough. This is a light material, easy to work with and that dries quickly and hardens, unlike plasticine, another material that I also use in my creations, but for this creation it was not suitable, because it does not harden.
Antes que nada, me gustaría invitar a @calisto24, @hayleysv y a @edeyglezsosa a participar en la iniciativa si aún están a tiempo o a suscribirse a la comunidad si aún no lo han hecho.
Pueden saber más sobre esta iniciativa siguiendo este enlace:
https://peakd.com/hive-189504/@hive-189504/a-gift-for-dad-oror-initiativePaso a paso
Bien, les hablaré de todo lo que hice para convertir los materiales que utilicé en este llavero tan simpático.
Primeramente tengo aquí a mi material base, la masa flexible. Este es un material liviano, fácil de trabajar y que seca rápido y se endurece, al contrario de la plastilina, otro material que también acostumbro a usar en mis creaciones, pero que para esta creación no servía, pues no se endurece.

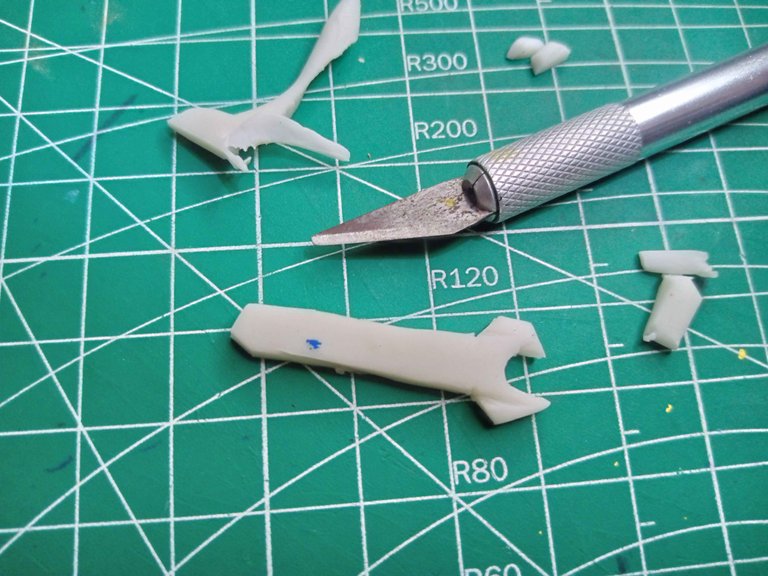
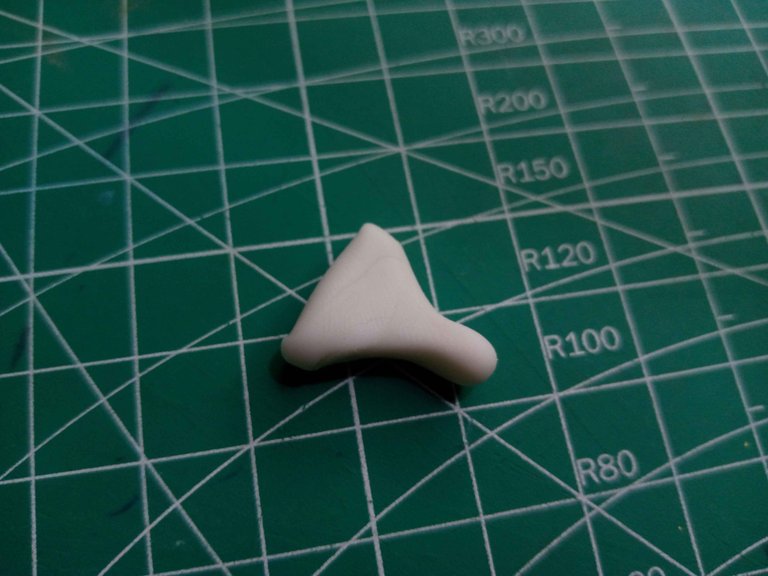
The first thing I did to start with the piece was to create a base shape to work on. This shape is similar to that of a female intimate towel, I thought it was a good initial shape to start working on.
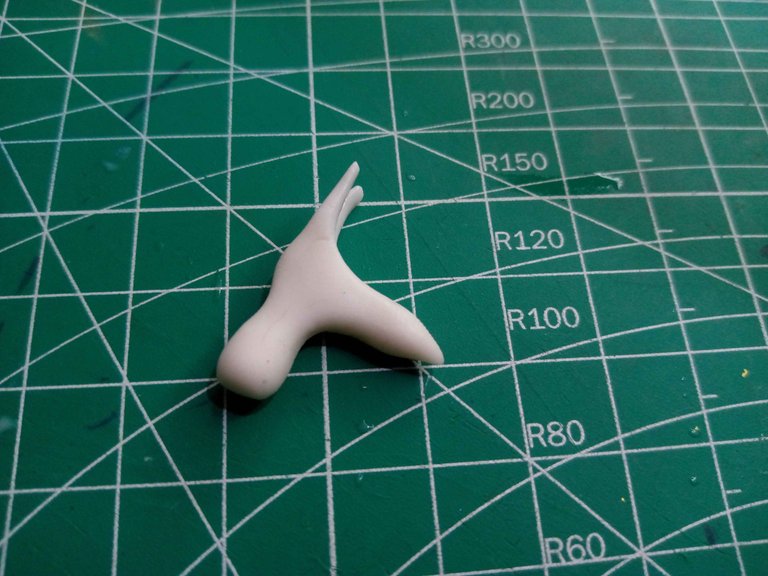
From this I began to cut the excess pieces until I achieved the shape of a double-mouth faucet.
Lo primero que hice para comenzar con la pieza fue crear una forma base sobre la cual trabajar. Esta forma es una parecida a la de una toalla íntima femenina, me pareció una buena forma inicial para comenzar a trabajar.
A partir de esta comencé a cortar los pedazos excedentes hasta lograr la forma de una llave de doble boca.

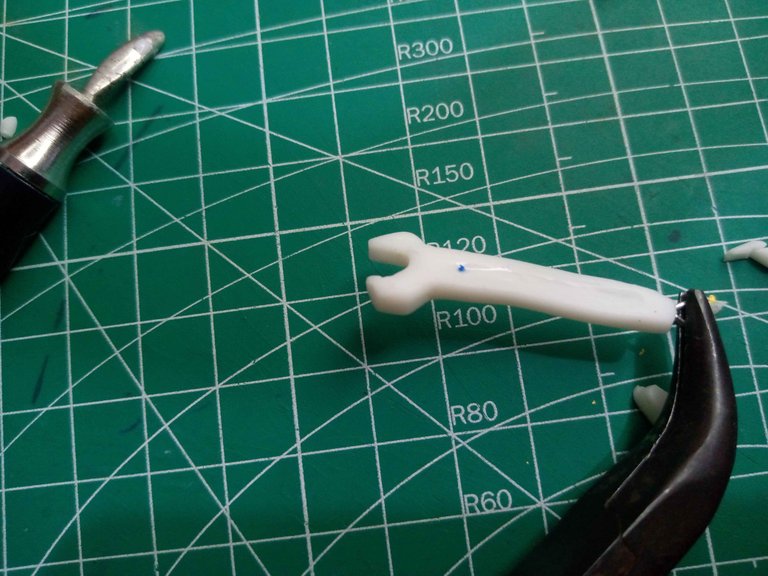
After making the cuts I shaped the edges and smoothed the surface. It was completely smooth and then I could insert a small wire with a ring that would hold it firmly so that it could be hung as a keychain.
Después de hacer los cortes moldeé los bordes y alisé la superficie. Así quedó completamente suave y entonces pude introducirle un pequeño alambre con argolla que la sostendría firme para que pueda colgar como llavero.
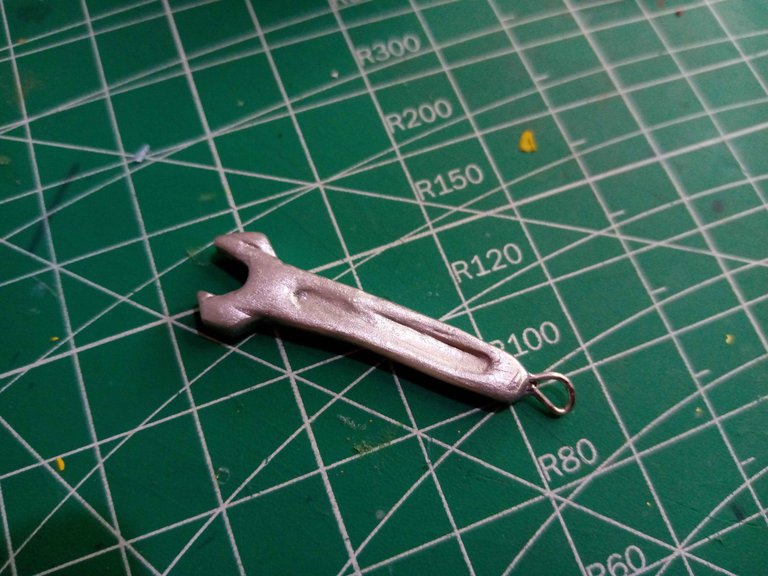
Finally I made some indentations on the surface to make it as close as possible to the model tool, then I painted it with a couple of coats of gold paint.
Finalmente le hice algunas hendiduras en la superficie para hacerla lo más parecida a la herramienta modelo, luego la pinté con un par de capas de pintura dorada.
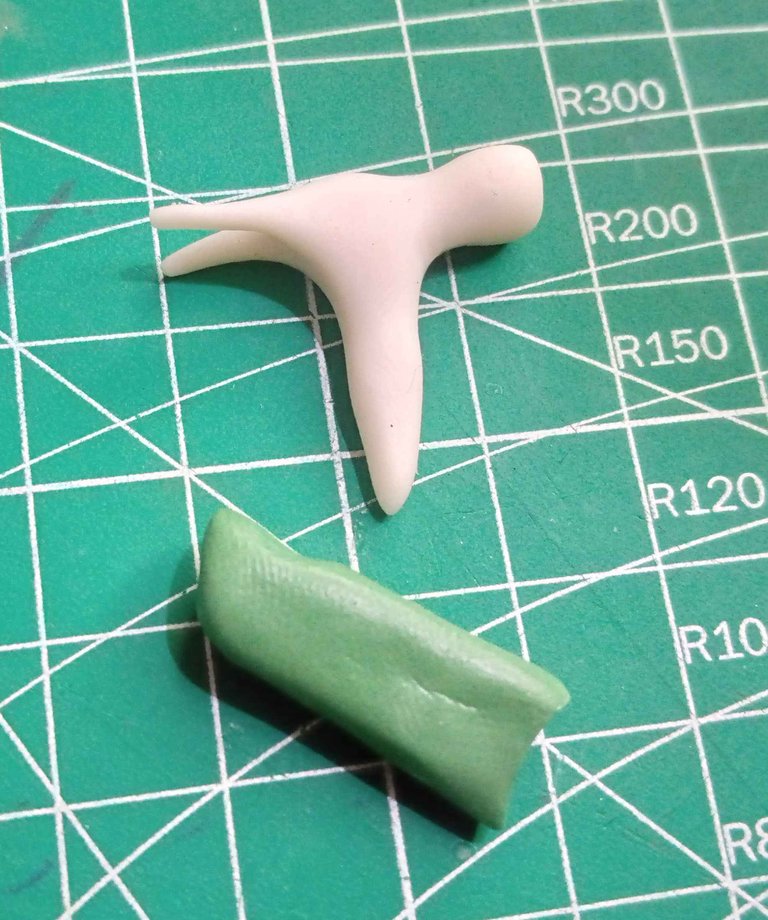
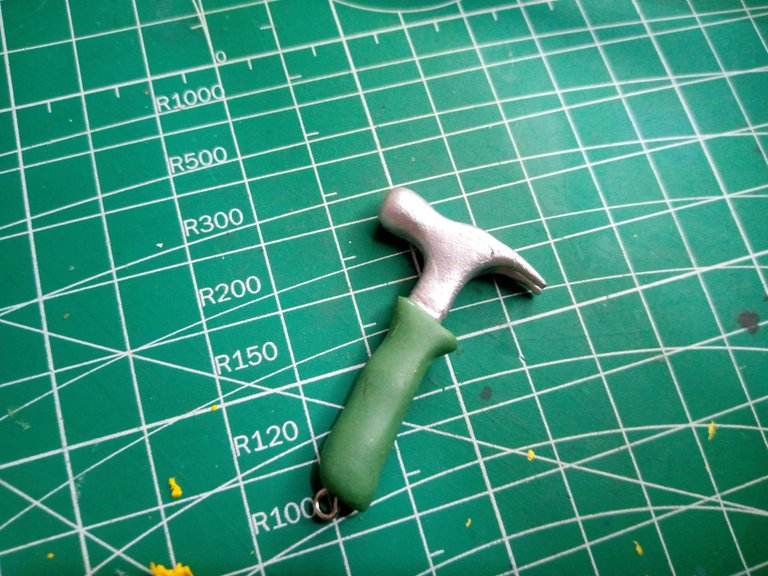
This is how the first keychain was finished. The second one, also a tool, was made by taking a piece of flexible dough and molding it in a triangular shape at first, then I continued molding it until I got the basic shape of a hammer, as you can see in the images below.
Así quedó terminado el primer llavero. El segundo, una herramienta también, lo hice tomando un trozo de masa flexible para moldearlo de forma triangular en un inicio, luego continué moldeándolo hasta lograr la forma básica de un martillo, tal como pueden observar en las imágenes de abajo.
 |  |
|---|
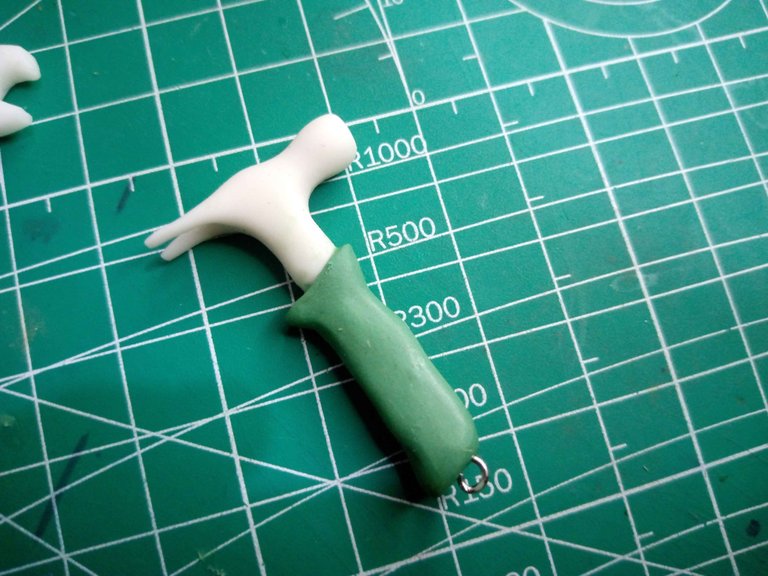
I then used green flexible dough to create a handle to support the base shape of the hammer I had created. To these two pieces, still wet, I joined them together using a long piece of wire with a ring that went through the two pieces.
Luego de esto usé masa flexible de color verde para crearle un mango que sirviera de soporte para la forma base del martillo que había creado. A estas dos piezas, aún húmedas, las uní usando un largo trozo de alambre con argolla que atravesó las dos piezas.
 |  |
|---|
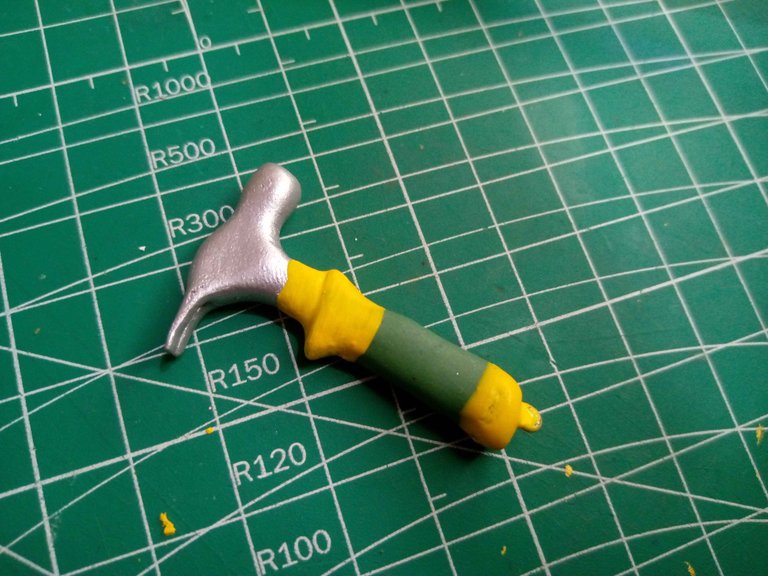
Then came the same painting process. I painted the head of the hammer silver, just as I had done with the other key. Then I used a bright yellow color to color some areas of the hammer, to give it some color.
Posteriormente vino el mismo proceso de pintado. Pinté la cabeza del martillo de color plateado, tal como había hecho con la otra llave. Luego usé un color amarillo intenso para colorear algunas áreas del martillo, para darle un poco de color.
 |  |
|---|
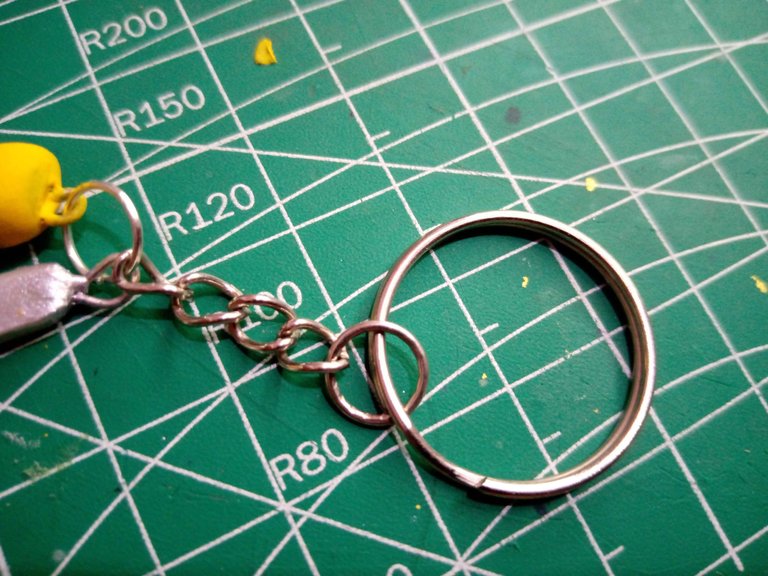
Finally I attached both pieces, the hammer and the key, with an even larger ring, to the ring chain of the key ring.
Finalmente uní ambas piezas, el martillo y la llave, con una argolla aún más grande, a la cadena con argolla del llavero.
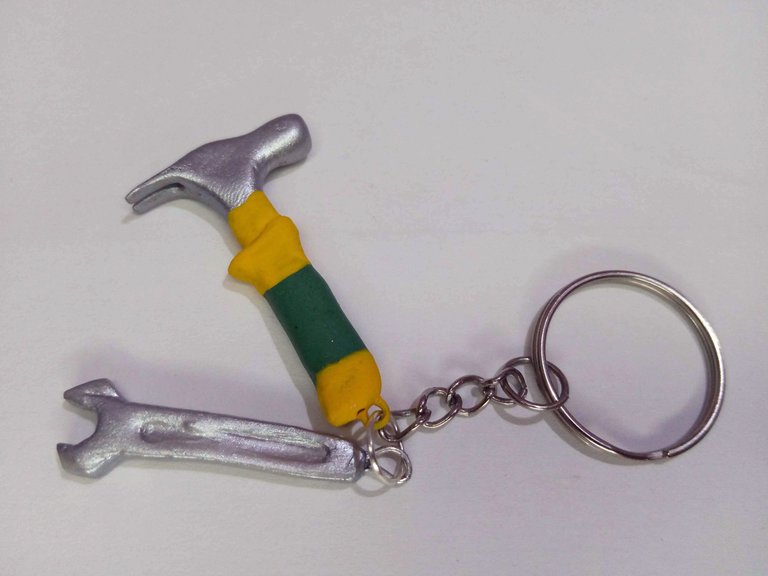
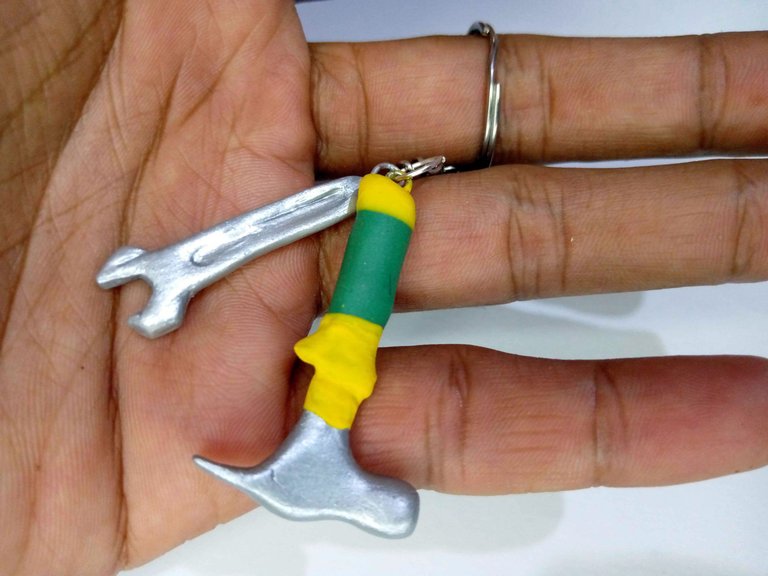
Well friends, this is how these pieces were finished. Here are some pictures of the final result:
Bien amigos, así quedaron terminadas estas piezas. A continuación unas fotografías del resultado final:

What did you think? For me it was a pleasure to have shared these pieces with you. I invite you to leave your opinions below in the comments, as always I will be happy to read them.
With nothing more to add, I'll say goodbye then...
See you next time!
¿Qué les ha parecido? Para mi todo un gusto haber compartido estas piezas con ustedes. Los invito a dejar sus opiniones abajo en los comentarios, como siempre estaré encantado de leerlos.
Sin más que agregar, me despido entonces...
¡Hasta la próxima!