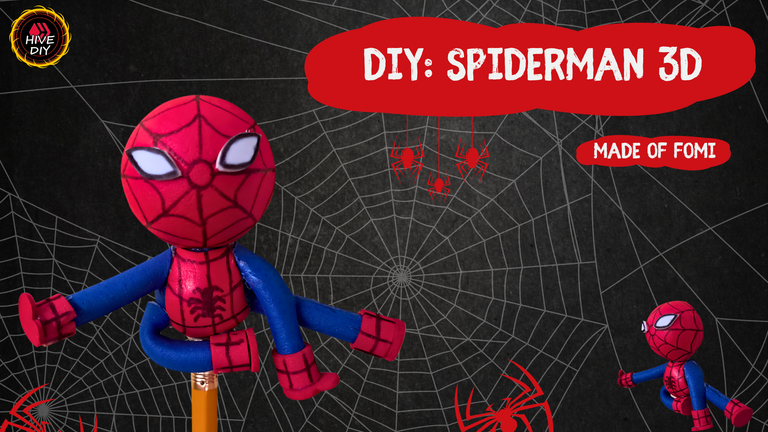
Greetings, dear friends of the community. This time I come to show you a videotutorial in which I show you step by step how I made a craft that is very, very out of my comfort zone as far as working with fomi is concerned. And yes, this is my first time making a fofusho. While the procedure to make this 3D Spider-Man is very easy, I must say that I still need to practice a lot and take an anatomy class 😅.
For the realization of this craft I used red and blue fomi, which are the characteristic colors of the costume of this superhero. The internal structure is composed of plastic balls of different sizes and I drew the lines of the suit with permanent marker. I hope you like it and I encourage you to make one by yourselves, let's start with the tutorial.
Saludos, queridos amigos de la comunidad. En esta ocasión vengo a mostrarles un videotutorial en el cual muestro cómo paso a paso realicé una manualidad que está muy, pero muy fuera de mi zona de confort en cuanto al trabajo con fomi se refiere. Y sí, esta es mi primera vez haciendo un fofucho. Si bien el procedimiento para hacer este Spider-Man 3D es muy fácil, debo decir que aún me hace falta practicar un montón y tomar una que otra clase de anatomía 😅.
Para la realización de esta manualidad empleé fomi rojo y azul, los cuales son los colores característicos del traje de este superhéroe. La estructura interna está compuesta por pelotitas de plástico de diferente tamaño y el trazado de las líneas del traje las hice con marcador permanente. Espero que les guste y se animen a hacer alguno por ustedes mismos, comencemos con el tutorial.
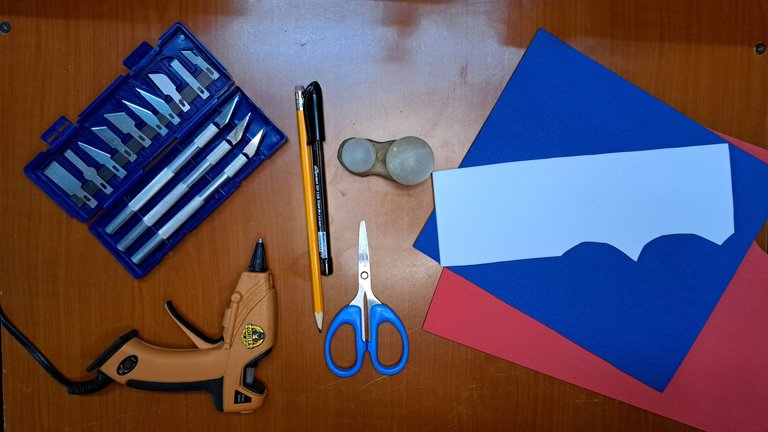
Materials // Materiales
| ✔️ Red, blue and white fomi | ✔️ Fomi rojo, azul y blanco |
| ✔️ Plastic Balls | ✔️ Pelotas de plástico |
| ✔️ Cutting and carving tools | ✔️ Herramientas de corte y tallado |
| ✔️ Scissors | ✔️ Tijeras |
| ✔️ Pencil and marker | ✔️ Lápiz y marcador |
| ✔️ Silicone gun | ✔️ Pistola de silicona |
Step by step // Paso a paso
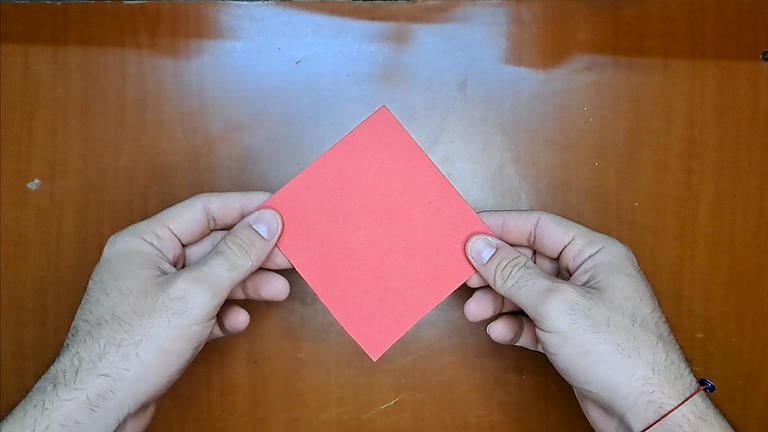
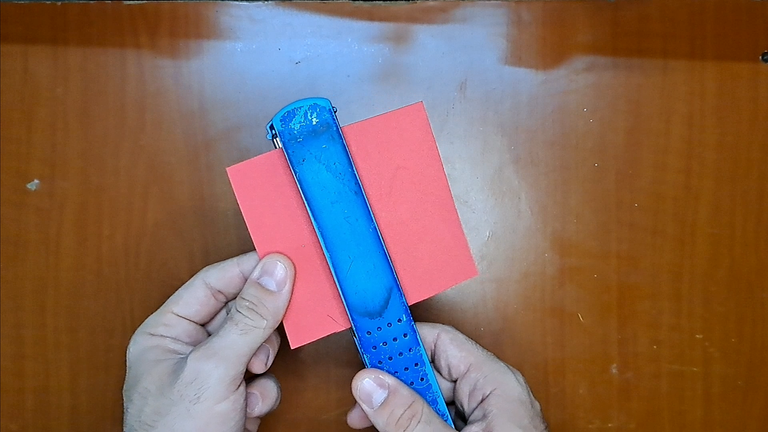
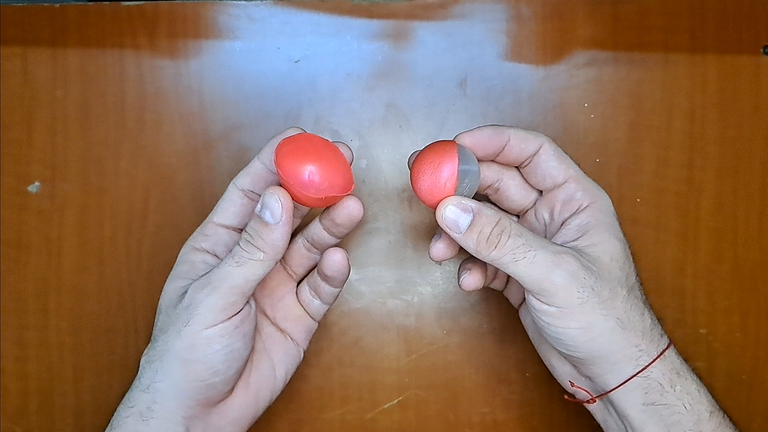
1️⃣ To start, the first thing I did was to cut out two square pieces of red fomi to heat with a hair iron and thermoform around the larger plastic ball. After thermoforming, trim the excess fomi until you have two sides of red fomi that will cover the ball completely.
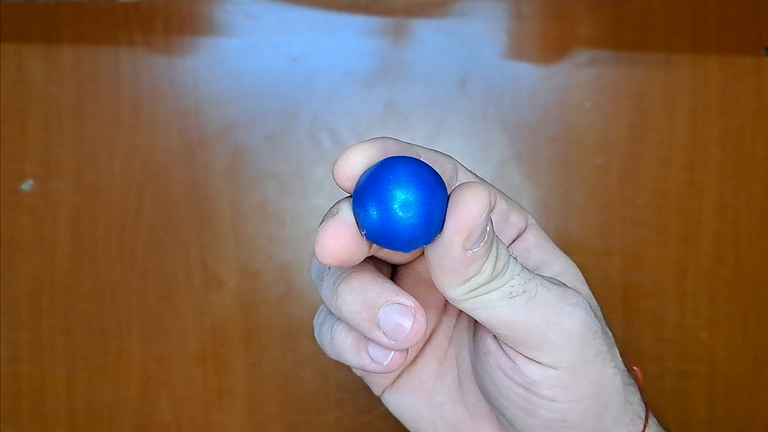
In the case of the blue fomi, I repeated the same process, only in this case I used the smaller plastic ball.
1️⃣ Para empezar, lo primero que hice fue recortar dos piezas cuadradas de fomi rojo para calentarlas con una plancha de pelo y termo formarlas alrededor de la pelota de plástico más grande. Luego de termoformado, recorte el fomi excedente hasta tener dos caras de fomi rojo que cubrirán la pelota por completo.
En el caso del fomi azul, repetí el mismo proceso, solo que en este caso utilicé la pelota de plástico más pequeña.
 |
 |
 |
 |
 |
 |
 |
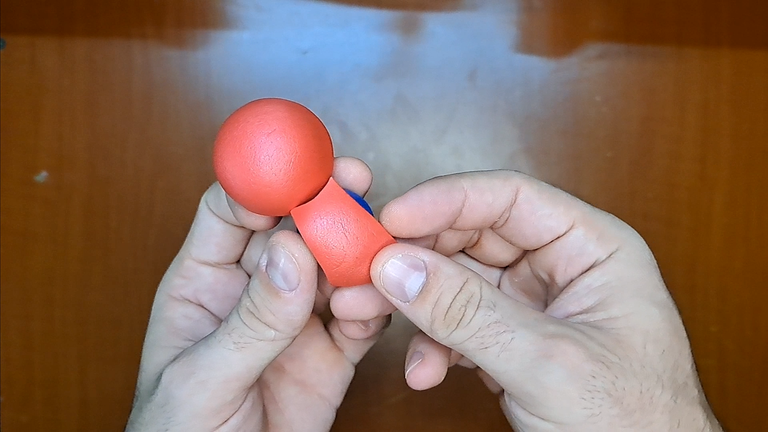
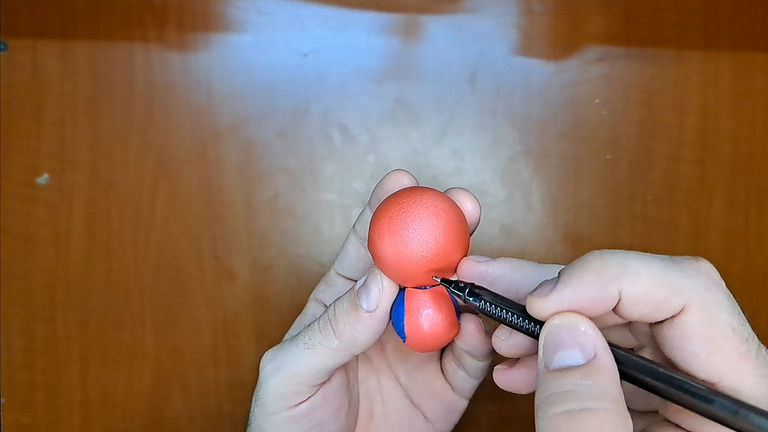
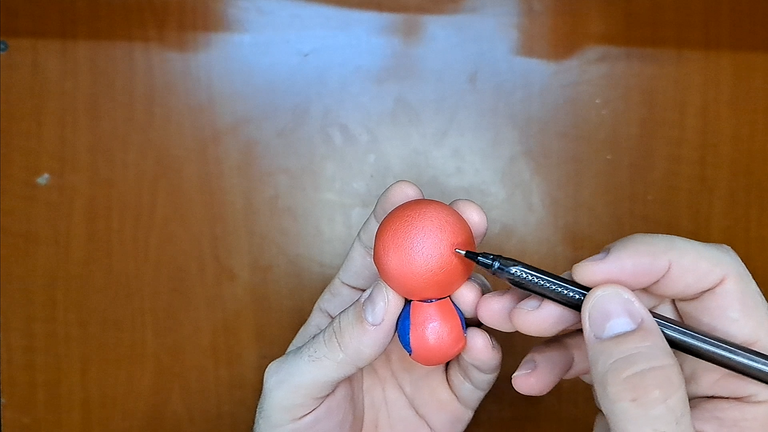
2️⃣ I glued each of the thermoformed fomi pieces around its respective plastic ball and then glued the balls together. Using a piece of red fomi, I made a breastplate for the costume and after gluing it in place, I used a marker to draw each of the stripes of the costume's spider web.
2️⃣ Cada una de las piezas de fomi termoformado las pegué alrededor de su respectiva pelotita plástica y luego pegué las pelotitas entre sí. Utilizando un retazo de fomi rojo, hice una pechera para el traje y luego de pegarla en su lugar, utilicé un marcador para dibujar cada una de las rayas de la telaraña del traje.
 |
 |
 |
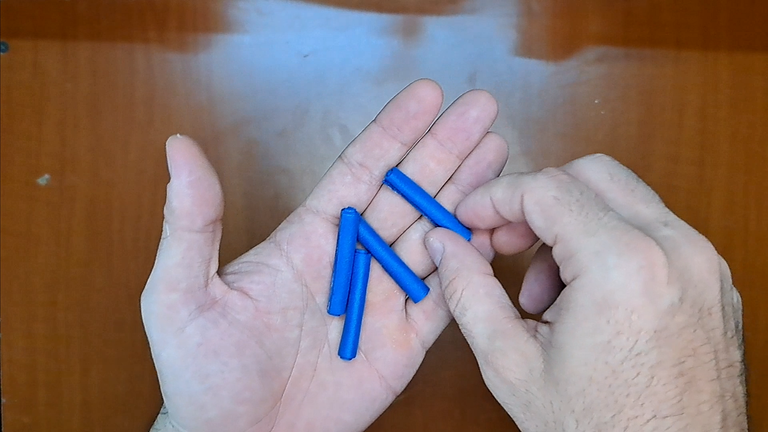
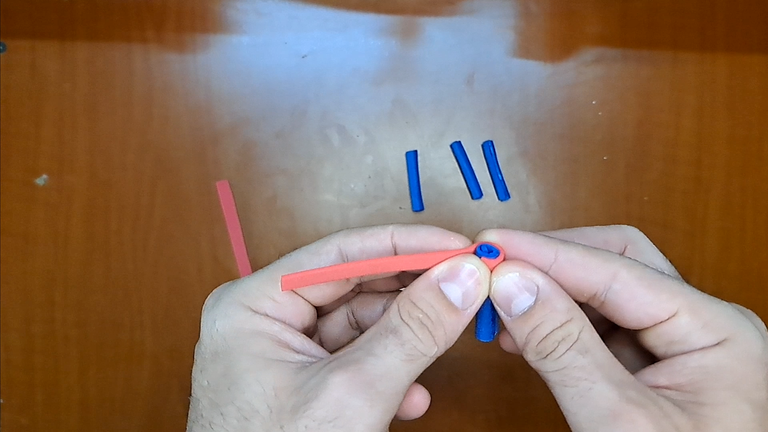
3️⃣ Next, I rolled small rectangles of blue fomi to form the hands and legs. At the end of each of the limbs, I rolled a small strip of red fomi to create the gloves and boots. Next, I drew and cut out the silhouette of the hands and feet in red fomi, which I glued to the end of each of the limbs.
3️⃣ A continuación, enrollé pequeños rectángulos de fomi azul para formar las manos y piernas. En el extremo de cada una de las extremidades enrollé una pequeña tira de fomi rojo para crear los guantes y botas. Seguidamente, en fomi rojo, dibujé y recorté la silueta de las manos y los pies, los cuales pegué en el extremo de cada una de las extremidades.
 |
 |
 |
 |
 |
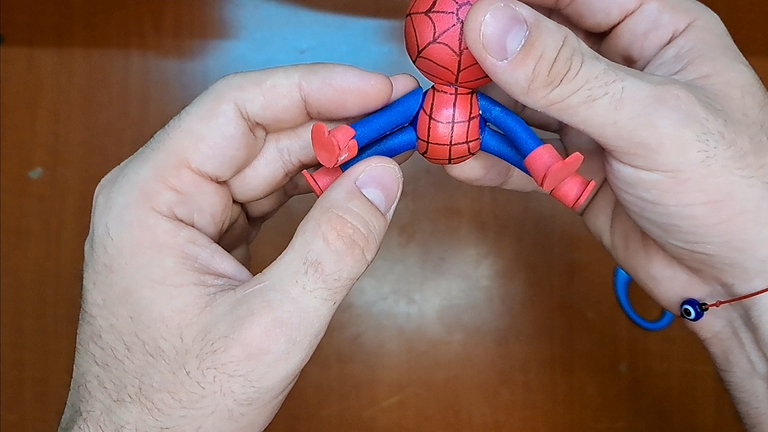
4️⃣ Once the limbs were created, I attached them to the body. In the case of the feet, I placed them in semi-flexed position, since Spider-Man will not be standing, and for the hands it was necessary to make some small transversal cuts that allowed to place them correctly next to the torso.
4️⃣ Una vez creadas las extremidades, las uní al cuerpo. En el caso de los pies, los coloqué en posición de semi-flexión, ya que Spider-Man no estará de pie, y para las manos fue necesario hacer unos pequeños cortes transversales que permitieron ubicarlas correctamente al lado del torso.
 |
 |
 |
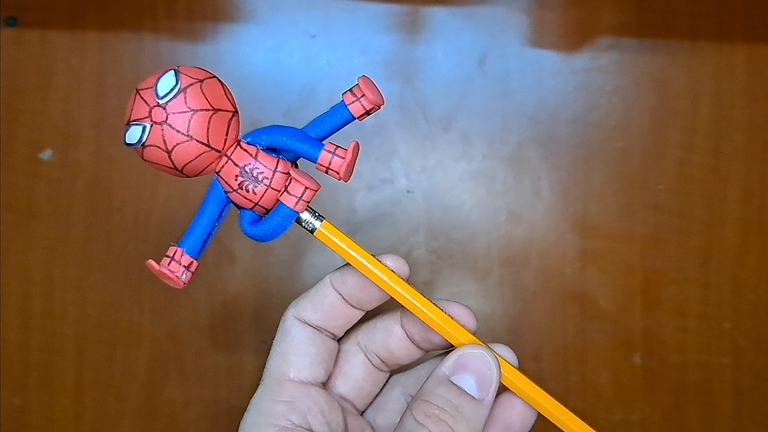
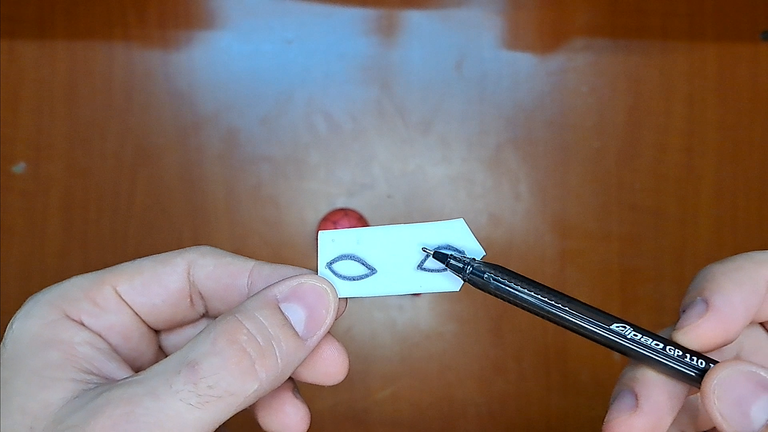
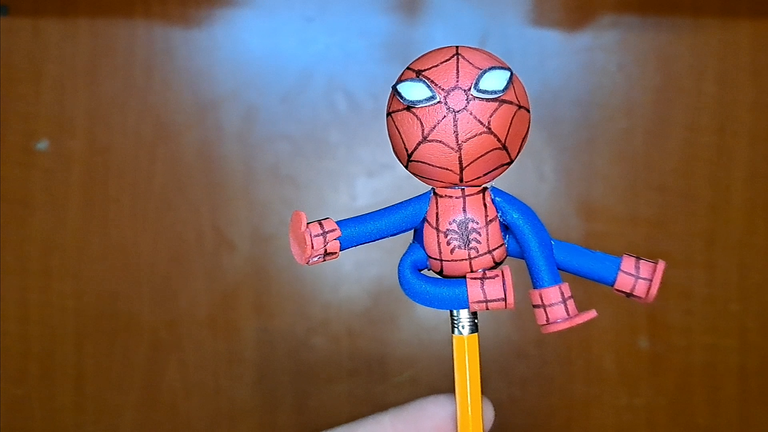
5️⃣ To finish, I drew the missing lines of the suit on the hands and feet. Also, in white fomi, I drew the eyes of the mask, which I attached to the suit after cutting them out. Finally, I placed the whole piece on top of a pencil cap, placing it in an action position.
5️⃣ Para finalizar, dibujé las líneas del traje faltantes en las manos y pies. También, en fomi blanco, dibujé los ojos de la máscara, los cuales adherí al traje luego de recortarlos. Por último, coloqué toda la pieza encima del casquillo de un lápiz, ubicándolo en una posición de acción.
 |
 |
 |
 |
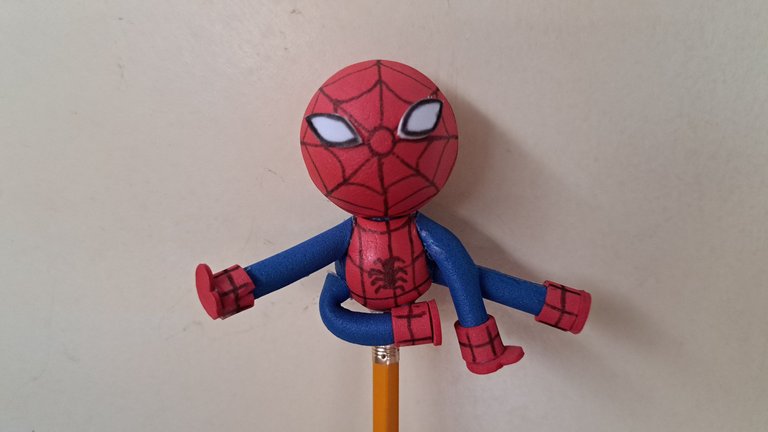
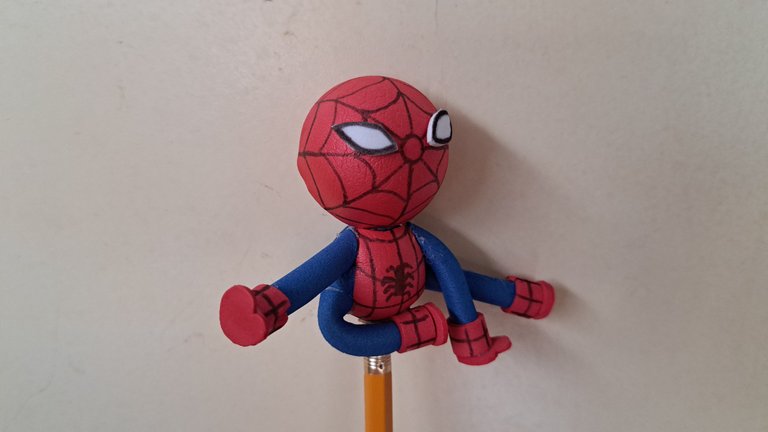
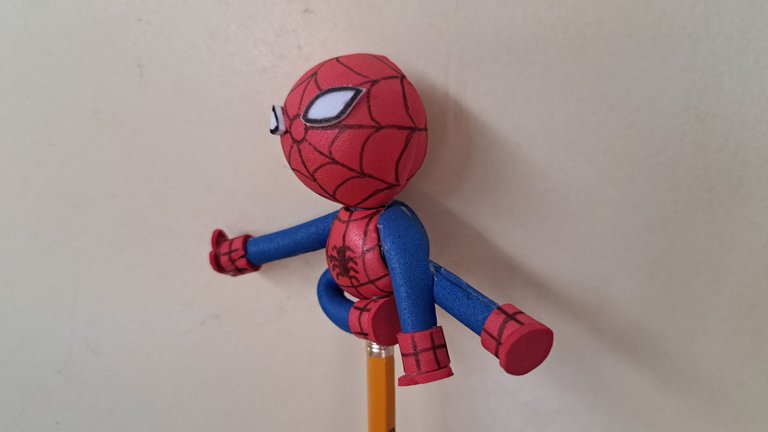
And so we come to the end of this tutorial where I showed you how, through a few simple steps, we can create a Spider-Man puppet using fomi. I hope you liked it and for now I say goodbye, but not before wishing you a happy day.
Y así llegamos al final de este tutorial donde les mostré cómo, a través de unos sencillos pasos, podemos crear un fofucho de Spider-Man utilizando fomi. Espero que haya sido de su agrado y por ahora me despido, no sin antes desearles una feliz jornada.
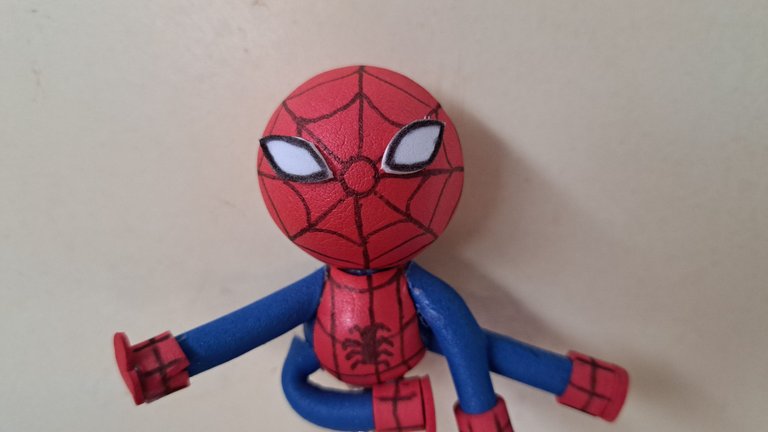
⚜️ Result // Resultado ⚜️
 |
 |
 |
 |

Thank you very much for reading my post. If you liked it, please leave a comment and consider following me so you don't miss my next posts. I'd love to know your opinion and your thoughts about the topic I discussed in this post, see you in the next one!
Credits and Resources // Créditos y Recursos
Cover page created in Canva
Translated by DeepL
Video and images captured with my Samsung Galaxy A53
Edited in Wondershare Filmora 13
Music by Yurii Semchyshyn from Pixabay


▶️ 3Speak
